
LCD Projector User's Manual GT1150


E – 50
Tools
Provides tools for capturing images and displaying files in a PC Card.
NOTE: The "Capture" and "PC Card Files" features are required for a PC card.
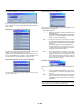
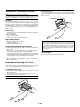
Capture:
Allows you to capture an image from a source that is currently be-
ing displayed. The image is saved as JPEG in the PC card.
When you select Capture from the menu, you will get a tool bar. You
can capture an image directly using the tool bar when the menu is
not displayed.
Freeze
Exit
Capture
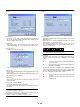
The tool bar includes the following buttons:
Capture ........ Captures an image and save it as a JPEG file in a PC card.
Freeze .......... Freezes and unfreezes images.
Exit............... Exits the Capture function.
Unless a PC card is inserted into the PC Card slot of the projector,
the Capture feature is not available.
The "Card Error" display means that the free space of the PC card
is insufficient for saving images. Make more space available on the
card by erasing unwanted images with your PC. The number of
images that can be captured depends on the size of the PC card.
NOTE: Be sure not to turn off the power or remove the PC card while cap-
turing an image. Doing so could cause a loss of the data in the PC card or
damage to the card itself.
NOTE: Captured images with higher resolution than the projector's native
resolution cannot be displayed correctly.
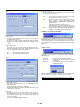
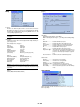
PC Card Files:
Displays a list of all the files stored in the PC card so that you can
select a file you want to display. You can also sort files by file name
or date, or display the file.
Although a list of all the files in the PC card is displayed, you can
view files in idx, text, HTML, JPEG and BMP format only.
Selecting BMP and JPEG files automatically switches to the PC
Card Viewer source.
NOTE: When an image with a resolution of XGA (1024 x 768) or higher is
projected, the PC Card Files screen may not be correctly displayed.
Selecting "Execute" displays the file you selected.
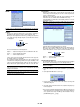
When you select a JPEG or BMP file and press the Enter button on
the remote or the cabinet, or "Execute" on the above, you will get a
toolbar. This toolbar is used to return to the PC Card Files screen.
Return
Close
Return .......... Returns to the PC Card Files screen.
Close ............ Close the toolbar.
Changing Background Logo:
The Logo button allows you to select a background logo from graphic
files on a PC card and change to it as the background logo.
NOTE: File size must be 64KB or less. Other file formats than JPEG and
BMP are not available.
1. Use the ▲ or ▼ button to select a JPEG or BMP file for your background
logo.
2. Use the
䊳
and then ▼ button to select "Logo".
3. Press the Enter on the remote control or the cabinet. You will get the
confirmation dialog box.
4. Select "OK" and press the Enter button. This completes changing a logo
for the background.
* Once you have changed the background from the NEC logo to another, you
cannot return the logo to background even by using Factory Default. To
do so, repeat the above steps. The NEC logo file is included on the sup-
plied CD-ROM (/logo/nec_b_x.jpg).