
Operation Manual

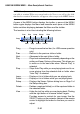


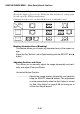


Table Of Contents
- INTRODUCTION
- INSTALLATION AND CONNECTIONS
- PROJECTING AN IMAGE
- CONVENIENT FEATURES
- USING THE VIEWER
- USING ON-SCREEN MENU
- Basic Menu Operation
- Menu Descriptions & Functions
- Source Select
- Picture (not available for Viewer and LAN)
- Volume
- Image Options
- Selecting Aspect Ratio (not available for Viewer and LAN)
- Masking Unwanted Area (Blanking)
- Adjusting Position and Clock
- Selecting Resolution
- Selecting Overscan Percentage
- Selecting Video Filter Level (not available for Video, Viewer and LAN)
- Selecting Noise Reduction Level (not available for RGB, Viewer and LAN)
- Picture Management
- Projector Options
- Tools
- Help
- Returning to Factory Default
- MAINTENANCE
- TROUBLESHOOTING
- SPECIFICATIONS
- APPENDIX

E-89
USING ON-SCREEN MENU
⬎
Menu Descriptions & Functions
NOTE:
* When "Resolution" is set to "Native", "Overscan", "3D Reform", "Aspect
Ratio" and "Screen" are not available.
* While you are displaying an image with higher resolution than the
projector’s native resolution, "Resolution" is not available.
Selecting Overscan Percentage
Select overscan percentage (0%, 5%, 10% and 25%) for signal.
NOTE: When "Resolution" is set to "Native", this feature is not available, and
the stored settings and adjustments are invalid.
NOTE: When "4:3 Fill" or "Crop" is selected in "Aspect Ratio", this feature is
not available.
Selecting Video Filter Level (not available for Video, Viewer and LAN)
This function reduces video noise.
Off ................... The filter is removed.
Less ................ The low-pass filter is applied partially.
More ................ The low-pass filter is applied fully.
Selecting Noise Reduction Level (not available for RGB, Viewer and LAN)
Select one of the three levels for reducing video noise: Low, Medium or
High.
NOTE: The lower the Noise Reduction level, the better the image quality by
way of higher video bandwidth.