
User's Guide

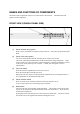
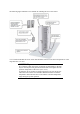


4. Install the larger rack mount bracket on the rear panel screw B (three screws each).
Rear panel side
NOTE:The larger rack mount brackets have five screw holes to fit the
depth of the rack. Install the larger rack mount bracket according to its
depth.
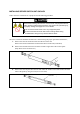
5. Install the four core nuts (coming with the rack) in the positions where the console panel and
rear panel will be mounted. See the rack operation manual for core nuts installation
procedures.
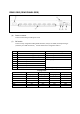
6. Fix the front side console panel onto the rack using four "A" screw (included).
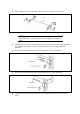
7. Fix the rear panel onto the rear side of the rack using four "A" screw (included).
Rear panel
Rear side of the rack
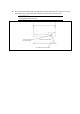
8. Connect the console panel connection cable located at the rear bottom side of the console
panel.