
User's Guide
AUTO SCAN MODE (COMMON TO OSD SELECTION MODE/DIRECT SELECTION MODE)
Keyboard and mouse operation are disabled during Auto Scan mode.
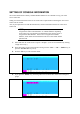
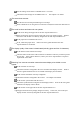
5. If you press the <0> (zero) key on OSD screen, the screen display is automatically switched
in a certain period.
6. The screen display is switched in ascending order of the port number. When the screen goes
to port 8, then returns to port 1.
For auto scan sequence in cascade connection, the ports of slave server switch unit are
included in the port of the master side.
For example, when the ports 1 to 6 of the master side are connected with servers and ports 7
and 8 are connected with the slave server switch units in cascade and each the server switch
units is connected with 8 servers, the auto scan sequence as follows:
Port 1 to 6 → F1 to F8 of port 7 → F1 to F8 of port 8 → Port 1
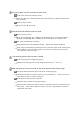
7. Any server with the power being off is skipped.
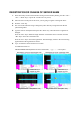
8. On the location where the server name is displayed, the character string "Auto Scan" appears
after displaying the switching rate.
To change the switching rate, use the <↑> or <↓> key. Pressing the <↑> key allows the
switching rate to be faster, while pressing the <↓> key enables the switching rate to be
slower. Whenever you press either of the <↑> or <↓> key, you can select the switching
period among 3, 5, 10 (default), 20, 40 and 60 seconds.
The character string "Auto Scan" appears while in the Auto Scan mode.
9. During the auto scan, any key entries to the servers and mouse operations are unavailable.
10. Before entering the hot-key mode, the auto scan mode must be terminated.
11. The auto scan mode is terminated by either of the following methods:
– Press the Enter key. Then the port is switched to that displayed currently.
– Press the Esc key. Then the port selected at the start of Auto Scan is selected again.