
Operation Manual


39
3. Convenient Features
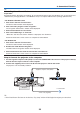
Step 3: Start Virtual Remote Tool
Startusingtheshortcuticon
• Double-clicktheshortcuticon ontheWindowsDesktop.
Start from the Start menu
• Click[Start]→[AllPrograms]or[Programs]→[NECProjectorUserSupportware]→[VirtualRemoteTool]
→[VirtualRemoteTool].
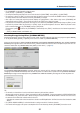
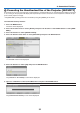
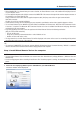
When Virtual Remote Tool starts for the first time, “Easy Setup” window will be displayed.
Follow the instructions on the screens
When “Easy Setup” is completed, the Virtual Remote Tool screen will be displayed.
NOTE:
• When[POWER-SAVING]isselectedfor[STANDBYMODE]fromthemenu,theprojectorcannotbeturnedonviathecomputer
cable(VGA)ornetwork(wiredLAN/wirelessLAN)connection.
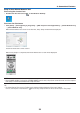
TIP:
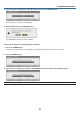
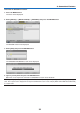
• TheVirtualRemoteToolscreen(orToolbar)canbedisplayedwithoutdisplaying“EasySetup”window.
Todoso,clicktoplaceacheckmarkfor“ DonotuseEasySetupnexttime”onthescreenatStep6in“EasySetup”.