
User's Manual

50
3. Convenient Features
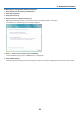
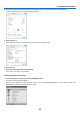
7. Input the password to the password input box displayed by the operation at step 3 on page 44.
8. Click[Connect].
The network projector function works and the screen of Windows 7 is projected from the projector.
• Iftheresolutionofyourcomputer’sscreenisdifferentfromtheprojector’sscreenresolution,theNETWORK
PROJECTOR function may not work. If this happens, change the resolution of the computer’s screen to lower
resolution than the one displayed at Step 3 on page 48.
NOTE:Whenthenetworkprojectorfunctionworks,thebackgroundcolorofthedesktopchangestosolidcolor.Whenthenetwork
projectorfunctionisstopped,theoriginalbackgroundcolorisrestored.
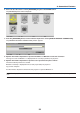
Reference:IftheprojectorcannotbefoundatStep5,click[→Entertheprojectoraddress].Then,inputthe“Networkaddress”
(Inputexample:http://10.32.97.61/lan)and“Projectorpassword”(Inputexample:82291627)displayedinthescreenprojected
fromtheprojector.
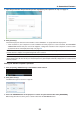
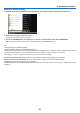
ExitingtheNetworkProjectorOperation
1. Click[Projecting:PA600Series]intheWindowsVistataskbar.
2. Click[Disconnect].
The Network Projector function is stopped.
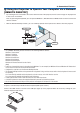
3. PresstheSOURCEbuttonoftheprojectortoselectaninputterminalotherthan[NETWORK].
When using the remote control, press a button other than the NETWORK button.