eBeam Education Suite Version 2.
© 2011 Luidia, Incorporated Table of Contents About...
© 2011 Luidia, Incorporated Gesture Based Navigation eBeam Inscribe Wireless Tablet Document Camera Gallery Adding Images to Scrapbook Pages Favorites Templates Flickr Encyclopædia Britannica Shared Meetings What is a Shared Meeting? Hosting/Sharing a Meeting Join a Meeting Sending an Invitation Accepting an Email Invitation Archive a Meeting Retrieve a Meeting Participants Chat Page 3 81 84 87 89 89 90 92 94 95 97 97 98 100 101 102 103 105 109 111
© 2011 Luidia, Incorporated About... eBeam Education Suite Version 2.4 eBeam Education Suite is made up of eBeam Scrapbook, the eBeam Tool Palette and eBeam Home. eBeam Education Suite makes it easy to develop, organize and communicate classroom information. It includes software applications that allow you to annotate lessons on-the-fly, create and save multi-page brainstorm sessions and mark up content from outside applications.
© 2011 Luidia, Incorporated What's New New Features with this release: For files saved before version 2.3.3, converted text retains its type size and location. Correction: In Scrapbook, changes in Annotation or Snapshot mode are saved even when Scrapbook isn’t open. In Powerpoint, the tool palette remains visible when you select the next slide.
© 2011 Luidia, Incorporated Minimum System Requirements Windows-compatible computer with Pentium IV or equivalent with 1GB RAM Windows 7, Vista or XP 120 MB available hard drive space for standard eBeam Education Suite software 65K color SVGA or comparable high performance video c ard CD-ROM drive or Internet connection (for software installation) Internet connection (for registering your software and participating in shared meetings) One available USB port or Bluetooth connectio
© 2011 Luidia, Incorporated Setup Hardware Setup Select a topic below for a description of how to set up an eBeam system. If your system is not described here then refer to the setup documentation included in the box.
© 2011 Luidia, Incorporated eBeam Edge(TM) Setup This section demonstrates the quick setup instructions for the eBeam(R) edge(TM) receiver. Connect your projector to your computer. Turn on your projector and align/focus the image on the board. Connect the eBeam USB cable to your eBeam Receiver. Peel the Command Adhesive backing from the Receiver. Hold the Receiver and prepare to place it carefully in the indicated location.
© 2011 Luidia, Incorporated Press the Receiver firmly against the board for best adhesion. Install the AAA battery in your eBeam Stylus. Connect the eBeam USB cable to your computer USB port. Insert the eBeam software CD and install. Launch the eBeam software and calibrate the system.
© 2011 Luidia, Incorporated Page 10
© 2011 Luidia, Incorporated eBeam Classic Setup The following describes a typical setup for the eBeam USB or Bluetooth Wireless receivers and related hardware. Connect your projector to your computer. Turn on your projector and align/focus the image on the board. Connect the eBeam USB cable to your eBeam Receiver. Attach the eBeam Receiver mounting bracket to the board. The eBeam package contains the following receiver mounting options.
© 2011 Luidia, Incorporated Connect the eBeam USB cable to your computer USB port. Insert the eBeam software CD and install. For additional information on setting up Bluetooth on your computer, see Bluetooth Wireless Configuration. Launch the eBeam software and calibrate the system.
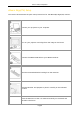
© 2011 Luidia, Incorporated The Interactive Stylus The Interactive Stylus was created specifically for use with an eBeam-enabled projection system. The Interactive Stylus behaves exactly like a mouse attached to your computer. Model 303 Model 305 In this document, we often refer to a tap on the board as opposed to a mouse click to indicate that you are using the Interactive Stylus to perform an action.
© 2011 Luidia, Incorporated The battery cap unscrews counter-clockwise to allow you to insert or replace the AA battery (Model 303) or AAA battery (Model 305).
© 2011 Luidia, Incorporated Software Setup The interactive software can be installed from the installation CD that came in the box or from a downloaded web package. At launch, the software provides access to the basic software feature set. The options for unlocking the full software feature set are: Connect the software to an interactive receiver. Activate the software using a CD-Key or security key (see The Welcome Dialog Box ). Use your eBeam Focus Document Camera as a security key.
© 2011 Luidia, Incorporated Once all information has been properly entered, the website will email an activation code to the email address that you have just provided. 5. Copy the activation code from the email into the text field in the Activation tab. 6. Click the Activate Now button. The software will activate and launch. You will not need to enter the activation code again.
© 2011 Luidia, Incorporated Note: Technical support might require 24 hours to reset your activation.
© 2011 Luidia, Incorporated eBeam Education Taskbar Menu The following menu items are offered from the eBeam Education taskbar menu: Menu Item Description Interactive Tools Shows/hides the eBeam Tool Palette. Scrapbook Opens Scrapbook. Spotlight Opens Spotlight. Calibrate Interactive Area Initiates the calibration. The interactive hardware must be detected by the software before calibration can begin.[$X$IF_CON3] Not active in this software version.
© 2011 Luidia, Incorporated Bluetooth Wireless Setup Select a topic below for a description of how to configure your Bluetooth connection for your eBeam Bluetooth Wireless system. If your system is not described here then refer to the setup documentation included in the box.
© 2011 Luidia, Incorporated eBeam Edge(TM) Setup For your eBeam Edge Bluetooth receiver to work properly, you must have Windows XP SP2 or later, Vista, or 7. Set up a Bluetooth Wireless connection to the receiver 1. Plug the Bluetooth USB key that came with your eBeam Edge product into a USB port on your PC. Two events should occur: The Windows New Hardware Setup message should appear in your taskbar telling you that the device has been detected. A Bluetooth icon should appear in your taskbar. 2.
© 2011 Luidia, Incorporated eBeam Classic Setup eBeam Classic Bluetooth Setup The Bluetooth-enabled eBeam Classic is supported only on Windows Vista, Windows 7 or Windows XP Service Pack 2 or higher at this time. To check the Service Pack level you are working with go to Start > Control Panel > System. Before you begin, make sure you have the latest eBeam software as well as an updated IOGEAR driver installed on your computer. Visit http://www.iogear.
© 2011 Luidia, Incorporated 4) Double click the Bluetooth icon and your Bluetooth Wizard will begin. Leave all 3 boxes checked and click Next. 5) A General dialog box appears allow you to change the name of your computer and select your computer type. Click Next twice. 6) The Bluetooth Service Selection Dialog Box allows you to choose what services you would like your computer to offer other computers. Uncheck all of the boxes and click Next twice.
© 2011 Luidia, Incorporated Bluetooth Wireless Settings The Bluetooth Settings Dialog Box can help you set preferences for your Bluetoothenabled eBeam receiver. To open this dialog box your Bluetooth receiver must be connected to your computer with a USB cable and your software must be launched.
© 2011 Luidia, Incorporated Interactive Hardware Detection Every time you launch the software or select Detect System from the eBeam Education taskbar menu, the software attempts to connect your interactive hardware. If the interactive receiver hardware is not detected, you are prompted to connect to the hardware. Detect Interactive Receiver Dialog Box The following options are available from the Detect Interactive Receiver dialog box: Help Launches eBeam Education Suite Help.
© 2011 Luidia, Incorporated Calibration Calibrating Your Software You need to calibrate your surface so that the eBeam Education Suite software knows what size whiteboard or flat surface you are using. To calibrate your surface, you will need to make sure your interactive receiver is setup and detected and that the software is launched. To initiate a calibration, Select the Calibrate Select Calibrate Interactive Area from the eBeam Education taskbar menu at any time.
© 2011 Luidia, Incorporated eBeam Education Options & Preferences eBeam Education Options The eBeam Education Options dialog box is used to set the eBeam Tool Palette and drawing specific preferences. The eBeam Education Options Dialog Box can be opened by selecting eBeam Education Taskbar Menu > Options . There are three tabs available here: General Tab Annotations Tab Activation Tab General Tab Palette Options Features Size: This option allow s you to resize the Tool Palette.
© 2011 Luidia, Incorporated Open Scrapbook after saving annotations: Default setting – opens Scrapbook. This setting gives you immediate feedback that your annotation has been placed in Scrapbook. Save the Scrapbook file to keep the new Scrapbook page. Navigatin When you change slides in a PowerPoint Slideshow, you must choose whether or not to save annotations g an into the PowerPoint file as objects. Options for desktop annotation are Save, Discard, or Ask Each Time.
© 2011 Luidia, Incorporated Scrapbook Options eBeam System Preferences The System Preferences dialog in the Windows Control Panel allows you to set hardware specific preferences. If your receiver is not detected, see Interactive Hardware Detection. There are two tabs that can be accessed in System Preferences. The System Preferences tab. The Projection tab.
© 2011 Luidia, Incorporated Stylus Buttons The Stylus Buttons section allow s you to configure each of the tw o buttons on the Interactive Stylus. For each button, it is possible to set the button to be: o o o o o o Off - Button causes no action Left Click - Left mouse click Middle Click - Middle mouse click Right Click - Right mouse click Move Cursor - Causes the mouse cursor to hover Show/Hide Tool Palette - Open close the eBeam Tool Palette. Select button options from the pull dow n lists.
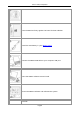
© 2011 Luidia, Incorporated eBeam Tool Palette The eBeam Tool Palette is used to navigate, annotate and edit the content on your computer. The tools on the Tool Palette change depending on the application that you are using. The four main places that you can use the Tool Palette are: in PowerPoint, in Scrapbook, on top of all applications (in Screen Annotation Mode) or outside of any application.
© 2011 Luidia, Incorporated Ne w Pag e Too l The New Page Tool creates a new page in a Scrapbook file. The new page is inserted directly after the displayed page. The New Page Tool is available in the sub menu of the Snapshot Tool. OnScr een Key boa rd Too l The On-Screen Keyboard Tool allows you to enter text by tapping keys w ith the Interactive Stylus. You can close the On-Screen Keyboard by selecting the On-Screen Keyboard button again or selecting the red close (X) button on the On-Screen Keyboard.
© 2011 Luidia, Incorporated not atio n Too l Sel ect Too l The Select Tool allows you to select a single Scrapbook element to move, rotate, resize, group or copy. You can also draw a bounding rectangle around a group of elements with the select tool. For more information about working with Scrapbook elements, see Scrapbook Elements. Sh ape s Too l The Shapes Tool allows you draw shapes.
© 2011 Luidia, Incorporated Fit Page ( ): Compresses or expands the page to fit into the page display area. Fit Page can also be selected by pressing Ctrl+0. Zoom out (-):Zooms the page out by a factor of 1.
© 2011 Luidia, Incorporated Handwriting Recognition Tool Handwriting Recognition is used to convert Interactive Stylus annotations into text that can be used in Text Boxes and dialog boxes. eBeam Education Suite software specifically works with ritePen® version 2.5 or later or MyScript® Stylus version 2.6 or later. To update to the latest version, visit www.visionobjects.com for MyScript and www.evernote. com for ritePen.
© 2011 Luidia, Incorporated On-Screen Keyboard On-Screen Keyboard opens a floating On-Screen Keyboard that you can use to enter text. You can change the font and font size of the text by using theText Edit Toolbar. You can close the On-Screen Keyboard by selecting the On-Screen Keyboard button again or selecting the red close (X) button. Keyboard Options To open the On-Screen Keyboard Options, select the Option key from the keyboard.
© 2011 Luidia, Incorporated Recorder Use Recorder to record everything that happens on your desktop including voice tracks from your computer’s microphone. Play back your recording instantly in our Movie Player if you save the recording in the default *.ebm format. Or save your recording as an .avi, .swf or .wmv movie.
© 2011 Luidia, Incorporated Hide Recorder Wheel The Hide Recorder Wheel button allows you to keep the Recorder menu from being recorded in your video. Select the Hide Recorder Wheel button to hide the menu. To reopen the menu, select the Recorder tool from the eBeam Tool Palette. Recorder Options The Recorder Options dialog box allows you to set audio, video and file save settings specific to Recorder.
© 2011 Luidia, Incorporated You can save movies as .ebm, .avi, .swf or .wmv file types. .ebm (eBeam default format) Plays on Windows using Luidia's Movie Player .avi (Microsoft Audio Video Interleave) Plays on Mac OS and Windows using Apple QuickTime Player or Microsoft Windows Media Player .swf (Macromedia Flash Movie) Plays on Mac OS and Windows using Adobe Flash Player or a Web browser with a Flash plug-in installed .
© 2011 Luidia, Incorporated Snapshot Snapshot allows you to take a picture of the current screen and save it into Scrapbook either as a background image in a new page or a Scrapbook element in the current page. 1. Select the Snapshot Tool button. 2. Select one of the following options: o Capture screen: Captures the entire desktop as a single image. As a default, the captured image is saved as a background into a new page in Scrapbook.
© 2011 Luidia, Incorporated Text Tool The Text Tool allows you to add a text box to the displayed page. A text box is also a Scrapbook Element . Modify text attributes through the Text Edit Toolbar which displays whenever a text box is open.
© 2011 Luidia, Incorporated Voting Tool Use the Voting Tool on the Tool Palette with the eBeam Respond RF voting system to allow participants to respond to electronic testing, formative assessments, surveys, opinion polls, games and questions posed by the presenter. The data collected from these keypads is immediately transmitted to the presentation, giving the presenter a better understanding of comprehension.
© 2011 Luidia, Incorporated Open TurningPoi nt 2008 Help Opens the TurningPoint 2008 help file. Data Slicing The Data Slicing button shows the responses on the chart for the portion of the audience who chose a certain response on another question. Refer to TurningPoint 2008 help for more information on data slicing.
© 2011 Luidia, Incorporated Standard Annotation Toolbar The standard annotation toolbar appears only when an interactive receiver or security key is not detected. The tools on the standard annotation toolbar include (from left to right): Marker The Marker Tool allows you to annotate the displayed page freehand in one of four solid colors. The color can be selected from the palette that appears when the Marker Tool is selected. The marks become annotation elements.
© 2011 Luidia, Incorporated eBeam Home eBeam Education Suite software comes with the eBeam Home application. eBeam Home is your resource for creating a centralized area for shortcuts to the programs and files that you use most often. The following topics are available for eBeam Home: To learn about more about working with shortcuts, see eBeam Home Shortcuts.
© 2011 Luidia, Incorporated eBeam Home Shortcuts eBeam Home Shortcuts There are nine default shortcuts included in eBeam Home. You can customize these shortcuts at any time, up to 25 shortcuts. If there are multiple users on your computer, these shortcuts will be saved per user account.
© 2011 Luidia, Incorporated Right-click on the shortcut and select Rename. Single click on the shortcut text. The shortcut text will become an editable field. Enter the new shortcut name and click outside of the text field or press Enter. Reordering Shortcuts You can reorder the shortcuts in your eBeam Home Window at any time. To reorder the shortcuts: 1. Press and hold your cursor over a shortcut 2. Drag your cursor to the new location and release.
© 2011 Luidia, Incorporated eBeam Scrapbook Scrapbook Menus File Menu Edit Menu View Menu Page Menu Meetings Menu Help Menu Page 47
© 2011 Luidia, Incorporated File Menu File Menu options are described below: New New creates a new Scrapbook meeting file after closing any previously opened meetings. To create a new Scrapbook meeting file: 1. Choose File > New or press Ctrl+N. 2. If a meeting is open when New is chosen, Scrapbook prompts you to save the current meeting. Select Yes to save the meeting, No to close the meeting without saving or Cancel to remain in the current meeting.
© 2011 Luidia, Incorporated o Pages - Allows you to select a range of pages to save. Note: If you have not previously saved the file, any unselected pages will be lost when you use the Selected or Pages options and are saving to either *.esb or *. wbd. 5. Save As Web Page Select OK. Save As Web Page allows you to save a Scrapbook (*.esb) meeting file in HTML format for posting to the Internet/intranet as a web page. To save a Scrapbook file in HTML format: 1. Choose File > Save As Web Page.
© 2011 Luidia, Incorporated with your file as an attachment. Use your address book to fill in names of the recipients and send the email as you normally would. You can send a Scrapbook meeting in any file format (except HTML) that is suitable for an e-mail attachment. Send to Kindle Send to Kindle allows you to send a Scrapbook meeting file in PDF, JPG or BMP format to your Kindle device as an attachment via any MAPI-compliant mail system, such as Microsoft Exchange.
© 2011 Luidia, Incorporated Edit Menu Edit Menu options are described below: Undo Undo cancels the last change on a Scrapbook page. It is possible to undo all changes to return the Scrapbook page to a totally empty state. Undo applies only to the current page. To Undo: Redo Choose Edit > Undo, or Select the Undo button from the Scrapbook Toolbar, or Press Ctrl+Z. Redo allows you to redo the last undone change.
© 2011 Luidia, Incorporated onto a new thumbnail. Paste Paste is used to paste Scrapbook elements into a Scrapbook page from either another Scrapbook page or from your computer's clipboard. It is also used with the Text Tool to cut and paste text between active Scrapbook text boxes. To paste an element: 1. Cut or copy the individual or grouped elements from a Scrapbook page, the Gallery or an outside image file. 2. Select the Scrapbook page. 3. Choose Edit > Paste, or press Ctrl + V.
© 2011 Luidia, Incorporated Rotate Left: Rotates the element counter-clockw ise 90 degrees. Flip Vertical: Flips the element vertically. Flip Horizontal : Flips the element horizontally. Reset Image Properties Change the selected element back to the size it was when it was brought into the application.
© 2011 Luidia, Incorporated View Menu View Menu options are described below: Normal (View Page and Normal allows you to switch to the Page and Thumbnails View. Switch to the Page and Thumbnails) Thumbnails View by: Thumbnails Selecting the View Page and Thumbnails (Normal) button from the Scrapbook Toolbar. Choosing View >Thumbnails , or Pressing Ctrl+2, or Selecting the View Thumbnails button from theScrapbook Toolbar. Page allows you to switch to the Page View.
© 2011 Luidia, Incorporated Layers Choosing View >Master Page, or Pressing Ctrl+6. Layers can be used to add content to a Scrapbook meeting file. Layers can be hidden or shown. Open the Layers by: Toolbar Pressing Ctrl+7. Choosing the Toolbar option causes a sub-menu to open with the following three selections: Zoom To Choosing View >Layers, or Interactive Tools : Show/hide the Tool Palette. Playback: Show/hide the Playback toolbar. Status Bar: Show/hide the Scrapbook status bar.
© 2011 Luidia, Incorporated Cover Sheet Cover Sheet is useful for hiding page content and gradually revealing presentation points during a lesson or meeting. To start Cover Sheet, select View > Use Cover Sheet. You can now control the display of Scrapbook page content and customize the Cover Sheet. When the Cover Sheet is visible, the page area of the Scrapbook is grayed out; thumbnails are not affected. You can uncover more of any page by dragging the covered area in the direction you wish it to move.
© 2011 Luidia, Incorporated Master Page Master Page is used to create a background template for all pages in the Scrapbook meeting, except for those pages containing their own background settings. Open the Master Page by choosing View > Master Page in Scrapbook. The Master Page will open the first time as a blank page.
© 2011 Luidia, Incorporated Layers The following section describes Layers and how to use them in your Scrapbook meeting. What are Layers? How to Use Layers What are Layers? Every Scrapbook page is made up of layers that can be shown or hidden at any time. The order of these layers are: Page Background Layer: The page background can be set using Background Settings to display an image, display a template of a grid or horizontal lines, and/or be set to a specific background color.
© 2011 Luidia, Incorporated Add Layer Add Layer adds a new blank layer to the currently selected Scrapbook page. The new layer is always added as the top-most layer (under the user layer). The new layer is always added as visible and unlocked. Delete Layer Delete Layer causes the selected layer to be deleted. It is not possible to delete the private or default layers. Move Layer Up Move Layer Up causes the layer to be moved one level higher in the layer list.
© 2011 Luidia, Incorporated Playback The Playback Toolbar can be opened by choosing View > Toolbar > Playback. The Playback Toolbar allows you to replay the meeting like a movie. The meeting can be played forward line by line and at varying speeds. Playback can be restricted to either the current page, or set to play all pages. The following Playback tools are available on the Playback Toolbar.
© 2011 Luidia, Incorporated Spotlight The Spotlight is useful for drawing attention to a particular region of your desktop. To start Spotlight select the Spotlight menu item in the eBeam Education taskbar menu or from the Scrapbook Toolbar. You can now highlight a specific area of your desktop and use the Spotlight Options menu to customize the spotlight. To move the spotlight, click in the grayed-out area, then drag.
© 2011 Luidia, Incorporated Page Menu Page Menu options are described below: New New creates a new blank page in the Scrapbook meeting. To create a new page: Choose Page >New , or Select the New Page button from theScrapbook Toolbar. The new page is inserted directly after the displayed page. Clear Clear clears all elements from the displayed page. To clear a page, select the page to be cleared and: Duplicate Choose Page >Clear, or Select the Clear Page button from the Scrapbook Toolbar.
© 2011 Luidia, Incorporated Use the Page Selection tools on the Scrapbook Toolbar. Playback See Playback for more information. Add Hyperlink Add Hyperlink allows you to add a hyperlink to a Scrapbook element. See Hyperlinked elements and Scrapbook elements for more information. Add Image Add Image allows you to import an image file or screen capture into the currently selected page. See Scrapbook elements for more information. Add Flash File Add Flash File allows you to import a Flash file (*.
© 2011 Luidia, Incorporated Meetings Menu Meetings Menu options are described below: Share/End Meeting Share Meeting allows a meeting host to share a Scrapbook meeting over the Internet/intranet. While a meeting is shared, this menu option changes to End Meeting. Join Meeting/Leave Meeting Join Meeting allows invited participants to log into a shared Scrapbook meeting. The participant will need to know the meeting name and a password (if applicable) prior to attempting to log in to the meeting.
© 2011 Luidia, Incorporated Help Menu The Help Menu opens a sub-menu that allows you to access help and also provides links to various registration and support pages that are provided by the hardware manufacturer of your interactive system.
© 2011 Luidia, Incorporated Scrapbook Features Scrapbook Elements The content of a Scrapbook page is made up of several types of objects known aselements. These elements are annotations, shapes, text boxes, image files and Flash files. Each element is selectable using the Select Tool. See the following topics: What is a Scrapbook Element? : This topic defines the Annotation, Shapes, Text Box, Image File and Flash file elements.
© 2011 Luidia, Incorporated multipage files, you w ill be prompted to select the page to use. See Background Settingsfor information on how to import multipage files as background images. Take a snapshot of your screen. Supported file formats for image files: Bitmap (*.bmp) Graphic Files (*.gif, *.jpg, *.ico, *.emf, *.w mf, *.png) Excel Spreadsheets (*.xls). SeeImport a PowerPoint, Excel and Word Document . PowerPoint Presentations (*.ppt). SeeImport a PowerPoint, Excel and Word Document .
© 2011 Luidia, Incorporated Select Individual or Multiple Elements Most operations on an element require that you select the element first. When an element is selected it will have drag handles and a rotate handle. Select an element by choosing the Select Tool and then clicking the element in the Scrapbook page. To deselect an element use the Select Tool and click anywhere outside of the element's bounding box.
© 2011 Luidia, Incorporated To resize an element, first select the element and then tap and drag one of the square handles. The element will resize as you drag. o Maintain Aspect Ratio: To maintain the element's aspect ratio while resizing, only drag using a corner drag handle. o Ignore Aspect Ratio : To resize an element without maintaining the element's aspect ratio, drag using a side drag handle.
© 2011 Luidia, Incorporated Group and Ungroup an Element Grouping is used to manipulate a group of elements at the same time. It causes a set of elements to behave as a single element, even while editing or resizing. A grouped set of elements cannot be ungrouped by using the Select Tool to select outside of the group.
© 2011 Luidia, Incorporated Scrapbook Elements Edit Toolbar Scrapbook includes an Object Edit Toolbar that can be used to modify the transparency of or to crop image elements. The Object Edit Tools cannot modify Flash files, Annotation elements or Text Box elements. Note: The Object Edit Tools can only be used on single elements. You cannot open the toolbar when you have selected multiple elements or have selected a grouped element.
© 2011 Luidia, Incorporated and the Transparency Slider (shown to the left from left to right). The Transparency Tool (dropper) is used to set individual colors transparent. When you use the Transparency Tool dropper to select a single color, it will render that color transparent as well as any color within 5 values of that color.(+/-, 5, 5 of RGB). The Transparency Slider is used to globally set the transparency of the entire element at once.
© 2011 Luidia, Incorporated Use the Transparency Slider to select a setting between 100% (default) to 0% opaque.
© 2011 Luidia, Incorporated Background Settings Background Settings allow you to set a color, image or document as the background for any Scrapbook page. Scrapbook elements remain visible in front of the background settings, and during a shared meeting background Settings are displayed to all participants (see Share a meeting). To open the Scrapbook Background Settings dialog box, select Background Settings from the Page menu in the Scrapbook window.
© 2011 Luidia, Incorporated o o Background Settings Color Background Settings Grid/ Lines as possible w hile retaining the aspect ratio. Scale to Fit: The file is scaled to fit the page completely. The aspect ratio is not preserved. Tile/Repeat: The file is tiled over the entire page. This option is not available for files w ith more than 1 page. This option is not available if the image size is bigger than the page size.
© 2011 Luidia, Incorporated Hyperlinked Elements A hyperlinked element is a Scrapbook element contained in a Scrapbook page that also contains a hyperlink. A hyperlinked element can be identified by the icon of a globe displayed in the bottom left corner of the element. Use your Select Tool to select the globe icon on the element and your default web browser will open to the hyperlink URL address. The following topics describe how to add, edit and remove hyperlinks when working with Scrapbook elements.
© 2011 Luidia, Incorporated Page 77
© 2011 Luidia, Incorporated Importing PowerPoint, Excel and Word Documents This section covers procedures for importing PowerPoint, Excel and Word documents into Scrapbook. For more on how background images are used in Scrapbook, see Background Settings. Note: You must have Microsoft Office installed in order to import PowerPoint, Excel and Word documents into Scrapbook. To import a PowerPoint, Excel or Word document into Scrapbook as a Background 1.
© 2011 Luidia, Incorporated Improving PowerPoint Image Quality The Scrapbook import typically decreases the file size of PowerPoint slides that contain high quality images by converting the images into a lower quality image format. This means that the images shown in Scrapbook are not as sharp or clear as the original PowerPoint slides. If you want retain the high image quality of the original PowerPoint slides, do the following when importing to Scrapbook: 1. Choose Edit > Options. 2.
© 2011 Luidia, Incorporated Exporting Documents into Scrapbook Exporting Documents as Backgrounds and Objects You can export documents into Scrapbook as backgrounds from any application that can print. This is a great option for PDFs and CAD drawings. For more on how background images are used in Scrapbook, see Background Settings. You can also export documents as objects (rather than backgrounds). See Print documents to Scrapbook as objects in Scrapbook Options.
© 2011 Luidia, Incorporated Gesture Based Navigation Gesture Based Navigation (gesturing) is an advanced navigation style that allows you to navigate the various eBeam Tool palette using click-sweep motions of the Interactive Stylus. Gesturing allows you to select between tools and tool properties without needing to have the Interactive Tools palettes visible on the screen. See the following topics for more information.
© 2011 Luidia, Incorporated Mapping a Gesture to a Tool The Tool Palette contains 8 main tools in any environment. One of eight tools can be selected at a time by gesturing a straight line from any point on the screen to the direction of the desired tool. Mapping a Gesture to a Tool Property A tool property is some defining characteristic of a tool. In the case of the Pen Tool , the tool properties are pen color and line thickness.
© 2011 Luidia, Incorporated Page 83
© 2011 Luidia, Incorporated eBeam Inscribe Wireless Tablet The eBeam Inscribe wireless tablet allows you to make annotations during presentations or while using Scrapbook using just the wireless pen and tablet and the Tablet Toolbar. You have a number of options for configuring the behavior of the tablet and pen, including Scrapbook Direct, Standard Mouse Mode, Absolute Mouse Mode and Relative Mouse Mode.
© 2011 Luidia, Incorporated To select Absolute or Relative Mouse Mode 1. Select the Pen Pad icon in the Windows Taskbar menu. The Pen Pad control window displays. 2. Under the About tab in the Tracking Mode area, select the Pen (Absolute) or Pen (Relative) radio button. 3. Select OK. The Pen is now in Absolute Mouse Mode.
© 2011 Luidia, Incorporated Color Specific Highlighter Selection Buttons (yellow, green) Outside of Scrapbook, use these buttons to annotate the desktop, then save your desktop annotations in Scrapbook. If you are in Scrapbook, use these buttons to select a yellow or green highlighter to use on a Scrapbook page. Eraser If you are not in Scrapbook, the eraser tool is disabled. If you are in Scrapbook, it selects the eraser tool.
© 2011 Luidia, Incorporated Document Camera The eBeam Focus Document Camera (DocCam)takes still images or videos that you can use as backgrounds or objects on a Scrapbook page. Save your images in the Gallery for easy access, and weave them into your presentations. The images are stored as medium resolution jpeg files. To launch eBeam Focus Viewer The eBeam Focus DocCam works with Windows Vista and Windows XP, and does not require a driver. 1. Plug the DocCam into a USB 2.0 port on your computer. 2.
© 2011 Luidia, Incorporated Closing eBeam Focus Viewer Select the red [X] in the upper right corner of the Viewer window. The DocCam Viewer window closes. Capturing Images and Video You can use the eBeam Focus DocCam to capture images and videos, then use them in your Scrapbook pages. Document Camera Toolbar Once you launch the Document Camera, you will see the Document Camera Toolbar.
© 2011 Luidia, Incorporated Gallery Adding Images to Scrapbook Pages You can import an image from the Gallery into a Scrapbook page either as a Scrapbook Element or as a Background Image. If you import an object as a Scrapbook element, then you can later move, rotate, resize, copy/paste and edit the object within the Scrapbook page.
© 2011 Luidia, Incorporated Favorites The Favorites folder can help you quickly access the images that you use most often. A favorite is a short-cut to files in your Gallery. Deleting a favorite does not delete the actual file, it deletes only the reference to that file in your Favorites folder. You can also use sub-folders under the Favorites folder to organize your Gallery images.
© 2011 Luidia, Incorporated o Press the Delete key on your keyboard. A dialogue will appear to confirm the removal. 3. Click Remove. The folder is removed from the Favorites folder. Move Favorites from one Favorites folder to another 1. Navigate to the object in your Favorites folder that you want to move using the Preview Pane. Select the object. 2. Drag and drop the selected favorite into the new Favorites folder.
© 2011 Luidia, Incorporated Templates If you have created a page that you want to use repeatedly, you can store it in the Templates folder. Starting out a new project with templates can save you time. You can begin with a template, then modify it as needed for each new project.
© 2011 Luidia, Incorporated 2. From the Preview Pane, select the template you want to add. 3. Select the Add as Background icon. The template background and objects are added to your current Scrapbook page.
© 2011 Luidia, Incorporated Flickr We have integrated key features from Yahoo's photo sharing site Flickr(TM) into the Gallery so that you can easily search for photos and integrate them into your Scrapbook pages. You can save images for later use by saving them in the Favorites folder. Accessing Flickr Searching for Images Search History Accessing Flickr Accessing Flickr through the Gallery is very simple.
© 2011 Luidia, Incorporated Encyclopædia Britannica We have integrated key features from Encyclopædia Britannica into the Gallery giving you access to a wide range of educational content and online resources while navigating Scrapbook. Search for information to incorporate into your presentations or save images in your Scrapbook meeting file. All images that you save will be stored in the Encyclopædia Britannica Content folder for later use.
© 2011 Luidia, Incorporated the option to Save Image As. If you save content other than an image, you will not be able to access it from the Gallery. See Preview Pane for file types that are compatible with the Gallery. Access images in your Encyclopædia Britannica Content Folder 1. Click on the Encyclopædia Britannica Content folder in your Gallery directory tree. All images that you have added will be displayed in the Preview Pane. 2. Select the image you would like to use in the Preview Pane.
© 2011 Luidia, Incorporated Shared Meetings What is a Shared Meeting? A Shared Scrapbook Meeting is a meeting that is broadcast over your local intranet or the Internet. At one location, the meeting coordinator/host uses the interactive system (software and hardware) to host or broadcast the meeting over the network (see Hosting/Sharing a Meeting). Remote participants use the interactive software or a Web browser to log into the meeting (see Join a Meeting).
© 2011 Luidia, Incorporated Hosting/Sharing a Meeting The following explains how to host/share a meeting over your local intranet or the Internet. When sharing a meeting, be aware of the following items. While Scrapbook v2.2 can open files created by previous versions of Scrapbook (v2.1 and earlier), previous versions of Scrapbook cannot open v2.2 files. During shared meetings, previous versions of Scrapbook do not support (will not display) text boxes created in Scrapbook v2.2. Scrapbook v2.
© 2011 Luidia, Incorporated Archive Meeting on the Server An archived meeting allow s you to search for, view , download, edit and/or delete your archived meeting (based on the archive privileges you select). Archive If Meeting on the Server is checked, the Archive Meeting dialog opens after you select theShare Meeting button. See Archive a Meeting for more information. Synchronize Participants Immediately Causes remote participants to be synchronized from the start of the meeting.
© 2011 Luidia, Incorporated Join a Meeting Using Scrapbook to Join a Meeting 1. Open Scrapbook from: o the eBeam Tool Palette, or o the eBeam Education Taskbar menu , or o the Scrapbook menu option found in the Windows Start bar. 2. Choose Join Meeting from the Scrapbook Toolbar . 3. In the Join Meeting dialog box, select the meeting server, enter your name and select a meeting name from the Meeting list. The Meeting list shows active meetings whose names have been published.
© 2011 Luidia, Incorporated Sending an Invitation You can invite others to a shared meeting by sending an e-mail invitation that contains a link to the meeting. In order to send email invitations: 1. In the Share Meeting dialog, check the Send Meeting Invitation checkbox or make sure you are sharing a meeting and choose Meetings > Send Invitation. See Sharing a Meeting for more information. 2. Select the language to be used for the e-mail invitation and then select Continue.
© 2011 Luidia, Incorporated Accepting an Email Invitation You can accept an e-mail invitation in one of the following ways: Double click the http: link in the email invitation to automatically launch the meeting in your browser or copy and paste the http: link into your web browser. When the meeting login screen appears, select the Join button. In Scrapbook, select the Join button and manually fill in all of the meeting fields using information provided by the invitation.
© 2011 Luidia, Incorporated Archive a Meeting Archive Meeting allows you to archive your Scrapbook meeting file on an eBeam server. The meeting can later be retrieved to be viewed, edited, printed or shared. There are two areas in Scrapbook where you can select to archive a meeting. While hosting a shared meeting, go to the Share Meeting dialog and select the Archive Meeting on the Server checkbox to have the Archive Meeting Screen open.
© 2011 Luidia, Incorporated Select the Change button to edit the current criteria via the Access Period Screen, as described below. Access Period Screen Meeting Storage: Choose the default, or select a specific date. Meeting File Availability: Define the duration the archived meeting will be available for other Scrapbook users to view and/or download. o Always (until deleted): Available until the same defined final date as meeting storage date.
© 2011 Luidia, Incorporated Retrieve a Meeting Retrieve a meeting by choosing the File > Retrieve Meeting menu selection to open the Retrieve Archived Meeting screen. You may search and retrieve archived meetings for viewing or downloading at any time, though some meetings may require password-access. The following topics describe the elements and activities available to you via the Retrieve Archived Meeting screen.
© 2011 Luidia, Incorporated confirmation. Security Code: Check this box (default) to require a specified security code before a user can edit or delete the archived meeting file. Note: if the box is checked, but no security code is specified, the defined password is automatically used. Access Period Section Meeting Storage: Choose the default or select a specific date. Meeting File Availability: Define the duration the archived meeting will be available for other users to download.
© 2011 Luidia, Incorporated name, and/or date and time. Server: Use the selector to choose the eBeam server where the archived meeting resides. If necessary, you may also select the Browser button and manually search for the server location. Search Criteria Options You can select one or more of the search options described below. Search by Meeting Name: Searches by meeting name. Select the checkbox to specify this search method. The meeting name may be case-sensitive.
© 2011 Luidia, Incorporated Page 108
© 2011 Luidia, Incorporated Participants The Participants window allows you to see information about every participant logged into a shared meeting and to Chat with connected participants. To open theParticipants window while participating in a shared meeting: Choose View > Participants, or Press Ctrl+4, or Select the Participants button from the Scrapbook Toolbar. The Participants window lists the following information for participants logged into the meeting through Scrapbook or Capture.
© 2011 Luidia, Incorporated Dismiss Participant(s) Dismiss Participant allows the meeting host to disconnect a participant from the meeting. To dismiss a participant from the meeting, select the participant in the Participants window, and then select the Dismiss Participant button. The Dismiss Participant option is also available w hen you select a participant name and either press Button A on the Interactive Stylus or right-click the name with your mouse then choose the Dismiss Participant option.
© 2011 Luidia, Incorporated Chat The Chat window allows participants in a shared meeting to send text messages to one another in the course of the meeting. Messages can be sent to anyone listed in the Participants List, by typing a text message into the New Message text box, and then clicking one of the buttons listed next to Send To. The following controls are contained in the Chat window: Control Description New Message Creates a new text message.