Built-in oven [en] INSTRUCTION MANUAL B45CS24.
en Table of contents NOITCURTSNI ] ne [ 8 Intended use . . . . . . . . . . . . . . . . . . . . . . . . . . . . . 4 ( Important safety information . . . . . . . . . . . . . . . 5 General information . . . . . . . . . . . . . . . . . . . . . . . . . . . 5 Halogen lamp. . . . . . . . . . . . . . . . . . . . . . . . . . . . . . . . 5 ] Causes of damage . . . . . . . . . . . . . . . . . . . . . . . . 6 n Baking and roasting assistant . . . . . . . . . . . . . 17 Information on the settings . . . . . . . . .
en Intended use J Tested for you in our cooking studio . . . . . . . . 27 Silicone moulds . . . . . . . . . . . . . . . . . . . . . . . . Cakes and small baked items . . . . . . . . . . . . . Bread and rolls. . . . . . . . . . . . . . . . . . . . . . . . . Pizza, quiche and savoury cakes . . . . . . . . . . . Bakes and soufflés. . . . . . . . . . . . . . . . . . . . . . Poultry . . . . . . . . . . . . . . . . . . . . . . . . . . . . . . . Meat . . . . . . . . . . . . . . . . . . . . . . . . . . . . . . .
Important safety information (Important safety information General information no i t amro f n i y t e f as t na t ropmI : Warning – Risk of fire! Combustible items stored in the cooking compartment may catch fire. Never store combustible items in the cooking compartment. Never open the appliance door if there is smoke inside. Switch off the appliance and unplug it from the mains or switch off the circuit breaker in the fuse box. Risk fire! is created when the appliance ■ A of draught door is opened.
en Causes of damage ]Causes of damage General information egam d f o sesuaC Caution! ■ Accessories, foil, greaseproof paper or ovenware on the cooking compartment floor: do not place accessories on the cooking compartment floor. Do not cover the cooking compartment floor with any sort of foil or greaseproof paper. Do not place ovenware on the cooking compartment floor if a temperature of over 50 ºC has been set. This will cause heat to accumulate.
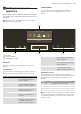
Getting to know your appliance en Control panel *Getting to know your appliance In the control panel, set the appliance's different functions. The current settings are shown on the display. In this chapter, we will explain the displays and controls. You will also find out about the various functions of your appliance. ecna i l p a ruoy wonk o t gn i t eG Note: Depending on the appliance model, individual details and colours may differ.
en Getting to know your appliance Main menu Touch the 0 touch button to access the main menu.
Accessories ‘ Top/bottom heating eco 50 - 275 °C ž CircoTherm eco 40 - 200 °C -------- For energy-optimised cooking of selected dishes. Heat is emitted evenly from the top and bottom. For energy-optimised cooking of selected dishes on one level without preheating. The fan distributes the energy-optimised heat from the ring heating element in the back wall evenly around the cooking compartment. Cooking compartment functions The functions in the cooking compartment make your appliance easier to use.
en Accessories Inserting accessories The cooking compartment has four shelf positions. The shelf positions are counted from the bottom up. : Warning – Risk of burns! The telescopic shelves become hot when the appliance is in use. Take special care not to get burnt when they are pulled out. Locking function The accessories can be pulled out approximately halfway until they lock in place. The locking function prevents the accessories from tilting when they are pulled out.
Before using for the first time Optional accessories You can purchase optional accessories from the aftersales service and specialist retailers, or on the Internet. You will find a comprehensive range of products for your appliance in our brochures and on the Internet. Both availability and whether it is possible to order online differ between countries. Please see your sales documents for more details. When purchasing, please always quote the exact order number of the optional accessory.
en Operating the appliance 5. Set the heating type and temperature, then start the appliance operation. ~ "Setting and starting the appliance operation" on page 12 Settings Heating type Top/bottom heating ƒ Temperature 240 °C Cooking time 1 hour 6. Keep the kitchen ventilated while the appliance is heating up. 7. Use the # touch button to switch off the appliance after the indicated cooking time. 8. Wait until the cooking compartment has cooled down. 9.
Operating the appliance 4. Use the ( or ) button to select the temperature. &LUFR7KHUP KRW DLU & Note: Depending on the operating mode, different settings are available. For each further setting, use the & button to navigate to the next line. Use the ( or ) button to select the setting. 5. Touch the # touch button to start the appliance operation. The heating bar and run time appear on the display.
en Time-setting options Activating the "PowerBoost" function 1. Set CircoTherm hot air ‚ or the bread baking setting … and the temperature. Note: Set a temperature above 100 °C to allow the appliance to preheat quickly. 2. Place the food on a single level in the cooking compartment. 3. Touch the # touch button to start the appliance operation. 4. Touch the ° touch button to activate the "PowerBoost" function. The ° symbol appears on the display.
Childproof lock Setting the cooking time Once the set cooking time has elapsed, the appliance switches off automatically. The function can only be used in combination with a type of heating. 1. Touch the # touch button. 2. Set the type of heating and temperature. 3. Touch the 0 touch button. The time-setting options are shown in the display. 4. Use the ( or ) button to set the cooking time. – Default value for the ( button = 10 minutes – Default value for the ) button = 30 minutes 5.
en Basic settings One-time childproof lock The control panel is locked so that the appliance cannot be switched on. To switch it on, the one-time childproof lock must be deactivated. After the appliance is switched off, the control panel is no longer locked. Activating and deactivating 1. Press and hold the 0 touch button until "Childproof lock activated" appears on the display. The childproof lock is activated. 2.
Baking and roasting assistant Fan run-on time Recommended Minimum Pull-out system* Not retrofitted (rack or single pull-out system) Retrofitted (double or triple pull-out system) Factory settings Restore *) Depending on the appliance model, this basic setting cannot be selected -------- Setting favourites You can set which heating types are shown in the heating types menu. Note: The "CircoTherm hot air", "Circo-roasting" and "Grill, large area" heating types are always shown in the heating types menu.
en Sabbath mode Dishes Beef pot roast Leg of lamb, boned Chicken, whole Chicken legs Goose, whole (3-4 kg) Setting meal You will be guided through the entire setting process for your chosen meal. 1. Touch the # touch button to switch on the appliance. 2. Touch the 0 touch button. 3. Use the ( or ) button to select the "Baking and roasting assistant". Use the & button to navigate to the next line. Use the ( or ) button to select the required category. Use the & button to navigate to the next line.
Cleaning agent DCleaning agent With good care and cleaning, your appliance will retain its appearance and remain fully functioning for a long time to come. We will explain here how you should correctly care for and clean your appliance. Door panels t nega gn i nae l C Door handle Suitable cleaning agents To ensure that the different surfaces are not damaged by using the wrong cleaning agent, observe the information in the table.
en Cleaning agent Surfaces in the cooking compartment After cleaning The back wall in the cooking compartment is selfcleaning.You can tell this from the rough surface. The base, ceiling and side panel are enamelled and have smooth surfaces. After cleaning the door seal, check whether it is sitting correctly on the left- and right-hand side (fig. !). If the door seal is running over the spacer ‚, push the door seal inwards so that it now runs beside the spacer ‚ (fig. ").
Cleaning function .Cleaning function The EasyClean cleaning aid makes it easier to clean the cooking compartment. Dirt is softened beforehand by vaporizing soapy water. It can then be removed more easily. no i t c nu f gn i nae l C : Warning – Risk of scalding! Water in a hot cooking compartment may create hot steam. Never pour water into the hot cooking compartment.
en Rails pRails With good care and cleaning, your appliance will retain its appearance and remain fully functional for a long time to come. This will tell you how to remove the shelves and clean them. s l i aR 2. Push the bar towards the back ‚ and down ƒ onto the pin „ (Fig. "). 3. Ensure that the hook is hooked onto the pin „ (Fig. #). 2 F Changing the shelf position for the telescopic rail D E Bars and telescopic rails can be positioned in any order.
Appliance door qAppliance door With good care and cleaning, your appliance will retain its appearance and remain fully functional for a long time to come. This will tell you how to remove the appliance door and clean it. r o d e c na i l p A en 3. Using a coin, fully turn both the left- and right-hand locks on the inside of the appliance at the bottom (Fig. &).
Appliance door en 4. Use a coin to release both locks on the appliance door (Fig. $). I II 3. Push on the left- and right-hand side on the outside of the appliance door until the inner glass is released on both sides (Fig. !). 4. Carefully lift the inner glass and remove it in the direction of the arrow (Fig. "). 2 1 D E Left lock: Anti-clockwise Right lock: Clockwise 5. Open the appliance door a little wider and then close it.
Trouble shooting 2. Push the intermediate panel downwards in the ‚ area, insert the ƒ holder at an angle and push down until it locks into place (Fig. "). The holder is inserted (Fig. #). 2 D If a fault occurs, there is often a simple explanation. Before calling the after-sales service, please refer to the fault table and attempt to correct the fault yourself. gn i t o h s e l buo r T : Warning – Risk of electric shock! 3. Insert the inner glass into the holder „ on the left and right (Fig. $). 4.
Customer service en Maximum operating time exceeded Your appliance ends the operation automatically when no cooking time is set and the setting has not been changed for a long time. The actual cooking time until the operation is stopped automatically varies according to the selected settings. The appliance display indicates that the operation will end automatically. Afterwards, the operation is stopped. To use the appliance again, switch it off beforehand.
Tested for you in our cooking studio JTested for you in our cooking studio Here, you can find a selection of dishes and the ideal settings for them. We will show you which type of heating and temperature are best suited to your dish. You will get information on suitable cooking accessories and the height at which they should be placed in the oven. You will also get tips about cookware and preparation methods.
en Tested for you in our cooking studio The setting values apply to dishes placed into a cold cooking compartment. By doing so, you can make energy savings of up to 20 per cent. If you preheat the oven, you can reduce the indicated baking times by several minutes. Preheating is necessary for selected dishes, and this is indicated in the table. If you wish to follow one of your own recipes when baking, you should use a similar baked item in the table as a reference.
Tested for you in our cooking studio en Dish Accessories/cookware Shelf posi- Type of tion heating Temperature in °C Yeast cake with dry topping Yeast cake with dry topping Yeast cake with dry topping, 2 levels Yeast cake with moist topping Yeast cake with moist topping Yeast cake with moist topping, 2 levels Plaited loaf, savarin Plaited loaf, savarin Swiss roll Swiss roll Stollen with 500 g flour Stollen with 500 g flour Strudel, sweet Strudel, sweet Strudel, frozen Universal pan Universal pan Univ
en Tested for you in our cooking studio Dish Accessories/cookware Biscuits, 2 levels Universal pan + baking tray Biscuits, 3 levels Baking trays + universal pan Meringue Baking tray Meringue, 2 levels Universal pan + baking tray Macaroons Baking tray Macaroons, 2 levels Universal pan + baking tray Macaroons, 3 levels Baking trays + universal pan * Preheat ** Preheat for 5 mins.
Tested for you in our cooking studio en Shelf positions Use the indicated shelf positions. Some frozen products may be unevenly pre-baked. Uneven browning may remain even after baking. Baking on one level When baking on one level, use the following shelf positions: ■ Tall baked items: Level 2 ■ Flat baked items: Level 3 Recommended setting values In the table, you can find the ideal heating type for various kinds of bread and bread roll.
en Tested for you in our cooking studio Dish Accessories Shelf posi- Type of tion heating Temperature in °C Multigrain bread, 1.5 kg Universal pan or cake tin 2 … Multigrain bread, 1.5 kg Universal pan or cake tin 2 ƒ Wholemeal bread, 1 kg Universal pan 2 … Wholemeal bread, 1 kg Universal pan 2 ƒ Flatbread Flatbread Universal pan Universal pan 3 3 ƒ … 210-220* 180-190* 230-240* 200-210* 210-220* 180-190* 230-240* 200-210* 250-270 220-240 Cooking time in mins.
Tested for you in our cooking studio baking tins/dishes next to one another or offset and vertically stacked in the cooking compartment. Accessories Ensure that you always use suitable accessories and that they are placed in the oven the right way around. Wire rack Insert the wire rack with the open side facing the appliance door and the outer rail pointing downwards .
en Tested for you in our cooking studio Dish Accessories Shelf posi- Type of tion heating Temperature in °C Tarte flambée Pierogi Pierogi Empanada Börek Börek * Preheat Universal pan Ovenproof dish Ovenproof dish Universal pan Universal pan Universal pan 3 2 2 3 2 1 200-210* 190-200 170-190 180-190 180-200 200-220* Bakes and soufflés Your appliance offers a range of heating types for preparing bakes and soufflés. You can find the ideal settings for many dishes in the settings tables.
Tested for you in our cooking studio en Bakes & soufflés Accessories/cookware Shelf posi- Type of tion heating Temperature in °C Lasagne, frozen, 400 g Potato gratin, raw ingredients, 4 cm deep Potato gratin, raw ingredients, 4 cm deep, 2 levels Soufflé Soufflé Wire rack Ovenproof dish Ovenproof dish 2 2 3+1 „ „ ‚ 190-210 160-190 150-170 Cooking time in mins.
en Tested for you in our cooking studio Tips ■ For duck or goose, pierce the skin on the underside of the wings. This allows the fat to run out. ■ If using duck breast, score the skin. Do not turn duck breasts. ■ When you turn poultry, ensure that the breast side or the skin side is underneath at first. ■ Poultry will turn out particularly crispy and brown if you baste it towards the end of the roasting time with butter, salted water or orange juice.
Tested for you in our cooking studio roasting dish, it will need a little more liquid than if cooked in glass cookware. The steam evaporates in the cookware when roasting. Carefully pour in more liquid if required. Shiny roasting dishes made from stainless steel or aluminium reflect heat like a mirror and are therefore not particularly suitable. The meat cooks more slowly and will not brown so much. Use a higher temperature and/or a longer cooking time.
en Tested for you in our cooking studio Dish Accessories/cookware Shelf posi- Type of tion heating Temperature in °C Fillet of pork, 400 g Smoked pork on the bone, 1 kg (with a little added water) Pork steaks, 2 cm thick Pork medallions, 3 cm thick Wire rack Cookware, covered 3 2 ‡ ‡ 220-230 210-230 Cooking time in mins. 20-25 70-90 Wire rack Wire rack 4 4 ˆ ˆ 275 290* 16-20 10-14 Beef Fillet of beef, medium, 1 kg Pot-roasted beef, 1.5 kg Sirloin, medium, 1.
Tested for you in our cooking studio Roasting and grilling on the wire rack Place the food to be grilled on the wire rack. In addition, slide the universal pan in at least one shelf position lower, with the slanted edge facing the appliance door. Pour up to ^ litres of water into the universal pan, depending on the size and type of the fish. Any dripping liquid will be caught. Less smoke is generated and the cooking compartment stays cleaner. Keep the appliance door closed when using the grill.
en Tested for you in our cooking studio Dish Accessories/cookware Shelf posi- Type of tion heating Temperature in °C Cooking time in mins.
Tested for you in our cooking studio en It is sufficient to heat UHT milk to 40 °C. Yogurt You can make your own yogurt using your appliance. Preparing yogurt Remove accessories and shelves from the cooking compartment. The cooking compartment must be empty. 1. Heat 1 litre of milk (3.5 % fat) to 90 °C on the hob and then cool down to 40 °C. 2. Stir in 150 g (chilled) yogurt. 3. Pour into cups or small jars and cover with cling film. 4.
en Tested for you in our cooking studio Dish Accessories/cookware Shelf posi- Type of tion heating Temperature in °C Bundt yeast cake Ring cake tin 2 ‘ 150-170 Cooking time in mins.
Tested for you in our cooking studio Slow cook Slow cooking is a technique for cooking food over a long period at low temperatures. For this reason, it is also called "low-temperature cooking". Slow cooking is ideal for all prime cuts (e.g. tender portions of beef, veal, pork, lamb or poultry) which are to be cooked "à point". The meat will remain succulent and tender. The benefit of this cooking method is that it allows lots of scope for menu planning because slow-cooked meat is easy to keep warm.
en Tested for you in our cooking studio Dish Cookware Lamb Saddles of lamb, boneless, 200 g each Cookware, uncovered Leg of lamb, boned, medium, 1 kg, tied Cookware, uncovered * Preheat Shelf posi- Type of tion heating Searing time Temperain mins. ture in °C Cooking time in mins. 2 2 5-7 6-8 120-180 180-240 Š Š 80* 80* Tips for slow cooking Slow-cooking duck breast. Place the cold duck breast into a pan and fry the skin side first. After slow cooking, grill for 3 to 5 minutes until crispy.
Tested for you in our cooking studio Preserving jars must not touch one another in the cooking compartment during the preserving process. jars are bubbling. Remove the jars from the cooking compartment after the indicated cooling time. Vegetables After a short while, small bubbles will form at short intervals. As soon as all preserving jars are bubbling, reduce the temperature to 120 °C and allow the jars to continue to bubble in the closed cooking compartment as indicated in the table.
en Tested for you in our cooking studio dough proving. Loosen any limescale with a little vinegar and wipe with clean water. Final fermentation Place your baked item into the oven at the shelf position indicated in the table. If you want to preheat the oven, the final fermentation takes place outside the appliance in a warm place. Recommended setting values The temperature and proving time are dependent on the type and quantity of the ingredients.
Tested for you in our cooking studio en Shelf positions for baking on two levels: ■ Universal pan: Level 3 Baking tray: Level 1 ■ Baking tins/dishes on the wire rack First wire rack: Level 3 Second wire rack: Level 1 cake tin onto the universal pan instead of onto the wire rack. Fatless sponge cake Fatless sponge cake on two levels: vertically stack springform cake tins in an offset manner on the wire racks.
&RQVWUXFWD 1HII 9HUWULHEV *PE+ &DUO :HU\ 6WUDH ' 0QFKHQ 5HJLVWHU \RXU SURGXFW RQOLQH ZZZ QHII LQWHUQDWLRQDO FRP *9001091395* 9001091395 951106 en