Oven [en] User manual and installation instructions C17CR22G0
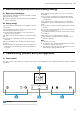
en Safety Futher information and explanations are available online: Table of contents USER MANUAL 1 Safety .................................................................... 2 2 Preventing material damage ............................... 4 3 Environmental protection and saving energy ....................................................................... 5 4 Familiarising yourself with your appliance ........ 5 5 Accessories..........................................................
Safety ▶ If smoke is emitted, the appliance must be switched off or the plug must be pulled out and the door must be held closed in order to stifle any flames. Loose food remnants, fat and meat juices may catch fire. ▶ Before using the appliance, remove the worst of the food residues and remnants from the cooking compartment, heating elements and accessories. Opening the appliance door creates a draught. Greaseproof paper may come into contact with the heating element and catch fire.
en Preventing material damage electronic implants, e.g. heart pacemakers or insulin pumps. ▶ Wearers of electronic implants must stay at least 10 cm away from the control panel. WARNING ‒ Risk of suffocation! Children may put packaging material over their heads or wrap themselves up in it and suffocate. ▶ Keep packaging material away from children. ▶ Do not let children play with packaging material. Children may breathe in or swallow small parts, causing them to suffocate.
Environmental protection and saving energy en 3 Environmental protection and saving energy 3.1 Disposing of packaging When baking multiple dishes, do so in succession or in parallel. ¡ The cooking compartment is heated after baking the first dish. This reduces the baking time for the second cake. If the cooking time is relatively long, you can switch the appliance off 10 minutes before the cooking time ends. ¡ There will be enough residual heat to finish cooking the dish.
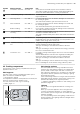
en Familiarising yourself with your appliance 2 Buttons 3 Control element 4.2 Buttons The buttons are touch-sensitive areas. To select a function, press the corresponding button.
Familiarising yourself with your appliance Symbol Heating function CircoTherm Intensive Temperature 50 - 275 °C Bread-baking setting 180 - 240 °C Grill, large area 50 - 290 °C Grill, small area 50 - 290 °C Bottom heating 50 - 250 °C Low Temperature Cooking 70 - 120 °C Dough proving 35 - 55 °C Top/bottom heating eco 50 - 275 °C CircoTherm eco 40 - 200 °C en Use Cook pizza or food that requires a lot of heat from below.
en Accessories Cooling fan The cooling fan switches on and off depending on the appliance's temperature. The hot air escapes above the door. ATTENTION! Do not cover the ventilation slot above the appliance door. The appliance overheats. ▶ Ensure that the ventilation slots are unobstructed. To ensure that the appliance cools down more quickly after operation, the cooling fan continues to run for a certain period afterwards.
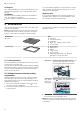
Before using for the first time en Combining accessories 5.3 Other accessories You can combine the wire rack with the universal pan to catch any liquid that drips down. 1. Place the wire rack on the universal pan so that both spacers are on the rear edge of the universal pan. 2. Insert the universal pan between the two guide rods for a shelf position. In so doing, the wire rack is on top of the upper guide rod.
en Basic operation 7 Basic operation 7.1 Switching on the appliance 7.5 Changing the temperature ▶ Press to switch the appliance on. Notes ¡ In the basic settings, you can specify whether the heating functions or the main menu should appear when you switch on the appliance. → "Basic settings", Page 14 ¡ If you do not perform any actions on the appliance for an extended period, it will automatically switch itself off. You can also change the temperature once you have started the appliance. 1.
Time-setting options en 8 Time-setting options Your appliance has different time-setting options, with which you can control its operation. 8.1 Overview of the time-setting options When you are setting a time, the time values will increase by greater increments as you scroll through the higher values. The cooking time, for example, can be set in 1-minute increments up to 1 hour, and then in 5minute increments thereafter.
en Childproof lock 3. Use the or button to change the end time. a The setting will then be applied. Cancelling the Ready at time for delayed starts 1. Press . 2. Use the button to reset the end time. a The end time corresponds to the current time plus the set cooking time. a The appliance will start heating using the set cooking time. 9 Childproof lock You can secure your appliance to prevent children from accidentally switching it on or changing the settings. 2.
Rapid heat-up en 10 Rapid heat-up You can use the "Rapid heat-up" and "PowerBoost" functions to reduce the heat-up time. Whether the appliance is preheated with the "Rapid heat-up" function or the "PowerBoost" function depends on the heating function that has been set. 10.
en Basic settings 12 Basic settings You can configure the appliance to meet your needs. 12.1 Overview of the basic settings Here you can find an overview of the basic settings and factory settings. The basic settings depend on the features of your appliance.
Cleaning and servicing en 13 Cleaning and servicing To keep your appliance working efficiently for a long time, it is important to clean and maintain it carefully. ▶ Do not use cleaning products with a high alcohol content. ▶ Do not use hard scouring pads or cleaning sponges. 13.1 Cleaning products ▶ Do not use any special cleaners for cleaning the ap- In order to avoid damaging the various oven surfaces on the appliance, do not use unsuitable cleaning products.
en Cleaning and servicing Cooking compartment Area Enamel surfaces Suitable cleaning agents ¡ Hot soapy water ¡ Vinegar water ¡ Oven cleaner Self-cleaning surfaces - Glass cover for the oven light Rails ¡ Hot soapy water Accessories ¡ Hot soapy water ¡ Oven cleaner ¡ Hot soapy water Information Soak any heavily soiled areas and use a brush or steel wool. Leave the appliance door open to dry the cooking compartment after cleaning it.
Cleaning function stains are residues from salty food – they are not rust. The stains are not hazardous to health. These marks do not impair the cleaning ability of the selfcleaning surfaces. en 10. Attach the shelf supports. → "Rails", Page 17 14 Cleaning function You can use the cleaning function to clean the appliance. 14.1 EasyClean cleaning aid You can use the "EasyClean" cleaning aid to clean light soiling from the cooking compartment between full cleans.
en Appliance door 2. Pull the whole rail to the front and remove it. ¡ For both rails, ensure that the retaining bracket is at the front. 1. First, push the rail into the middle of the rear socket until the rail rests against the cooking compartment wall, and then push this back . 2. Push the rail into the front socket until the rail also rests against the cooking compartment wall, and then press this downwards . 3. Clean the rail. → "Cleaning products", Page 15 15.
Appliance door 3. Close the appliance door fully . Grab hold of the appliance door with both hands (on the left and right) and pull it upwards and out . en 2. Open the locking levers on the left- and right-hand hinges . a The locking levers are open. The hinges are now secured and cannot snap shut. 3. Close the appliance door fully . 4. Carefully place the appliance door on a level sur- face. 4. Push on the left- and right-hand side of the door 16.
en Appliance door 9. If necessary, you can remove the condensate trough for cleaning. ‒ Open the appliance door. ‒ Tilt the condensate trough upwards and remove it. 3. Slide the intermediate pane into the left- and right- hand retainers . 4. Push the intermediate pane upwards until it is in the left- and right-hand retainers . 10. WARNING ‒ Risk of injury! Scratched glass in the appliance door may develop into a crack.
Troubleshooting 7. Push the inner pane upwards until it is in the left- and right-hand retainers . 8. Put the door cover in position and push down on it until you hear it click into place. 9. Open the appliance door fully. en 10. Close the locking levers on the left- and right-hand hinges . a The locking levers are closed. The appliance door is secured and cannot be detached. 11. Close the appliance door.
en Troubleshooting Fault The appliance is not heating; appears on the display. Cause and troubleshooting Demo mode is activated in the basic settings. 1. Briefly disconnect the appliance from the power supply by switching the circuit breaker in the fuse box off and then on again. 2. Deactivate Demo mode within the next 3 minutes in the → "Basic settings", Page 14. There has been a power cut. ▶ Open and close the appliance door once after a power failure.
Disposal 4. Insert the new halogen lamp and press it firmly into the socket. Make sure the pins are positioned correctly. 5. Depending on the appliance model, the glass cover may have a sealing ring. Put the sealing ring in position. en 6. Screw the glass cover on. 7. Take the tea towel out of the cooking compartment. 8. Connect the appliance to the power supply. 18 Disposal Find out here how to dispose of old appliances correctly. 18.
en How it works ATTENTION! When the cooking compartment is hot, any water inside it will create steam. The change in temperature may cause damage. ▶ Never pour water into the cooking compartment when it is still hot. ▶ Never place cookware containing water on the cooking compartment floor. General information about roasting in cookware ¡ Use heat-resistant, ovenproof cookware. ¡ Place the cookware on the wire rack. ¡ Glass cookware is best.
How it works en 20.6 List of foods Recommended settings for a variety of foods, sorted into food categories.
en How it works Food Accessory/cookware Shelf pos- Heating ition function → Page 6 Ovenproof dish 1 Bake, savoury, cooked ingredients Bake, savoury, cooked ingrediOvenproof dish ents Potato gratin, raw ingredients, Ovenproof dish 4 cm deep Chicken, 1 kg, unstuffed Wire rack Small chicken portions, 250 g Wire rack each Goose, unstuffed, 3 kg Wire rack Joint of pork without rind, e.g. Wire rack neck, 1.5 kg Joint of pork without rind, e.g. Uncovered cookware neck, 1.
How it works 4. Sear the meat on all sides on the hob at a very high en To ensure that the climate in the cooking compartment remains constant, keep the cooking compartment door closed during low temperature cooking. 6. After low temperature cooking, remove the meat from the cooking compartment. heat. 5. Immediately place the meat into the pre-warmed cookware in the cooking compartment.
en Installation instructions Recommended settings for baking Food Accessory/cookware Shelf pos- Heating ition function → Page 6 Viennese whirls Baking tray 1 Viennese whirls Baking tray 1 Viennese whirls, on 2 levels Universal pan 3+1 + Baking tray Small cakes Baking tray 1 Small cakes Baking tray 1 Small cakes, on 2 levels Universal pan 3+1 + Baking tray Hot water sponge cake Springform cake tin, 1 diameter 26 cm Hot water sponge cake Springform cake tin, 1 diameter 26 cm 1 Preheat the appliance for five
Installation instructions en ATTENTION! Carrying the appliance by the door handle could break it. The door handle cannot support the weight of the appliance. ▶ Do not carry or hold the appliance by the door handle. 21.2 Appliance dimensions You will find the dimensions of the appliance here ¡ Wear protective gloves so that you do not cut yourself. Parts that are accessible during installation may have sharp edges. ¡ Dimensions of the figures in mm.
en Installation instructions 21.4 Installation underneath a hob If the appliance is installed under a hob, the following minimum dimensions must be adhered to (including substructure, if applicable). Hob type Induction hob Full-surface induction hob Gas hob Electric hob a raised in mm 42 52 32 32 21.5 Installation in a tall unit Observe the installation dimensions and the installation instructions when installing in a tall unit.
Installation instructions ¡ Ensure that air exchange is guaranteed in accordance with the diagram. en ¡ Contact protection must be guaranteed by the installation. Electrically connect the appliance with the protective contact plug Note: The appliance must only be connected to a protective contact socket that has been correctly installed. ▶ Insert the plug into the protective contact socket. When the appliance is installed, the mains plug of the power cord must be freely accessible.
en Installation instructions 3. Open the appliance door and unscrew the left and right-hand panels. 4. Close the appliance door. 5. Screw the appliance into place. 7. Refit the panels and screw them in place, first at the top and then at the bottom. 8. If required, the gap between the appliance door and the side panels can be adjusted using the screws at the top left and right. 6.
Valid within Great Britain: Imported to Great Britain by BSH Home Appliances Ltd.