
Instructions for Use


Before using for the first time en
9
Only use original accessories provided by your
appliance manufacturer. They are specially adapted for
your appliance.
You can buy accessories from the after-sales service,
from specialist retailers or online.
Note: Microwaveable ovenware can be placed on the
cooking compartment floor (level 0).
Cooking compartment functions
The functions in the cooking compartment make your
appliance easier to use. This, for example, enables the
cooking compartment to be well lit and a cooling fan to
prevent the appliance from overheating.
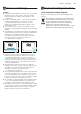
Interior lighting
When you open the appliance door, the interior lighting
switches on. If the door remains open for longer than
around five minutes, the cooking compartment lighting
switches off again. When the door is closed and
opened again, the cooking compartment lighting
switches on again.
For all operating modes, the cooking compartment
lighting switches on as soon as the operation is started.
When the operation has finished, the lighting switches
off.
Note: Opening the appliance door during operation:
The operation is suspended. After closing the door,
press the start/stop l button briefly. The operation will
then continue.
Cooling fan
The cooling fan switches on as required. The hot air
escapes above the door.
The cooling fan may continue to run for a certain time
after the operation.
Caution!
Do not cover the ventilation slots. Otherwise, the
appliance may overheat.
Notes
■ The appliance remains cool during microwave
operation. Despite this, the cooling fan will still
switch on. The fan may run on even when the
microwave operation has ended.
■ Condensation may form on the door window, interior
walls and floor. This is normal and does not
adversely affect microwave operation. Wipe away the
condensation after cooking.
KBefore using for the first
time
Be f o r e us i ng for the first time
Before you can use your new appliance, you must
make some settings.
Initial use
After connecting the appliance to the power or following
a power cut, the settings for initial use are shown in the
display. It may take a few seconds for the instruction to
appear.
Note: You can change these settings again at any time
in the basic settings.
Setting the language
1. Use the & button to navigate to the next line.
2. Use the ( or ) button to select the language.
3. Use the % button to navigate to the previous line.
4. Use the ) button to select the next setting.
Setting the time
1. Use the & button to navigate to the next line.
2. Use the ( or ) button to select the current hour.
3. Use the & button to navigate to the next line.
4. Use the ( or ) button to select the current minute.
5. Press the % button repeatedly until "Time" appears.
6. Use the ) button to select the next setting.
Setting the date
1. Use the & button to navigate to the next line.
2. Use the ( or ) button to select the current day.
3. Use the & button to navigate to the next line.
4. Use the ( or ) button to select the current month.
5. Use the & button to navigate to the next line.
6. Use the ( or ) button to select the current year.
7. Press the % button repeatedly until "Date" appears.
8. Use the ) button to apply the settings.
The initial use is complete.
Cleaning accessories
Before using the accessories for the first time, clean
them thoroughly using hot, soapy water and a soft cloth.