Oven [en] User manual and installation instructions C28MT27G0
en Safety Futher information and explanations are available online: Table of contents 1 Safety Observe the following safety instructions. USER MANUAL 1 Safety .................................................................... 2 2 Preventing material damage ............................... 6 3 Environmental protection and saving energy ....................................................................... 7 4 Familiarising yourself with your appliance ........ 8 5 Accessories..................
Safety been instructed on how to use the appliance safely and have understood the resulting dangers. Do not let children play with the appliance. Children must not perform cleaning or user maintenance unless they are at least 15 years old and are being supervised. Keep children under the age of 8 years away from the appliance and power cable. 1.4 Safe use Always place accessories in the cooking compartment the right way round.
en Safety ▶ Never kink, crush or modify the power cord. An ingress of moisture can cause an electric shock. ▶ Do not use steam- or high-pressure cleaners to clean the appliance. If the appliance or the power cord is damaged, this is dangerous. ▶ Never operate a damaged appliance. ▶ Never pull on the power cord to unplug the appliance. Always unplug the appliance at the mains. ▶ If the appliance or the power cord is damaged, immediately unplug the power cord or switch off the fuse in the fuse box.
Safety Airtight packaging may burst when food is heated. ▶ Always follow the instructions on the packaging. ▶ Always use oven gloves to remove the dishes from the cooking compartment. The accessible parts of the appliance become hot during operation. ▶ Never touch these hot parts. ▶ Keep children at a safe distance. At the highest settings in microwave only mode, the drying function will automatically switch on an additional heating element to heat the cooking compartment.
en Preventing material damage 1.6 Meat probe WARNING ‒ Risk of electric shock! Using the wrong meat probe could damage the insulation. ▶ Only use the meat probe for this specific appliance. 1.7 Cleaning function WARNING ‒ Risk of fire! Loose food remnants, fat and meat juices may catch fire when the cleaning function is in progress. ▶ Before you start the cleaning function, always remove coarse dirt from the cooking compartment. ▶ Never clean accessories at the same time.
Environmental protection and saving energy Using oven cleaner in a hot cooking compartment damages the enamel. ▶ Never use oven cleaner in the cooking compartment when it is still warm. ▶ Remove all food remnants from the cooking compartment and the appliance door before you next heat up the appliance. If the seal is very dirty, the appliance door will no longer close properly during operation. This may damage the front of adjacent kitchen units. ▶ Keep the seal clean at all times.
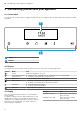
en Familiarising yourself with your appliance 4 Familiarising yourself with your appliance 4.1 Control panel You can use the control panel to configure all functions of your appliance and to obtain information about the operating status. 1 2 1 2 Display Buttons 4.2 Buttons The buttons are touch-sensitive areas. To select a function, press the corresponding button.
Familiarising yourself with your appliance Direction Navigate upwards Use Swipe down on the display with your finger Direction Navigate downwards en Use Swipe up on the display with your finger 4.4 Main menu The main menu provides an overview of your appliance's functions. Press the button to open the main menu.
en Familiarising yourself with your appliance Symbol Heating function Dough proving Temperature 35 - 55 °C Preheat cookware 30 - 70 °C Use For proving dough and culturing yoghurt. Dough will prove more quickly than at room temperature. The surface of the dough does not dry out. For heating cookware. Keep warm 60 - 100 °C For keeping cooked food warm. Top/bottom heating eco 50 - 275 °C Hot air eco 40 - 200 °C For gently cooking selected types of food. Heat is emitted from above and below.
Accessories en 5 Accessories Use original accessories. These have been made especially for your appliance. Note: Accessories may become deformed if they get hot. Deformation has no effect on function. As the accessory cools down, it will regain its original shape. Accessories Wire rack Universal pan Baking tray 5.1 Information on accessories Some accessories are only suitable for certain types of heating.
en Before using for the first time 6 Before using for the first time Configure the settings for initial start-up. Clean the appliance and accessories. 3. Swipe left or right to select the required language. 4. Press the top row. Setting the time 6.1 Initial use When the appliance is connected to the power supply for the first time or following a lengthy power failure, the settings that you will need to configure before you can use it will appear.
Time-setting options en 7.8 Cancelling operation 7.9 Viewing the current temperature Note: Some functions, e.g. cleaning functions, cannot be cancelled. ▶ Press and hold the button until the function that is currently in progress is cancelled. a Operation will stop and all the settings will be reset. a The cooling fan will continue to run until the cooking compartment has cooled down. You can view the current temperature while the appliance is heating up. ▶ Press .
en Microwave time (duration) and specify when you want your food to be ready. You can only use the delayed start function in conjunction with a heating function. Setting the Ready at time for delayed starts Notes ¡ Do not leave food that spoils easily in the cooking compartment for too long. ¡ You cannot use the delayed start function with every heating function. 1. Place the food into the cooking compartment and close the appliance door. 2. Set a heating function and a temperature. 3. Press . 4.
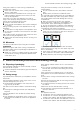
Microwave Cookware and acInformation cessories Metal cookware and Metal can be used with Microbakeware Combi. Note: Metal must be kept at least 2 cm from the cooking compartment walls and the inside of the door. Accessories supThe supplied accessory is suitplied: able for MicroCombi. No ¡ Wire rack sparks are created. ¡ Universal pan ¡ Baking tray Testing cookware for microwave suitability If you are unsure whether your cookware is suitable for use in the microwave, carry out a cookware test.
en Microwave Drying the cooking compartment with the Dry function The "Dry" function heats up the cooking compartment so that the moisture in the cooking compartment evaporates. You will then need to open the appliance door to allow the steam to escape. WARNING ‒ Risk of burns! The appliance becomes hot during operation. ▶ Allow the appliance to cool down before cleaning.
Microwave programmes en 10 Microwave programmes The microwave programmes help you to use your appliance to prepare different dishes by selecting the optimum settings automatically. This significantly reduces the cooking time. 10.1 Cookware The cooking result depends on the composition of the meat and the size of cookware. You should therefore use heat-resistant cookware that is suitable for temperatures up to 300 °C. Glass or glass ceramic cookware is best. The joint should cover approx.
en Meat probe 11 Meat probe Cook with precision by inserting the meat probe into the food and setting a core temperature on the appliance. Once the set core temperature has been reached in the food, the appliance automatically stops heating. Thick pieces of meat Insert the meat probe diagonally into the meat from above, pushing it in as far as possible. Poultry Insert the meat probe into the thickest part of the breast, pushing it in as far as possible.
Meat probe Poultry Chicken Chicken breast Duck Duck breast, medium rare Turkey Turkey breast Goose Pork Shoulder of pork Fillet of pork, medium rare Pork loin, well done Beef Tenderloin or sirloin, rare Tenderloin or sirloin, medium rare Tenderloin or sirloin, well done Veal Joint of veal or hock, lean Joint of veal, shoulder Veal knuckle Lamb Leg of lamb, medium rare Leg of lamb, well done Saddle of lamb, medium rare Fish Whole fish Fish fillet Other Meat loaf, all kinds of meat (Re)heating food Core tem
en Baking and roasting assistant 12 Baking and roasting assistant The baking and roasting assistant helps you to use your appliance to cook various dishes by suggesting the optimal settings. The baking and roasting assistant helps you to make classic cakes, bread and roasts. The appliance selects the optimal heating function for you. The default temperature and cooking time can be changed according to your requirements. 12.
Rapid heating en 3. Press the bottom row. 4. Swipe left or right to select the "Automatic childproof lock". Press the bottom row. Swipe right to set the lock to "Activated". Press . Press "Save" to save your settings. a When you switch off the appliance, will appear on the display. 5. 6. 7. 8. 13.3 Interrupting the automatic childproof lock 1. Press and hold the button until "Childproof lock deactivated" appears on the display. 2. Press to switch the appliance on and then start it up. 13.
en Basic settings 10. Once the cooking time has elapsed, an audible sig- nal sounds. A note appears on the display confirming that the operation has finished. The appliance stops heating up and responds again as usual outside of Sabbath mode. ‒ Press to switch the appliance off. The appliance automatically switches off after approx. 10 to 20 minutes. 15.2 Cancelling Sabbath mode ▶ Press to cancel Sabbath mode. 16 Basic settings You can configure the appliance to meet your needs. 16.
Home Connect en 17 Home Connect This appliance is network-capable. Connecting your appliance to a mobile device lets you control its functions via the Home Connect app, adjust its basic settings and monitor its operating status. The Home Connect services are not available in every country. The availability of the Home Connect function depends on the availability of Home Connect services in your country. You can find information about this at: www.home-connect.com.
en Cleaning and servicing 17.3 Operating the appliance with the Home Connect app When the Remote start function is activated, you can use the Home Connect app to remotely configure the appliance's settings and start it. Note: Some operating modes can only be started on the oven itself. Requirements ¡ The appliance must be switched on. ¡ The appliance must be connected to your home network and to the Home Connect app.
Cleaning and servicing Using oven cleaner in a hot cooking compartment damages the enamel. ▶ Never use oven cleaner in the cooking compartment when it is still warm. en ▶ Remove all food remnants from the cooking com- partment and the appliance door before you next heat up the appliance. New sponge cloths contain residues from production. ▶ Wash new sponge cloths thoroughly before use. Suitable cleaning agents Only use cleaning agents that are suitable for the different surfaces on your appliance.
en Cleaning functions Area Rails Pull-out system Accessories Meat probe Suitable cleaning agents Information ¡ Hot soapy water Soak any heavily soiled areas and use a brush or steel wool. Note: To clean thoroughly, detach the rails. → "Rails", Page 28 ¡ Hot soapy water Use a brush to remove very heavy soiling. Clean the pull-out rails while they are pushed in so that you do not remove the lubricant. Do not clean in the dishwasher. Note: To clean thoroughly, detach the pull-out system.
Cleaning functions Configuring the Pyrolytic self-cleaning function WARNING ‒ Risk of harm to health! The cleaning function heats up the cooking compartment to a very high temperature so that food left over from roasting, grilling and baking will burn off. This process releases vapours, which can irritate mucous membranes. ▶ Keep the kitchen well ventilated while the cleaning function is running. ▶ Do not remain in the room for long periods. ▶ Keep children and pets away.
en Rails a Once the cleaning aid has run through to the end, an audible signal will sound. 8. Press any button to end the audible signal. 9. After using the cleaning aid, finish cleaning the cooking compartment. → "Wiping down the cooking compartment", Page 28 Wiping down the cooking compartment ATTENTION! The prolonged presence of moisture in the cooking compartment leads to corrosion. ▶ After using the cleaning aid, wipe the cooking compartment clean and allow it to dry fully.
Appliance door 3. Hook the rear retainers with the hook into the top hole and push them into the bottom hole . en ¡ The rails only fit on the right or left. ¡ For both pull-out rails, ensure that you can pull them forwards and out. ¡ The rails fit both the left- and right-hand sides. 1. Set the rear rail at an angle, hooking it into the re- tainers at the top and bottom 2. Pull the rail forwards . 3. Hook in the rail at the front . and press it down . 20.
en Appliance door 6. Press the intermediate pane against the appliance with one hand while pushing the left- and right-hand retainers upwards. Do not detach the retainers . 7. Remove the intermediate pane. 8. WARNING ‒ Risk of serious harm to health! If the screws are undone, the safety of the appliance can no longer be guaranteed. Microwave energy may escape. ▶ Never undo the screws. Never unscrew the four black screws on the frame. 2.
Troubleshooting en 22 Troubleshooting You can rectify minor faults on your appliance yourself. Read the troubleshooting information before contacting aftersales service. This will avoid unnecessary costs. WARNING ‒ Risk of injury! Improper repairs are dangerous. ▶ Repairs to the appliance should only be carried out by trained specialist staff. ▶ If the appliance is defective, call Customer Service. WARNING ‒ Risk of electric shock! Incorrect repairs are dangerous.
en Disposal Fault During simple microwave operation, the cooking compartment becomes hot. The interior lighting does not work. Maximum operating time reached. A message with "D" or "E" appears in the display, e.g. D0111 or E0111. The cooking result is not satisfactory. Cause and troubleshooting The drying function is switched on. The LED light is defective. Note: Do not remove the glass cover. ▶ Call the after-sales service.
Declaration of Conformity en 24.1 Product number (E-Nr.) and production number (FD) You can find the product number (E-Nr.) and the production number (FD) on the appliance's rating plate. You will see the rating plate with these numbers if you open the appliance door. Make a note of your appliance's details and the Customer Service telephone number to find them again quickly.
en How it works Baking on 2 levels Universal pan Baking tray Baking tins on two wire racks Shelf position 3 1 3 1 Use the hot air heating function. Notes ¡ Items that are placed in the appliance on baking trays or in baking tins/dishes at the same time will not necessarily be ready at the same time. ¡ If you opt for cooking in combination with the microwave mode, you can only cook on one level. 26.
How it works en ¡ Use salt and seasoning sparingly. When cooking food using the microwave mode, most of the food's natural flavour will be retained. ¡ Turn or stir the food 2-3 times during cooking. ¡ After cooking, leave the food to rest for 2-3 minutes. ¡ Remove any ice. ¡ Some frozen products may be unevenly pre-baked. Uneven browning may remain even after baking. 26.5 Cooking frozen products ¡ Take ready meals out of the packaging.
en How it works Food Accessory/cookware Bread, without a tin, 1500 g Flatbread Flatbread Bread rolls, fresh Bread rolls, fresh Pizza, fresh Pizza, fresh, on 2 levels Loaf tin Shelf pos- Heating ition function → Page 9 1 Universal pan 1 Universal pan 1 Baking tray 1 Baking tray 1 Baking tray 1 Universal pan 3+1 + Baking tray Pizza, fresh, thin-crust, on Pizza tray 1 a pizza tray Quiche Tart dish or tin 1 , Black tray Quiche Tart dish or tin 1 , Black tray Tarte flambée Universal pan 1 Bake, savoury,
How it works Food Accessory/cookware Sirloin, medium, 1.5 kg Uncovered cookware Wire rack Uncovered cookware Covered cookware Shelf pos- Heating ition function → Page 9 1 Burger, 3-4 cm thick 2 Leg of lamb, boned, me1 dium, 1.5 kg Leg of lamb, boned, me1 dium, 1.5 kg Meat loaf, 1 kg, + 50 ml Uncovered cook1 water ware Fish, grilled, whole, Uncovered cook1 300 g, e.g. trout ware Fish, grilled, whole, Wire rack 2 300 g, e.g.
en How it works Recommended settings for desserts and compote Food Accessory/cookware Blancmange made from blancmange powder Yoghurt Covered cookware Rice pudding, 125 g, + 500 ml milk Covered cookware Individual moulds Shelf pos- Heating ition function → Page 9 1 Temperature in °C Cooking compartment floor 1 Fruit compote, 500 g Covered cookware 1 Microwave popcorn, 1 x Uncovered cook1 100 g bag 2 ware 1 Stir the food one or two times during cooking. 2 Place the sealed bag on the cookware.
How it works en ¡ Once the food has defrosted, switch off the appliance and leave the food in the appliance for another 10 to 30 minutes to allow the temperature to equalise. Recommended settings for defrosting Food Accessory/cookware Bread, 500 g Uncovered ware Wire rack Uncovered ware Uncovered ware Uncovered ware Bread rolls Cakes, moist, 500 g Cakes, dry, 750 g Meat, whole, e.g. joint, raw meat, 1 kg Minced meat, mixed, 500 g Chicken, whole, 1.
en How it works Recommended settings for warming up food using the microwave mode Food Accessory/cookware Drinks, warming up, 200 ml Baby food, heating up, e.g. baby bottle, 150 ml Vegetables, chilled, 250 g Side dishes, e.g. pasta, dumplings, potatoes, rice Chilled Soup, stew, 400 ml Chilled Plated meal, 1 portion Chilled Bakes, 400 g, e.g. lasagne, potato gratin Side dishes, 500 g, e.g. pasta, dumplings, potatoes, rice Frozen Soup, stew, 200 ml Frozen Plated meal, 1 portion Frozen 1 Stir the food well.
How it works en Recommended settings for baking Food Accessory/cookware Shelf posi- Heating tion function → Page 9 Viennese whirls Baking tray 1 Viennese whirls Baking tray 1 Small cakes Baking tray 1 Small cakes Baking tray 1 Small cakes Baking tray 1 Small cakes, 2 levels Universal pan 3+1 + Baking tray Hot water sponge cake Springform cake tin, 1 diameter 26 cm Hot water sponge cake Springform cake tin, 1 diameter 26 cm 1 Preheat the appliance for five minutes.
en Installation instructions Food Cakes Accessory/cookware Shelf pos- Heating ition function → Page 9 1 Uncovered cookware Chicken Uncovered cook1 ware 1 Turn the dish 2/3 of the way through the cooking time. Temperature in °C 190 - 210 Microwave power setting in W 180 Cooking time in mins 12 - 18 180 - 200 360 25 - 35 1 27 Installation instructions Observe this information when installing the appliance. 27.
Installation instructions and comply with the applicable national safety requirements. ▶ If the power cord is too short, contact customer service. ▶ Only use adapters approved by the manufacturer. en 27.3 Installation below a worktop Observe the installation dimensions and the installation instructions when installing below a worktop. ATTENTION! Carrying the appliance by the door handle could break it. The door handle cannot support the weight of the appliance.
en Installation instructions 27.5 Installation in a tall unit Observe the installation dimensions and the installation instructions when installing in a tall unit. ¡ To ensure that the appliance door can be opened, you must take the minimum dimensions into consideration when installing in a corner. The dimension is dependent on the thickness of the unit front and the handle. 27.7 Electrical connection ¡ To ventilate the appliance, the intermediate floors must have a ventilation cut-out.
Installation instructions 27.8 Installing the appliance Note: Do not use a cordless screwdriver to secure the panels. This may damage the panels. 1. Push the appliance in fully. Do not kink or trap the connection cable, or route it over sharp edges. 2. Centre the appliance. There must be an air gap of at least 4 mm between the appliance and adjacent unit fronts. 3. Open the appliance door and unscrew the left and right-hand panels. en 6.
Valid within Great Britain: Imported to Great Britain by BSH Home Appliances Ltd.