Extractor hood [en] User manual and installation instructions D49ED52X1, D46ED52X1 2
en Safety Table of contents USER MANUAL 1 Safety .................................................................... 2 2 Avoiding material damage................................... 4 3 Environmental protection and saving energy ....................................................................... 5 4 Operating modes ................................................. 5 5 Familiarising yourself with your appliance ........ 6 6 Basic operation ....................................................
Safety WARNING ‒ Risk of poisoning! Risk of poisoning from flue gases being drawn back in. Room-air-dependent heat-producing appliances (e.g. gas, oil, wood or coaloperated heaters, continuous flow heaters or water heaters) obtain combustion air from the room in which they are installed and discharge the exhaust gases into the open through an exhaust gas system (e.g. a chimney). With the extractor hood switched on, air is extracted from the kitchen and the adjacent rooms.
en Avoiding material damage WARNING ‒ Risk of injury! Components inside the appliance may have sharp edges. ▶ Carefully clean the appliance interior. Changes to the electrical or mechanical assembly are dangerous and may lead to malfunctions. ▶ Do not make any changes to the electrical or mechanical assembly. The light emitted by LED lights is very dazzling, and can damage the eyes (risk group 1). ▶ Do not look directly into the switched-on LED lights for longer than 100 seconds.
Environmental protection and saving energy en 3 Environmental protection and saving energy 3.1 Disposing of packaging The packaging materials are environmentally compatible and can be recycled. ▶ Sort the individual components by type and dispose of them separately. 3.2 Saving energy If you follow these instructions, your appliance will use less power. Adjust the fan speed to the amount of steam produced during cooking. ¡ The lower the fan speed, the less energy is consumed.
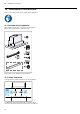
en Familiarising yourself with your appliance 5 Familiarising yourself with your appliance 5.1 Controls Switch the appliance on or off You can use the control panel to configure all functions of your appliance and to obtain information about the operating status. Increase the fan setting Decrease the fan setting Switch the lighting on or off 6 Basic operation 6.1 Switching on the appliance 6.5 Switching off intensive mode 1. Pull out the filter pull-out. 2. Press .
Cleaning and servicing en 7 Cleaning and servicing To keep your appliance working efficiently for a long time, it is important to clean and maintain it carefully. 7.1 Cleaning products You can obtain suitable cleaning products from aftersales service or the online shop. WARNING ‒ Risk of electric shock! An ingress of moisture can cause an electric shock. ▶ Before cleaning, pull out the mains plug or switch off the fuse in the fuse box. ▶ Do not use steam- or high-pressure cleaners to clean the appliance.
en Troubleshooting ATTENTION! The grease filters may become damaged if they are squeezed. ▶ Do not squeeze the grease filters. Note: When cleaning the grease filter in the dishwasher, light discolouration may occur. This discolouration has no effect on the performance of the metal grease filters. Requirement: The grease filters have been removed. → "Removing the grease filter", Page 7 1. Observe the information regarding the cleaning agents. → "Cleaning products", Page 7 2.
Customer Service en 9 Customer Service If you have any queries on use, are unable to rectify faults on the appliance yourself or if your appliance needs to be repaired, contact Customer Service. Function-relevant genuine spare parts according to the corresponding Ecodesign Order can be obtained from Customer Service for a period of at least 10 years from the date on which your appliance was placed on the market within the European Economic Area.
en Installation instructions 12 Installation instructions Observe this information when installing the appliance. 12.1 Included with the appliance After unpacking all parts, check for any damage in transit and completeness of the delivery. Depending on the appliance specifications 12.2 Safety clearances Comply with the safety clearances for the appliance. For Australia and New Zealand the minimum safety clearance above electrical cooktops must be 600 mm.
Installation instructions 12.3 Secure installation Follow these safety instructions when installing the appliance. WARNING ‒ Risk of poisoning! Risk of poisoning from flue gases being drawn back in. Room-air-dependent heat-producing appliances (e.g. gas, oil, wood or coaloperated heaters, continuous flow heaters or water heaters) obtain combustion air from the room in which they are installed and discharge the exhaust gases into the open through an exhaust gas system (e.g. a chimney).
en Installation instructions The appliance may fall down if it has not been properly fastened in place. ▶ All fastening components must be fixed firmly and securely in place. Changes to the electrical or mechanical assembly are dangerous and may lead to malfunctions. ▶ Do not make any changes to the electrical or mechanical assembly. WARNING ‒ Risk of electric shock! Sharp-edged components inside the appliance may damage the connecting cable. ▶ Do not kink or trap the connecting cable.
Installation instructions 12.6 Instructions for the electrical connection In order to be able to safely connect the appliance to the electrical system, follow these instructions. WARNING ‒ Risk of electric shock! It must always be possible to disconnect the appliance from the electricity supply. The appliance must only be connected to a protective contact socket that has been correctly installed. ▶ The mains plug for the mains power cable must be easily accessible after the appliance is installed.
en Installation instructions 8. 19 mm wall thickness: Open up the spacers on both of the mounting parts. 9. Screw the mounting parts to the body on the left and right. 3. Connect the enclosed power cord to the appliance and secure the stain relief. Installing the appliance 1. Fit the appliance in the cabinet bolts , lock the fastening and attach the protective caps . 10. Remove the limit stops from the bottom of the mounting parts. Preparing the appliance 1.
Installation instructions 4. Snap the wall closing strip into the holders. en 5. Remove the protective caps from the fastening bolts. 5. Fit the grease filters. 6. Establish the pipe connection. 7. Establish the electrical connection. 6. Support the appliance with one hand while carrying out the following steps. Note: You can conceal the housing of the extractor hood within the upper cabinet. In doing so, observe the following: ¡ The intermediate floor must not rest on the housing.
en Installation instructions 9. Carefully remove the appliance.
Valid within Great Britain: Imported to Great Britain by BSH Home Appliances Ltd.