Extractor hood [en] User manual and installation instructions D55MH.6N0., D57MH56N0.
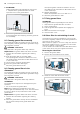
en Safety Table of contents Do not use the appliance: ¡ With an external timer. 1 Safety .................................................................... 2 2 Avoiding material damage................................... 4 3 Environmental protection and saving energy ....................................................................... 4 4 Operating modes ................................................. 5 5 Familiarising yourself with your appliance ........ 5 6 Accessories................
Safety WARNING ‒ Risk of poisoning! Risk of poisoning from flue gases being drawn back in. Room-air-dependent heat-producing appliances (e.g. gas, oil, wood or coaloperated heaters, continuous flow heaters or water heaters) obtain combustion air from the room in which they are installed and discharge the exhaust gases into the open through an exhaust gas system (e.g. a chimney). With the extractor hood switched on, air is extracted from the kitchen and the adjacent rooms.
en Avoiding material damage WARNING ‒ Risk of injury! Components inside the appliance may have sharp edges. ▶ Carefully clean the appliance interior. Changes to the electrical or mechanical assembly are dangerous and may lead to malfunctions. ▶ Do not make any changes to the electrical or mechanical assembly. The filter cover may swing out. ▶ Open the filter cover slowly. ▶ Take hold of the filter cover after opening until it no longer swings out. ▶ Close the filter cover slowly.
Operating modes 3.2 Saving energy If you follow these instructions, your appliance will use less power. Adjust the fan speed to the amount of steam produced during cooking. ¡ The lower the fan speed, the less energy is consumed. Only use the intensive mode as required. If cooking produces large amounts of steam, select a higher fan speed in good time. ¡ The odours are distributed around the room less. en Switch off the lighting if it is no longer required.
en Accessories 6 Accessories You can buy accessories from the after-sales service, from specialist retailers or online. Only use original accessories, as these have been specifically designed for your appliance. Accessories vary from one appliance to another. When purchasing accessories, always quote the exact product number (E no.) of your appliance. → Page 10 You can find out which accessories are available for your appliance in our catalogue, in the online shop or from our after-sales service. www.
Cleaning and servicing en 8 Cleaning and servicing To keep your appliance working efficiently for a long time, it is important to clean and maintain it carefully. 8.1 Cleaning products You can obtain suitable cleaning products from aftersales service or the online shop. ATTENTION! Unsuitable cleaning products may damage the surfaces of the appliance. ▶ Do not use harsh or abrasive detergents. ▶ Do not use cleaning products with a high alcohol content. ▶ Do not use hard scouring pads or cleaning sponges.
en Cleaning and servicing 2. ATTENTION! Falling grease filters may damage the hob below. ▶ Grip below the grease filter with one hand. Open the locks on the grease filters. Use special grease solvent for stubborn dirt. You can obtain grease solvents from after-sales service or the online shop. 3. Start the dishwasher. Select a temperature of no more than 70 °C. 4. Allow the grease filters to drain. 8.7 Fitting grease filters ATTENTION! Falling grease filters may damage the hob below.
Troubleshooting 4. Remove the odour filter. Fitting the odour filters en 2. Guide the odour filter around the motor. 3. Carefully slide the odour filter into the holder. 1. Slide the odour filter into the extractor hood. 4. Install the grease filters. 9 Troubleshooting You can rectify minor faults on your appliance yourself. Read the troubleshooting information before contacting after-sales service. This will avoid unnecessary costs. WARNING ‒ Risk of injury! Improper repairs are dangerous.
en Disposal Fault The lighting does not work. Cause and troubleshooting The LED lamp is defective. ▶ Call the after-sales service. ▶ Defective LED lights may be replaced by the manufacturer, their customer service or a qualified technician (electrician) only. 10 Disposal Find out here how to dispose of old appliances correctly. 10.1 Disposing of old appliance Valuable raw materials can be reused by recycling. ▶ Dispose of the appliance in an environmentally friendly manner.
Installation instructions 12.2 Appliance dimensions You will find the dimensions of the appliance here 12.3 Safety clearances Comply with the safety clearances for the appliance. For Australia and New Zealand the minimum safety clearance above electrical cooktops must be 600 mm. en 12.4 Secure installation Follow these safety instructions when installing the appliance. WARNING ‒ Risk of poisoning! Risk of poisoning from flue gases being drawn back in. Room-air-dependent heat-producing appliances (e.g.
en Installation instructions Risk of poisoning from flue gases being drawn back in. ▶ If an extractor hood with an open-flued heat production source is installed, the power supply for the extractor hood must be provided with a suitable safety switch. Risk of poisoning from flue gases being drawn back in. ▶ Do not emit the exhaust air into a smoke or exhaust gas flue that is in operation. ▶ Do not emit the exhaust air into a shaft that is used to ventilate installation rooms for heat-producing appliances.
Installation instructions ¡ The surfaces of the appliance are sensitive. Avoid damaging them during installation. Round pipes 12.6 Instructions for the electrical connection Flat ducts In order to safely connect the appliance to the electrical system, follow these instructions. WARNING ‒ Risk of electric shock! It must always be possible to disconnect the appliance from the electricity supply. The appliance must only be connected to a protective contact socket that has been correctly installed.
en Installation instructions 2. Make the cut-out for the exhaust air pipe either 3. Undo the hinge lock and remove the filter cover. above the fitted unit or behind the fitted unit. 4. Remove the grease filters. To avoid causing damage, do not bend the grease filters. 5. Undo the control panel cabling and cabling for the lighting. Preparing the appliance 1. Fit the one-way flaps on the air outlet and click them into place. 6. Undo the screws in the frame frame and remove the . 2.
Installation instructions 5. Restore the control panel cabling and the cabling Installing the appliance 1. Insert the appliance into the opening in the fitted unit and screw it to the fitted unit en for the lighting. . The plug can only be inserted into one position. 2. Tighten the fastening screws. 6. Ensure that the connector has engaged correctly. 3. Attach the frame and screw it to the appliance from 7. Fit the grease filters. below.
en Installation instructions 2. Connect the pipe to the opening on the fitted unit. 3. Screw the air guide grille to the fitted unit. 4. Seal the joints. Connecting to the power supply 1. Insert the mains plug into the protective contact socket. 2. If a fixed connection is required, follow the instruc- tions in the section → "Instructions for the electrical connection", Page 13. Removing the appliance WARNING ‒ Risk of injury! Components inside the appliance may have sharp edges.
Valid within Great Britain: Imported to Great Britain by BSH Home Appliances Ltd.