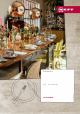
Dishwasher [en] User manual S153HAX02G
en Table of contents Safety ............................................... 4 General information.......................... 4 Intended use..................................... 4 Restriction on user group................. 4 Safe installation ................................ 5 Safe use ........................................... 6 Damaged appliance ......................... 7 Risk to children ................................ 8 Preventing material damage ........ 10 Safe installation .........................
en Setting timer programming1 ........... 32 Starting the programme ................. 33 Interrupting programme ................. 33 Terminate programme.................... 33 Switching off appliance .................. 33 Customer Service.......................... 54 Product number (E-Nr.), production number (FD) and consecutive numbering (Z-Nr.) ..................... 55 AQUA-STOP guarantee .................. 55 Basic settings................................ 34 Overview of basic settings .............
en Safety Safety Please read the safety information to ensure that you use the appliance safely. General information ¡ Read this instruction manual carefully. Only this will ensure you use the appliance safely and efficiently. ¡ Keep the instruction manual and the product information safe for future reference or for the next owner. ¡ Check the appliance after unpacking it. Do not connect the appliance if it has been damaged in transit.
Safety en Safe installation Follow these safety instructions when installing the appliance. WARNING ‒ Risk of injury! Improper installation may cause injury. ▶ When installing and connecting the appliance, follow the instructions in the manual and installation instructions. WARNING ‒ Risk of electric shock! ¡ Improper installation is dangerous. ▶ Connect and operate the appliance only in accordance with the specifications on the rating plate.
en Safety ▶ Only use adapters approved by the manufacturer. WARNING ‒ Risk of injury! Hinges move when opening and closing the appliance door and can cause injury. ▶ If built-under or integrable appliances are not in a cavity so that one side is accessible, the hinge area must be covered at the side. Covers are available from Customer Service or specialist outlets. WARNING ‒ Risk of tipping! Improper installation may cause the appliance to tip up.
Safety en WARNING ‒ Risk of injury! ¡ Leaving the appliance door open may result in injury. ▶ Only open the appliance door to load or unload tableware in order to prevent accidents, e.g. through tripping. ▶ Do not sit or stand on the appliance door when open. ¡ Knives and utensils with sharp points can cause injuries. ▶ Arrange knives and utensils with sharp points in the cutlery basket with the points downwards, on the knife shelf or in the cutlery drawer.
en Safety ▶ Never operate an appliance with a cracked or fractured surface. ▶ Never pull on the power cord to unplug the appliance. Always unplug the appliance at the mains. ▶ If the appliance or the power cord is damaged, immediately unplug the power cord or switch off the fuse in the fuse box and turn off the water tap. ▶ "Call Customer Service." → Page 54 ▶ Repairs to the appliance should only be carried out by trained specialist staff. ¡ Incorrect repairs are dangerous.
Safety en WARNING ‒ Risk of harm to health! Children can lock themselves in the appliance, thereby putting their lives at risk. ▶ With redundant appliances, unplug the power cord. Then cut through the cord and damage the lock on the appliance door beyond repair so that the appliance door will no longer close. WARNING ‒ Risk of crushing! With higher-level appliances, children can become crushed between the appliance door and cabinet doors underneath.
en Preventing material damage Preventing material damage Preventing material damage Preventing material damage Safe installation Follow the instructions when installing the appliance. ATTENTION! ¡ Improper installation of the appliance may cause damage. ▶ If the dishwasher is installed above or below other domestic appliances, follow the information on installation in combination with a dishwasher in the installation instructions for the individual appliances.
Environmental protection and saving energy ▶ So as not to scratch the finish on the appliance, do not use sponges with a rough surface or abrasive cleaning agents. ▶ To prevent corrosion, do not use sponge cloths on dishwashers with a stainless steel front or rinse such cloths thoroughly several times before using them for the first time. en and replaced with fresh water. If the soiling level is lower, the rinsing water is used in the next wash cycle, so reducing water consumption by 3-6 litres.
en Installation and connection over, e.g. by screwing it to the wall or installing it under a continuous worktop that is securely connected to adjacent cabinets. 1. "Follow the safety instructions." → Page 4 2. "Follow the instructions for electrical connection." → Page 12 3. Check the Scope of supply and the condition of the appliance. 4. Consult the installation instructions for the installation dimensions required. 5. Make the appliance level using the height-adjustable feet.
Installation and connection en The connection data for the appliance can be found on the rating plate. 3. Check that the mains plug is inserted properly.
en Familiarising yourself with your appliance Familiarising yourself with your appliance Familiarising yourself with your appliance Familiarising yourself with your appliance Appliance You can find an overview of the parts of your appliance here. 7 8 6 9 5 4 10 3 11 12 2 1 1 1 14 Rating plate Depending on the appliance specifications Rating plate with "E number and FD number" → Page 55. The data you need for "Customer Service" → Page 54.
Familiarising yourself with your appliance en "Detergent" → Page 27 is added to the detergent dispenser. "Bottom basket" → Page 20 2 Detergent dispenser 3 4 Bottom basket 5 Lower spray arm 6 Tablet collecting tray 7 8 9 Top basket Add the special salt to the dispenser for special salt. → "Water softening system", Page 23 The lower spray arm washes the tableware in the bottom basket. If the tableware has not been washed properly, clean the spray arms.
en Familiarising yourself with your appliance 1 2 3 4 5 6 7 8 9 A B C 14 13 12 11 10 1 ON/OFF button 2 3 4 5 6 7 8 Programme button "Switching on the appliance" → Page 32 "Switching off the appliance" → Page 33 "Terminating the programme" → Page 33 "Programmes" → Page 17 Programmes "Programmes" → Page 17 Water supply display Display for water supply WLAN display "Home Connect" → Page 36 9 10 11 12 13 14 1 16 and reset button 1 Timer programming "Setting timer programming" → Page 32
Programmes en Programmes Programmes You can find an overview of the programmes that can be selected here. Different programmes, which can be found on the control panel of your appliance, are available depending on the appliance configuration. The running time may vary depending on the programme selected. The running time depends on the water temperature, the quantity of tableware, the level of soiling and the additional function selected.
en Additional functions Programme Classic 60° Easy Clean Use Programme sequence Additional functions All → "Additional functions", Page 18 Tableware: ¡ Cleaning mixed tableware and cutlery. Level of soiling: ¡ Removing common household food remnants lightly dried-on. Only when using unloaded appliance.
Features Additional func- Use tion ¡ The additional function can be activated before the start of the programme and at any time when the programme is running. ¡ Energy and water consumption are increased. ¡ Switch on with mixed loads containing tablePower Zone ware with different soiling levels, e.g. place very soiled pots and pans in the bottom basket and normally soiled tableware in the upper basket. ¡ The spray pressure in the bottom basket is increased and the maximum programme temperature held longer.
en Features 3. Press in the levers on the right and left on the outside of the basket. Bottom basket Arrange pans and plates in the bottom basket. a The basket can then slip down slightly. 4. Raise or lower the basket evenly to the right level. → "Basket heights", Page 22 Cutlery basket 1 Large plates up to a diameter of 31 cm can be arranged in the bottom basket as shown. Check that the basket is level on both sides. 5. Slide the basket back in.
Features Cutlery basket Folding prongs Arrange cutlery in the cutlery basket, always without sorting it and with the sharp points downwards. Use the folding prongs to position tableware securely, e.g. plates. Etagere Use the cutlery shelf and space underneath for small cups and glasses or for large items of cutlery, e.g. cooking spoons or serving cutlery. You can fold the prongs down to position pans, bowls and glasses better.1 Folding down prongs1 If you do not need the prongs, fold them down. 1.
en Features Knife shelf Use the shelf for knives and long items of cutlery. Note: Check that the appliance is always operated with the top basket or the baking sheet spray head. Inserting baking sheet spray head Use the baking sheet spray head instead of the top basket to clean large trays, grilles and plates. 1. Remove top basket. 2. Insert the baking sheet spray head in the holder and turn to the right . Baking sheet spray head Use the baking sheet spray head to clean large items of tableware, e.g.
Before using for the first time Setting 3 max. ø Top basket 27 cm en Bottom basket 25 cm 2. "Add rinse aid." → Page 26 3. "Switch on the appliance." Before using for the first time Before using for the first time → Page 32 Configure the settings for initial startup. Before using for the first time Performing the initial configuration On initial start-up or after a reset to the factory settings, you will need to make settings. Tip: Connect your appliance to a mobile device.
en Water softening system Note: Set the water hardness determined on your appliance. → "Setting the water softening system", Page 24 With a water hardness of 0 - 8 °E you can dispense with special salt and switch off the water softening system. → "Switching off the water softening system", Page 25 Setting the water softening system Set the water hardness on your appliance. 1. Determine the water hardness and the appropriate setting value. → "Overview of water hardness settings", Page 23 2. Press . 3.
Water softening system 3. Note: Only use special salt for dishwashers. Do not use salt tablets. Do not use table salt. Add the special salt to the dispenser. a Funnel 1 Fill the dispenser right up with special salt. The water in the dispenser is displaced and forced out. 4. Place the lid back on the dispenser and turn to close. Switching off the water softening system If you find the special salt refill indicator irritating, e.g.
en Rinse aid system Additional run time in minutes Additional water consumption in litres Additional power consumption in kWh 7 5 0.05 The consumption values specified are laboratory measurements determined in accordance with the currently applicable standard and using the Eco 50° programme and the factory value of the water hardness is set to 9 - 20°E. Rinse aid system Rinse aid system You can use the rinse aid system and rinse aid to get tableware and glasses rinsed perfectly without marks.
Detergent – A higher setting adds more rinse aid during the wash cycle, reduces water marks and improves the drying result. 5. To save the settings, press for 3 seconds. Switching the rinse aid system off If you find the rinse aid refill indicator irritating, e.g. when using combined detergents with a rinse aid component, you can switch the rinse aid system off. Tip: The function of rinse aid is limited with combined detergents. You will generally get better results using rinse aid. 1. Press . 2.
en Detergent Detergent Liquid detergent Description Liquid detergent works faster and is recommended for shorter "Programmes" → Page 17 without PreRinse. Sometimes liquid detergent may leak out despite the detergent dispenser being closed. This is not a fault and is non-critical if you remember the following: ¡ Only choose a programme without PreRinse. ¡ Do not select timer programming for starting the programme. The dosage can be adjusted to the level of soiling.
Detergent ¡ According to manufacturers, combined detergents with salt replacement substances can only be used up to a certain water hardness, usually 26 °E, without adding special salt. For the best washing and drying results we recommend using special salt from a water hardness of 17 °E. ¡ To prevent sticking, only touch detergents in a water-soluble pouch with dry hands and only ever place them in a dry detergent dispenser.
en Tableware 3. Close the lid of the detergent dis- penser. Damage to glass and tableware Avoid damage to glass and tableware. a The lid clicks into position. a The detergent dispenser will open automatically at the optimum time during the programme. Powder or liquid detergent will spread around the washing tank and dissolve there. Tablets will fall into the tablet collecting tray and dissolve in the right dosage.
Tableware Cause The water temperature of the programme is too high. Recommendation Select a programme with lower temperatures. After the programme has ended, take glassware and cutlery out of the appliance without delay. Arrange tableware Arrange the tableware correctly to optimise the dishwashing result and prevent damage to both the appliance and tableware. Tips ¡ Using the appliance allows you to save energy and water compared to washing-up by hand.
en Basic operation Removing tableware WARNING Risk of injury! Hot tableware can cause burns to the skin. When hot, tableware is sensitive to shock, may crack and can result in injury. ▶ When the programme has ended, do not empty the appliance until the tableware has cooled down for a while. 1. To prevent water dripping on the tableware, unload it starting at the bottom and working up. 2. Check the washing tank and accessories for soiling and clean if necessary.
Basic operation en Starting the programme Terminate programme ▶ Press . a The programme has ended when no indicators on the controls light up. To end a programme early or to switch from a programme that has already started, you will need to cancel it first. 1. Open the appliance door. 2. Press for approx. 4 seconds. 3. Close the appliance door. a All displays light up. a As soon as the displays are off, the residual water is pumped out. a The programme is cancelled and ends after approx. 1 minute.
en Basic settings Basic settings Basic settings You can configure the appliance to meet your needs. Basic settings Overview of basic settings The basic settings depend on the features of your appliance. Basic setting Water hardness Selection Scale with 4 levels Rinse aid disp.
Basic settings en Setting Extra Dry 1. Press . 2. To open the appliance settings, press for 3 seconds. a is flashing on the display. 3. Press repeatedly until and flash in the display. 4. Press repeatedly until the LEDs show the right value. If "LED A" → Page 15 is not lit, Extra Dry is switched off. If "LED A" → Page 15 is lit, Extra Dry is switched on. 5. To save the settings, press for 3 seconds. Setting signal volume 1. Press . 2. To open the appliance settings, press for 3 seconds.
en Home Connect Home Connect Home Connect This appliance is network-capable. Connect your appliance to a mobile device to control its functions via the Home Connect app. The Home Connect services are not available in every country. The availability of the Home Connect function depends on the availability of Home Connect services in your country. You can find information about this at: www.home-connect.com.
Home Connect en Home Connect settings Remote Diagnostics Adapt Home Connect to your needs. You can find the Home Connect settings in the basic settings for your appliance. Which settings the display shows will depend on whether Home Connect has been set up and whether the appliance is connected to your home network.
en Cleaning and servicing This initial registration prepares the Home Connect functions for use and is only required when you want to use the Home Connect functions for the first time. Note: Please note that the Home Connect functions can only be utilised with the Home Connect app. Information on data protection can be retrieved in the Home Connect app.
Cleaning and servicing Phase 1 Removal of Grease and limescale 2 Food remnants and deposits Detergent Liquid machine care product or machine descaler in powder form. Machine cleaner To ensure optimum cleaning performance, the programme doses the detergents independently of each another during the relevant cleaning phase. Correct placement of the detergents is necessary here.
en Cleaning and servicing 3. Pull down the micro filter to re- Filter system The filter system removes coarse soiling from the dishwashing cycle. move. 3 2 1 1 2 3 4. Press the locking catches together and lift the coarse filter out . Micro filter Fine filter 2 Coarse filter Cleaning filters Soiling in the dishwashing water may block the filters. 1. After each wash check the filters for residue. 2. Turn the coarse filter anticlockwise and remove the filter system .
Cleaning and servicing en Cleaning spray arms Limescale and soiling in the dishwashing water may block the nozzles and bearings on the spray arms. Clean the spray arms regularly. 1. Unscrew the upper spray arm and pull down to remove . 1 2 2. Pull up the lower spray arm to re- move. 3. Check the outlet nozzles on the spray arms for blockages under running water and remove any foreign bodies. 4. Insert the lower spray arm. a The spray arm clicks into position. 5.
en Troubleshooting Troubleshooting Troubleshooting You can rectify minor faults on your appliance yourself. Read the troubleshooting information before contacting after-sales service. This will avoid unnecessary costs. Troubleshooting WARNING Risk of electric shock! Incorrect repairs are dangerous. ▶ Repairs to the appliance should only be carried out by trained specialist staff. ▶ Only use genuine spare parts when repairing the appliance.
Troubleshooting Fault Display for water supply lights up Cause en Troubleshooting 9. Check the water connection for leaks. 10. Restore the power supply. 11. Switch the appliance on. Wastewater hose is blocked 1. Reposition the wastewater hose or kinked. without kinks. 2. Remove residues. Display "Check water supply" flashes Siphon connection is still sealed. ▶ Check the connection to the siphon Cover of the wastewater pump is loose.
en Troubleshooting Fault Tableware is not dry. Cause Programme or programme option has no drying phase, or the drying phase is too brief. Troubleshooting ▶ "Select a programme with drying, e.g. intensive, strong or ECO programme." → Page 17 Some option buttons decrease the drying result, e.g varioSpeed. Water collects in recesses of ▶ Position tableware at an angle the tableware or cutlery. where possible. The combined detergent used has a poor drying performance. 1.
Troubleshooting Fault Appliance interior still wet after wash cycle. Remnants of food on tableware. en Cause Troubleshooting Not a fault. The condensaNo action required. tion drying principle causes water droplets in the tub – they are indeed desirable here. The moisture in the air condenses on the inside walls, runs off and is pumped out. Tableware is placed too 1. Arrange tableware with sufficient close together or basket is space in between. overfilled.
en Troubleshooting Fault Detergent residue in the appliance Water marks on plastic parts. Cause Lid of the detergent dispenser is blocked by items of tableware parts and will not open. Troubleshooting 1. Arrange tableware in the top basket tableware so the tab collecting tray is not obstructed by tableware. → "Arrange tableware", Page 31 Items of tableware are blocking the dispenser lid. 2. Do not place tableware or fragrance dispensers in the tablet collecting tray.
Troubleshooting Fault Stubborn white coatings are present on tableware, inside the appliance or the door. Cause Detergent substances are deposited there. These coatings cannot generally be removed with chemicals. The hardness range is set incorrectly or the water hardness is greater than 44 °E (6,2 mmol/l). 3in1/organic/eco detergent is not effective enough. Troubleshooting ▶ Change your "detergent" → Page 27. Too little detergent is being used.
en Troubleshooting Fault Coloured coatings (blue, yellow, brown) that are difficult or impossible to remove are present inside the appliance or on stainless steel tableware. Coloured deposits (yellow, orange, brown) that are easy to remove are present inside the appliance (mainly at the bottom). Cause Troubleshooting may not always be possible to completely remove deposits but they are harmless to health. The formation of films is due 1.
Troubleshooting Fault Removable streaks are present on glasses, glassware with a metallic appearance and cutlery. Irreversible clouding of glassware. en Cause Troubleshooting ▶ Only remove large remnants of food Tableware has been precleaned too intensely. The and do not prerinse tableware. sensors chose a weaker programme. Stubborn soiling cannot be entirely removed. Glasses are not dishwasher- ▶ Use dishwasher-proof glasses. proof, only suitable for dishGlasses are usually only suitable for washers.
en Troubleshooting Fault Cause Troubleshooting Excessive formation of foam Detergent or appliance care ▶ Change the brand of detergent. occurs. product used causes excessive foaming. Home Connect problem Fault Connection to home network is not established. Cause WLAN on router is not active. Troubleshooting ▶ Check the wireless network connection of your router. WLAN display is flashing. Connection to home network is not available. ▶ Activate the wireless network con- Home Connect set incorrectly.
Troubleshooting Fault Cause Water is left in the appliance at the end of the programme. Appliance cannot be Software update is taking switched on or operated. place. Appliance functions have failed. en Troubleshooting ▶ → "Terminate programme", Page 33 ▶ Wait until the software update has finished. 1. Pull out the mains plug or switch off the fuse. 2. Wait at least 2 minutes. 3. Connect the appliance to the power supply. 4. Switch the appliance on. Appliance does not start.
en Troubleshooting Fault Appliance door cannot be closed. Cause Troubleshooting When closed, the appliance door, its decor or attached parts should not knock against adjacent cabinets or the worktop. Lid on the detergent dispenser cannot be closed. Detergent dispenser or lid are blocked by sticky detergent residue. ▶ Remove detergent residue. Noise Fault Cause Troubleshooting Filling valves making knock- Caused by the domestic in- ▶ Can only be remedied in the doing noises. stallation.
Transportation, storage and disposal Clean wastewater pump 8. Insert the pump cover down Large remnants of food or foreign bodies can block the waste water pump. As soon as the rinsing water no longer drains properly, the waste water pump must be cleaned. WARNING Risk of injury! Sharp and pointed objects or fragments of glass may block the waste water pump and cause injury. ▶ Remove any foreign bodies carefully. 1. Disconnect the appliance from the power supply. 2.
en Customer Service Protect appliance from frost Disposing of old appliance If there is a risk of frost where the appliance will be standing, e.g. in a holiday home, empty the appliance completely. ▶ "Empty the appliance." → Page 54 Valuable raw materials can be reused by recycling. Transporting the appliance To avoid damage to the appliance, empty it before transporting.
Technical specifications en With any warranty claims, we will make sure that your appliance is repaired by trained after-sales technicians using genuine spare parts, including after the manufacturer's warranty has expired. Function-relevant genuine spare parts according to the corresponding Ecodesign Order can be obtained from Customer Service for a period of at least 10 years from the date on which your appliance was placed on the market within the European Economic Area.
en Technical specifications Power consumption Water pressure Inlet rate Water temperature Capacity Off mode/standby mode: 0.50 W Left-on mode: 0.50 W Networked standby: 2.00 W Time in left-on mode: 0 min Time after which appliance is switched to networked standby mode: 10 min Complies with the latest regulations (EU) for energy labels and ecodesign at the time of placing on the market. Additional functions and settings may increase power consumption and times. ¡ Min. 0.05 MPa (0.5 bar) ¡ Max.
Technical specifications en meets the essential requirements and other relevant provisions of the Directive 2014/53/EU. A detailed RED Declaration of Conformity can be found online at www.neff-international.com among the additional documents on the product page for your appliance. BE BG CZ ES FR HR HU MT NL SK FI SE 5 GHz WLAN (Wi-Fi): For indoor use only. DK IT AT UK 2.4 GHz band: 100 mW max. 5 GHz band: 100 mW max.
*9001586739* Constructa-Neff Vertriebs-GmbH Carl-Wery-Straße 34 81739 München GERMANY 9001586739 en 001104 650 E5