
User's Manual


4 Nektar Impact GX49 & GX61 User Guide www.nektartech.com
Getting Started
Connection and Power
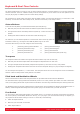
The Impact GX49 is USB Class compliant. This means there is no driver to install, to get the keyboard set up with your
computer. Impact GX49 uses the built-in USB MIDI driver which is already part of operating systems such as Windows, OS X
and iOS (via the optional camera connection kit). On Linux you may need to install a MIDI package such as JACK.
This makes the first steps simple:
Locate the included USB cable and plug one end in to your computer and the other in to your Impact GX49
If you want to connect a foot switch to control sustain, plug it in to the 1/4” TS jack socket on the back of the keyboard.
Note that foot switch pedals with a TRS jack may not be compatible.
Set the power switch on the back of the unit to On
Your computer will now spend a few moments identifying the Impact GX49 and subsequently you will be able to set it up for
your DAW.
Nektar DAW Integration
If your DAW is supported with Nektar DAW integration software, you’ll need to first create a user account on our website and
subsequently register your product to then gain access to the downloadable files applicable to your product.
Start by creating a Nektar user account here: www.nektartech.com/registration
Next follow the instructions given to register your product and finally click on the “My Downloads” link to access your files.
IMPORTANT: Make sure to read the installation instructions in the PDF guide, included in the downloaded package, to ensure
you don’t miss an important step.
Using Impact GX49 as a Generic USB MIDI Controller
You do not need to register your Impact GX49 in order to use your controller as a generic USB MIDI controller. It will work as
a USB class device on OS X, Windows, iOS and Linux.
However there are several additional benefits to registering your product:
Notification of new updates to your Impact GX49 DAW integration
PDF download of this manual as well as the latest DAW integration files
Access to our email technical support
Warranty service