
User's Manual


6 Nektar Impact GX49 & GX61 User Guide www.nektartech.com
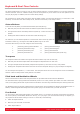
Transport Buttons and Potentiometer
The Transport and navigation buttons are located above the Octave and Transpose buttons. The buttons are used for DAW
control in conjunction with the Impact GX DAW integration files. If you plan to use your Impact GX49 with a supported DAW,
make sure to download the files you need, by first creating a Nektar user account as described on page 4. Once you have
downloaded the package applicable to your DAW, make sure to read the included PDF guide which describes how to set it up
and how it all works.
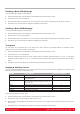
Assignable MIDI buttons (14)
The Transport/Navigation buttons can be used as generic MIDI buttons when no
Nektar DAW integration is present. There are 7 buttons, each with a transport
function icon and each able to send a MIDI message when pressed.
Pressing the top left button activates a secondary level of button assignments,
providing another 7 MIDI assignments, which means you can have quick
access to 14 MIDI buttons in total.
You can use the default MIDI assignments for MIDI learn immediately, or each
can be programmed as needed. To program the buttons with your own MIDI
messages, access the Setup menu as explained on page 7.
Potentiometer
The potentiometer can be assigned to any MIDI cc message but is by default
assign to send MIDI cc 7 (volume). To change the assignment, access the Setup menu as explained on page 7.
The two LED’s below the potentiometer are only used with Nektar DAW integration.