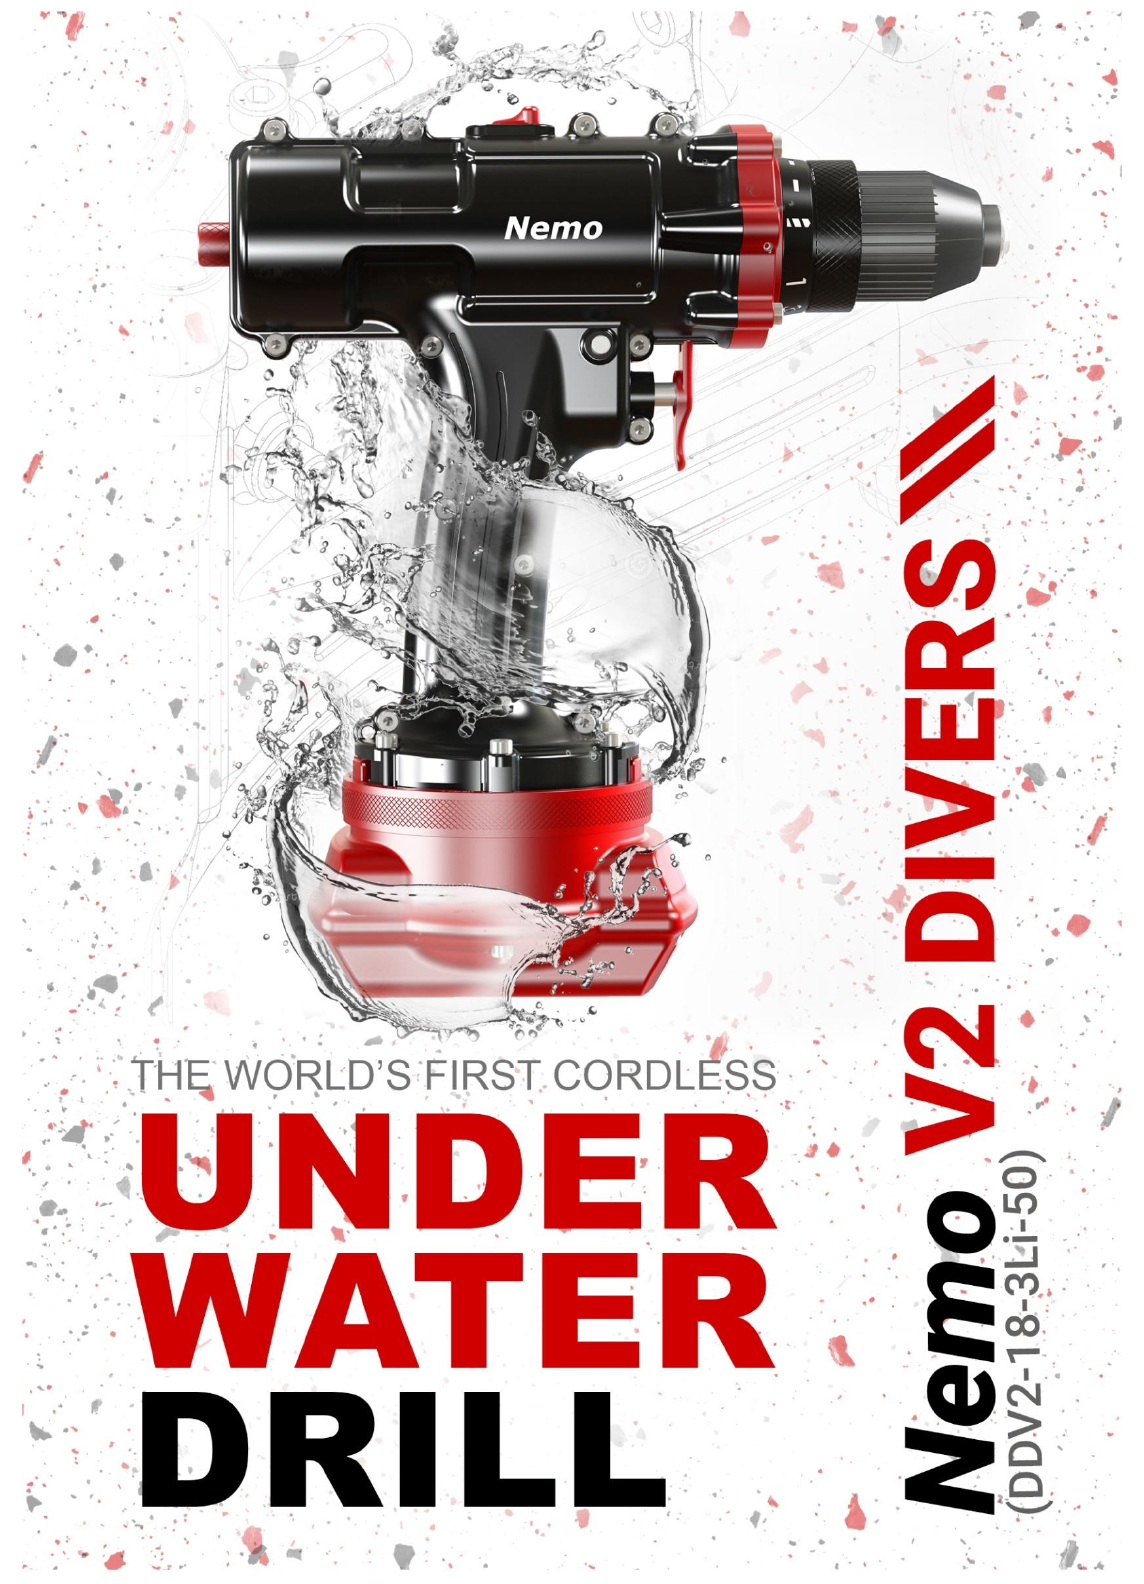
Nemo Submersible Tools Li-ion Cordless Drill Driver DDV2-18-3Li-50 10 3 2 1 4 8 9 5 6 7
Product Features The numbers of the product’s features below refer to the illustration of the machine on the inside cover. 1. Corrosion-resistant keyless chuck 2. Torque pre-setting ring 3. Gear selector 4. LED light 5. Drill handle 6. Battery locking ring 7. Battery pack 8. Rotational direction switch 9. On/Off trigger switch 10. Pressure valve Accessories shown or described are not part of the standard delivery scope of the product. Technical Data Model no.
FUNCTIONAL DESCRIPTION AND SPECIFICATIONS Read all safety warnings and instructions. Standard safety precautions should be taken when operating the Nemo drill and handling any of its accessories. Intended Use This machine is intended for working underwater but may also be used above water. This tool is a valuable asset to any professional who works in and around water.
SAFETY NOTES General Power Tool Safety Warnings SAVE ALL WARNINGS AND INSTRUCTIONS FOR FUTURE REFERENCE The term “power tool” in all of the warnings refers to your battery-operated (cordless) Nemo drill. 1) Work-area safety a) All work carried out should be done in accordance with the local, state, and government occupational safety and health guidelines. b) Keep work area clean and well lit.
c) When battery pack is not in use, keep it away from other metal objects, like paper clips, coins, keys, nails, screws or other small metal objects, that can make a connection from one terminal to another. d) Protect the battery charger from rain and moisture. f) Do not charge other batteries. The battery charger is suitable only for charging batteries supplied by the manufacturer of the Nemo drill. g) Before using, always check the battery charger, cable and plug.
ASSEMBLY 1. Battery charging Use only the battery charger provided with the drill. Only this battery charger is matched to the lithium-ion battery of your power tool. Please use the charger in a dry environment. The charger is not waterproof. Note: The battery is supplied partially charged. To ensure full capacity of battery, completely charge the battery in the battery charger before using your power tool for the first time.
Before any work on the machine (e.g., maintenance, tool change, etc.) as well as during transportation and storage, set the rotational direction trigger to the center position. Unintentional activation of the On/Off switch can lead to injuries. 2. Changing the tool The drill spindle is locked when the On/Off switch (9) is not pressed. This ensures quick, convenient and easy changing of the tool in the drill chuck. Open the keyless chuck (1) by rotating clockwise, until the tool can be inserted.
It is recommended to wear a P2 filter-class respirator. Observe the relevant regulations in your country for the materials to be worked. OPERATION 1. Inserting the battery Use only the lithium-ion battery from the original factory with the voltage listed on the nameplate of your power tool. Using other batteries can lead to injuries and pose a fire hazard. Note: Use of batteries not suitable for the machine can lead to malfunctions of or cause damage to the power tool.
4. Gear speed selection The gear speed selector (3) can be activated at a standstill. Two speed ranges can be pre-selected with the gear speed selector (3). If the gear speed selector (3) cannot be pushed through to stop, lightly turn the drill chuck with the drill. This is a normal occurrence. This tool has a speed gear clutch, and sometimes the gear teeth hit together, resulting in the gear speed selector sticking.
ADDING AIR PRESSURE TO YOUR DRILL FOR UNDERWATER USE This Nemo drill may be used in any wet conditions and may be submerged and used underwater at depths of up to 50m. For ALL underwater use, it should be pressurized according to the instructions and table below. 1. Locate the red cap on the back valve at the back of the drill. 2. Remove the red cap and connect a pump (for example, a simple bicycle pump). 3.
Belt clip With the belt clip (5), the machine can be attached to a belt. The user has both hands free and the machine is always on hand. Recommendations for optimal handling of the battery Store the battery only within a temperature range of 0˚C - 45˚C (32˚ F - 113˚ F). Please see notes below on the proper disposal of the battery. MAINTENANCE AND SERVICE Maintenance and cleaning Before any work on the machine itself (e.g., maintenance, tool change, etc.
FUNCTIONAL DESCRIPTION OF CHARGER Product features: The numbering of the product features refers to the illustration of the battery charger below. 2 1 3 1. Battery 1 2. Green/Red battery charging indicator 4 3. CHOGORI Connector 1 1 4. Battery socket 1 Technical data: MODEL NO. DSS-220200 Charging time approx.
Connecting the battery to the charger In order to connect the CHOGORI connector to the battery, press it into the socket located on its upper shell. Notice that there is an overlap between the connector and the battery socket, and there is only one way to insert the CHOGORI connector into the battery socket. To release the CHOGORI connector, rotate its plastic cap counterclockwise and pull it out vertically.
MAINTENANCE AND SERVICE OF CHARGER Maintenance and cleaning If the battery charger should fail despite the care taken in manufacturing and testing procedures, repairs should be carried out by an authorized after-sales service agent. TROUBLE AND SOLUTIONS FOR CHARGER Problem Possible reason Solution No charging procedure Blinking red light on charger Battery not inserted properly Battery contacts contaminated Properly insert battery into charger Clean the battery contacts (e.g.
Nemo Power Tools Ltd www.nemopowertools.