
User manual


Labelflash
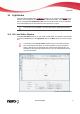
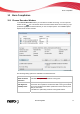
The following configuration options are available in the Burn Label window:
Input field
Inner Radius
Defines the distance between the label and the inner edge.
Input field
Width
Defines the width of the print area.
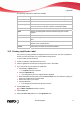
Button
Edit
Opens the Labelflash Print Properties window.
This is where you can change the printing quality and the contrast
level and display the changes made directly in the print preview.
Button
Preview
Opens the Print Preview window that shows how the label should
appear on the Labelflash disc.
Selection list
Label templates
Contains a selection of different templates for designing the label.
You can continue to edit and customize a selected template.
Button
Writing
Starts the burn process.
Button
Cancel
Cancels the procedure and closes the window.
If you are creating a DiscT@2, Nero Burning ROM displays only the available
print area for creating the label by default, i.e. the area on the data side of your
DVD that is not already taken up by data. You cannot increase the radius of the
print area.
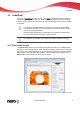
11.2 Printing Labelflash Labels And DiskT@2
Basically, it is irrelevant whether you print on the label or the data side when creating labels.
The label is actually printed outside the normal burn process.
You can print on the label side of the DVD at any time.
We recommend that you print on the data side first when you have burned the
compilation. It is not possible to burn data on a printed data side. When you in-
sert a DVD on which data has already been burned, Nero Burning ROM auto-
matically identifies the space that is still available on the data side and on which
you can print.
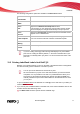
To print a Labelflash
label on the label side or a DiskT@2 on the data side of your DVD, pro-
ceed as follows:
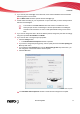
1. If you want to print a Labelflash label on the label side, insert a blank Labelflash disc into the
recorder with the label side facing down.
The Burn Label window is opened with the Labelflash logo.
Nero Burning ROM 65