
User manual


Burn Compilation
Nero Express
55
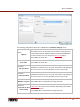
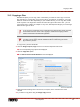
3. Add to the required values in the input fields.
4. Add to the required settings in the extended area as necessary.
5. Click the Burn button.
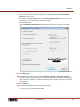
The Burning Process screen is displayed and the Save Image File dialog box is
opened.
6. Enter a name for your image file in the File Name input field.
7. Select the desired storage location in the navigation tree and click the Save button.
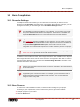
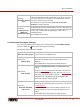
The burn or save process starts. You can follow the process status in the status bar. As
soon as the burn or save process is finished, a window is opened and displays a
message about the result of the burn process.
Burn progress window
8. Click the OK button.
9. If you would like to save a log of the burn process, click the Save button.
10. Click the Next button.
You have successfully saved a project with Nero Image Recorder and can now
continue by selecting another option from the final screen or by exiting Nero
Express.
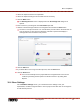
10.4 Burn Settings
In the Final Burn Settings screen, you can define the burn settings to suit your
requirements, use Nero Image Recorder to save a project to the hard drive as an image file
or start the burn process.