Manual Nero Kwik Media
Copyright and Trademark Information This document and all its contents herein are subject to and protected by international copyright and other intellectual property rights and are the property of Nero AG and its subsidiaries, affiliates or licensors. All rights reserved. No part of this document may be reproduced, transmitted or transcribed without the express written permission of Nero AG. All trade names and trademarks and/or service marks are the property of their respective owners.
Table of contents 1 1.1 1.2 1.3 1.4 1.5 Start Successfully About the Manual About the Application Versions of the Application Installation Starting the Program 2 2.1 2.2 Working with the Program Library Management and Options Nero MediaBrowser 9 10 12 3 Market 13 4 4.1 Music Browsing Starting Music Playback (Library or Playlist) 14 18 5 5.1 5.2 5.2.1 5.2.2 5.2.
10.1 Creating a Playlist 58 11 Photo & Video Albums 60 12 12.1 12.2 12.3 Audio CD Browsing and Playback Starting Audio CD Playback Ripping from Audio CD Importing from Data Disc 62 63 63 64 13 13.1 Blu-ray Playback Starting Blu-ray Disc Playback 65 66 14 14.1 14.2 Devices Setting Up Devices Importing from Device 68 70 71 15 Apple Device 73 16 Publish Screen 74 17 17.1 17.2 17.2.1 17.2.2 17.2.
Start Successfully 1 Start Successfully 1.1 About the Manual This manual is intended for all users who want to learn how to use Nero Kwik Media. It is process-based and explains how to achieve a specific objective on a step-by-step basis. To make best use of this documentation, please note the following conventions: Indicates warnings, preconditions or instructions that have to be precisely followed. Indicates additional information or advice. 1.
Start Successfully 1.3 Versions of the Application Nero Kwik Media is available in various versions. The Nero Kwik Media full and Essentials versions are included in the different Nero Suite product packs. In addition, a free standalone version is available. Essentials or OEM software as well as the Nero Kwik Media free standalone version differ from the full version in a more or less broad functional range.
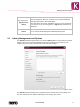
Start Successfully 3. Click the Next button. 4. The Installation of Nero Ask Toolbar screen is displayed. 5. Please read the licensing agreement carefully. If you want Ask to be your default search provider, select the first check box. If you want to set your home page to Ask.com, select the second check box. 6. Click the Next button. 7. The License Agreement (EULA) screen is displayed. 8.
Start Successfully Nero Kwik Media is checking for available updates in the background. When the first update is available, you are asked if you want to turn on the automatic update feature. If you agree, updates are from then on downloaded silently as soon as they are available. A dialog then asks whether the new update should be installed now or later. You can always select/deselect this feature in the Miscellaneous category of the Options window. 1.
Working with the Program 2 Working with the Program The welcome screen is the starting point for using the application. This starting page offers various linked entries that lead to the multiple functions of Nero Kwik Media. Depending on which add-ons your version currently supports, more or less entries can be displayed. If you click an entry for the first time, the respective browsing screen is displayed with additional information pop-ups that give a feature introduction.
Working with the Program Drop-down menu [My Nero User Name] Input field Search 2.1 Offers access to your personal account information such as your account settings as well as an overview of your market downloads and photo gift orders in Nero Kwik Media . This drop-down menu stays available as long as you are logged into your account. If you are not logged in, a Sign In drop-down menu is displayed. Uses key word search to search for file names, artists, albums and so on.
Working with the Program The following categories are displayed: Displays the Library Manager settings area. Library Three default folders (the Windows default folders) for Photos, Music, and Videos are available in the Watched folders or drives area from the start. If you want to add personal media folders, click the Add button and select the desired folder from the navigation tree. The library is refreshed when launching Nero Kwik Media.
Working with the Program In addition, the Blu-ray category entry displays the Blu-ray area where you can set up your preferred settings for Blu-ray playback. You can select and change the region code of your BD-player up to 5 times. The currently selected region is displayed. Click the Set Region for BD-player button on the lower right to open another window and select a region from the list. This function is only available with Nero Kwik Blu-ray installed on your computer. 2.
Market 3 Market Market lists a broad range of apps and creative packs. Your shopping cart is displayed in the right column of the screen. The first time you select Market entry in the navigation tree, you`re asked to select your country from a drop-down menu. Click the Continue button to browse the store. Each add-on is listed with a short description and price information. You can double-click a product to display its detailed product information and see more preview images.
Music Browsing 4 Music Browsing In the music browsing screen you can browse the items of your Music library group. An overview is displayed when you choose the Music library entry in the navigation tree on the left. The overview is the entry point into the detailed browsing view. By default, your music is sorted by album. Content can be arranged by different sorting criteria such as by Genre or Folder. Each stack then shows information about the amount of albums included.
Music Browsing Music browsing screen The following setting options are available on the lower task bar: Button Stop Button Rewind/Fast forward Button Skip back/Skip to next track Stopps playback. Rewinds/fast forwards the playing item. Skips to the next/previous track. If you click the respective button when the last (first) track of an album comes to an end, the playback of the next (previous) album will be started. Starts/pauses play back of selected items or albums.
Music Browsing Button Turn random playback on/off Plays selected items or an album in a random sequence. Button Repeats the Plays the currently played item, selection, album or playlist again. current playback or a complete playlist Button Volume Button Burn music disc Button Create New Playlist Adjusts the volume. Activating the additional Mute button below the slider mutes the background music.
Music Browsing metadata is written to the music file(s) and is then available. In this way your music collection is correctly tagged with all information. This is particularly useful when audio files are not named or are only partially named. Click the Apply button in the lower right of the window to synchronize the found data to your file(s). At least one item must be selected. Opens the Get Meta Data window. Edit Song Information You can edit metadata – like add missing data into the input fields.
Music Browsing 4.1 Starting Music Playback (Library or Playlist) The following requirement must be fulfilled: ▲ Desired tracks are available in the application. To play back tracks, albums, or a playlist proceed as follows: 1. If you want to play back tracks or an album: 1. Click the Music library entry in the navigation tree on the left. The music browsing screen is displayed. 2. Select the respective stack, album or track you want to play back and click the Play button on the lower task bar.
Photo Browsing 5 Photo Browsing In the photo browsing screen you can browse the items of your Photos library group. An overview is displayed when you choose the Photos library entry in the navigation tree on the left. The overview is the entry point into the detailed browsing view. By default, your photos are sorted by folder. Content can be arranged by different sorting criteria such as by Year. Each stack then shows information about the amount of items included.
Photo Browsing Sorting and searching options are additionally displayed on the upper task bar of the screen. The following setting options are available for photo browsing: Button Overview Drop-down menu Arrange by Drop-down menu Show Drop-down menu with slider Ends the detailed browsing view and returns to the overview. The arrangement that was chosen in the detailed browsing view will be kept. Changes the sorting of items and has the files arranged by different criteria such as by Year or Folder.
Photo Browsing Button Edit Button Publish/Burn Displays the Editing Photos screen in which you can view, edit, and enhance your photos. At least one item must be selected. Displays the Publish screen in which you can collect items or preselections into content titles and burn or export those. At least one item must be selected. Button Rotates a selected item 90° to the left or to the right. Rotate counterOnly available in detailed browsing view. At least one item must be clockwise / Rotate selected.
Photo Browsing Rename Enables the title input field where you can enter the desired new name for the item. At least one item must be selected. Delete Deletes an item or a whole stack from Nero Kwik Media and from its folder on your computer. At least one item or stack must be selected. Opens a Windows Explorer window that shows the respective browser path to the directory in which the selected item is stored on Open with Windows Explorer your computer. At least one item must be selected.
Photo Browsing Editing Photos screen Adapted setting options are additionally displayed on the upper task bar of the screen. The following setting options are available: Button Photo strip Button Split view Button Fit to screen Button Fullscreen Drop-down menu with slider Turns the thumbnail strip on/off. Splits the content area into two screens to see e.g. the before (on the left) and after (on the right) effect of an applied modification. A second click closes the split screen mode.
Photo Browsing The following setting options are available on the lower task bar: Opens the Add Name to Face window. Each recognized face is marked with a rectangle. Face recognition helps you sort your photo library by the people in your pictures. If a person’s face is not recognized, click the Add Button Face button. Drag the rectangle over the face of the person you want Add Name to Face to add and enter the person’s name into the input field below the rectangle. Press the Enter key on your keyboard.
Photo Browsing Button Reverses/repeats the last editing step. Undo edited Independent of the number of process steps you already performed, steps/Redo edited you can always undo your previous editing until you reach the steps original again. Button Rotate counterclockwise/ Rotate clockwise Rotates a selected item 90° to the left or to the right. Button Additional functionalities Displays more features.
Photo Browsing The following entries are available in the additional functionalities pop-up menu: Adds a star icon to the lower right corner of selected items or whole stacks. The rating may be useful in organisation if you use the Show dropdown menu (sorting setting options) and display your favorites only. Add to Favorites You can remove items or stacks from your list of favorites again.
Photo Browsing 3. Click the Edit button on the lower taskbar. The Editing Photos screen is displayed. A preview of the preselected item is displayed in the content area. If you place the mouse pointer in the upper third of the content or editing area, a thumbnail strip is faded in. The thumbnail strip shows all items you selected in the photo browsing screen (check box selected). If you selected only one item, the thumbnail strip shows the photos of the corresponding group.
Photo Browsing 5.2.2 Cropping a Photo The following requirement must be fulfilled: ▲ The desired photo is opened for editing in the Editing Photos screen. To crop your photo, proceed as follows: 1. Click the Crop button on the lower task bar. The Crop window is opened. A rectangle is displayed in the content area. You can choose from several templates that are defining the aspect ratio of a crop frame. You can also change the size of your item manually. 2. If you want to choose a defined format: 1.
Photo Browsing Color and editing effects are listed. 3. If you want to see a preview of an effect, place the mouse pointer on an effect thumbnail. A preview of the result is displayed in the Editing Photos screen. 4. Click the respective thumbnail to actually apply the desired effect. The effect is added to the photo. You have added an effect to a photo.
Video Browsing 6 Video Browsing In the video browsing screen you can browse the items of your Videos library group. An overview is displayed when you choose the Videos library entry in the navigation tree on the left. The overview is the entry point into the detailed browsing view. By default, your videos are sorted by folder. Content can be arranged by different sorting criteria such as by Year or Duration. Each stack then shows information about the amount of items included.
Video Browsing The following setting options are available for video browsing: Button Overview Drop-down menu Arrange by Drop-down menu Show Drop-down menu with slider Ends the detailed browsing view and returns to the overview. The arrangement that was chosen in the detailed browsing view will be kept. Changes the sorting of items and has the files arranged by different criteria such as by Year or Folder. Filters the groups by different criteria (e.g. shows only favorites).
Video Browsing The following entries are available in the additional functionalities pop-up menu: Copy To Opens the Copy Selected Files to window. Here you can choose a target device to copy the selected files to. At least one item must be selected. Adds a star icon to the lower right corner of selected items or whole stacks. The rating may be useful in organization if you use the Show dropdown menu (sorting setting options) and display your favorites only.
Video Browsing 6.1 Video Playback The Playback screen is displayed when you click the button in the photo and video browsing screen or when you start playback from an optical disc. Here you can view your videos. Some of the features mentioned here are only available with Nero Kwik Play or Nero Kwik Blu-ray installed on your computer. DVD Video burning is only available with Nero Kwik DVD installed on your computer.
Video Browsing The following setting options are available on the upper task bar: Button Fits the displayed item to the size of the content area. The aspect ratio is kept. Button Displays an item in the full screen view. In the lower left of the screen a thumbnail of the currently playing video and a time display is shown. In addition, the following setting options are available on the lower task bar: Button Stops playback. Button Rewinds/fast forwards the playing item.
Video Browsing Publish / Burn Add to Marked / Remove from Marked Displays all publish and burn options you can choose from such as Send Email To. Adds the respective video to or removes it from the list of marked items. Click the Marked entry below the Photos & Videos main entry (in the navigation tree on the left) to display only your list of marked items. Fit Video to Screen Displays possible options for the set up of aspect ratio.
Faces 7 Faces The Faces screen lists all photos with recognized named faces in stack groups sorted by the people in your pictures. This feature is only available with Nero Kwik Faces installed on your computer. As long as no faces are tagged, the screen displays a short introduction how to add names to faces. If you want to add names to your photos or tag additional faces, go to the Editing Photos screen. Face recognition makes it easy for you to find the people you are looking for to e.g.
Faces Button Play Button Edit Button Publish/Burn Button Send Email To Starts playback of an instant slide show. The slide show is presented with default transitions and default background music. Slide shows are played in full screen view. Displays the Editing Photos screen in which you can view, edit, and enhance your photos. At least one item must be selected. Displays the Publish screen in which you can collect items or preselections into content titles and burn or export those.
Faces Only available in detailed browsing view. At least one additional suggestion must be selected. This Is Not [Name] Set as Top Photo Removes the assigned name tag from the selected face. At least one item must be selected. Selects the respective photo that is displayed as a person’s preview photo in Faces overview. Only available in detailed browsing view. A single item must be selected. Displays possible alternative names for a tagged face.
Faces Faces screen 7.1 Adding Names to Faces This feature is only available with Nero Kwik Faces installed on your computer. The following requirement must be fulfilled: ▲ The desired photo is opened for editing in the Editing Photos screen. To add a name to a face, proceed as follows: 1. Click the Add Face button on the lower task bar. The Faces window is opened. Each recognized face is automatically marked with a rectangle. 2.
Faces 2. Drag the rectangle over the face of the person you want to add. You can resize the rectangle by dragging its edges or corner. The highlighted rectangle is adapted. 3. Enter the person’s name into the Add name input field below the rectangle and press the Enter key on your keyboard. All changes are saved to the photo. The Faces tab on the photos and videos browsing screen now lists all photos with recognized named faces in stack groups sorted by the people in your pictures.
Slide Shows 8 Slide Shows Your slide show compilations are listed under the Slide Shows entry in the navigation tree; you can always open existing creations from there. When you are satisfied, click the Back to Slide Shows button in the upper left of the screen (header) to return to the previous screen.
Slide Shows The following buttons are available on the thumbnail strip: Opens the Add files to slide show window. You can choose photos and videos to be added to the slide show. Expands the display of the thumbnail strip over the full size of the screen. This overview may be useful while you are bringing the items of your slide show into the correct order. Click the Collapse the storyboard button to scale down the thumbnail strip again.
Slide Shows 8.1 Personalize Slide Show The Personalize Slide Show window is opened when you click one of the buttons in the Personalize Slide Show area on the left of the Slide Show screen. Three tabs are available in the window, corresponding to the buttons in the Personalize Slide Show area. Personalize Slide Show window You can choose from various slide show templates on the left of the Themes tab. Select a template to see an animated preview on the upper right of the tab.
Slide Shows The following setting options are available on the Music and Duration tab: Area with input field Slide duration Area with slider Music Volume Area with options buttons Music source 8.2 Sets the default duration of still pictures in your slide show. The minimum possible duration is one second, the maximum is 60 seconds. Default duration is three seconds.
Slide Shows 8. If you want to change the order of the items in your slide show, drag any thumbnail on the strip to the desired position. 9. If you want to personalize your slide show, choose your preferred slide show theme in the Personalize Slide Show area. (Proceed as described in the Personalize Your Slide Show chapter.) You have created a slide show. You can now start the playback or publish your project. 8.2.
Photo Products 9 Photo Products Your photo product compilations – photobooks, calendars or cards – are listed in the Photo Products screen; you can always open existing creations from there. When you are satisfied, click the button in the upper left of the screen (header) to return to the previous screen.
Photo Products Select a Product The following setting options are available on the Products tab same as on any other tab in the creating screen: Button ( ) Expands (or downsizes) the tab for a better overview of available options. Button Return to the higher selection level. Button / Scrolls up and down the content view and displays options currently outside the visible area. When you are satisfied with your choices in this step, click the Next step button on the lower task bar.
Photo Products Click the button in the footer of the screen to create and view your photo product in convenient full screen mode. 9.2 Select a Photo Project Theme In step two of the preselection - Select a Theme - your photo project is displayed in the work area of the screen. You can now select a theme from the Themes tab in the lower area of the screen. The photo project preview is instantly adapted to your chosen theme.
Photo Products Button Next Scrolls to the next double-page spread. Lets you choose between two layout modes. Drop-down menu Photobook layout Economic mode (selected by default) limits the number of pages of your book to the smallest possible. In Design mode you can add pages; the layout will have as much variety as possible. Displayed only after you chose your theme.
Photo Products Removes all photos from your compilation. Button Remove all Display Cover To remove a single photo, a Remove icon is displayed in the lower right of a thumbnail when you hover over it with your mouse pointer. Click the icon to adapt your selection. Displays the currently selected cover photo in a thumbnail. To change and choose your cover photo, drag your preferred item to the display. Button Add photos to your Opens Nero MediaBrowser where you can browse for your photos.
Photo Products Button Copies a selected photo, clipart or text from the page displayed in the work area. You can paste the item onto any page of your photo project. Button Pastes an item onto any selected page of your photo project. Only active after you cut or copied a photo, clipart or text from the work area. Edit Your Project For Photobook projects, the following setting options are available in the work area: Display fields Worktable Works like a clipboard.
Photo Products Only available with customized editing. Buttons / Button Previous Drop-down menu Pages Button Next Zooms on the currently displayed double-page spread in the work area, and accordingly unzooms all. Scrolls to the previous double-page spread. Shows the page numbers currently displayed in the work and preview area. You can select any page number to directly open the respective display. Scrolls to the next double-page spread.
Photo Products When you are satisfied with your choices in this step, click the Preview button on the lower task bar. You can always go back to the previous step by clicking the Previous step button or click the Start over button that returns to the first step of the preselection. In addition, the following setting option is available on the lower task bar: Display field Quantity Displays the quantity and price of your photo projects planned to order. Shipping costs are not included.
Photo Products Adds Rotate Edit photo arrows to your mouse pointer in the work area. Keep the left mouse button pressed and drag the respective item to your preferred tilt angle. Opens the Edit Photo window where you can add additional effects and adjust your photo. Only available for photos. Crop Highlights sides and corners of your selected photo. Keep the left mouse button pressed and drag the photo to your preferred cropping size. Only available for photos.
Photo Products Adds Brightness Delete arrows to your mouse pointer in the work area. Keep the left mouse button pressed and drag left (darker) or right (lighter) to adjust the brightness of your selected background image. Deletes the selected item from the photo project. 9.4.2 Photo Project Tabs In the Edit Your Project step your photo project is ready to be edited. Click the Customize button on the lower task bar to display more detailed editing features and tabs.
Photo Products Clicking the additional Add photos button in the upper right of the tab opens Nero MediaBrowser where you can browse for more photos. Displays clipart in various categories such as birthday or vacations. Drag items from the tab to a page or place it on a photo in the work area. Clipart You can place your mouse pointer on an item’s thumbnail to display a preview. It will fade out when you move the mouse pointer away.
Photo Products Button Previous Button Next Drop-down menu / list Pages Scrolls to the previous double-page spread. Scrolls to the next double-page spread. Lists the pages (page numbers). You can select any page (page number) to directly open the respective display. For Calendar projects, the following setting options are available in the work area: Buttons Zooms either on the collage or grid of your calendar; or you can see the calendar as a whole. Drop-down menu / list Pages Lists the pages.
Playlists 10 Playlists Existing playlists are listed under the Playlists entry in the navigation tree. If you click one of your playlists, the content is shown in a numbered order (the order you added the single tracks or albums to the list) in detailed browsing view. One empty playlist is available by default.
Playlists 2. Drag a desired track, a selection of tracks, an album or a stack from the browsing screen to the respective playlist entry on the navigation tree. The content is shown in a numbered order (the order you added the single tracks or albums to the list). 8. If you want to change the order of the tracks in your playlist, drag single tracks to the desired position. You have created a playlist from an individual selection of tracks. You can now start the playback or publish your project.
Photo & Video Albums 11 Photo & Video Albums Your album compilations are listed under the Photo & Video Albums entry in the navigation tree; you can always open and edit existing creations from there. If you want to create a new album, click the Create a new Album button that is displayed at the right hand side of the Photo & Video Albums entry in the navigation tree (when you hover over it with your mouse pointer). A window is opened where you can enter a name for the new album.
Photo & Video Albums file format, size, resolution or creation date. The Media Info pop-up area stays open in the lower left of the window. The entry in the additional functionalities pop-up menu changes to Hide Media Info. To close or hide the pop-up area, choose this entry. Rename Enables the title input field where you can enter the desired new name for the item. One stack must be selected. Remove Removes an item or a whole stack from the collection.
Audio CD Browsing and Playback 12 Audio CD Browsing and Playback The content of a disc inserted in your disc drive is listed for playback when you choose the respective optical disc drive entry in the navigation tree on the left. The Nero Kwik Media optical disc player supports playback of three disc types: Blu-ray (BD), DVD and CD. Playback view and task bar are displayed. Switching to full screen view is possible. In addition, Nero Kwik Media offers a simple import of media files from data disc.
Audio CD Browsing and Playback In addition, the following entries are available on the lower task bar of the Audio CD browsing screen: Retrieve CD information from Gracenote. With Gracenote MusicID Nero Kwik Media can identify music files. Identification is possible for complete original Audio CDs. So called Get CD Information metadata such as artist, title, and genre are accessed from the Gracenote Media Database and displayed in Nero Kwik Media.
Audio CD Browsing and Playback The ripping process is started. Switching to another screen will not stop the ripping. A small display in the lower left corner of the main window stays visible and shows the progress. When the ripping is completed, the library is being updated. You have saved single tracks or a whole album from CD to your computer. 12.3 Importing from Data Disc Nero Kwik Media automatically offers a simple import of your media files like photos or videos from data disc.
Blu-ray Playback 13 Blu-ray Playback The content of a disc inserted in your disc drive is listed for playback when you choose the respective optical disc drive entry in the navigation tree on the left. Here you can view your videos. The Nero Kwik Media optical disc player supports playback of three disc types: Blu-ray (BD), DVD and CD. Playback view and task bar are displayed. Switching to full screen view is possible. In addition, Nero Kwik Media offers a simple import of media files from data disc.
Blu-ray Playback The following entries are available in the Player menu: Go to Title(s) Audio Subtitle Angle Secondary Video Secondary Audio Starts playback of a selected title or chapter. Select a respective title or chapter from the displayed list. Displays all languages available for audio playback. Switches subtitles on or off. You can choose from all available subtitle languages. Changes the camera perspective if different camera perspectives are available on the respective BD-Video.
Blu-ray Playback The Disc Playback screen is displayed. The video main menu is displayed on the screen. 4. Click the Play button on the lower task bar. Playback is started. 5. If you want to change the language of the playback or display subtitles, select the Player menu button > respective entry on the lower right of the screen. 6. If you want to play back a specific chapter, select the Player menu > Go to Title(s) > [Desired chapter] entry on the lower right of the screen.
Devices 14 Devices Basically, Nero Kwik Media supports a simple import of media from all mobile devices connected to your computer – no matter if the device is still unknown to the Nero device database. The app provides maximum multimedia flexibility between all your devices and empowers your digital life. Some of the features mentioned here are limited without or only available with Nero Kwik Mobile Sync installed on your computer.
Devices Device Options Opens the Options window with the device options displayed. If you import files to your Nero Kwik Media library, the files you import will be copied to the folders you choose in this area. Click the respective Browse button to browse your preferred storage directories. If you click the main [Device name] entry in the navigation tree, the upper area of the browsing screen shows the name and information about free and total capacity of your device.
Devices Defines which media files are imported. Option button / Check box Select files Button Import You can select to import all files or selected media types. In case you import from camera folder (DCIM), you can choose to additionally delete the newly synchronized media from your camera after the import process. Starts the import when all import settings are adjusted as desired. Click the Eject button at the right hand side of the respective device entry to safely remove your connected device.
Devices 1. Click the Browse button. The Select path manually window is opened. 2. Select the folder and click the OK button. 3. Click the Next button. The device is scanned for videos and the Step 4 of 5 – Videos screen is displayed. 10. If the wizard found the correct folder, just click Next to approve and continue. 11. If you want to change the folder: 1. Click the Browse button. The Select path manually window is opened. 2. Select the folder and click the OK button. 3. Click the Next button.
Devices select the respective option button and check box. 5. Click the Import button. The importing process is started. A status bar is displayed in the lower left of the main window to show the progress of the importing process. When the importing process is successfully completed, the files are automatically displayed in the respective browsing screen. You have imported media files from the selected source.
Apple Device 15 Apple Device A special Apple Device entry is additionally displayed in the navigation tree if iTunes is installed on your computer. Like to any connected mobile device, you can drag and drop selected music and video files or whole playlists from your library or other device to the Apple Device. Nero Kwik Media automatically converts the files into the iTunes format. Files in formats compatible with iTunes (AAC, AIFF, AIF, WAV, WAVE and MP3) will not be converted.
Publish Screen 16 Publish Screen Clicking the publishing button in one of the browsing screens displays the Publish screen. The Publish screen is split in two areas: The upper area shows the content of your compilation. In the lower area of the screen different ways to publish the project content are offered. You can choose the required options on the selected tab. Finally, clicking the Burn or the Upload button in the lower right of the tab starts the publishing or uploading process.
Technical Information 17 Technical Information 17.1 System Requirements Nero Kwik Media is part of the Nero product you have installed. Its system requirements are the same. Detailed system requirements of this and all other Nero products can be found in the Support section on our Web site www.nero.com. 17.2 Supported Formats and Codecs 17.2.
Technical Information Hard Disc Camera Movie (MOD) Matroska (MKV) Micro MV (MMV) Microsoft Digital Video Recording (DVR-MS) Digital Video Express (DIVX) OGG Vorbis (OGM, OGV) QuickTime Movie (MOV) 3rd Generation Partnership Project (3GP) Video Object (VOB) Windows Media Video (WMV) Motion Joint Photografic Expert Group (MJPG) 17.2.
Index 18 Index Add Face .............................................. 24 Add Name to Face ......................... 24, 39 Administrator rights ................................ 6 Advanced editing............................ 42, 74 Albums ................................................. 60 Android Market ..................................... 69 Apple Device ........................................ 73 Audio CD .............................................. 63 Audio settings................................
Index Gracenote .......................... 16, 17, 63, 63 Gracenote Playlist . Error! Bookmark not defined. Help file .................................................. 9 Import from device ............................... 68 Import options ........ 11, 64, 69, 69, 69, 71 Importing .............................................. 11 Importing from AVCHD camcorder ...... 71 Importing from data disc .......... 62, 64, 65 Importing from device .......................... 71 Importing from digital camera .......
Index Sorting options ................... 14, 20, 31, 60 Split view .............................................. 23 Splitting screen..................................... 23 Stand-alone ............................................ 6 Start Via desktop icon.............................................. 8 Via start menu ................................................. 8 Starting instant slide show ............. 24, 30 Starting playback.... 14, 18, 31, 33, 42, 66 Subtitles ..................................
Contact 19 Contact Nero Kwik Media is a Nero AG product. Nero AG Im Stoeckmaedle 18 Internet: www.nero.com 76307 Karlsbad Help: http://support.nero.com Germany Fax: +49 724 892 8499 330 N Brand Blvd Suite 800 Internet: www.nero.com Glendale, CA 91203-2335 Help: http://support.nero.com USA Fax: (818) 956 7094 E-mail: US-CustomerSupport@nero.com Rover Center-kita 8F-B, 1-2-2 Nakagawa-chuou Tsuzuki-ku Internet: www.nero.com Yokohama, Kanagawa Help: http://support.nero.com Nero Inc.