
User manual


PC Sharing
Nero Mobile Sync
48
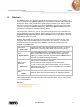
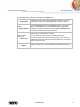
Check boxes
Select Data Type
Defines which media types are synced.
You can select to sync all files or selected media types.
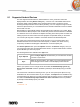
Button
Sync
Starts the manual synchronization. The status of a running
transferring and transcoding process is visible in a small display in
the lower left.
In the lower area of the screen, you can set up the import options to copy media files from
the network computer to your local computer.
Basically, Nero Mobile Sync supports the same simple import of media from your network
computer to your local computer. The following setting options are available in the Import
area:
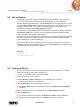
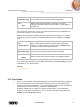
Button
Import Options
Opens the Options window in the Import category. If you import
files to a Nero Mobile Sync library, the files will be copied to the
folders you choose in this area. Click the respective Browse button
to browse your preferred storage directories.
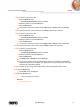
Check boxes
Select Data Type
Defines which media types are imported.
You can select to import all files or selected media types.
Button
Import
Starts the import when all import settings are adjusted as desired.
You can also drag single files from the default folders below the main [PC name] entry to the
media library on your local computer.
See also
PC Sharing →47
10.2 Sync Rules
PC to PC syncing applies to all media belonging to your Nero Mobile Sync library categories.
Your local computer syncs only those files that are located in the local media library (e.g.
located in C:\User\Your Name\Music\...) and watched folders; it does not copy content that is
originated from another PC and is e.g. located in C:\Desktop\Music\...
By default, a Sync folder is created on C:\Users\Your Name\Sync\... and automatically
added to your Windows 7 Media Library. You can always change the directory path in the
Options window > PC Sharing category.