
User manual


Start Successfully
Nero Mobile Sync
6
Click the Skip button in the lower right of the welcome screen to directly display the main
browsing screen with navigation tree on the left. The navigation tree provides access to the
three major media libraries, locally attached devices, network PCs as well as albums and
playlists you are creating in Nero Mobile Sync.
To actually start working with Nero Mobile Sync, you have to show the application where
your media files are located on your computer. You will not be able to use your media files in
the application unless you added the respective folders to the Nero Mobile Sync library. Nero
Mobile Sync automatically monitors the Windows 7 default libraries.
You can indeed fill and manage the media libraries in the Options window any time later.
Simply click the
button in the header of the main window. You can also just drag and
drop files or folders to Nero Mobile Sync. A window will automatically open and ask if you
would like to add the respective folder to the library. Subfolders will be automatically
included. The library is refreshed when Nero Mobile Sync is relaunched.
If media content is not available any more (e.g. if files were deleted from your PC), Nero
Mobile Sync offers to remove the listing from the library.
In addition, files can be imported to your media libraries from mobile devices and the network
PCs connected to your local computer. It is also possible to rip single tracks or a whole
album from Audio CD. All media files that are imported to the Nero Mobile Sync library will
be copied to the folders that you select in the Options window.
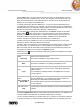
Additionally to the
button, the following overall setting options are available in the header
of the main window:
Button
Start Page
Returns to the welcome screen.
This button is available on any browsing screen.
Button
Back
Returns to the previous screen.
This button is available on any editing and playback screen.
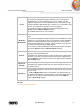
Entry
Login
Displays a drop box with input fields to login to your My Nero and
online storage account. Your account is automatically checked for
updated content.
Your username is displayed instead of the Login entry as long as
you are logged in.
Button
Sync Contacts to
Google Mail
Opens the Sync Contacts to Google Mail window where you can
give Nero Mobile Sync your Google account data to update your
Gmail with your latest Outlook contact information.
Only available with the supported e-mail application (Outlook) in use
on your computer.
Drop-down menu
Help
Provides help access and information around your Nero Mobile Sync
software.
An additional MySyncFiles folder for special files is by default created on your desktop. You
can place all files in the folder that you want Nero Mobile Sync to manage.
You can now edit and manage your media content by e.g. creating your own album collections
for photos and videos, by creating and personalizing slideshows or by collecting tracks into