Quickstart Ahead Software AG
Table of Contents 1 Getting Started 3 1.1 Introduction .......................................................................................... 3 1.2 How This Manual is Organized ............................................................ 3 1.2.1 Notes for the User............................................................................. 4 2 About Cover Designer 5 2.1 Introduction .......................................................................................... 5 2.2 Program Structure.
8.1 Introduction ........................................................................................ 41 8.2 'Properties' Window ........................................................................... 42 8.2.1 'Textbox Tab'................................................................................... 42 8.2.2 'Pen' Tab ......................................................................................... 43 8.2.3 'Brush' Tab ...................................................................
1 Getting Started 1.1 Introduction These instructions will show you how to quickly create and design your own CD cover. The program is very comprehensive and powerful, so we will only present the most important features. We will omit some parts of the program or will only touch on them briefly. You will find detailed information about Cover Designer in the online help which you can access at any time by pressing the F1 key.
Chapter 8 presents editing features for text blocks and gives a detailed description of the corresponding 'Textbox', 'Pen', 'Brush' and 'Image' tabs. Chapter 9 presents artistic text design features and provides a detailed description of the corresponding 'Pen', 'Brush', 'Text' and 'Font' tabs. The 'Bent' function is emphasized, which allows you to fit artistic text to the curvature of the CD. Chapter 10 shows you how to add, name or delete files, folders and tracks for you document data.
2 About Cover Designer 2.1 Introduction The Cover Designer was specially created to allow the design and production of CD covers via a userfriendly interface. It is included in some of Ahead software’s products and can be initiated by clicking on the respective icon. One of the advantages of integrating the Cover Designer into some of Ahead’s products is the ability to automatically create playlists and/or filename lists, thus saving you the annoyance of having to manually type them in.
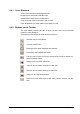
2.2.1 Cover Elements A CD cover includes the following elements: Booklet (front): front side of the title insert Booklet (Rear): back side of the title insert Inlay: back side of the CD as inlay in the CD case Disk: designation of a sticker (label) in the shape of a CD 2.2.2 Buttons on the Toolbar The table below provides you with a quick overview of the most important buttons in Cover Designer.
3 Auxiliary Aids 3.1 Ruler The ruler, which appears at the left upper side of the application window, makes it easier to set the size and position of objects. The ruler is displayed by default. If it is not displayed, you can make it visible using the 'Ruler' item on the 'View' menu. 3.2 Guidelines Guidelines are lines that help you align objects. They can be either horizontal or vertical. 1. Select 'Guidelines' from the 'View' menu. 2.
4. Click on the 'OK' button to close the window. The reference lines you have created are identified by a dotted red line. If 'Snap to guidelines' is active, objects are automatically aligned to the guidelines when they are moved or drawn near the lines. 3.3 Grid In a way similar to guidelines, the grid helps you align objects. The grid is a row of dots with uniform horizontal and vertical spacing. 1. Select the 'Set grid' command on the 'View' menu. 2.
4 Settings 4.1 Default Settings Default settings define the appearance of various elements of Cover Designer. Use 'Default settings' on the 'File' menu to display and modify default settings. Pen: Defines the width and color of the pen. Brush: Defines the style and the selection of foreground and background colors. Font: Defines the font, style, size and display type. Field: Defines various field functions, such as alignment and number format. Directory: Defines the appearance of the directory tool.
Undo: Defines options for the undo command. 4.2.1 Paper Stocks Selection Cover Designer lets you to choose between pre-defined or user-defined paper stocks. In this manual, we will describe how to work with pre-defined paper stocks. 1. Select 'Paper Stocks' on the 'File' menu. Click on 'Predefined stocks' in the 'Paper Stocks' window that then appears. A list of available paper stocks is displayed. In the center of the window, you see the number of paper stocks separated into pre-defined and user-defined.
You must pre-define any user-designed paper stocks before you can use them. 4.2.2 Printer Calibration Because printers are mechanical devices that are subject to minimal variations while printing, we recommend the you calibrate the printer once after you have chosen the label type and selected the printer. 1. Prior to calibration, select the desired label type and the printer. 2. Select the 'Preferences' command on the 'File' menu and click on the 'Printing' tab. 3.
5 Create Cover 5.1 Introduction In this chapter, you will learn how you create a cover step by step using an example, from selection of a cover and CD type through design of the various cover elements, booklet (front), the booklet (Rear), inlay and label. Cover Designer lets you very easily create professional customized covers. 5.2 Select Cover and CD Type The first step is to select a cover and CD type, because different cover elements are available depending on the selection you make.
Maxi: Cover for a maxi CD with inlay and label The CD type is selectable as a tab. The choices are: Audio: the CD contains only music Data: the CD contains only data Audio+Data: the CD contains music and data The document templates that are available for the CD type appear in the center of the window. Define the number of disks in the 'Disks' field. Either enter the value or use the arrow keys.
The menu bar with the associated functions The icon bar for quick access to functions using buttons The formatting bar for easy object formatting 5.3 Booklet Design A booklet is the title insert of a CD. Booklet (Front) means the front side of this title and booklet (Rear) means the back side. Both can consist of images as well as text. 5.3.1 Booklet (Front) The following section describes how to create a booklet (Front) containing an image. 1.
3. If necessary, change the directory and file type. Select a file and click on the 'Open' button. A moveable alignment frame appears. 4. Position the frame with the mouse and click once. The image will be inserted.
You can easily edit the selected image by right clicking. Refer to the 'Image Editing' chapter. If a scanner is installed, you can scan in an image. Use the 'TWAIN' and 'Acquire Image' commands on the 'File' menu. 5. On the icon bar, click on the 'Save' button and enter a file name. All additional cover elements for this cover are then saved in this file.
5.3.2 Booklet (Rear) The following section describes how to create a booklet (Rear) with text. 1. Click on the 'Booklet (Rear)' tab to bring up the template for the back side of a booklet. 2. On the toolbar, click on the button to insert a text box. The mouse cursor changes to cross hairs. 3. Position the cross hairs at the place you want the text to begin, hold down the left mouse button and drag the frame to the approximate size of the anticipated text block. Release the mouse button.
4. Double click on the selected text box to enter your text. The 'Properties' window appears with the 'Textbox' tab in the foreground. 5. Write your text, for example 'I am creating my first booklet'. Select the text and change the font size from 24 to 26 point. 6. Click on 'A' at the upper frame of the window to select another font color. Choose a color, for example blue.
7. Click on the 'Pen' tab to create a color frame. Click on a color, for example red and confirm with 'OK'. Your screen should now look like this: 8. Double click on the selected text box to create a colored background. The 'Properties' window opens again. 9. Click on the 'Brush' tab, select a color, for example yellow, and confirm with 'OK'.
10. On the icon bar, click on the 'Save' button to save this cover element. You can make changes at any time by double clicking on the text box or right clicking. You will find detailed information on using the text box and editing text in the 'Text Block Editing' chapter. 5.4 Add Document Data You can add the information which you enter under 'Document data' into the appropriate cover element with the 'Track list tool' and the 'Field Tool'.
3. On the line below that, click on 'Disk 1'. The CD type that was selected when the document was created is displayed. Assign a subtitle to the CD, for example 'Rock'. In the example that follows, it is assumed that the audio CD contains 5 tracks and that information about the title, artist and playing time is entered manually. If track information has been saved in '.cdc' format, you can import it by clicking on the 'Import data' button. 4.
5. In the next line, click on 'Track 01' and enter 'Title', 'Artist' and 'Playing Time'. 6. Repeat these steps for the other four tracks. 5.5 Create Inlay This section describes the creation of an inlay containing an image in the background, a track list and text as field functions. 1. Click on the 'Inlay' tab to bring up the template for the inlay. 2. Select the 'Background properties' command on the 'Object' menu. 3.
5. First click on the to display the fields and then click on the 'Title' field. A moveable alignment frame appears. 6. Using the mouse, place the frame at the desired position and click once. The field function will be added. 7. Repeat the field function insertion steps for the 'Year' and 'Disk title' fields.
8. Then add the 'Number of tracks' and 'Total playing time' fields.
If you modify the entries under 'Document data', the changes appear automatically. 5.6 Label Design Label is the designation for a sticker in the shape of a CD, which can be accurately attached onto the CD using a label kit. A label can consist of images and text. This section describes the creation of a label containing artistic text. Artistic text differs from text blocks, which were used to design the booklet (Rear), principally in the functions available. 1.
6. Select the 'Bent' function to fit the text to the CD curvature. The text is adapted immediately. The 'Bent' function is only available for artistic text. Text blocks in a text box cannot be bent. The 'Convert to curves' function converts artistic text into a artistic element. Subsequently it cannot be edited, bent or formatted.
7. To arrange the text in the shape of a circle, click on the lower left handle of the selected text, hold the left mouse button down and drag the text into the shape of a closed circle. Release the mouse button. 8. To enlarge the text, click on one of the outer handles, hold the left mouse button down and drag the text to the outer edge of the circle. Release the mouse button. 9. To change the text color, double click on the text. The 'Properties' window appears. 10.
11. On the icon toolbar, click on the 'Save' button to save the label. You have now created all the cover elements for your CD, and you can either perform additional editing or print them. You can make changes at any time by double clicking on the text or right clicking. You will find detailed information about working with artistic text 'Editing Artistic Text ' chapter.
6 Document Templates 6.1 Create template You can create a uniform appearance for your CD covers by using the 'Create template' function. A document template defines the basic structure of a document and contains document settings. Everything that is in this document is also in every other document which is based on this template. The example: Booklet front: Every CD should contain an custom image. Booklet back: The same image should be on each CD.
2. Because you want a custom image to appear on the front of every booklet, do not make any entries on this tab. Click on the 'Booklet (Rear)' tab. button to add an image, select the image you want and click 3. Click on the on the 'Open' button. 4. Position the image at the place you want to put it and click with the mouse to add the image. 5. Edit the image as necessary, for example to resize it. 6. Click on the 'Inlay' tab. 7.
8. Click on the button and select the desired field from among those displayed and position it on the inlay. Continue adding each field you want. You may write additional text if necessary. In the example that follows, six fields are added, namely 'Title', 'Artist', 'CD type', 'Year', 'Number of tracks' and 'Total playing time'. The artistic text 'Number of Tracks' and 'Playing time' are also added.
9. Click on the 'Disk 1' tab. 10. Click on the button and select the desired field from among those displayed and position it on the disk. Continue adding each field you want. In the example below, two fields, 'Disk artist' and 'Disk title' are added and are fit to the curvature of the disk using the 'Bent' function.
11. On the 'File' menu, select the 'Save' command, assign a name to the format template and click on the 'Save' button. 6.2 Load or Modify Document Template There is always a saved document template available to the user. Cover Designer templates have the ending 'nct', whereas documents have the ending 'nce'. 1. On the 'File' menu, select the 'Open' command. 2. Click on the dropdown button in the 'File type' field, select the file type (.nct), select the template you want and click on the 'Open' button.
3. Click on the 'No' button to create a new document. Clicking on the 'Yes' button opens the document template, which you can then modify. 4. Edit the document or modify the template.
7 Image Editing 7.1 Introduction The quickest way to add an image is to use the button on the toolbar. Double clicking on the image opens the 'Properties' window, which contains the 'Effects' button and the 'Stretching' region. 7.2 Using Effects Cover Designer's effects give you unlimited scope to use your imagination. The image can be varied in countless ways, giving you complete and total assurance that you can design your own individual cover.
After you click on the 'Effects' button, the following basic functions, including a variety of detailed functions, are available for selection: Adjust, for example brightness and contrast Filters for example mosaic, parabolic, soften Flip Negate Pinch Swirl Rotate Many image editing operations are performed in a window containing the original and a preview. Below is an example of 'Adjust' effects. Select the 'Contrast' effect for image editing. The preview window appears.
An example of 'Filter' effects. Select 'Parabolic' and then 'Concave' to edit the image. The image changes immediately and has a concave appearance.
An example of 'Flip' effects. Select 'Horizontally' to edit the image. The image is immediately mirrored horizontally and appears laterally reversed. One last example, the 'Swirl' effect from the other effects: The preview window appears. You can create a bizarre view of the iceberg by moving the slider from 0 to 286.
7.3 Fitting to the Frame Size Three functions in the 'Background properties' window enable you to fit the image to the current frame size of the cover element. The 'Stretching' region is only active if you insert the image using the 'Background properties' command on the 'Object' menu. The 'Background Properties' window opens showing the fit options that are active. The following options are available in the 'Stretching' region. Select the individual fields to choose a function.
The image is resized to exactly fit the defined frame size. Length and width distortion can occur. 'Proportional, no clipping’ The image is resized proportionally to fit the defined frame size. No image information is lost. Areas on the cover element may remain empty. 'Proportional, clip image’ The image is resized proportionally to fit the defined frame size. Image information can be lost, because certain areas of the image are cut off. Fitting is not visible in the preview window.
8 Text Block Editing 8.1 Introduction A text block is text that Cover Designer treats as an element and that can be entered into a text box. The individual letters, sentences or sections are linked to each other and can only be moved as a complete unit. If you want text to be located at the right, left, upper and lower frame of a cover element, you cannot do this with one single text block. Instead, you would have to create four text blocks.
8.2 'Properties' Window 8.2.1 'Textbox' Tab Use the 'Properties' window with the 'Textbox' tab in the foreground for: entering text in the text field and selecting it for editing font selection using a drop down button changing font size using a drop down button formatting the text using 'Bold', 'Italic', 'Underline', 'Align Left', 'Align Center', 'Align right' and 'Justify' using buttons.
8.2.2 'Pen' Tab Use the 'Properties' window with the 'Pen' tab in the foreground for: removing the color of the text box frame by clicking on the 'X' button (the frame is no longer visible) changing the text box frame color by clicking on a color. The color in the 'Color' field changes depending on your selection. changing frame thickness in the 'Width' field by entering a value or using the arrow keys. creating user-defined colors by clicking on the 'Choose Color' button.
To create a new color, click on a basic color and enter color properties in the fields at the lower right using the keyboard or scroll bar. Use the 'Add color' button to save it. 8.2.3 'Brush' Tab Use the 'Properties' window with the 'Brush' tab in the foreground for: removing the text box foreground by clicking on the 'X' button. The foreground becomes transparent and any existing background remains visible. changing the text box foreground by clicking on a color.
To create a new color, click on a basic color and enter color properties in the fields at the lower right using the keyboard or scroll bar. Use the 'Add color' button to save it. 8.2.4 'Image' Tab Use the 'Properties' window with the 'Image' tab in the foreground for: adding an image to the text box loading an image from a file by clicking on the 'File …' button. This opens the window for selecting the directory, file type and file.
Clicking on the 'Open' button loads the image into the preview. Clicking on the 'OK' button inserts the image into the text box. scanning an image by clicking on the 'TWAIN …' button. fitting the image to the size of the text box in the 'Stretching' region by activating the 'Adjust to frame size', 'Proportional, no clipping' and 'Proportional, clip image' fields. (Refer to chapter 'Image Editing') editing the image by clicking on the 'Effects' button.
9 Editing Artistic Text 9.1 Introduction The quickest way to add artistic text is to use the button on the toolbar. Select text for further editing by using the button. You can select artistic text using the handles, which you can use to easily make immediate modifications to the text. Double click or right click to access further design options, for example bending the text, changing font attributes and selecting the foreground and background color.
9.2 'Properties' Window 9.2.1 'Pen' Tab Use the 'Properties' window with the 'Pen' tab in the foreground for: removing the outline by clicking on the 'X' button (the line is no longer visible) changing the outline color by clicking on a color. The color in the 'Color' field changes depending on your selection. changing outline thickness in the 'Width' field by entering a value or using the arrow keys. creating user-defined colors by clicking on the 'Choose color …' button.
To create a new color, click on a basic color and enter color properties in the fields at the lower right using the keyboard or scroll bar. Use the 'Add color' button to save it. 9.2.2 'Brush' Tab Use the 'Properties' window with the 'Brush' tab in the foreground for: removing the color of the font foreground by clicking on the 'X' button. The foreground is white. changing the color of the text foreground by clicking on a color.
To create a new color, click on a basic color and enter color properties in the fields at the lower right using the keyboard or scroll bar. Use the 'Add color' button to save it. 9.2.3 'Text' Tab Use the 'Properties' window with the 'Text' tab in the foreground for: additional editing of artistic text in the 'Content' area Click on the text field to make changes.
The 'Bent' function is only available for artistic text. A text block in a text box cannot be bent. 9.2.4 'Font' Tab Use the 'Properties' window with the 'Font' tab in the foreground for: selecting the font type in the 'Font' section by clicking on the font you want selecting the style type in the 'Font Style' area by clicking on 'Regular' or 'Italic', for example. If the 'Strikeout' check box is checked, the artistic text appears as strikeout.
10 Document Datas 10.1 Introduction Document data define the structure and content of Cover Designer elements. They were defined during creation of the cover and definition of the CD type (refer to 5.2). The corresponding cover elements appear at the lower frame of the work space. Standard: The cover elements for a normal CD with one disk consist of a booklet (front and back), inlay and disk. Multibox: The cover elements for a multibox consist of a booklet (front and back), inlay and disks (at least 2).
2. In the next line, click on 'Disk 1'. The CD type that was selected during creation of the document is displayed. You can assign a subtitle to the disk and enter the artist or publisher. If you click on the 'Apply to all subitems', this entry is carried over to all data and tracks on this disk. 3. In the next line, click on 'File system data'.
To add individual files, click on the 'Add Files' button, select the files you want and then click on the 'Open' button. The file(s) you added appear(s) in the directory. To add a folder and its contents, click on the 'Add Folder' button, select the folder and click on the 'OK' button. The folder(s) you added appear(s) in the directory. Clicking on the 'Delete all' deletes all references to existing data and folders. 4. In the next line, click on 'Audio data'.
5. Repeat the appropriate steps for the next disk. 10.3 Files, Folders and Tracks 10.3.1 Naming Files and Folders 1. Select the 'Document data' command on the 'Data' menu and select 'File system data'. 2. Click on the '+' button to display the existing file and folders. 3. Click on a file or folder. You can change the title of the file or folder in the title field. You cannot change the entries in the 'Path' and 'Size' fields.
4. Click on the 'OK' button to save the changes and close the window. 10.3.2 Deleting Files and Folders 1. Select the 'Document data' command on the 'Data' menu and select 'File system data'. 2. Click on the '+' button to display the existing file and folders. 3. Click on the file or folder you want to delete and then click on the 'Delete' button. Repeat these steps for each additional element you want to delete.
4. Click on the 'OK' button to save the changes and close the window. 10.3.4 Deleting Tracks 1. Select the 'Document data' command on the 'Data' menu and select 'Audio data'. 2. Click on the '+' button to display the existing tracks. 3. Click on the track you want to delete and then click on the 'Delete' button. Repeat these steps for each track that you want to delete. You can delete all existing tracks by clicking on the 'Delete all' button when 'Audio data' is selected. 4.
11 Adding Fields 11.1 Introduction Fields are tools you can use to keep document data up to date quickly and easily. If a title has been assigned to the document, the title appears when the 'Title' field is added. If the title is changed later, the new title appears automatically. Fields are added as artistic text. You can use the 'Bent' function to create bent text. You cannot, however, convert fields into curves.
Number of Tracks Number of audio tracks on the CD. If the document contains more than one audio disk, the appropriate number appears only on the corresponding disk. If this field is added to another cover element, the number of tracks on the first disk is displayed. You can change this using the 'Properties' command. Playing time Playing time of the audio tracks. If the document contains more than one audio disk, the appropriate playing time only appears on the corresponding disk.
F 12 Index Fields adding 57 Files adding 51 Folders adding 52 G Grid settings 8 Guidelines adding 7 A Artistic text adding 45 bent 48 editing 45 B Background properties 37 Bent 25, 45, 49 Booklets creating 14, 17 Button toolbar 6 C CD type Audio 13 Audio+Data 13 Data 13 selecting 13 Convert to curves 25 Cover type Maxi 12 Multi box 12 selecting 13 Standard 12 D Default settings changing 9 Document data adding 20 Document template changing 32 creating 27 loading 31 Quickstart Cover Designer I Image size
Quickstart Cover Designer Index • 61