
User Guide

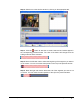


Write: When checked, the data is actually written to the disc after all tests have
passed successfully.
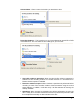
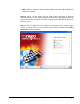
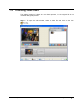
Step 10: When you are ready, click the 'Burn' button and begin to start the
recording process. Your project files will be converted to the appropriate format and
then burned to disc, burned as an image, or written to the hard disk, depending on
what you chose.
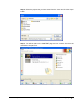
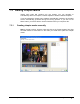
Step 11: You can make use of the options on this page to burn a project again,
store it, or start a new one. You can also create covers and labels, launch Nero
ShowTime or quit the program.
NeroVision Express 3 Making your first DVD-Video, VCD, SVCD or miniDVD • 42