Nero Recode Manual Nero AG
Copyright and Trademark Information The Nero Recode manual and all its contents are protected by copyright and are the property of Nero AG. All rights reserved. This manual contains material that is protected by internationally valid copyright. No part of this manual may be reproduced, transmitted or transcribed without the express written permission of Nero AG. All trade names and trademarks are the property of their respective owners.
Contents Contents 1 General information 5 1.1 Conventions of the manual 5 1.2 About Nero Recode 5 1.3 Versions with different ranges of functions 5 1.4 Terminology 6 2 Technical information 7 2.1 System requirements 7 3 Program start 8 3.1 StartNero Recode using Nero StartSmart 8 3.2 Start Nero Recode directly 8 4 The Nero Recode start screen 9 5 Nero Recode wizards 11 5.1 5.1.1 5.1.2 5.1.3 5.1.4 5.1.
Contents 8 Compile a DVD 29 8.1 Task-specific input options 29 8.2 Recode 30 9 Recode DVDs and videos for Nero Digital 33 9.1 Task-specific input options 33 9.2 9.2.1 9.2.2 9.2.3 9.2.4 9.2.5 Recode Audio settings Create your own subtitle track Set chapter markers Define video settings Set Nero Digital options 34 36 37 39 40 41 10 Recode main movie to Nero Digital 42 10.1 Task-specific input options 42 10.2 Recode 43 11 Nero Digital expert settings 46 11.
General information 1 General information 1.1 Conventions of the manual This manual is intended for all users who want to find out about how to use Nero Recode. It is task-based and explains how to achieve a particular objective on a step-by-step basis. In order to make best use of this manual, please note the following conventions: Symbol Meaning Indicates warnings, preconditions or instructions that have to be followed strictly. Indicates additional information or advice. 1.
General information The following versions are available: Nero Recode Full version Nero Recode Essentials The following features of the full version are not included: PSP export function iPod export function Nero Recode Essentials SE Exclusive features: Recode complete DVD to DVD Burn function (via Nero API) Nero Recode Essentials CE The following features of the full version are not included: 1.
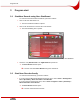
Technical information 2 Technical information 2.1 System requirements In addition to the general system requirements for Nero Suite, the following individual system requirements apply to Nero Recode: Microsoft® DirectX® 9.
Program start 3 Program start 3.1 StartNero Recode using Nero StartSmart To start Nero Recode with Nero StartSmart, proceed as follows: 1. Click on the Nero StartSmart icon. Æ The Nero StartSmart window is opened. 2. Click on the arrow button on the left side of the window. Æ The extended dialog box is opened. Fig. 1: Nero StartSmart 3. Select the entry Nero Recode in the Applications drop-down list. Æ The Nero Recode window opens. Î You have now started Nero Recode using Nero StartSmart. 3.
The Nero Recode start screen 4 The Nero Recode start screen After you launch Nero Recode the Nero Recode start screen will appear.. This is where you can choose what you want to do with Nero Recode. Choose the appropriate menu icon to call up a wizard that will guide you through the required task stepby-step. Fig. 2: Nero Recode start screen The Nero Recode start screen offers the following options: Menu icons Recode an Entire DVD to DVD Imports DVDs including their menus and extras.
The Nero Recode start screen ? Displays the online help, version and manufacturer information. Exit Closes Nero Recode. Buttons in the extended area Options Calls up a window containing various tabs that allow you set the way the program operates (see Basic settings). Erase Disc Erases a rewritable disc. Disc Info Calls up information about the disk in the drive. Nero CoverDesigner Launches Nero CoverDesigner in a separate window.
Nero Recode wizards 5 Nero Recode wizards All the tasks you can perform with Nero Recode can be divided into four steps: Define the basic settings Import the files you want to recode Set the options for Nero Digital and/or for burning a disk. Burn the disk. The wizards also follow this four-step structure, so that a separate screen appears for each step. You can use the Next and Back buttons to move back and forth through the three screens while performing a task.
Nero Recode wizards 5.1.1 DVD tab This tab is used to define the settings for importing DVDs. The following input options are available: Prompt to include DVD data files when importing check box Relax DVD-Video specification to allow 16-bit Unicode for the volume label check box This decides whether this content is included in copying when importing a DVD with data content. This box must be checked if the data content is also to be copied. This relaxes the restrictions on the use of character sets.
Nero Recode wizards The following input options are also available: Standard button This restores the default settings. Enlargement/ Reduction Method drop-down list This enables the method for changing the video resolution to be selected if necessary. The default setting is Automatic which means that the best method is chosen automatically. Analyze files while importing check box Analyzes the video file while importing it.
Nero Recode wizards 5.1.5 File I/O tab This tab is used to define the method for accessing the drive for direct conversion. The following input option is available: File I/O area Specifies the method for accessing the drive during direct conversion. When reading-copyright DVDs that have a copyright bit with SPTI/ASPI, a message occasionally appears in Nero Recode indicating that the DVD cannot be copied. In this case, select the Windows File System option when reading. 5.
Nero Recode wizards Fit to target drop-down list This shows the target medium. The capacity bar in the lower area of the screen shows the volume of data selected. The drop-down list is active when the check box is checked. Total size area Shows how much space on the disk is used. Capacity Bar area Shows how much space on the disk is used. Provided the bar is blue, the entire content will fit on the disk. If a red bar appears, the volume of data is greater than the capacity of the disk. 5.2.
Nero Recode wizards 5.2.2 Data Files tab Data files can be burned onto the disk as well as the film. These files are imported using the Data Files tab. The following input options are available in the context of every task: Add Files button This opens a dialog for adding data files. Delete button This deletes a data file and is only active if at least one data file has been added. Displays the contents of higher folders and is only active when the user is located in a subfolder.
Nero Recode wizards Select all tracks if none meets my selection criteria check box Selects all audio tracks of the tracks on the DVD if the tracks on the DVD do not meet the set criteria. Subtitles tab Preselect the following subtitle tracks check box Defines whether the DVD should only contain subtitles in certain languages or in all languages. Add button This opens a dialog window where subtitle tracks in different languages can be added.
Nero Recode wizards 5.3 Set Burn Options screen The screen for setting burning options changes, depending on the task selected. The standard input options in this screen are explained below. The descriptions of the various tasks contain explanations of the input options displayed, depending on the selected task. Fig.
Nero Recode wizards The following task-specific input options are also available: If this box is not checked, the DVD structure is saved on hard drive before burning. Burning takes longer in this case. This Burn-at-once check method is faster if more than one copy is required because box recoding only occurs once. The check box is only active if a CD/DVD recorder is selected in the Destination drop-down list. Extended Analysis check box Dramatically improves the quality of the encoding process of a DVD.
Nero Recode wizards Fig. 6: Nero Recode burning process The following input options are contained in the Burn Disc screen and are available in the context of every task: Enable video preview check box Activates the video preview during burning. Enlarges and reduces the area of the video preview. Status area Indicates the progress of the burning process.
Recode an Entire DVD to DVD 6 Recode an Entire DVD to DVD Nero Recode allows you to adapt and change the structure of a DVD while copying it, so that the data can be burned onto a commercial blank disk.
Recode an Entire DVD to DVD Lock Locks the automatic change of recoding quality for a DVD video title. It is still possible to make manual changes to the quality settings by moving the control. It may make sense to block individual video titles if the quality of other content is to be improved, necessitating a proportionate deterioration in the rest of the content. The button is only active if a DVD video title has been imported. Unlock Removes the lock on the automatic change of recoding quality.
Recode an Entire DVD to DVD the DVD Video Files tab shows how the DVD will be recoded in line with the selected profile. 9. Mark the audio tracks you want to copy on the Audio tab. 10. Mark the subtitle tracks you want to copy on the Subtitle tab. 11. If there is an individual video title you do not want to copy: 1. Mark the required video file on the DVD Video Files tab. 2. Click on the Disable button. Æ The Remove Element dialog window appears. 3.
Recode an Entire DVD to DVD 19. To cancel burning, click on the Stop button. To pause/ resume burning, click on the Pause/Restart button. Î The burning process is complete when the relevant message appears in the information window. You can now return to the burning settings and burn the compilation again. The Next button takes you to the What do you want to do now? screen, where you can select the other options or close Nero Recode.
Recode Main Movie to DVD 7 Recode Main Movie to DVD Nero Recode allows you to copy the main movie on a DVD without the extras. You can adapt and change the structure of the main movie so that the data can be burned onto a commercial blank disk.
Recode Main Movie to DVD The columns in the upper area of the DVD-Video Files tab have the following meaning. 7.2 Content Shows the structure on the DVD Duration Shows the length of the relevant area. Size Shows the size of the relevant area. Video quality Shows the quality. The higher the number, the better the quality of the file recoded with Nero Recode. Recode To recode a DVD, proceed as follows: 1. Start Nero Recode. Æ The start screen appears (see The Nero Recode start screen). 2.
Recode Main Movie to DVD 4. Click on the OK button. Æ You have now shortened the video title. 12. Move an area control in the Video Quality column until the required video title quality is reached The quality of the rest of the content of the DVD will deteriorate proportionately to the improvement in the improvement in the quality of an individual title. 13. Click on the Next button to continue to define the burn settings. Æ The Burn Settings dialog appears. 14.
Recode Main Movie to DVD 7.2.1 Trim Title If you do not want to use the whole of a video title in the imported main movie, you can just use a special clip by trimming the video title. The Trim Movie window where video titles can be trimmed is divided into two areas, the first showing the first frame where the video title is to begin and the second containing the last frame where the video title is to end. Fig.
Compile a DVD 8 Compile a DVD Nero Recode allows you to compile your own DVD from imported video titles and data files. 8.1 Task-specific input options Fig. 10: My Own DVD Compilation screen with already imported files In addition to the input options described under Import Files screen, the following buttons are available for the Compile DVD task in the My DVD Compilation screen. Delete Removes video titles. The button is only enabled if a DVD video title has been imported.
Compile a DVD 8.2 Size Shows the size of the relevant area. Video quality Shows the quality. The higher the number, the better the quality of the file recoded with Nero Recode. Recode To recode a DVD, proceed as follows: 1. Start Nero Recode. Æ The start screen appears (see The Nero Recode start screen). 2. Select Compile a DVD in the Nero Recode start screen. Æ The My Own DVD Compilation screen appears. 3. Insert the DVD you want to recode in the DVD drive on your PC. 4.
Compile a DVD 13. If you want to unlock an already locked video title to adjust the quality proportionately to the changes in quality in the other titles: 1. Mark the video title in the DVD Video Files tab. 2. Click on the Unlock button. Æ The marked video title is unlocked. 14. To trim a video title: 1. Mark the video title in the DVD Video Files tab. 2. Click on the Trim Movie button. Æ The Trim Movie window will open. 3. Trim the video title by defining the first and last frames (see Trim Title). 4.
Compile a DVD 21. To cancel burning, click on the Stop button. To pause/ resume burning, click on the Pause/Restart button. Î The burning process is complete when the relevant message appears in the information window. You can now return to the burning settings and burn the compilation again. The Next button takes you to the What do you want to do now? screen, where you can select the other options or close Nero Recode.
Recode DVDs and videos for Nero Digital 9 Recode DVDs and videos for Nero Digital Nero Recode allows you to encode all video formats supported by Nero in Nero Digital files. The Nero Digital Codec conforms to MPEG-4. These files can be played back in Nero ShowTime and other commonly available programs. 9.1 Task-specific input options Fig.
Recode DVDs and videos for Nero Digital Nero Digital Category Changes the Nero Digital Category. The setting relates to the relevant target medium for which encoding is being carried out. The size of the result varies, depending on the selection. Nero Digital Profile Changes the Nero Digital-Profile. The setting relates to the target medium for which encoding is carried out. The columns in the upper area of the Nero Digital Title tab have the following meaning. 9.
Recode DVDs and videos for Nero Digital 10. If you want to change the audio settings, click the Settings button (see Audio settings). 11. Mark the subtitle tracks you want to copy on the Subtitle tab. 12. Create your own subtitle track as required (see Create your own subtitle track). 13. To delete a video title: 1. Mark the video title you want to delete on the Nero Digital Title tab. 2. Click on the Delete button. Æ The video title will be removed from the compilation. 14.
Recode DVDs and videos for Nero Digital 20. Select the required Nero Digital profile in the Nero Digital Profile drop-down list. 21. Move an area control in the Video Quality column until the required video title quality is reached The quality of the rest of the content of the DVD will deteriorate proportionately to the improvement in the improvement in the quality of an individual video title. 22. Click on the Next button to continue to define the burn settings. Æ The Burn Settings dialog appears. 23.
Recode DVDs and videos for Nero Digital 9.2.2 Create your own subtitle track The Second Subtitle Track drop-down list in the Subtitle tab allows you to create a subtitle track. This option is only available if you are converting titles into Nero Digital. You can also import an already existing subtitle track. For an import of this kind, the file must be saved in the following format: .SRT; .SUB. The individual subtitles in files in .SUB format consist of a single line.
Recode DVDs and videos for Nero Digital Fig. 12: Nero Digital Subtitle Settings window The following input options are available: Open existing file button Opens the Open dialog window. Already existing subtitle files can be selected there. Export button This opens the Save As dialog window. This is where you can export a subtitle file you have created yourself. OK button Saves the changes in the Nero Digital Subtitle Settings dialog window.
Recode DVDs and videos for Nero Digital Change tab Export button Edit button Delete button Adds a new line to the end of the frame. In the standard setting the interval between the start and end of the time code is 4 seconds. Opens the Edit Subtitle Line dialog window This button can be used to enter the subtitle text for every interval in the Text column. Deletes a previously highlighted line. 9.2.
Recode DVDs and videos for Nero Digital 9.2.4 Define video settings You can use the Nero Digital Video Settings dialog box to define the settings for the video encoder. 9.2.4.1 Deinterlace tab The following input option is available: De-Interlace Video area Nero Recode automatically recognizes when a DVD video title is made up of half frames (see interlaced). If a video is interlaced, Nero Recode recommends deinterlacing to increase Nero Digital image quality. The Enable option converts the video title.
Recode DVDs and videos for Nero Digital pixels for height. Disable radio button Allows the video to be converted without changing the frame size. Letterboxed check box Creates a Nero Digital file consisting of square pixels. Some, players require square pixels. 9.2.5 Set Nero Digital options The following additional setting options become available when converting to Nero Digital: Current Profile drop-down menu Displays the Nero Digital Profile you selected in the My Nero Digital Disc screen.
Recode main movie to Nero Digital 10 Recode main movie to Nero Digital Nero Recode allows you to encode DVD video files as Nero Digital files. The Nero Digital codec is MPEG-4-compatible. This option allows you to encode just the main movie on a DVD without the Extras. You can then play this back, for example in Nero ShowTime. 10.1 Task-specific input options Fig.
Recode main movie to Nero Digital The columns in the upper area of the Nero Digital Title tab have the following meaning. Content Shows the structure contained on the DVD. Duration Shows the length of the relevant area. Size Shows the size of the relevant area. Video quality Shows the quality. The higher the number, the better the quality of the file recoded with Nero Recode. 10.2 Recode To recode a main movie for Nero Digital, proceed as follows: 1. Start Nero Recode.
Recode main movie to Nero Digital 13. To trim a video title: 1. Mark the video title you want to trim in the Nero Digital Title tab. 2. Click on the Trim Movie button. Æ The Trim Movie window is opened. 3. Trim the video title by defining the first and last frames (see Trim Title). 4. Confirm your selection by clicking on the OK button. Æ The video title is trimmed. 14. If you want to add additional; chapters to individual video titles: 1.
Recode main movie to Nero Digital 23. To cancel burning, click on the Stop button. To pause/ resume burning, click on the Pause/Restart button. Î The burning process is complete when the relevant message appears in the information window. You can now return to the burning settings and burn the compilation again. The Next button takes you to the What do you want to do now? screen, where you can select the other options or close Nero Recode.
Nero Digital expert settings 11 Nero Digital expert settings You can define additional settings for the Nero Digital Options in the Burn Settings screen. You should only change the expert settings if you are sufficiently familiar with the area of video encoding, in particular MPEG-4 encoding. Incorrect settings can have a major negative impact on the quality of the output file 11.
Nero Digital expert settings Macroblock A macroblock describes 16 x 16 pixels and is the elementary unit in the MPEG standard on which motion coding is also based. Matrix A matrix is a rectangular pattern whose elements are usually numbers, although they can be other mathematical elements such as variables of functions. It consists of m lines and n columns. In relation to qualification: the values in the matrix are factors that control the value of the compression.
Nero Digital expert settings 11.2 MPEG-4 profiles MPEG-4 SP/ASP is mainly available in two different profiles, Simple Profile (SP) and Advanced Simple Profile (ASP). Nero Recode allows you to choose the profile in which the files are to be output (see Simple Profile (QuickTime™ compatible)).
Nero Digital expert settings 11.2.2 Encoding mode The Encoding mode setting allows you to choose between the Real-time encoding (1 pass) and High quality encoding (2 pass) settings. Coding in a single pass may take less time, but it does not offer the same quality as coding in two passes. If coding in a single pass is selected, two fields are available, Min. quant. and Max. quant.. You can use these to set the range for the permitted quantization factor.
Nero Digital expert settings 11.2.3.3 Scene cut If you check the Scene cut box, you can use the control to set the sensitivity with which the encoder detects scene changes. For efficiency, it inserts keyframes at these points whose information is used by the P- and B-VOPs. This is necessary in scenes involving a lot of fast movement in order to reproduce the details of the picture accurately. We advise a central control setting because inserting too many keyframes is inefficient. 11.2.3.
Nero Digital expert settings 11.2.4.1 Simple Profile (QuickTime™ compatible) If you check the Simple profile box, a number of options in expert mode are grayed out and cannot be changed. The output file is thus encoded in the MPEG-4 simple profile (see MPEG-4 profiles). 11.2.4.2 Quantization The Quantization drop-down list allows you to choose between H236 Quantization and MPEG Quantization. Select MPEG if you want to use your own quantization matrix or change the existing one.
Nero Digital expert settings 11.2.4.9 Support of interlaced VOP The Support of interlaced VOPs setting allows the Interlaced process. This process, which is used to display a TV picture in PAL standard, displays two half frames in succession. As the frame is generated, only the odd lines from the output device are displayed for the first half frame and, one this is complete, the second half frame is generated from the even lines. The two frames are coded separately.
Nero Digital expert settings 11.2.7 AVC Encoder The AVC (Advanced Video Encoding) entry and its subentries can be used to make AVC encoding settings for your data. 11.2.7.1 Thread Count Nero Recode supports multi-core processors. If you have one of these, you can distribute the encoding process to the required number of threads. The Thread Count drop-down list allows you to choose whether to allow the encoding process to be performed by several threads.
Nero Digital expert settings 11.2.11 Maximum GOP size The number in the Maximum GOP Size field indicates the number of frames permitted between I-Frames. Maximum B-Frames The number in the Maximum B-Frames field indicates the maximum number of consecutive B-Frames that can be used in a GOP. Encoder Tools You can make the settings for the encoder process in the Encoder Tools entry. These setting options are only available if you have selected Nero Digital AVC in the Nero Digital category. 11.2.11.
Nero Digital expert settings 11.2.12 Visual Enhancements The settings in the Psycho visual quality level entry use human perception patterns to achieve better overall quality. This means, for example, that the quality is better in the middle of the picture than at the outer edges because the eyes tend to focus on the middle and do not notice slight blurring at the edge. Because quality is "saved" at the edge, you can either improve overall quality of achieve greater compression.
List of figures 12 List of figures Fig. 1: Nero StartSmart .....................................................................................................................................8 Fig. 2: Nero Recode start screen ......................................................................................................................9 Fig. 3: Nero Recode Options window.............................................................................................................11 Fig.
Index 13 Index A ASP Audio settings AVC K 46 36 46 B Basic settings Burn Options Burn-at-once Burning 11 18 19 19, 27, 31, 36, 44 46 15 39 59 5 40 D Data Compression Decoding Deinterlace Disk Image DVD Importing 46 6 40 5 15 E Encoding 6 F Fitting To Target 14 H H263 H264 High Quality Mode L 12 41 M Macroblock Movie Trimming Multi-core Processor 46 46 19 Nero Digital expert settings Nero Recode Starting using Nero StartSmart Nero StartSmart Noise 7 46 40 25, 29, 33, 42 53 46 8 8 47 O O
Transcoding T Target Group Title Disabling Enabling Lock Locking Trimming Unlocking Titles Merging Separate 5 21 21 33 22, 29 26, 28, 31, 35, 44 22, 29, 33 29 29 6 V Versions Video files Converting Video Settings Defining VOP Bidirectional Intracoded Predicted 5 33, 42 40 46 46 47 Seite 58
Contact 14 Contact 14.1 Contact details Nero Recode is a product of Nero AG. Nero AG Im Stoeckmaedle 18 76307 Karlsbad Germany Web: www.nero.com Help: http://support.nero.com E-mail: techsupport@nero.com Fax: +49 724 892 8499 Copyright © 2006 Nero AG. All rights reserved.