Nero Recode
Copyright and Trademark Information This document and all its contents herein are subject to and protected by international copyright and other intellectual property rights and are the property of Nero AG and its subsidiaries, affiliates or licensors. All rights reserved. No part of this document may be reproduced, transmitted or transcribed without the express written permission of Nero AG. All trade names and trademarks and/or service marks are the property of their respective owners.
Table of Contents Table of Contents 1 1.1 1.2 1.3 1.4 1.5 1.6 Start Successfully About the Manual About Nero Recode Versions of Nero Recode Working With Nero Recode Starting the Program System Requirements 5 5 5 6 7 8 8 2 Start Screen 9 3 3.1 3.2 3.3 3.4 3.4.1 3.4.2 3.4.3 3.4.4 3.4.
Table of Contents 6.2.3 Encoder Settings Tab for MPEG-4 SP/ASP 53 7 Nero MediaBrowser 55 8 8.1 Tools Erase Rewritable Disc Window 58 58 9 9.1 9.2 9.3 9.4 9.5 9.
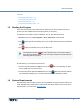
Start Successfully 1 Start Successfully 1.1 About the Manual This manual is intended for all users who want to learn how to use Nero Recode. It is process-based and explains how to achieve a specific objective on a step-by-step basis. To make best use of this documentation, please note the following conventions: Indicates warnings, preconditions or instructions that have to be precisely followed. Indicates additional information or advice. 1.
Start Successfully It is also possible to crop, trim and rotate the video, when converting to video file. No matter whether the video is intended for playing on the computer, DVD player or devices like tablet, smartphone or game console, the export profiles allow converting into the format that is required by the chosen device - and you always get the best quality for your respective file size thanks to the various export profiles. Of course you can adjust the output format to your requirements.
Start Successfully The Crop feature is not available under Windows XP. 1.4 Working With Nero Recode Despite its wide range of features, Nero Recode is an easy-to-use recoding program that recodes videos in just a few steps: First, choose the media file you want to recode. As Nero Recode is source based, choose the medium (disc or file) where the video or audio is located or simply add it by dragging & dropping it to the main screen. Then select the target format by choosing the device.
Start Successfully See also Recoding Video Discs →12 Converting Video Files →29 Edit Profile Window →47 Playback and Edit the Video →42 1.5 Starting the Program There are several ways to open Nero Recode, depending on various factors such as the product you have installed and the operating system you are using.
Start Screen 2 Start Screen The main screen of Nero Recode is your starting point, giving you an overview about all running and scheduled jobs. Nero Recode provides a source-based approach for starting - you choose your content to be converted and continue. Furthermore, you can use the Drag your files here area to start without clicking any button. The main screen is divided into two areas: the job start area and the job overview area.
Start Screen The following options are available in the Recode discs area: Import Blu-ray/ AVCHD Import Blu-ray/ AVCHD structure Import DVD Opens a window where you can choose the Blu-ray-Video disc or AVCHD to be converted. You can choose a drive with an inserted Blu-ray disc or AVCHD. Opens a window where you can choose the Blu-ray-Video disc or AVCHD to be converted. You can choose a folder (BDMV) on your hard drive including Bluray material.
Start Screen Lists all jobs. You can re-arrange the jobs in the job list via drag & drop. You can edit or even remove the whole job and you can stop or pause the job during the recoding process. List Your Jobs Button Start Encoding Check box / Dropdown menu When job list finished In the job area is the video to be recoded – or even the videos, if you have edited some video files together.
Converting Video Files 3 Recoding Video Discs 3.1 Recoding Video Disc to Video File Ripping and converting of Blu-ray Video discs and 3D Blu-ray Video discs is only available with Nero Recode as part of Nero 2014 Platinum. With Nero Recode you can recode a Blu-ray or a DVD-Video to a video file. You can use Nero Recode to adjust the quality to ensure video files with perfect video quality that fits your needs. You also have the possibility to crop, trim and rotate the video.
Converting Video Files When the import process is finished, the Recode [Disc type] screen is displayed. The Recode [Disc type] screen provides three areas on the left side which guide you through all the recoding options. 4. Click the icon that represents your device category, then choose the device in the dropdown menu (for example Video Files > MPEG-4). Recode Blu-ray/AVCHD 5. If you want to change the recoding options: 1. Click the Edit Settings button. The Edit Profile window is opened.
Converting Video Files Edit Profile window 2. Change the settings according to your preferences (see Edit Profile Window→ 47). 3. To save the changes into a new profile, click the Save As button. Note that if you click the OK button, the changes will only be used for this job, as predefined profiles will not be changed permanently. 4. Click the OK button. The window is closed and the changed profile is passed on to the Recode [Disc type] screen. 6. If you want to adjust the quality: 1.
Converting Video Files 3. Click the button of a title and click Audio settings to change the audio recoding op- tions. 10. If you want to edit the video (crop, trim or rotate), click the Edit Video button (see Playback and Edit the Video→ 47). 11. Click the OK button. The Home screen is displayed and the created job is added to the job list in the Your Jobs area. Home screen with jobs You have created a job to recode a Blu-ray or DVD-Video to a video file.
Converting Video Files Copyright Unless you possess the copyright yourself, or at least have the permission of the copyright holder, the unauthorized reproduction of discs may be a breach of national or international law and may lead to severe penalties! To recode a DVD-Video, proceed as follows: 1. Insert the DVD-Video you want to recode into the disc drive of your PC. 2. Choose the Import DVD task from the Home window. The Import DVD window is opened. 3.
Converting Video Files When the import process has finished, the Recode DVD screen is displayed. The Recode DVD screen provides three areas on the left side which guide you through all the recoding options. 4. Click the DVD Player icon, then choose the DVD entry in the drop-down menu. Recode DVD screen 5. If you want to change the recoding options: 1. Click the Edit Settings button. The Edit Profile window is opened.
Converting Video Files Edit Profile window 2. Change the settings according to your preferences (see Edit Profile Window→ 47). 3. To save the changes into a new profile, click the Save As button. Note that if you click the OK button, the changes will only be used for this job, as predefined profiles will not be changed permanently. 4. Click the OK button. The window is closed and the changed profile is passed on to the Recode DVD screen. 6. If you want to adjust the quality: 1.
Converting Video Files In order to adjust the quality of a desired video title individually, you can move the slider in the Quality column. The output file size is updated in real time according to the changes. 7. If you want to define the target: 1. Select either Burn to disc, Save to hard drive, or Create ISO from the Target dropdown menu (see Target Settings). If you selected Burn to disc, the Recorder settings expandable area is displayed. Recode DVD screen - Burn to disc 2.
Converting Video Files Home screen with jobs You have created a job to recode a DVD-Video to DVD-Video. You can now start the job anytime by clicking the Start Encoding button. See also Recode DVD/Blu-ray/AVCHD Screen →21 Device Settings →22 Quality Settings →22 3.3 Recoding to Audio File With Nero Recode you can recode Blu-ray Video, AVCHD or DVD-Video to an audio file.
Converting Video Files ControlCenter and used together with Nero 2014. You will find further information in the Nero WaveEditor manual. See also Recoding Video Disc to Video File →12 3.4 Recode DVD/Blu-ray/AVCHD Screen In the Recode [Disc] screen you define the output. This is basically done by choosing the target device. Each device contains encoding settings that are optimized for a specific output format on the chosen specific device.
Converting Video Files Cancel Cancels the job creation process. You can either discard the data or save them for further processing. 3.4.1 Device Settings The following options are available: Select the device for which you want to recode the content. Device category buttons Several device categories are available like your PC, DVD player, tablet or smartphone. For each device category, a number of specific devices is available, e.g. for tablet iPad, Kindle Fire or Windows 8 Tablet.
Converting Video Files If this entry is selected, the editable drop-down menu Fit to target is available. Defines the target size: 4403 (DVD5): Content fits onto a DVD5 with 4.7 GB (4403 MB) 8089 (DVD9): Content fits onto a DVD9 with 8.5 GB (8089 MB) Editable drop-down menu Fit to target You can also enter a custom value in MB for the target size.
Converting Video Files are chosen to be converted, each of them is saved to hard disk. Create ISO: Saves the output folder structure as an image file to your hard drive, connected device or network drive. The image file will be in the ISO format. You can specify or change the path and enter a name for the image file using the Browse button. Create ISO and Burn to disc are only available for DVD. Drop-down menu Defines the target path for the output.
Converting Video Files Input field Disc name Drop-down menu Disc burner Defines the disc name. Defines the disc burner that you want to use for burning. Selects the write speed at which the disc is burned. Drop-down menu Write speed Maximum: Maximum speed of selected disc burner. Safe mode: Moderate speed with emphasis on safety. Minimum: Slowest speed for the most reliable burning. Input field Number of copies Defines the number of discs that are to be burned. The default is set to one disc. 3.4.
Converting Video Files Button on preview image Button Edit Video Opens the internal video player displaying the main movie. If several main movies were detected on the video disc by Nero Recode you can select and watch another main movie in the player. You can also select and watch the extras. Opens the editing screen where you can crop, trim and rotate the video. Only available when recoding to video file. Displays some information about the source and the target.
Converting Video Files Lists one audio track of the selected video item. By clicking on the button you can see all available audio tracks and you can also select / deselect audio tracks for the selected video item. Audio Audio settings: Opens the Audio & Subtitles window. Here, you can select / deselect audio tracks and see the audio codecs used. These settings affect the encoding and are optimized for a specific output format. However, you can change those settings to meet advanced needs.
Converting Video Files Defines what kind of bit rate the audio codec is using. Constant bit rate (CBR): Specifies a constant bit rate, i.e., the data flow per unit of time and thus the quantity of the saved data is the same over the entire audio file. Bit rate mode Variable bit rate (VBR): Specifies a variable bit rate, i.e., the data flow per unit of time and thus the quantity of the saved data adapts to the dynamics of the audio file.
Converting Video Files 4 Converting Video Files 4.1 Converting a Video File With Nero Recode you can encode a video file to a video file. Copyright Unless you possess the copyright yourself, or at least have the permission of the copyright holder, the unauthorized reproduction of files may be a breach of national or international law and may lead to severe penalties! To encode a video file, proceed as follows: 1. Provide the source video file: 1.
Converting Video Files Additionally, you can simply add the video content by using the Drag-and-drop area. The Convert video files screen is displayed. The Convert video files screen provides three areas on the left side which guide you through all the recoding options. When importing is finished, a preview of the video file and source information are displayed on the right side. You can add more video files using the Add File(s) button. 2.
Converting Video Files Note that if you click the OK button, the changes will only be used for this job, as predefined profiles will not be changed permanently. 4. Click the OK button. The window is closed and the changed profile is passed on to the Convert video files screen. 4. If you want to adjust the quality: 1. Move the slider to the desired quality or select a output size using the Fit to target check box. 2.
Converting Video Files You have created a job to encode a video file to another video format. You can now start the job anytime by clicking the Start encoding button. See also Convert Video Files Screen →34 Output Settings →36 4.2 Converting Online Video File With Nero Recode you can encode a online video file to a video file. The process for encoding a video file from the Internet is nearly the same as for encoding a video file from harddisk.
Converting Video Files Select the videos to convert screen 3. Select the check box of the online video you want to encode. 4. Click the Add button. The Convert video files screen is displayed. The Convert video files screen provides three areas on the left side which guide you through all the recoding options. The video file is imported. During the import process you have the option to cancel the process. You can track the import process with the progress bar in the Titles bar.
Converting Video Files The process for encoding a video file to an audio file is nearly the same as for encoding a video file to another video file format (see Encoding video file to video file→ 29). For every device categorie you have the option to rip only the audio part. You can even choose the audio device categories Audio Files (AIFF, APE, MP3, and so on) or Audio Player (iPod classic, iPod touch 5G and so on). Just like the video file, you can edit the audio file by trimming it.
Converting Video Files path. Additionally you can crop, trim, and rotate the video, and define the file name. You can convert several videos at once and even combine them into one output file. The screen is basically divided into two areas: A left area with edit options for the output (device, quality and target) and a right area with target and source information, and advanced output settings.
Converting Video Files 4.5.1 Device Settings The following options are available: Select the device for which you want to recode the content. Device category buttons Several device categories are available like your PC, DVD player, tablet or smartphone. For each device category, a number of specific devices is available, e.g. for tablet iPad, Kindle Fire or Windows 8 Tablet. The selected device defines which encoding settings and targets can be chosen.
Converting Video Files Defines the target size: 4403 (DVD5): Content fits onto a DVD5 with 4.7 GB (4403 MB) Editable drop-down menu Fit to target 8089 (DVD9): Content fits onto a DVD9 with 8.5 GB (8089 MB) You can also enter a custom value in MB for the target size. Note that it is not in every case possible to achieve the target size as the video cannot compressed any more and you have to deselect titles, audio or subtitles to achieve your wished target size.
Converting Video Files eo with Nero Video button. Check box Combine videos into one file Creates one target video file out of several source videos. Only available if you had selected more than one video. Nero Burning ROM allows you to burn your data, music and videos to disc and gives you full, customized control of your burning projects. Nero Burning ROM is available as part of Nero 2014 and as standalone product. You can find further information in the Nero Burning ROM user manual and on www.nero.com.
Converting Video Files Internet, the file name OnlineMedia is entered. Button X Expandable area More options Removes the video title from the screen. Opens an area where you can change the quality for the output video file. In addition you can deselect audio tracks in order to reduce output size. If the video file is a stream containing several videos, you can also deselect single video titles. This is useful if a media file contains more than one video track, audio track or subtitles.
Converting Video Files Variable bit rate (VBR): Specifies a variable bit rate, i.e., the data flow per unit of time and thus the quantity of the saved data adapts to the dynamics of the audio file. The bit rate, for example, can be lowered at quieter points in the track. Average bit rate (ABR): Specifies an average bit rate, i.e., the data flow per unit of time and thus the quantity of the saved data adapts to the dynamics of the audio file but the average bit rate tends to the defined value.
Converting Video Files In order to adjust the quality individually, you can move the slider. Note: The higher the required aspect ratio, the higher the needed bit rate. Therefore, parts of the quality slider may be grayed out, if the required aspect ratio would result in a bit rate which is not supported by the selected encoder or technically impossible. Only available when the check box Fit to target is cleared. Input field Video bit rate Displays the bit rate of the output in Kbps.
Playback and Edit the Video 5 Playback and Edit the Video 5.1 Playback In the Playback screen you can play back the video to be recoded. The Playback screen is opened when you click the button on a preview image. The video is played back in original resolution. If the resolution is bigger than the window, Nero Recode resizes the video to fit into the window and shows black bars. For audio files, a wave form is displayed.
Playback and Edit the Video / Starts and stops playback. / Increases the rewinding / fast-forwarding speed each time the button is clicked. / Jumps back one item / Jumps forward to the next item. Controls are only visible if more than one video item is available. Changes the audio volume. Button More Button OK Allows to switch to another title, audio track or subtitle; if such is available. Closes the screen. See also General Options →60 5.
Playback and Edit the Video Playback screen, Crop area The following options are available for the Crop enhancement: Displays the area with setting options for cropping. Button Crop Cropping is useful if your video features black picture bars on the sides. To crop the video also decreases the size and as a result improves its quality. Disabled: Disables cropping. Drop-down menu Mode Automatic: Detects black picture bars and removes them automatically. The aspect ratio of the source file is kept.
Playback and Edit the Video Drop-down menu Selection color Defines the color of the border being displayed to indicate the cropping area. You can choose between black and white. This feature is useful to get a better contrast for the cropping frame. Displays the pixel size to be cropped. The boxes are updated autoCrop area textbox- matically when you drag the crop area. You can also enter pixel values manually here and the cropping area will change accordingly.
Playback and Edit the Video tion. By clicking the little triangle on the left or the right you can snap the pin to the playback marker. Start and end position of the area you want to keep and the duration can also be entered in the input fields in the Trim area. Clicking the OK button closes the screen and saves any made changes. The so-called nondestructive procedure is used for processing, i.e.
Edit Profile Window 6 Edit Profile Window The Edit Profile window displays the video encoding settings for the selected device. These settings are pre-defined and optimized for a specific output format. However, you can change the settings to meet advanced needs. Note that settings which are not possible for the selected device are not shown. The Edit Profile window can be opened via the Edit Settings button.
Edit Profile Window Edit Profile window – Video Settings The following options are available in the General video settings area: Drop-down menu File extension Drop-down menu Codec Defines the file extension for the container used by the device. A container can contain video and audio codec. Defines the video codec used for the output. Selects the method to be used for encoding. Drop-down menu Encoding Fast (1-pass): The video undergoes only one conversion pass.
Edit Profile Window The following options are available in the Advanced settings area: Defines the aspect of the output. The aspect ratio is set for the video itself and not for the pixels. The pictograms in the drop-down menu give a good impression of the different resizing modes: Drop-down menu Aspect ratio Original aspect ratio: Keeps the original aspect ratio. The aspect ratio is kept and the resolution is resized. Letter box: Resizes the video to fit exactly the desired resolution.
Edit Profile Window lution may be lost. Interpolate: One of the two interlaced fields gets discarded completely, and each discarded line is replaced by an average of its upper and lower neigbour from the other field. This is very fast, but image details in the vertical axis may be removed. Interpolate Adaptive: Similar to Interpolate, but discards only sections which are not needed. Therefore, it is not as fast as Interpolate, but gives better detail result.
Edit Profile Window Encoder Settings 6.2.1 General Settings Tab On the General Settings tab in the Encoder Settings window you can change the general encoding settings. With the settings in the Psychovisual enhancements area, you can use human perception patterns to achieve better overall quality. This means, for example, that the quality is better in the middle of the picture than at the outer edges because the eyes tend to focus on the middle and do not notice slight blurring at the edge.
Edit Profile Window Drop-down menu Max. reference frames Input field Max. keyframe interval Specifies how many frames from which a P-frame or B-frame may query information. Defines the range for the size of the GOP. The following options are available in the Psychovisual enhancements area: Check box Picture level Check box Macroblock level Takes human perception into account in order to achieve better compression for individual pictures at certain spots in the video.
Edit Profile Window Check box CABAC Check box Weighted prediction Uses the Context Adaptive Binary Arithmetic Coding encoding method. This provides great quality along with lossless compression, but demands high computer power. If this check box is selected, reference frames can be re-weighted during motion predictions. This increases the encoding efficiency especially during cross fading.
Edit Profile Window Check box Quarter pixel precision Check box Global motion compensation If this check box is selected, a quarter of a pixel instead of a pixel is used for motion estimation and compensation. The movement across the frame will be more accurate. This option often improves the quality. However, older standalone DVD players may not be able to playback files encoded with this option. If this check box is selected, the encoder tries to compensate for camera movement.
Nero MediaBrowser 7 Nero MediaBrowser Nero MediaBrowser is a tool which you can use to easily find, view and access media files and add them to your project. More precisely, with Nero MediaBrowser you can access a media library which contains all your media files that were indexed by Nero MediaHome. Nero MediaBrowser is designed to be accessed in several Nero applications, but is also available as a standalone application.
Nero MediaBrowser ing the corresponding tabs in Nero MediaHome. Also, the same scroll bar as in Nero MediaHome is used. This is either the standard scroll bar or the dynamic scroll bar. The following views are available for the Photos & Videos category, referring to the corresponding views in Nero MediaHome: All Photos & Vide- Displays all photos and videos sorted in chronological order by creaos tion date.
Nero MediaBrowser library. In the General area you can select to list your external playlists (such as iTunes) as entries in the navigation tree of Nero MediaHome.
Options 8 Tools The following entries are available in the Tools drop-down menu: Erase Disc Disc Info Erases rewritable discs. The Erase Rewritable Disc window is opened; the erasing method is adjustable. Before a disc can be erased, the disc burner must contain a rewritable disc. Shows information about the inserted disc (e.g. type of disc, available storage capacity, number of sessions, and tracks). The Disc Info window is opened.
Options Erase Rewritable Disc window The following configuration options are available in the Erase Rewritable Disc window: Selection list Select recorder Defines the desired recorder. Defines the erase method. Two options are available: Selection list The Quick-erase rewritable disc method does not physically erase all data from the disc, but only the references to the contents. The disc will appear to be empty even though the data is still physically available.
Options 9 Options You can customize Nero Recode according to your preferences in the Options window. To open the window, click the Options button in the upper bar. Options window 9.1 General Options On the General tab, you can define general Nero Recode settings. The following check box is available in the Nero MediaBrowser area: Allows Nero MediaHome to automatically add the target folder you Add target folder to had chosen for recoding to the list of to be indexed folders.
Options The following options are available in the Media playback area: Drop-down menu Play recoded files with Chooses the media player with which recoded media files are played back. Your preference will be saved. The following options are available in the Notifications area: List Messages Check box Enable tooltips Displays warning messages for certain actions which can be selected here. Enables the display of tooltips.
Options 9.3 Output Options On the Output tab, you can define the output settings. The following options are available in the Default paths area: Input field / Button Default output path Defines the folder in which the output video is to be stored. Input field / Button Defines the folder in which the output data is to be temporarily Temporary output stored.
Options Removes the selected language. Button X This button is only visible when you hover with your mouse over a language in the list. In the Default DVD quality area you can specify quality options regarding DVD-Video recoding with the Fit to target recode method. The Fit to target method recodes the content of the imported disc automatically in such a way that the output size fits the size value that you selected.
Options 9.4 Profiles Options On the Profiles tab, you can manage custom profiles. Options window – Profiles tab The following options are available in the Custom profiles area: Drop-down menu Select device Selects the device that is associated with the profiles below. Lists all custom created profiles that are associated with the selected device. List Custom profiles Custom created profiles are profiles that you have created during the encoding setting and saved under a new name.
Options name of the profile is pre-entered by default. Button Create Button Export Button Import Opens the Edit Profile window where you can create a completely customized profile. All codecs are selectable. Allows you to export custom profiles. Allows you to import custom profiles. See also Edit Profile Window →47 9.5 Performance Options On the Performance tab, you can define settings that affect the encoding performance.
Options CPU. Doing so results in a fast encoding with less encoding errors. 9.6 Disc Options On the Disc tab, you can define settings regarding disc burning. The following options are available in the Default disc label area: Defines a default disc label used for the disc if no title has been deDefault disc label if tected. no title was found This option applies only to DVD burning.
Glossary 10 Glossary Bicubic Interpolation Bicubic interpolation is an image processing method. If an image is enlarged beyond its original size, not only are the four neighboring pixels analyzed to calculate the new resulting pixel, but other nearby pixels are analyzed as well. This way, the new pixel is interpolated based on eight neighboring pixels. Bilinear Interpolation Bilinear interpolation refers to an image processing method.
Index 11 Index 1:1 copy.................................................. 7 AVCHD Import AVCHD .............................................. 10 Import AVCHD structure................................ 10 Blu-ray Import Blu-ray disc ........................................ 10 Import Blu-ray disc structure ......................... 10 Copy DVD .............................................. 7 Deinterlacing ........................................ 49 Device Aspect ratio ......................................
Index Quality Fit to target options ....................................... 63 Quick info ............................................... 7 Recoding Define output file name ................................. 26 Edit video ...................................................... 26 Fit to target...............................................22, 63 General DVD options .................................... 66 Import DVD-Video ........................................... 9 Preview playback ........................
Contact 12 Contact Nero Recode is a Nero AG product. Nero AG Im Stoeckmaedle 18 Internet: www.nero.com 76307 Karlsbad Help: http://support.nero.com Germany Fax: +49 724 892 8499 Copyright © 2013 Nero AG and its licensors. All rights reserved.