
User Guide
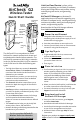

AirCheck
™
G2
Wireless Tester
The AirCheck G2 is a comprehensive, hand-
held tool for network professionals to test and
troubleshoot the latest wireless networks. The
AirCheck G2 operates on 802.11b/g/n networks
in the 2.4-GHz band and 802.11a/n/ac networks
in the 5-GHz band. It oers the following test
types:
• The high-level discovery screens for Networks,
Access Points, Clients, and Interferers show an
overview of the devices that AirCheck G2 has
detected on your network.
• From the discovery screens, you can touch any
network or device’s name to view its detailed
connections and measurements.
• The Channels utilization screen allows you to
examine in-depth the usage for all channels in
your network.
• AutoTest provides a comprehensive summary of
your Wi-Fi Air Quality and Network Quality at the
current time and location.
• The wired Ethernet Test measures PoE voltage
and link speed and indicates whether the
Tester can connect to network and user-dened
targets.
• The Locate function helps you physically nd
access points, clients, and interferers.
• Network Roaming and AP Range tests dene the
boundaries of your network.
Quick Start Guide
Touchscreen
Power Button
and LED
RJ-45 Ethernet
Port
10/100/1000 Mbps
External
Antenna
Connector
USB Port 1
Micro USB
Port 2
USB Port 3
Charging
Port
Kensington
Lock
External
Antenna
Holder
1
Power Up and Connect
a) Charge the internal battery for 3 hours by
connecting the included power supply to an AC
outlet and the charging port.
b) Press the power button to start up the unit.
c) Connect your AirCheck G2 to an active Internet
connection using the Ethernet port.
2
Sign Up/Sign In
a) To get started with Link-Live, create a user
account at Link-Live.com.
b) Follow the instructions in the activation email
you receive from Link-Live.
c) Then, sign in.
3
Claim to Link-Live
a) The first time you sign in to Link-Live, a pop-up
window appears prompting you to claim a
device. If you already have units claimed,
navigate to the Units page from the left
side navigation menu, and click the
Claim Unit button at the lower right
corner.
b) Select your device (AirCheck G2), and follow the
on-screen instructions to finish claiming.
c) For more information on using Link-Live, open
Support from the left side menu.
4
Download and Install
AirCheck G2 Manager
a) From your Link-Live account, go to Support,
and select Downloads.
b) Download and install AirCheck G2 Manager.
c) Use AirCheck G2 Manager to transfer test results
to your PC for management and analysis.
d) See the AirCheck G2 Manager Help for more
instructions.
Get the complete AirCheck G2
Wireless Tester User Manual at
NetAlly.com/products/AirCheck.
Link-Live Cloud Service is a free, online
system for upgrading your AirCheck G2 soware,
sharing test congurations and proles, storing
and analyzing test results, and generating
reports.
AirCheck G2 Manager is a Windows PC
application that can be used for upgrading your
AirCheck G2 soware locally, creating test cong-
urations and proles, storing and analyzing test
results, and generating reports.
Download the AirCheck G2 Manager soware
from Link-Live.com/downloads.
Register your product at support.netally.com/
Login to receive information on updates.