2016-05-QSG-PR-V5.
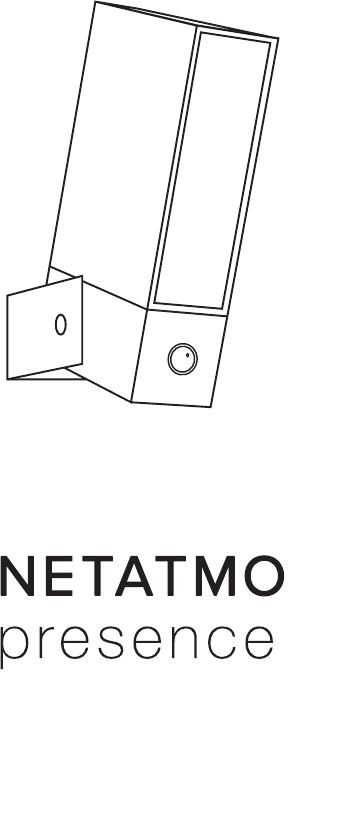
A E EN B C F Pack content: (A) 1 Presence camera. (B) 1 mounting strap and green screws. (C) 1 mounting holder and its black screw. (D) 1 Allen key. (E) 6 mounting screws (3 sizes). G D H I (F) 2 wall screws and 2 anchors. (G) 1 protective envelope. (H) 1 User Guide. (I) 1 QR code card. Contenu de la boîte : (A) 1 Caméra Presence. (B) 1 plaque de fixation et ses vis vertes. (C) 1 support de montage et sa vis noire. (D) 1 clé Allen. (E) 6 vis de montage (3 tailles).
IT Contenuto della confezione: (A) 1 Videocamera Presence. (B) 1 staffa di montaggio e viti verdi. (C) 1 accessorio di supporto per il montaggio e vite nera abbinata. (D) 1 Brugola (E) 6 viti di montaggio (3 formati). (F) 2 viti da parete e 2 tasselli. (G) 1 involucro protettivo. (H) 1 Manuale di istruzioni. (I) 1 Tessera con codice QR. NL Inhoud pakket: (A) 1 Presence camera. (B) 1 montagebeugel en groene schroeven. (C) 1 montagehouder en bijbehorende zwarte schroef. (D) 1 inbussleutel.
EN Required Tools (not included): - Caulking gun and Silicone - Phillips and slotted screwdrivers. sealant (recommended tool). - Step ladder. - Level (recommended tool). - Drill - Ø6mm (only required if there is no junction box where the product is installed). FR Outils requis (non inclus) - Pistolet à calfeutrer et mastic - Tournevis cruciforme et plat. silicone (outil recommandé). - Un escabeau. - Niveau (outil recommandé).
SV Nödvändiga verktyg (ingår ej) - Phillips och spårade skruvmejslar. - Stege. - Borr - Ø6mm (krävs endast om det inte finns någon kopplingsdosa där produkten är installerad). - Drevning pistol och tätningsmedel av silikon (rekommenderat verktyg). - Vattenpass (rekommenderat verktyg). NO Nødvendige Verktøy (ikke inkludert) - Phillips og avlange skrutrek- Fugepistol og silikon tetningskere. masse (anbefalt verktøy). - Stige. - Vater (anbefalt verktøy).
EN For optimal performance install Presence at a height between 2.5 and 4 meters (8 and 14 ft.) with a tilt angle of around 30°. Guided installation video available at: https://www.netatmo.com/presence-installation Read carefully the safety information on page 40 before proceeding to the installation. FR Pour un fonctionnement optimal, installez Presence à une hauteur comprise entre 2,5 mètres et 4 mètres selon une inclinaison d'environ 30º.
IT Per una prestazione ottimale, installare Presence ad un'altezza compresa tra 2,5 e 4 metri, con un angolo di inclinazione di circa 30°. Leggere attentamente le istruzioni di sicurezza indicate a pag.41, prima di procedere all'installazione. NL Voor optimale prestaties installeert u Presence op een hoogte van 2,5 tot 4 meter met een kantelhoek van ongeveer 30°. Lees zorgvuldig de veiligheidsinformatie op pagina 41 voordat u de installatie uitvoert.
Pick a spot on the wall to install Presence. OK EN Check with your smartphone that you have Wi-Fi reception at the spot you chose. If you do not, try to move your Wi-Fi router closer. FR Choisissez un endroit sur le mur pour installer Presence. Vérifiez avec votre smartphone que vous recevez une connexion Wi-Fi à l'endroit choisi. Dans le cas contraire, essayez de rapprocher votre routeur Wi-Fi. DE Wählen Sie eine Stelle , um die Presence an der Wand zu installieren.
IT Scegliere il punto di installazione della telecamera Presence sulla parete esterna della casa. Controllare con lo smartphone che in questo punto sia raggiunto dal segnale WiFi. In caso negativo, avvicinare il router WiFi. NL Kies een plek op de muur om Presence te installeren. Controleer met uw smartphone of u Wi-Fi-ontvangst heeft op de gekozen plek. Probeer indien dit niet het geval is, uw Wi-Firouter dichterbij te verplaatsen. SV Välj en plats på väggen för att installera Presence.
Caution: electrical danger. EN Disconnect power at fuse or circuit breaker before proceeding to the installation. FR Avertissement : danger électrique. Coupez le courant au disjoncteur général avant de procéder à l'installation. DE Vorsicht: elektrische Gefahr. Schalten Sie den Strom der Sicherung oder Schutzschalter ab, bevor Sie mit der Installation beginnen. ES Atención: peligro eléctrico. Antes de proceder con la instalación desconecta el fusible o el disyuntor. 10 2016-05-QSG-PR-V5.
IT Attenzione: rischio elettrico. Staccare i fusibili o il contatore della corrente, prima di effettuare l'installazione. NL Let op: gevaar door elektriciteit. Schakel de stroom uit bij de zekering of stroomonderbreker voordat u de installatie uitvoert. SV OBS!: elektrisk fara. Koppla bort strömmen vid säkringen innan du fortsätter med installationen. NO Forsiktighet: elektrisk fare. Koble fra strømmen eller sikringen før du går videre til installasjonen.
Prepare the installation. 3A 3B EN If you are replacing an old light fixture, disassemble the light fixture. If there is a junction box behind it, go to step (3A). If there is no junction box behind it or if you ran a new wire to power Presence, go to step (3B). FR Préparez l'emplacement Si vous remplacez un ancien appareil d'éclairage, retirez-le. Si une boîte de jonction est présente derrière passez à l'étape (3A).
IT Preparare l'installazione. Nel caso in cui si voglia sostituire un faretto esistente, smontarne la struttura di supporto. Nel caso in cui il punto prescelto corrisponda al punto in cui è collocata una scatola di derivazione, andare al passo (3A). Se non c'è nessuna scatola di derivazione o se viene utilizzato un nuovo cavo dell'elettricità per alimentare Presence, andare al passo (3B). NL Bereid de installatie voor. Indien u een oude lamp moet vervangen, dan demonteert u deze lamp eerst.
Secure the mounting strap to the junction box. EN Fasten the mounting strap (B) to your junction box. Make sure that the UP sign is at the top. You can use the screws provided (E). Skip (3B) and go directly to step (4). FR Sécurisez la plaque de fixation à la boîte de jonction. Sécurisez la plaque de fixation à la boîte de jonction. Assurezvous que le signe UP est vers le haut. Vous pouvez utiliser les vis fournies (E). Sautez l'étape (3B) et allez directement à l'étape (4).
IT Fissare la staffa di montaggio alla scatola di derivazione. Assicurare la staffa di montaggio (B) alla scatola di derivazione. Verificare che la scritta UP si trovi nella parte superiore. Utilizzare le viti in dotazione (E). Saltare il passo (3B) e andare direttamente al passo (4). NL Bevestig de montagebeugel op de aansluitdoos. Draai de montagebeugel (B) vast op uw aansluitdoos. Zorg dat het UP teken zich aan de bovenkant bevindt. U kunt de bijgeleverde schroeven gebruiken (E).
9 cm -3 ,5 in Secure the mounting strap to the wall. EN 45˚ Drill two holes above and to the left of the power cable and secure the mounting strap as shown in the picture. You can use the screws and anchors provided (F) or others that are better suited for your wall. Make sure that the UP sign is at the top. FR Sécurisez la plaque de fixation au mur. Percez deux trous au-dessus et sur la gauche du câble d'alimentation et sécurisez la plaque de fixation comme indiqué sur l'image.
IT Fissare la staffa di montaggio alla parete. Eseguire due perforazioni in alto e a sinistra del cavo di alimentazione e fissare la staffa di montaggio, come mostrato nella figura. Utilizzare le viti e i tasselli in dotazione, o altri eventualmente più adatti alla parete. Verificare che la scritta UP si trovi in alto NL Bevestig de montagebeugel aan de muur. Boor twee gaten bovenaan en links van de stroomkabel en bevestig de montagebeugel zoals weergegeven op de afbeelding.
Hang the camera with the wire tie. EN Carefully hang the camera with the wire tie from the green screw. Put the camera in the protective envelope (G) to avoid any damage. FR Suspendez la caméra à l'aide de la sangle. Suspendez avec précaution la caméra à l'aide de la sangle sur la vis verte. Placez la caméra dans sa housse de protection (G) pour éviter tout dommage. DE Hängen Sie die Kamera mit dem Kabelbinder auf. Hängen Sie vorsichtig die Kamera mit dem Kabelbinder an der grünen Schraube auf.
IT Appendere la telecamera con il cavo d'aggancio. Appendere accuratamente la telecamera alla vite verde con il cavo d'aggancio. Proteggere la telecamera con l'involucro protettivo (G) per evitare danni. NL Hang de camera op met behulp van de kabelbinder. Hang de camera zorgvuldig met behulp van de kabelbinder op aan de groene schroef. Steek de camera in het beschermend omhulsel (G) om beschadigingen te voorkomen. SV Häng kameran med kabelfästaren.
Connect the wires. EN Use the wire terminal behind the plate. Blue/White (NEUTRAL) supply wire to Blue wire Brown/Black (HOT) supply wire to Brown wire Yellow and Green (GROUND) supply wire to Yellow and Green wire Make sure the ground (GND) wire from the wire terminal is also screwed to the mounting strap (B) with the second green screw. FR Connectez les fils. Utilisez la barrette de connexion derrière le boîtier mural - Fil bleu/blanc (NEUTRE) à connecter au fil bleu.
IT Collegare i cavi. Utilizzare il mamut che si trova dietro la placca. - Cavo di alimentazione Blu/Bianco (NEUTRO) al cavo Blu. - Cavo di alimentazione Marrone/Nero (DI FASE) al cavo Marrone. - Cavo di alimentazione Giallo e Verde (MESSA A TERRA) al cavo Giallo e Verde. Assicurarsi che anche il cavo della messa a terra (GND) avvitato al mamut arrivi alla staffa di montaggio (B) e fissarlo con il secondo chiodo verde. NL Verbind de draden. Gebruik de draadklem achter de plaat.
Secure the plate on the mounting strap. EN Align the central holes of the wall plate with those of the mounting strap and pass the green screw through one of the holes of the “U” shaped guide. Then turn the plate horizontal (use a level if needed) and fasten the green screw tight. FR Sécurisez le boîtier mural sur la plaque de fixation. Alignez les trous centraux du boîtier mural avec ceux de la plaque de fixation et passez la vis verte à travers l'un des trous du guide en forme de "U".
IT Assicurare la placca sulla staffa di montaggio. Allineare i fori centrali della placca da parete a quelli della staffa di montaggio e inserire la vite verde in uno dei fori della fessura a forma di "U". Successivamente collocare la placca in posizione orizzontale (utilizzare una livella se necessario) e avvitare bene la vite verde. NL Bevestig de plaat op de montagebeugel.
Secure the camera to the plate. EN Use the provided mounting holder and black screw (C) to secure the camera to the mounting strap and plate. You can now cut and remove the wire tie and the protective envelope. FR Fixez la caméra au boîtier mural. Utilisez le support de montage fourni et la vis noire (C) pour sécuriser la caméra au boîtier mural. Vous pouvez maintenant couper la sangle et retirer la housse de protection. DE Befestigen Sie die Kamera an der Platte.
IT Fissare la telecamera alla placca. Utilizzare l'accessorio di supporto per il montaggio e la vite nera (C) in dotazione per fissare la telecamera alla staffa di montaggio e alla placca. Solo adesso il cavo d'aggancio e l'involucro protettivo possono essere rimossi. NL Bevestig de camera aan de plaat. Gebruik de bijgeleverde montagehouder en zwarte schroef (C) om de camera aan de montagebeugel en plaat te bevestigen. U kunt nu de kabelbinder en het beschermend omhulsel afknippen en verwijderen.
Tilt the camera to record video from the correct angle. EN Use the Allen key (D) to untighten the screws on the side or the back to tilt the camera. Make sure to secure them properly afterwards. FR Inclinez correctement la caméra pour filmer la zone à surveiller Utilisez la clé Allen (D) pour desserrer les vis sur le côté ou à l'arrière pour incliner la caméra. Assurez-vous de les fixer correctement par la suite. DE Neigen Sie die Kamera, um das Video aus dem richtigen Winkel aufzunehmen.
IT Inclinare la telecamera per registrare i video dall'angolazione corretta. Utilizzare la brugola(chiave di Allen) (D) per allentare le viti laterali o posteriori e poter inclinare la telecamera. Successivamente, fissarle di nuovo adeguatamente. NL Kantel de camera om video vanuit de juiste hoek op te nemen. Gebruik de inbussleutel (D) om de schroeven aan de zijkant of de achterkant iets los te draaien en de camera te kantelen. Vergeet niet de schroeven daarna weer vast te draaien.
Reconnect the power. EN Presence will start for the first time and the light will turn on. This can take up to a minute. If the light does not turn on, go to page 34 for troubleshooting advice. FR Rétablissez le courant. Presence démarre pour la première fois et la lumière s'allume. Cela peut prendre jusqu'à une minute. Si la lumière ne s'allume pas, rendez-vous page 34 pour obtenir des conseils de résolution de problèmes. DE Schließen Sie sie wieder ans Netz an.
IT Ricollegare la corrente. Presence si attiverà per la prima volta e si accenderà la luce. Questo processo può durare fino ad un minuto. Se la luce non si accende, andare alla pagina di risoluzione di problemi (pag.36). NL Schakel de stroom opnieuw in. Presence wordt voor de eerste keer opgestart en het licht gaat aan. Dit kan tot een minuut in beslag nemen. Indien het licht niet aangaat, raadpleegt u pagina 36 voor advies om dit probleem op te lossen. SV Återanslut strömmen.
Protect the wiring. EN We recommend that you caulk the mounting surface on the top and sides of the plate with silicone weather sealant. Leave bottom unsealed so moisture can drain out. FR Protégez le câblage. Nous vous recommandons de calfeutrer l'espace entre le mur et le dessus et les côtés du boîtier mural avec le mastic silicone d'étanchéité. Laissez le bas non calfeutré pour permettre à l'humidité d'être évacuée. DE Schützen Sie die Verdrahtung.
IT Protezione dei fili. Raccomandiamo di sigillare bene la superficie di montaggio sulla parte superiore e ai lati della placca con silicone sigillante. Non sigillare il lato inferiore, per permettere la fuoriuscita dell'umidità. NL Bescherm de bedrading. We raden u aan het montageoppervlak aan de bovenkant en zijkanten van de plaat te kitten met weerbestendige siliconenkit. De onderkant hoeft niet te worden gekit, zodat het vocht kan weglopen. SV Skydda kablarna.
Download the app. https://presence.netatmo.com EN To set up Presence from your smartphone or tablet, go to: https://presence.netatmo.com Presence cannot be setup from a computer. FR Téléchargez l'application. Pour configurer Presence de votre smartphone ou tablette, rendez-vous sur presence.netatmo.com. Presence ne peut pas être configurée depuis un ordinateur. DE Laden Sie die App herunter. Um Presence von Ihrem Smartphone oder Tablet einzurichten, gehen Sie zu presence.netatmo.com.
IT Scaricare l'app. Per impostare Presence dallo smartphone o dal tablet, andare su presence.netatmo.com. Presence non puo essere impostata dal computer. NL Download de app. Om Presence in te stellen op uw smartphone of tablet, gaat u naar presence.netatmo.com. Presence kan niet worden ingesteld op een computer. SV Ladda ner appen. För att ställa in Presence från din smartphone eller surfplatta, gå till presence.netatmo.com. Närvaro kan inte ställas in från en dator. NO Last ned appen.
EN Installation troubleshooting. Problem Light does not turn on (Presence does not start). Fuse blows or circuit breaker trips when light is turned on. Possible causes Solutions Fuse is blown or circuit breaker is turned off. Replace the fuse or turn circuit breaker on. Switch that controls old light fixture is off. Turn old switch on and keep it on at all times. Presence needs to be permanently powered. Incorrect circuit wiring. ! Crossed wires or power wire is grounding out.
DE Installation Fehlersuche Problem Licht geht nicht an (Presence startet nicht). Sicherung brennt durch oder Leistungsschalter wird ausgelöst, wenn das Licht eingeschaltet ist. Mögliche Ursachen Lösungen Sicherung ist durchgebrannt oder Leistungsschalter ist ausgeschaltet. Tauschen Sie die Sicherung aus oder schalten Sie den Leistungsschalter ein. Schalter, der die alte Lichthalterung steuert, ist aus. Schalten Sie den alten Schalter ein und lassen Sie ihn immer eingeschaltet.
IT Risoluzione di problemi per l'installazione Problema La luce non si accende (Presence non si attiva). Possibili cause Sostituire il fusibile o riattivare il contatore. L'interruttore che regolava il faretto installato precedentemente è spento. Accendere l'interruttore del faretto installato precedentemente e mantenerlo sempre acceso. Presence deve essere continuamente collegato alla corrente. Circuito dei cavi non corretto. Il fusibile è bruciato o il contatore salta quando si accende la luce.
SV Felsökning vid installation Problem Ljuset tänds inte (Presence startar inte). Möjliga orsaker Strömbrytare som kontrollerar gammal armatur är släckt. Felaktig kabel krets. Säkringen går eller brytaren löses ut när ljuset är påslagen. Lösningar Säkringen Byt ut säkringen eller har gått eller slå på strömbrytaren. verspänningsskyddet är avstängt. Korsade ledningar eller strömkabeln går ut i jorden. Tänd den gamla kontakten och ha den på hela tiden. Presence måste ständigt ha el.
RU Устранение неполадок при установке Неполадка Свет не включается (Presence не запускается). При включении света перегорает предохранитель или срабатывает автоматический выключатель. Возможные причины Способы устранения Перегорел предохранитель или выключен автоматический выключатель. Замените предохранитель или включите автоматический выключатель. Выключатель от старого светильника выключен. Включите старый выключатель и оставьте его в таком положении. Presence требует постоянного электропитания.
TW 安裝故障排除 問題 燈不亮 (Presence 未啟 動)。 燈被打開時,保 險絲熔斷或斷路 器跳閘。 可能原因 解決方案 保險絲熔斷或斷 路器處於關閉狀 態。 更換保險絲或打 開斷路器。 控制舊燈具的開 關處於關閉狀 態。 打開舊開關,使其 一直處於打開狀 態。Presence 需要 持續供電。 電路線路不正 確。 ! 檢查導線接頭。 首先切斷電源。 (返回第5步) 導線交叉或電源 線接地。 ! 檢查導線接頭。 首先切斷電源。 (返回第5步) 如需更多説明,請查看應用程式中的FAQ部分或登錄 http://support.netatmo.
EN IMPORTANT: Safety information Class I electrical appliance: use only on 100-240 V AC 50-60Hz. Risk of electric shock or fire. A good knowledge of electrical systems is required. If not qualified, do not attempt to install. Contact a qualified electrician. Disconnect power at fuse or circuit breaker before installing or servicing. No user serviceable parts inside. To avoid electrical shock, do not disassemble the product.
ES IMPORTANTE: Información de seguridad Dispositivo eléctrico de clase I: utilizar sólo a 100-240 V CA 5060Hz. Riesgo de descarga eléctrica o incendio. Se requiere un buen conocimiento de los sistemas eléctricos. Si no estás cualificado, no intentes realizar la instalación. Ponte en contacto con un electricista cualificado. Antes de la instalación o puesta en funcionamiento, desconecta la alimentación del fusible o el disyuntor. En el interior del aparato no hay ninguna pieza que sea útil para el usuario.
SV VIKTIGT: Säkerhetsinformation Elektriska apparater Klass I: Använd endast på 100-240 V AC 50-60 Hz. Risk för elektriska stötar eller brand. En god kännedom om elsystem krävs. Om du inte har kännedom, försök inte att installera. Kontakta en behörig elektriker. Bryt strömmen med säkringen innan installation eller service. Inga delar inuti. För att undvika elektriska stötar, ta inte isär produkten. För att förhindra kabelskador eller nötning, utsätt inte ledningarna för vassa föremål såsom plåtkanter.
CN 重要提示:安全信息 I 类电气:只能在100-240伏交流电及50-60赫兹的情况下使 用。触电或火灾危险!需要具备良好的电气系统知识。如无资 质,请勿尝试安装。联系具备资质的电工。 安装或维修前,请断开电源保险丝或断路器。 不含用户可维修零件。为了避免触电,请勿拆卸本产品。 为防止线路损坏或磨损,请勿使线路与尖锐物体接触,如金属 薄板边缘。 安装过程中可能需要帮助。 安装过程中,对本产品应轻拿轻放。锋利边缘对用户或墙壁会 造成伤害。正面的玻璃遭受碰撞后可能会破碎。玻璃破碎后应 进行更换。 灯光与眼睛或正前方的表面之间最低应保持相距1米(3.
FCC Statement This equipment has been tested and found to comply with the limits for a Class B digital device, pursuant to part 15 of the FCC rules. These limits are designed to provide reasonable protection against harmful interference in a residential installation. This equipment generates, uses and can radiate radio frequency energy and, if not installed and used in accordance with the instructions, may cause harmful interference to radio communications.
EU Declaration of Conformity We, Netatmo, declare that this device is in compliance with the essential requirements and other relevant provisions of Directive 1999/5/EC. Česky [Czech] - Netatmo tímto prohlašuje, že tento NOC01 je ve shodě se základními požadavky a dalšími příslušnými ustanoveními směrnice 1999/5/ES a ROHS 2011/65/ES. Dansk [Danish] - Undertegnede Netatmo erklærer herved, at følgende udstyr NOC01 overholder de væsentlige krav og øvrige relevante krav i direktiv 1999/5/EF og ROHS 2011/65/EF.
Svenska [Swedish] - Härmed intygar Netatmo att denna NOC01 står I överensstämmelse med de väsentliga egenskapskrav och övriga relevanta bestämmelser som framgår av direktiv 1999/5/ EG och ROHS 2011/65/EG. Português [Portuguese] - Netatmo declara que este NOC01 está conforme com os requisitos essenciais e outras disposições da Directiva 1999/5/CE e ROHS 2011/65/CE.
Canadian Compliance Statement This device complies with Industry Canada license-exempt RSS standard(s). Operation is subject to the following two conditions: (1) this device may not cause interference, and (2) this device must accept any interference, including interference that may cause undesired operation of the device. Cet appareil est conforme aux normes CNR exemptes de licence d’Industrie Canada.
? https://support.netatmo.com FCC ID: N3A-NOC01 IC : 10860A-NOC01 Copyright Netatmo © 2016 All rights reserved. Reproduction and distribution prohibited without written authorization from Netatmo 48 2016-05-QSG-PR-V5.