Mobile Broadband The Mobile Broadband tab in Basic view allows you to configure the country, service provider and network name (APN) options of your mobile broadband connection. If your SIM is PIN locked, you can also use this page to unlock it with the PIN. You should contact your mobile broadband carrier for the correct APN and PIN if you do not know them.
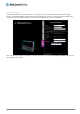
Advanced configuration To access the advanced configuration pages, you must first log in to the router and change to the Advanced view. Click on the Switch to advanced view link at the bottom of the basic view screen. www.netcommwireless.
NetComm Wireless 4GM3W User Guide 23 www.netcommwireless.
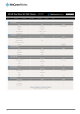
ITEM DESCRIPTION IPv4 System Status IP Address The current WAN IP address of the router Subnet Mask Gateway The current subnet mask in use by the router The gateway in use by the router to access the internet Domain Name Server The Domain name server converts Connection Time The time the current connection to the internet has been active IPv6 System Status WAN Link-Local Address The current WAN IPv6 address Global IPv6 Address LAN IPv6 Link-Local Address Link Status The current IPv6 subnet mask
Mobile Broadband OPTION DEFINITION WAN Type Country Select from Mobile Broadband or Wi-Fi Hotspot Select your country from the list. This will shorten the APN list to those in your selected country. Select Your Service Provider Select your 3G/4G service provider from the list. This will then enable you toselect the correct APN for the 3G/4G service in use. APN Enter the APN for your 3G/4G service. This should be automatically filled in after selecting your country and 3G provider name.
the Status-page. Keep Alive There are three keep alive options to select from: Disable:Disable the keep alive function. LCP Echo Request:The 4GM3W will automatically verify the connection is active. Set the interval and Max. number of failures to determine when the connection is up or down. Ping Remote Host: The 4GM3W will ping the chosen host IP to verify the connection is active. Set the host IP address and the interval between ping tests.
Step 3: If required, enter the Wireless security for the remote wireless network in the Pre-shared key field. Click the Save button to save your selected settings. The router reboots so that the new setting can take effect. NetComm Wireless 4GM3W User Guide 27 www.netcommwireless.
DHCP Server This Page allows you to change the Dynamic Host Configuration Protocol (DHCP) server settings on the 4GM3W. The DHCP Server enables computers or devices connecting to the 4GM3W to automatically obtain their network configuration settings. By default, the DHCP server is enabled. OPTION DHCP Server LAN IP Address DEFINITION Enable or disable the DHCP server.
DHCP Client List This is the list of currently connected devices utilising DHCP. If you wish to set a permanent IP address for a particular DHCP client (or device), select the appropriate DHCP client by clicking in the Select box. This will ensure the client’s current IP address is always assigned to it. DHCP Fixed Mapping DHCP Fixed Mapping allows you to reserve a specific IP address for a specific device. The DHCP Server will reserve a specific IP for a device based on that devices unique MAC address.
Wireless 2.4GHz The Wireless 2.4GHz LAN settings page allows you to configure the 2.4GHz wireless network features of the router. OPTION Wireless Module DEFINITION Wireless Select to enable or disable the Wireless network function of the 4GM3W. Network ID is used for identifying the Wireless LAN (WLAN). Client stations can roam freely over this product and other Access Points that have the same Network ID.
Wireless 5GHz The Wireless 5GHz LAN settings page allows you to configure the 5GHz wireless network features of the router. OPTION Wireless Module DEFINITION Wireless AP Isolation Select to enable or disable the Wireless network function of the 4GM3W. Network ID is used for identifying the Wireless LAN (WLAN). Client stations can roam freely over this product and other Access Points that have the same Network ID.
Change Password This page allows you to change the 4GM3W web configuration password. Please type in the old password or username(the factory default username and password is admin) and then type in the new password. Type the same new password in the Reconfirm field and click Save. www.netcommwireless.
Forwarding Rules The Forwarding Rules page allows you to configure the port forwarding management on the router. Click on any of the menu items on the left to access the respective settings page. Forwarding rules are a necessary feature as by default NAT (Network Address Translation) will automatically block incoming traffic from the Internet to the LAN unless a specific port mapping exists in the NAT translation table.
For example, if you have an FTP server (the default port is 21) at 192.168.20.10, a Web server (the default port is 80) at 192.168.20.40, and a VPN server (the default port is 1723) at 192.168.20.60, then you would need to specify the following virtual server mappings: Please note: At any given time, only one IP address can bind to a particular Service Port. SERVICE PORT SERVER IP ENABLE USE RULE# 21 12.168.1.10 9 (0) Always 80 192.168.20.40 9 (0) Always 1723 192.168.20.
Miscellaneous A Demilitarized Zone (DMZ) Host is a computer without the protection of firewall. It allows that particular computer to be exposed to unrestricted 2-way communication to the internet. It is mostly used for Internet games, Video conferencing, Internet telephony and other special applications. To enable DMZ, enter the IP address of the computer you want to be live on the internet and click on Enable.
Security Settings The Security Settings pages allow you to configure the security management on the router such as Packet filters and MAC Control. Status The Status page lists any currently configured filtering for the Outbound, Inbound and Domain filters. Packet Filters The Packet Filter enables you to control what packets are allowed to pass through the router.
There are two types of filtering policies: Allow all data traffic to pass except those that match the specified rules. Deny all data traffic to pass except those that match the specified rules. You can specify up to 48 filtering rules for each direction (Inbound or Outbound). For each rule you will need to define the following: Source IP address Source port Destination IP address Destination port Protocol: TCP or UDP or both.
Domain Filters Domain Filters enable you to prevent users from accessing specific domain addresses. To enable the Domain Filter, tick the Enable tick box at the top of the page. OPTION DEFINITION Domain Filter Log DNS Query Select to enable or disable domain filtering. Enable this if you want to log when someone accesses filtered URLs.
URL Blocking URL Blocking will block LAN computers from connecting to a pre-defined website. The major difference between the Domain Filter and URL Blocking is that Domain Filtering require users to input a suffix (e.g. xxx.com, yyy.net) while URL Blocking only requires you to input a keyword. To enable URL Blocking, select the Enableoption at the top of the page.
MAC Control MAC Control allows you to assign different access rights for different users and to assign a specific IP address to a specific MAC address. To enable MAC Address Control, select the Enableoption at the top of the page. Two types of MAC Control are available: OPTION Connection control (C column) Association control (A column) DEFINITION Use this to control which clients (wired and wireless) can connect to the unit.
Miscellaneous This page allows you to change various miscellaneous security settings on the unit. OPTION Administrator Time-out Remote Administration Discard PING from WAN side DEFINITION The period of time with no activity in the web configuration page to logout automatically, set this to zero to disable this feature. Normally only Intranet users can browse the built-in web pages to perform administration tasks. This feature enables you to perform administration tasks from a remote host.
Advanced Settings The Advanced Settings page allows you to configure the advanced settings on the router such as the System log, Dynamic DNS and SNMP options. Click on any of the menu items on the left to configure the access the respective setting page. Status The Status page displays the current System time, and lists any configured Dynamic DNS (DDNS) accounts, any Static or Dynamic Routes added or any Quality of Service (QoS) rules in place. www.netcommwireless.
System Log This enables you to set up the system log features of the router. You can also choose to send the system log to a remote syslog server (via a UDP connection) or email a copy to a recipient. OPTION DEFINITION IP Address for remote System Logs (syslog) Email address to send syslog to The IP address of the syslog server where the system log data will be sent. Click the "Enable" checkbox to enable this function. Click the “Enable” checkbox to enable this function.
Dynamic DNS The Dynamic DNS feature enables you to set a static domain name for their internet connection even whenthe ISP only provides a dynamic IP address. By mapping the host name to the current public IP address of the router, users who want to connect to the router or any services behind the router from the internet can just use the Dynamic DNS hostname instead of the IP Address which might change every time the router connects to the Internet.
QoS Quality of Service (QoS) is a collection of network technologies which allow configuration of different prioritiesfordifferent applications, users or data flows in order to guarantee a certain level of performance. The ultimate goal of QoS is to guarantee that the network delivers predictable results for availability, throughput, latency and error rate. QoS is especially important in ensuring the smooth operation of real-time streaming applications such as Voice over IP (VoIP), IPTV and online games.
Basic QoS configuration To configure QoS: 1. Set the QoS item to Enable. 2. The WAN Interface item displays the current WAN interface in use by the router and therefore to which interface the configuration applies. 3. Use the QoS Mode drop down list to set the QoS mode to Smart-QoS. 4. In the Bandwidth of Upstream field, enter the total upstream bandwidth of your broadband connection in Kilobits per second. 5.
7. Click the Add A New Rule button. A new screen to configure a QoS rule is displayed. 8. For the Rule item, check the Enable option. Use the descriptions in the table below to complete the rest of the settings for the rule. When the Class field is set to TCPPORT, UDPPORT, MAC, TOS or VLANPRI, you are able to add a conjunction rule. Click the Add A Conjunction (AND) Rule button that appears at the bottom of the page to add a conjunction rule.
Click on Save to store your setting or Undo to discard your changes. QoS configuration examples Example 1. To limit downstream bandwidth on LAN port 1 (IP address 192.168.20.2) to 100 KBps: Click the Add a New Rule button. Enter the settings as below. When the direction is set to “IN”, the QoS function checks packets coming from the WAN side to the LAN side. The QoS rule is displayed in the QoS Rules Table at the bottom of the screen.
Example 2 To limit the number of sessions (per port) that can be made in an outbound direction from the machine on LAN port 1 (192.168.20.2) to 4 sessions: Click the Add a New Rule button. Enter the settings as below. When the direction is set to “OUT”, the QoS function checks packets going from the LAN side to the WAN side. The QoS rule is displayed in the QoS Rules Table at the bottom of the screen.
SNMP SNMP (Simple Network Management Protocol) is a protocol designed to give a user the capability to remotely manage a computer network by polling and setting terminal values and monitoring network events. OPTION DEFINITION Get Community You must check Local, Remote or both to enable SNMP function. If Local is checked, this device will only respond to requests from LAN connected hosts. If Remote is checked, this device will respond to requests from the WAN connection.
Routing Routing tables allow you to determine which physical interface address to use for outgoing IP data. If you have more than one router and subnet, you will need to configure the routing table to allow packets to find the proper routing path and allow different subnets to communicate with each other. These settings are used to setup the static and dynamic routing features of the 4GM3W.
System Time This page allows you to change the System time setting on the 4GM3W. OPTION DEFINITION Time Zone Select the time zone where this device is located. Auto-Synchronization Time Server Select the "Enable" checkbox to enable this function. Select a NTP time server to obtain the current UTC time from. Sync with Time Server Select if you want to set Date and Time by NTP Protocol.
Scheduling You can use scheduling to enable or disable a service at a specific time or on a specific day. Select Enable and then click the Add New Rule button. Select a name for the rule and enter the details such as the day, start time or end time and click the Savebutton In the example below, the rule is called “Work Hours” and it is only active between 08:00 and 17:30.
Click the Save button to save the settings or the Undobutton to cancel. www.netcommwireless.
IPv6 The IPv6 page enables you to configure the settings used for an IPv6 connection (if supported by your Internet Service Provider). OPTION IPv6 IPv6 Connection DNS Setting DEFINITION Select to enable or disable IPv6 functionality. Select the type of IPv6 connection to utilise for your service. You can select from: 6 to 4 IPv6 in IPv4 Tunnel Select the type of connection as required by your Internet Service Provider for their IPv6 service.
NAS Settings The NAS Settings page enables you to configure the network area storage (NAS) function of the 4GM3W. This function can be used to remotely access files stored on an attached USB hard drive. Click on any of the menu items to access the respective configuration page. Disk Utility The Disk Utility function enables you to check any attached USB storage for errors. The 4GM3W will scan the attached storage and determine if there are any file system errors present.
Client Support UTF8 NetComm Wireless 4GM3W User Guide 57 Enable Unicode support for connected clients. www.netcommwireless.
Access Control The Access Control function provides control over which users can access any attached USB Storage. By default, the 4GM3W is in “Guest Mode” which means anyone can access the attached hard drive. Enabling “Authorization Mode” allows the creation of specific user accounts with a password to further control access permissions. To enable this, click on the Authorization Mode radio button and click Save.
Download Assistant The Download Assistant enables you to schedule the 4GM3W to perform a download from an Internet host. You are able to select from two download types: FTP HTTP Each type of download job requires different configuration options. FTP OPTION DEFINITION Job Name URL A name to identify the download job. The address to download from. Port Save To The port required for the FTP server (This would usually be left as 21). The location on the 4GM3W to save the downloaded file to.
HTTP OPTION DEFINITION Job Name URL A name to identify the download job. The address to download from. Save To The location on the 4GM3W to save the downloaded file to. Select to either schedule a time for the download to begin or start the download immediately. Start Time www.netcommwireless.
Download Status The Download Status page enables you to monitor previously scheduled Download Assistant jobs. From this page you are able to Start, Pause, Resume or Delete any Download Assistant jobs. The View drop-down list enables you to select whether currently running jobs, waiting jobs or scheduled jobs are displayed. Once listed, click on the checkbox on the left hand side of the listed jobs and then click the appropriate function button.
Toolbox The toolbox menu provides access to various settings and maintenance functions of the router. System Info The System Info screen displays the general settings on the router, such as the WAN type, the date and time, the log types and the log data. Routing Table The Routing table displays the current routes in place on the router. Click the Refresh button to update this list. Restore Settings The Restore settings page allows you to restore a previously saved configuration of the router.
Firmware Upgrade This page lets you upgrade the firmware of the router. The firmware is the system running on the router. New firmware updates are regularly made available and can fix bugs and add new features. Backup Settings Click the Backup Settings menu item to save the current configuration of the router to a file for safe-keeping. Reset to Default Click the Reset to Default menu item to set the configuration of the router to the factory default settings.
Additional Product Information Establishing a wireless connection Windows XP (Service Pack 3) 1. 2. 3. 4. 5. Open the Network Connections control panel (Start -> Control Panel -> Network Connections): Right-click on your Wireless Network Connection and select View Available Wireless Networks: Select the wireless network listed on your included wireless security card and click Connect. Enter the network key (refer to the included wireless security card for the default wireless network key).
Troubleshooting Using the indicator lights (LEDs) to Diagnose Problems The LEDs are useful aides for finding possible problem causes. Power LED The Power LED does not light up. STEP CORRECTIVE ACTION 1 Make sure that the 4GM3W power adaptor is connected to the device and plugged in to an appropriate power source. Use only the supplied power adaptor. 2 Check that the 4GM3W and the power source are both turned on and device is receiving sufficient power. 3 Turn the 4GM3W off and on.
www.netcommwireless.
Technical Data The following table lists the hardware specifications of the 4GM3W. MODEL Wireless LAN Ethernet WAN/LAN port Connectivity LED Indicators Operating Temperature Power Input Dimensions & Weight Regulatory Compliance 4GM3W 1x1 Internal WiFi (IEEE 802.11ac) 2x2 Internal WiFi (IEEE802.11b/g/n) 1 x WAN/LAN port (10/100/1000Mbps) 1 x USB 2.
Safety and product care RF Exposure Your device contains a transmitter and a receiver. When it is on, it receives and transmits RF energy. When you communicate with your device, the system handling your connection controls the power level at which your device transmits. This device meets the government’s requirements for exposure to radio waves.
Do not expose your device or its accessories to open flames or lit tobacco products. Do not expose your device or its accessories to liquid, moisture or high humidity. Do not drop, throw or try to bend your device or its accessories. Do not use harsh chemicals, cleaning solvents, or aerosols to clean the device or its accessories. Do not paint your device or its accessories. Do not attempt to disassemble your device or its accessories, only authorised personnel must do so.
The level of interference will depend on the type of hearing device and the distance from the interference source, increasing the separation between them may reduce the interference. You may also consult your hearing aid manufacturer to discuss alternatives. www.netcommwireless.
Medical devices Please consult your doctor and the device manufacturer to determine if operation of your device may interfere with the operation of your medical device. Hospitals Switch off your wireless device when requested to do so in hospitals, clinics or health care facilities. These requests are designed to prevent possible interference with sensitive medical equipment.
Legal & Regulatory Information Intellectual Property Rights All intellectual property rights (including copyright and trade mark rights) subsisting in, relating to or arising out this Manual are owned by and vest in NetComm Wireless (ACN 002490486) (NetComm Wireless Limited) (or its licensors). This Manual does not transfer any right, title or interest in NetComm Wireless Limited’s (or its licensors’) intellectual property rights to you.
Product Warranty All NetComm Wireless products have a standard one (1) year warranty from date of purchase, however, some products have an extended warranty option (refer to packaging and the warranty card) (each a Product Warranty). To be eligible for the extended warranty option you must supply the requested warranty information to NetComm Wireless Limited within 30 days of the original purchase date by registering online via the NetComm Wireless web site at www.netcommwireless.com.
www.netcommwireless.
Contact Address: NETCOMM WIRELESS LIMITED Head Office PO Box 1200, Lane Cove NSW 2066 Australia Phone: +61(0)2 9424 2070 Fax: +61(0)2 9424 2010 Email: sales@netcommwireless.comtechsupport@netcommwireless.com NetComm Wireless 4GM3W User Guide 75 www.netcommwireless.