User Manual Insight Managed Business Router BR200 September 2021 202-12151-02 NETGEAR, Inc. 350 E.
Insight Managed Business Router BR200 Support and Community Visit netgear.com/support to get your questions answered and access the latest downloads. You can also check out our NETGEAR Community for helpful advice at community.netgear.com. Regulatory and Legal Si ce produit est vendu au Canada, vous pouvez accéder à ce document en français canadien à https://www.netgear.com/support/download/. (If this product is sold in Canada, you can access this document in Canadian French at https://www.netgear.
Contents Chapter 1 Set Up and Access the Router About this user manual and NETGEAR Insight.................................9 Set up the BR200 router with an Internet connection......................9 Set up the BR200 router to connect to a modem........................9 Set up the BR200 router to connect to the LAN of an existing router...............................................................................................12 Router management options..................................................
Insight Managed Business Router BR200 Manage port scan protection and denial of service protection.46 Set up a default DMZ server.........................................................47 Manage IGMP proxying................................................................48 Manage NAT filtering....................................................................48 Manage the SIP application-level gateway.................................49 Allow or block device access to your network........................
Insight Managed Business Router BR200 Change the PVID for a LAN port..................................................82 Remove a VLAN..............................................................................83 Manage reserved LAN IP addresses................................................84 Reserve a LAN IP Address for a LAN subnet..............................84 Change a reserved IP address for a LAN subnet.......................85 Remove a reserved IP address entry for a LAN subnet.............
Insight Managed Business Router BR200 Check the Internet connection status and manage the connection.........................................................................................118 Display the port statistics.................................................................119 Display the router status, CPU and memory usage, and temperature......................................................................................120 Display the WAN traffic processed on the router.....................
Insight Managed Business Router BR200 Application example: Port triggering for Internet Relay Chat.151 Chapter 10 Troubleshooting Reboot the router from the local browser interface....................154 Quick tips...........................................................................................154 Sequence to restart your network.............................................154 Check Ethernet cable connections............................................155 Network settings.........................
1 Set Up and Access the Router This user manual is for the NETGEAR Insight Managed Business Router BR200, in this manual referred to as the router. The router is designed to provide firewall and VPN functionality for small business environments with up to 50 users. The router functionality includes Network Address Translation (NAT) routing and classical routing, a configurable firewall, VLANs for guest networks and better network segmentation, and IPv6.
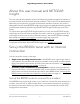
Insight Managed Business Router BR200 About this user manual and NETGEAR Insight This user manual describes the router’s local browser–based management interface, in this manual referred to as the local browser interface. That is, this manual describes the tasks that you can perform using the local browser interface.
Insight Managed Business Router BR200 After you physically connect the router, you can let the NETGEAR installation assistant set up your router automatically. For DSL service, you might need the following information to set up the Internet connection for your router: • The ISP configuration information for your DSL account. • The ISP login name and password. • Fixed or static IP address setting (special deployment by the ISP; this setting is rare).
Insight Managed Business Router BR200 You can also enter https://www.routerlogin.com or enter the IP address in this format: https://192.168.1.1. The default IP address for the router is 192.168.1.1. For security, we recommend that you enter https rather than http. However, if you enter http, the browser automatically redirects your request to https. Your browser might display a security message, which you can ignore (also see the following step). 7.
Insight Managed Business Router BR200 8. In the login window, enter admin for the user name and password for the password. The NETGEAR installation assistant starts and searches your Internet connection for servers and protocols to determine your Internet configuration. NETGEAR installation assistant guides you through connecting the router to the Internet and setting up a new admin password for the router.
Insight Managed Business Router BR200 To set up the BR200 router to connect to the LAN of another router and get an Internet connection: 1. Connect an Ethernet cable from the Internet WAN port on the BR200 router to a LAN port on a switch or hub that is connected to the LAN of the other router. You can also connect the Ethernet cable directly to a LAN port on the other router. 2. Connect the router to power.
Insight Managed Business Router BR200 pop-up window opens to let you confirm changes to your certificate trust settings, enter your Mac user name and password and click the Update Setting button. • Mozilla Firefox. If Mozilla Firefox displays a Your connection is not secure message, click the ADVANCED button. Then, click the Add Exception button. In the pop-up window that opens, click the Confirm Security Exception button. • Microsoft Internet Explore.
Insight Managed Business Router BR200 c. Read You cannot access the Internet on page 158. If problems persist, register your product and contact NETGEAR technical support. Note: The NETGEAR installation assistant runs only the first time that you set up the router. Router management options The router provides management options (which are not mutually exclusive) that let you discover the router on the network and configure, monitor, and control the router: • Local browser–based management interface.
Insight Managed Business Router BR200 Log in to the local browser interface After you set up the router and the router is connected to the Internet, you can view and change the router settings by connecting to the local browser–based management interface, in this manual referred to as the local browser interface. To access the local browser interface, the procedures in this manual use https://www.routerlogin.net. You can also enter https://www.routerlogin.
Insight Managed Business Router BR200 A login window opens. 3. Enter the router user name and password. The user name is admin. The password is the one that you specified when you set up your router. If you didn’t change the password, enter password. The user name and password are case-sensitive. The Dashboard displays. You can now monitor and change the settings of the router. Change the language of the local browser interface By default, the language of the local browser interface is set to English.
Insight Managed Business Router BR200 To use the NETGEAR Insight mobile app to add the router to an Insight managed network: 1. On your iOS or Android mobile device, visit the app store, search for NETGEAR Insight, and download the app. 2. Open the NETGEAR Insight app on your mobile device. 3. If you did not set up a NETGEAR account yet, tap Create NETGEAR Account and follow the onscreen instructions. 4. To log in to your NETGEAR account, enter your credentials and tap LOG IN. 5.
Insight Managed Business Router BR200 Access Insight to manage the router After you add the router to an Insight managed network (see Add the router to an Insight managed network on page 17), you can manage the router through one of the following methods: • Cloud access from a mobile device. After initial configuration, as long as your router is on a network with an Internet connection, you can access the router through the cloud using the Insight mobile app. • Insight Cloud Portal.
2 Specify Your Internet Settings Manually Usually, the quickest way to set up the Internet connection is to allow the NETGEAR installation assistant to detect the Internet connection when you first set up and access the router with a web browser.
Insight Managed Business Router BR200 Use the Internet Setup Wizard You can use the Setup Wizard to detect your Internet settings and automatically set up your router. Although the functionality is similar, the Setup Wizard is not the same as the NETGEAR installation assistant that runs the first time that you connect to your router to set it up. To use the Setup Wizard: 1. Launch a web browser from a computer or mobile device that is connected to the router network. 2. Enter https://www.routerlogin.net.
Insight Managed Business Router BR200 Manually set up the router Internet connection You can view or change the router’s Internet connection settings. Specify a dynamic or fixed IP address Internet connection without a login To specify or view the settings for an ISP or LAN Internet connection that uses a dynamic or fixed IP address and that does not require a login: 1. Launch a web browser from a computer or mobile device that is connected to the router network. 2. Enter https://www.routerlogin.net.
Insight Managed Business Router BR200 7. If your Internet connection requires a domain name, enter it in the Domain Name (If Required) field. For the other sections on this page, the default settings usually work, but you can change them. 8. Select an Internet IP Address radio button: • Get Dynamically. Depending on your router connection, your ISP uses DHCP to automatically assign your IP address, or another router on the LAN does so. • Use Static IP Address.
Insight Managed Business Router BR200 12. Click the Test button to test your Internet connection. If the NETGEAR website does not display within one minute, see You cannot access the Internet on page 158. Specify a PPPoE Internet connection that uses a login To specify or view the settings for an ISP Internet connection that uses PPPoE and that requires a login: 1. Launch a web browser from a computer or mobile device that is connected to the router network. 2. Enter https://www.routerlogin.net.
Insight Managed Business Router BR200 This is how long the router keeps the Internet connection active when no one on the network is using the Internet connection. A value of 0 (zero) means never log out. The default is 5 minutes. 12. Select an Internet IP Address radio button: • Get Dynamically. Your ISP uses DHCP to automatically assign your IP address. • Use Static IP Address. Enter the IP address, IP subnet mask, and the gateway IP address that your ISP assigned.
Insight Managed Business Router BR200 3. Enter the router user name and password. The user name is admin. The password is the one that you specified when you set up your router. If you didn’t change the password, enter password. The user name and password are case-sensitive. The Dashboard displays. 4. Select BASIC > Setup > WAN Setup. The WAN Setup page displays. 5. Select the Yes radio button. The settings on the page change. 6.
Insight Managed Business Router BR200 14. Select a Router MAC Address radio button: • Use Default Address. Use the default router MAC address that displays on the Dashboard page and the router label. • Use Computer MAC Address. If your router connects to a modem, the router captures and uses the MAC address of the computer that you are now using. You must use the one computer that the ISP allows. 15. Click the Apply button. Your settings are saved. 16.
Insight Managed Business Router BR200 Your Internet service provider (ISP) can provide this information.
Insight Managed Business Router BR200 4. Select ADVANCED > IPv6. The IPv6 page displays. 5. From the Internet Connection Type menu, select Auto Detect. The page adjusts. The router automatically detects the information in the following fields: • Connection Type. This field indicates the connection type that is detected. • Router’s IPv6 Address on WAN. This field shows the IPv6 address that is acquired for the router’s WAN (or Internet) interface.
Insight Managed Business Router BR200 Use Auto Config for an IPv6 Internet connection To set up an IPv6 Internet connection through autoconfiguration: 1. Launch a web browser from a computer or mobile device that is connected to the router network. 2. Enter https://www.routerlogin.net. Your browser might display a security message, which you can ignore. For more information, see Log in to the local browser interface on page 16. A login window opens. 3. Enter the router user name and password.
Insight Managed Business Router BR200 8. Select an IPv6 Domain Name Server (DNS) Address radio button: • Get Automatically from ISP. Your ISP uses DHCP to assign your DNS servers. Your ISP automatically assigns these addresses. • Use These DNS Servers. If you know that your ISP requires specific servers, select this option. Enter the IPv6 address of your ISP’s primary DNS server. If a secondary DNS server address is available, enter it also. 9.
Insight Managed Business Router BR200 3. Enter the router user name and password. The user name is admin. The password is the one that you specified when you set up your router. If you didn’t change the password, enter password. The user name and password are case-sensitive. The Dashboard displays. 4. Select ADVANCED > IPv6. The IPv6 page displays. 5. From the Internet Connection Type menu, select 6to4 Tunnel. The page adjusts.
Insight Managed Business Router BR200 10. Select an IPv6 Filtering radio button: • Secured. In secured mode, which is the default mode, the router inspects both TCP and UDP packets. • Open. In open mode, the router inspects UDP packets only. 11. Click the Apply button. Your settings are saved. Set up an IPv6 6rd Internet connection The 6rd protocol makes it possible to deploy IPv6 to sites using a service provider’s IPv4 network.
Insight Managed Business Router BR200 4. Select ADVANCED > IPv6. The IPv6 page displays. 5. From the Internet Connection Type menu, select 6rd Tunnel. The page adjusts. The router automatically detects the information in the following sections: • 6rd (IPv6 Rapid Development) Configuration. The router detects the service provider’s IPv4 network and attempts to establish an IPv6 6rd tunnel connection.
Insight Managed Business Router BR200 Your settings are saved. Set up an IPv6 fixed Internet connection To set up a fixed IPv6 Internet connection: 1. Launch a web browser from a computer or mobile device that is connected to the router network. 2. Enter https://www.routerlogin.net. Your browser might display a security message, which you can ignore. For more information, see Log in to the local browser interface on page 16. A login window opens. 3. Enter the router user name and password.
Insight Managed Business Router BR200 • Use DHCP Server. This method passes more information to LAN devices but some IPv6 systems might not support the DHCPv6 client function. • Auto Config. This is the default setting. This setting specifies how the router assigns IPv6 addresses to the devices on your home network (the LAN). 8. In the LAN Setup section, in the IPv6 Address/Prefix Length fields, specify the static IPv6 address and prefix length of the router’s LAN interface. 9.
Insight Managed Business Router BR200 The page adjusts. The router automatically detects the information in the following fields: • Router’s IPv6 Address on WAN. This field shows the IPv6 address that is acquired for the router’s WAN (or Internet) interface. The number after the slash (/) is the length of the prefix, which is also indicated by the underline (_) under the IPv6 address. If no address is acquired, the field displays Not Available. • Router’s IPv6 Address on LAN.
Insight Managed Business Router BR200 11. Select an IPv6 Filtering radio button: • Secured. In secured mode, which is the default mode, the router inspects both TCP and UDP packets. • Open. In open mode, the router inspects UDP packets only. 12. Click the Apply button. Your settings are saved. Set up an IPv6 PPPoE Internet connection To set up a PPPoE IPv6 Internet connection: 1. Launch a web browser from a computer or mobile device that is connected to the router network. 2. Enter https://www.
Insight Managed Business Router BR200 6. Either select the Use the same Login information as IPv4 PPPoE check box, or specify the PPPoE settings for IPv6: • Login. Enter the login name that your ISP gave you. • Password. Enter the password for the ISP connection. • Service Name (If Required). Enter a service name. If your ISP did not provide a service name, leave this field blank. Note: The default setting of the Connection Mode menu is Always On to provide a steady IPv6 connection.
Insight Managed Business Router BR200 Change the MTU size The maximum transmission unit (MTU) is the largest data packet a network device transmits. When one network device communicates across the Internet with another, the data packets travel through many devices along the way. If a device in the data path uses a lower MTU setting than the other devices, the data packets must be split or “fragmented” to accommodate the device with the smallest MTU.
Insight Managed Business Router BR200 4. Select ADVANCED > Firewall > Basic Setup. The firewall Basic Setup page displays. 5. In the MTU Size field, enter a value from 616 to 1500. The default size is 1500 bytes. 6. Click the Apply button. Your settings are saved. If you suspect an MTU problem, a common solution is to change the MTU to 1400. If you are willing to experiment, you can gradually reduce the MTU from the maximum value of 1500 until the problem goes away.
Insight Managed Business Router BR200 Set up a new Dynamic DNS account NETGEAR offers you the opportunity to set up and register for a free Dynamic DNS account. To set up Dynamic DNS and register for a free NETGEAR account: 1. Launch a web browser from a computer or mobile device that is connected to the router network. 2. Enter https://www.routerlogin.net. Your browser might display a security message, which you can ignore. For more information, see Log in to the local browser interface on page 16.
Insight Managed Business Router BR200 Specify a DNS account that you already created If you already created a Dynamic DNS account with NETGEAR, No-IP, or Dyn, you can set up the router to use your account. To set up Dynamic DNS if you already created an account: 1. Launch a web browser from a computer or mobile device that is connected to the router network. 2. Enter https://www.routerlogin.net. Your browser might display a security message, which you can ignore.
Insight Managed Business Router BR200 Change the Dynamic DNS settings You can change the settings for your Dynamic DNS account. To change your settings: 1. Launch a web browser from a computer or mobile device that is connected to the router network. 2. Enter https://www.routerlogin.net. Your browser might display a security message, which you can ignore. For more information, see Log in to the local browser interface on page 16. A login window opens. 3. Enter the router user name and password.
3 Manage the Firewall and Security The router comes with a built-in firewall that helps to protect your network from unwanted intrusions from the Internet and lets you control access to the Internet.
Insight Managed Business Router BR200 Manage the basic firewall settings The basic firewall settings let you manage port scan protection and denial of service (DoS) protection, specify whether the router can respond to a ping from the WAN port, set up a DMZ server, and manage IGMP proxying, NAT filtering, and the application-level gateway (ALG) for the Session Initiation Protocol (SIP). For information about the MTU size, which is another basic firewall setting, see Change the MTU size on page 40.
Insight Managed Business Router BR200 7. Click the Apply button. Your settings are saved. Set up a default DMZ server A default DMZ server is helpful when you are using some Internet services and videoconferencing applications that are incompatible with Network Address Translation (NAT). The router is programmed to recognize some of these applications and to work correctly with them, but other applications might not function well.
Insight Managed Business Router BR200 6. Enter the LAN IP address of the computer that must function as the DMZ server. 7. Click the Apply button. Your settings are saved. Manage IGMP proxying IGMP proxying allows a computer or mobile device on the LAN to receive the multicast traffic it is interested in from the Internet. If you do not need this feature, leave it disabled, which is the default setting. To enable IGMP proxying: 1.
Insight Managed Business Router BR200 applications from working. Open NAT provides a much less secured firewall but allows almost all Internet applications to work. Secured NAT is the default setting. To change the default NAT filtering settings: 1. Launch a web browser from a computer or mobile device that is connected to the router network. 2. Enter https://www.routerlogin.net. Your browser might display a security message, which you can ignore.
Insight Managed Business Router BR200 Your browser might display a security message, which you can ignore. For more information, see Log in to the local browser interface on page 16. A login window opens. 3. Enter the router user name and password. The user name is admin. The password is the one that you specified when you set up your router. If you didn’t change the password, enter password. The user name and password are case-sensitive. The Dashboard displays. 4. Select ADVANCED > Firewall > Basic Setup.
Insight Managed Business Router BR200 3. Enter the router user name and password. The user name is admin. The password is the one that you specified when you set up your router. If you didn’t change the password, enter password. The user name and password are case-sensitive. The Dashboard displays. 4. Select ADVANCED > Firewall > Access Control. The Access Control page displays. 5. Select the Turn on Access Control check box.
Insight Managed Business Router BR200 Manage network access control lists You can use access control to block or allow device access to your network. An access control list (ACL) functions with the MAC addresses of wired and mobile devices that can either access your entire network or are blocked from accessing your entire network. The router can detect the MAC addresses of devices that are connected to the network and list the MAC addresses of devices that were connected to the network.
Insight Managed Business Router BR200 6. To add a device to the allowed list, do the following: a. Click the Add button. The Add Allowed Device slide-out panel opens. b. Enter the MAC address and device name for the device that you want to allow. c. In the Add Allowed Device slide-out panel, click the Apply button. The device is added to the allowed list on the Access Control page. 7. To remove a device from the allowed list, do the following: a. Select the check box for the device. b.
Insight Managed Business Router BR200 A table displays the detected device name, MAC address, and connection type of the devices that are not connected and are blocked from accessing the network. 6. To add a device to the blocked list, do the following: a. Click the Add button. The Add Blocked Device slide-out panel opens. b. Enter the MAC address and device name for the device that you want to block. c. In the Add Blocked Device slide-out panel, click the Apply button.
Insight Managed Business Router BR200 3. Enter the router user name and password. The user name is admin. The password is the one that you specified when you set up your router. If you didn’t change the password, enter password. The user name and password are case-sensitive. The Dashboard displays. 4. Select ADVANCED > Security > Block Sites. The Block Sites page displays. 5. Specify a keyword blocking option: • Per Schedule. Use keyword blocking according to a schedule that you set.
Insight Managed Business Router BR200 Your browser might display a security message, which you can ignore. For more information, see Log in to the local browser interface on page 16. A login window opens. 3. Enter the router user name and password. The user name is admin. The password is the one that you specified when you set up your router. If you didn’t change the password, enter password. The user name and password are case-sensitive. The Dashboard displays. 4. Select ADVANCED > Security > Block Sites.
Insight Managed Business Router BR200 4. Select ADVANCED > Security > Block Sites. The Block Sites page displays. 5. In the Block sites containing these keywords or domain names field, select the keyword or domain. 6. Click the Delete keyword button. The keyword or domain is removed from the blocked list. 7. Click the Apply button. Your settings are saved. Remove all keywords and domains from the blocked list You can simultaneously remove all keywords and domains from the blocked list.
Insight Managed Business Router BR200 Block specific services and applications from the Internet You can add service blocking rules to prevent access from your LAN to specific services and applications on the Internet. In addition, you can specify if a blocking rule applies to one user, a range of users, or all users on your LAN. The router lists many default services and applications that you can use in blocking rules. You can also add a service blocking rule for a custom service or application.
Insight Managed Business Router BR200 6. Click the Add button. The Add Services Blocking slide-out panel opens. 7. From the Service Type menu, select the service or application to be covered by this rule. The Protocol, Starting Port, and Ending Port fields are automatically populated when you select the service or application.
Insight Managed Business Router BR200 Your browser might display a security message, which you can ignore. For more information, see Log in to the local browser interface on page 16. A login window opens. 4. Enter the router user name and password. The user name is admin. The password is the one that you specified when you set up your router. If you didn’t change the password, enter password. The user name and password are case-sensitive. The Dashboard displays. 5.
Insight Managed Business Router BR200 • Only This IP Address. Enter the required address in the fields to apply the rule to a single device on your LAN. • IP Address Range. Enter the required addresses in the start and end fields to apply the rule to a range of devices. • All IP Addresses. All computers and devices on your LAN are covered by this rule. By default, the All IP Addresses radio button is selected. 11. Click the Add button. The new rule is added to the Service Table on the Block Services page.
Insight Managed Business Router BR200 Your settings are saved. The modified rule displays in the Service Table on the Block Services page and the changes go into effect immediately. Remove a service blocking rule You can remove a service blocking rule that you no longer need. To remove a service blocking rule: 1. Launch a web browser from a computer or mobile device that is connected to the router network. 2. Enter https://www.routerlogin.net.
Insight Managed Business Router BR200 on page 58), or both. Without a schedule, you can only enable or disable these features. By default, no schedule is set. To set up a schedule: 1. Launch a web browser from a computer or mobile device that is connected to the router network. 2. Enter https://www.routerlogin.net. Your browser might display a security message, which you can ignore. For more information, see Log in to the local browser interface on page 16. A login window opens. 3.
Insight Managed Business Router BR200 Manage custom firewall traffic rules A firewall protects one network (the trusted network, such as your LAN) from another (the untrusted network, such as the Internet), while allowing communication between the two. Traffic rules define policies for packets traveling between different zones, for example to reject traffic between certain hosts or to open WAN ports on the router.
Insight Managed Business Router BR200 5. Click the Add button. The Add Traffic Rule slide-out panel opens. 6. In the Name field, enter a name for the traffic rule. The name is for identification purposes. 7. From the Protocol menu, select the protocol to which the rule must apply. By default, the selection is ALL and the rule applies to the ICMP, UDP, and TCP protocols. 8. Specify the source or sources from which the traffic originates by doing the following: a. Select a Source Zone radio button: • LAN.
Insight Managed Business Router BR200 10. Specify the action for the rule by making a selection from the Action menu: • ACCEPT. Traffic that conforms to the rule is accepted from its origination and sent to its destination. • DROP. Traffic that conforms to the rule is dropped. 11. (Optional). In the Extra arguments field, enter arguments that are added to the iptables for the rule. This is an advanced option and we recommend that you use care adding arguments to this field.
Insight Managed Business Router BR200 7. Click the Apply button. The modified rule displays in the table on the Traffic Rules page and the changes go into effect immediately. Remove a traffic rule If you no longer need a traffic rule, you can remove it from the firewall. To remove a traffic rule from the firewall: 1. Launch a web browser from a computer or mobile device that is connected to the router network. 2. Enter https://www.routerlogin.net.
Insight Managed Business Router BR200 A login window opens. 3. Enter the router user name and password. The user name is admin. The password is the one that you specified when you set up your router. If you didn’t change the password, enter password. The user name and password are case-sensitive. The Dashboard displays. 4. Select ADVANCED > Firewall > Traffic Rules. The Traffic Rules page displays. 5. Do one of the following: • Remove several rules. Select the check boxes to the left of the rules.
4 Manage the LAN and VLAN Settings This chapter describes how you can manage the local area network (LAN) and virtual LAN (VLAN) settings of the router.
Insight Managed Business Router BR200 Change the router network device name The router’s default network device name is the router model number (BR200). This device name displays in, for example, a file manager when you browse your network. To change the router network device name: 1. Launch a web browser from a computer or mobile device that is connected to the router network. 2. Enter https://www.routerlogin.net. Your browser might display a security message, which you can ignore.
Insight Managed Business Router BR200 Change the LAN IP address settings for a LAN subnet The router is preconfigured to use private IP addresses on the LAN side and to act as a DHCP server. The router’s LAN IP configuration for the default LAN subnet (LAN1) is as follows: • LAN IP address. 192.168.1.1 (this is the same as www.routerlogin.net) • Subnet mask. 255.255.255.0 • VLAN ID.
Insight Managed Business Router BR200 6. In the IP Address fields, enter the LAN IP address. If you change the IP address for the default LAN subnet (LAN1), the LAN IP address for the router changes. 7. In the IP Subnet Mask fields, enter the LAN subnet mask. If you change the IP subnet mask for the default LAN subnet, the LAN IP subnet mask for the router changes. 8. Click the Apply button. Your settings are saved.
Insight Managed Business Router BR200 The user name is admin. The password is the one that you specified when you set up your router. If you didn’t change the password, enter password. The user name and password are case-sensitive. The Dashboard displays. 4. Select BASIC > Setup > LAN Setup. The LAN Setup page displays for the default LAN subnet (LAN1). 5.
Insight Managed Business Router BR200 To disable the DHCP server for a LAN subnet: 1. Launch a web browser from a computer or mobile device that is connected to the router network. 2. Enter https://www.routerlogin.net. Your browser might display a security message, which you can ignore. For more information, see Log in to the local browser interface on page 16. A login window opens. 3. Enter the router user name and password. The user name is admin.
Insight Managed Business Router BR200 The user name is admin. The password is the one that you specified when you set up your router. If you didn’t change the password, enter password. The user name and password are case-sensitive. The Dashboard displays. 4. Select BASIC > Setup > LAN Setup. The LAN Setup page displays for the default LAN subnet (LAN1). 5. From the RIP Direction menu, select the RIP direction: • Both.
Insight Managed Business Router BR200 3. Enter the router user name and password. The user name is admin. The password is the one that you specified when you set up your router. If you didn’t change the password, enter password. The user name and password are case-sensitive. The Dashboard displays. 4. Select BASIC > Setup > LAN Setup. The LAN Setup page displays for the default LAN subnet (LAN1). 5. Click the Add Subnet button. The Add New Subnet slide-out panel opens.
Insight Managed Business Router BR200 Remove a LAN subnet If you no longer need a LAN subnet, you can remove it. Before you remove it, make sure that no clients are connected to the LAN subnet. You cannot remove the default LAN subnet (LAN1). Note: If you added two LAN subnets, LAN2 and LAN3, and you remove LAN2, the old LAN3 becomes the new LAN 2. That is, the name changes from LAN3 to LAN2. To remove a LAN subnet: 1.
Insight Managed Business Router BR200 Manage VLANs The router supports virtual LANs (VLANs). This section describes how you can manage them. VLAN concepts You can define a local area network (LAN) as a broadcast domain. Hubs, bridges, switches, and WiFi access points in the same physical segment or segments connect all end nodes. End nodes can communicate with each other without a router. Routers connect LANs, routing the traffic to each appropriate port.
Insight Managed Business Router BR200 VLAN, you can assign a single VLAN ID only as the port VLAN identifier (PVID). By default, all four LAN ports of the router are assigned to the default VLAN, or VLAN 1, and all untagged traffic is routed through the default VLAN. Therefore, by default, all four LAN ports are assigned the default PVID 1. However, you can change the configuration of VLAN 1 and you can assign another PVID to a LAN port.
Insight Managed Business Router BR200 Another potential benefit is that a management VLAN can help you minimize the impact of a broadcast storm on other VLANs by giving you a separate path to access your network. On the router, the management VLAN (VLAN 1) is also the native or default VLAN. By default, all ports are members of the default VLAN. For the management VLAN to be secure, it must be used only for controlling and managing your network devices.
Insight Managed Business Router BR200 5. Click the Add button. The Add VLAN slide-out panel opens. 6. In the VLAN ID field, enter a VLAN ID. The ID must be in the range from 3 to 4094. (IDs 1 and 2 are already in use.) 7. In the Name field, enter a name for the VLAN. The name is for identification purposes. 8. Specify the port members of the VLAN by doing the following: a. Select the check boxes for the ports the must be members of the VLAN. b. From the menu for each port, select TAG or UNTAG.
Insight Managed Business Router BR200 4. Select ADVANCED > VLAN. The VLAN page displays. 5. In the table, click the blue pencil icon for the VLAN. The Edit VLAN slide-out panel opens. 6. Change the settings for the VLAN. For more information about the settings, see Add a VLAN on page 80. 7. Click the Apply button. The modified VLAN displays in the table on the VLAN page. Change the PVID for a LAN port By default, all LAN ports are assigned a PVID of 1 because they are members of VLAN 1.
Insight Managed Business Router BR200 Your settings are saved. Remove a VLAN If you no longer need a VLAN, you can remove it. You cannot remove VLAN 1 and VLAN 2. To remove a VLAN: 1. Launch a web browser from a computer or mobile device that is connected to the router network. 2. Enter https://www.routerlogin.net. Your browser might display a security message, which you can ignore. For more information, see Log in to the local browser interface on page 16. A login window opens. 3.
Insight Managed Business Router BR200 Manage reserved LAN IP addresses When you specify a reserved IP address for a device on a LAN subnet, that device always receives the same IP address each time it accesses the router’s DHCP server on that LAN subnet. Reserve a LAN IP Address for a LAN subnet You can assign a reserved IP address for a device such as a computer or server that requires permanent IP settings. To reserve an IP address for a LAN subnet: 1.
Insight Managed Business Router BR200 8. Click the Add button. The reserved address is entered into the Address Reservation table on the LAN Setup page for the LAN subnet. The reserved address is not assigned until the next time the computer or device contacts the router’s DHCP server. Reboot the computer or device, or access its IP configuration and force a DHCP release and renew. Change a reserved IP address for a LAN subnet You can change an existing reserved IP address entry for a LAN subnet.
Insight Managed Business Router BR200 Remove a reserved IP address entry for a LAN subnet You can remove a reserved IP address entry that you no longer need. To remove a reserved IP address entry for a LAN subnet: 1. Launch a web browser from a computer or mobile device that is connected to the router network. 2. Enter https://www.routerlogin.net. Your browser might display a security message, which you can ignore. For more information, see Log in to the local browser interface on page 16.
Insight Managed Business Router BR200 • Your company’s network address is 134.177.0.0. When you first configured your router, two implicit static routes were created. A default route was created with your ISP as the gateway and a second static route was created to your local network for all 192.168.1.x addresses. With this configuration, if you attempt to access a device on the 134.177.0.0 network, your router forwards your request to the ISP.
Insight Managed Business Router BR200 6. In the Name field, enter a name for the route. The name is for identification purposes. 7. To make the route private, select the Private check box. A private static route is not reported in RIP. 8. To prevent the route from becoming active after you click the Apply button, clear the Active check box. In some situations, you might want to set up a static route but keep it disabled until a later time.
Insight Managed Business Router BR200 The user name is admin. The password is the one that you specified when you set up your router. If you didn’t change the password, enter password. The user name and password are case-sensitive. The Dashboard displays. 4. Select ADVANCED > Static Routes. The Static Routes page displays. 5. In the Static Routes table, select the radio button for the route. 6. Click the Edit button. The Edit IPv4 Static Route slide-out panel opens. 7. Change the settings for the route.
Insight Managed Business Router BR200 A warning pop-up window opens. 7. Click the OK button. The route is removed from the table on the Static Routes page. Enable an IPTV bridge for a port group or VLAN tag group Some devices, such as an Internet Protocol television (IPTV), cannot function behind the router’s Network Address Translation (NAT) service or firewall.
Insight Managed Business Router BR200 The IPTV page displays. 5. Select the Enable VLAN/Bridge group check box. The page expands. 6. Select the By bridge group radio button. The page adjusts. 7. Select the check box for the wired (LAN) port to which the IPTV device is connected. You must select at least one LAN port. You can select more than one LAN port. 8. Click the Apply button. Your settings are saved.
Insight Managed Business Router BR200 A login window opens. 3. Enter the router user name and password. The user name is admin. The password is the one that you specified when you set up your router. If you didn’t change the password, enter password. The user name and password are case-sensitive. The Dashboard displays. 4. Select ADVANCED > IPTV. The IPTV page displays. 5. Select the Enable VLAN/Bridge group check box. The page expands. 6. Select the By VLAN tag group radio button.
5 Optimize Performance You can set up the router to dynamically optimize performance for sevices and applications such as Internet gaming, high-definition video streaming, and VoIP communication.
Insight Managed Business Router BR200 Use Dynamic QoS to optimize Internet traffic management Dynamic Quality of Service (QoS) helps improve your router’s Internet traffic management capabilities through better application and device identification, bandwidth allocation, and traffic prioritization techniques. Dynamic QoS resolves traffic congestion when the Internet bandwidth is limited and different demands compete for bandwidth. Note: QoS does not increase your total Internet bandwidth or throughput.
Insight Managed Business Router BR200 6. To specify your Internet bandwidth, do one of the following (although we recommend that you use the automatic speed test): • Use the automatic speed test. Do the following: a. Make sure that the Let Speedtest detect my Internet bandwidth radio button is selected. By default, this radio button is selected. b. For more accurate speed test results, make sure that no other devices are accessing the Internet while your perform the automatic speedtest. c.
Insight Managed Business Router BR200 Your browser might display a security message, which you can ignore. For more information, see Log in to the local browser interface on page 16. A login window opens. 3. Enter the router user name and password. The user name is admin. The password is the one that you specified when you set up your router. If you didn’t change the password, enter password. The user name and password are case-sensitive. The Dashboard displays. 4. Select ADVANCED > QoS Setup.
Insight Managed Business Router BR200 4. Select ADVANCED > QoS Setup. The QoS Setup page displays. The version and release date of the installed database display. 5. Click the Update Now button. The router checks for the newest version of the database and downloads it. 6. Click the Apply button. Your settings are saved.
Insight Managed Business Router BR200 By default, this check box is selected. If the Turn UPnP On check box is cleared, the router does not allow any device to automatically control router resources, such as port forwarding. 6. Type the advertisement period in minutes. The advertisement period specifies how often the router broadcasts its UPnP information. This value can range from 1 to 1440 minutes. The default period is 30 minutes.
6 Maintain the Router This chapter describes how you can maintain the router by managing the firmware, configuration file, admin password, and logs and by setting up the traffic meter.
Insight Managed Business Router BR200 Check for new firmware and update the router From time to time, or as needed, NETGEAR makes new firmware available. The firmware is stored in flash memory. To download new firmware manually and update your router: 1. Launch a web browser from a computer or mobile device that is connected to the router network. 2. Enter https://www.routerlogin.net. Your browser might display a security message, which you can ignore.
Insight Managed Business Router BR200 A warning pop-up window might open. 10. If a warning pop-up window opens, click the OK button. The current version and the version that you intend to upload display. 11. Click the Yes button. WARNING: To avoid the risk of corrupting the firmware, do not interrupt the upload. For example, do not close the browser, click a link, or load a new page. Do not turn off the router. Wait until the router finishes restarting and the Power LED turns solid green.
Insight Managed Business Router BR200 To set the password for the user name admin: 1. Launch a web browser from a computer or mobile device that is connected to the router network. 2. Enter https://www.routerlogin.net. Your browser might display a security message, which you can ignore. For more information, see Log in to the local browser interface on page 16. A login window opens. 3. Enter the router user name and password. The user name is admin.
Insight Managed Business Router BR200 Your browser might display a security message, which you can ignore. For more information, see Log in to the local browser interface on page 16. A login window opens. 3. Enter the router user name and password. The user name is admin. The password is the one that you specified when you set up your router. If you didn’t change the password, enter password. The user name and password are case-sensitive. The Dashboard displays. 4. Select BASIC > Setup > Set Password.
Insight Managed Business Router BR200 5. Click the Continue button. A window opens requesting the answers to your security questions. 6. Enter the saved answers to your security questions. 7. Click the Continue button. A window opens and displays your recovered password. 8. Click the Login again button. A login window opens. 9. With your recovered password, log in to the router.
Insight Managed Business Router BR200 The backup file ends in .cfg. 7. Follow the directions of your browser to save the file. Restore the router configuration settings If you backed up the configuration file, you can restore the configuration settings from this file. To restore configuration settings that you backed up: 1. Launch a web browser from a computer or mobile device that is connected to the router network. 2. Enter https://www.routerlogin.net.
Insight Managed Business Router BR200 Return the router to its factory default settings Under some circumstances (for example, if you lost track of the changes that you made to the router settings or you move the router to a different network), you might want to erase the configuration and reset the router to factory default settings. If you do not know the current IP address of the router, first try to use the NETGEAR Insight mobile app or an IP scanner application to detect the IP address.
Insight Managed Business Router BR200 Erase the settings CAUTION: This process erases all settings that you configured in the router. To erase the settings: 1. Launch a web browser from a computer or mobile device that is connected to the router network. 2. Enter https://www.routerlogin.net. Your browser might display a security message, which you can ignore. For more information, see Log in to the local browser interface on page 16. A login window opens. 3. Enter the router user name and password.
Insight Managed Business Router BR200 Manage the activity log The log is a detailed record of the websites that users on your network accessed or attempted to access and many other router actions. You can manage which activities are logged. Specify which activities the router logs You can specify which activities the router logs. These activities display in the log. To manage which activities are logged: 1. Launch a web browser from a computer or mobile device that is connected to the router network. 2.
Insight Managed Business Router BR200 6. Clear the check boxes that correspond to the activities that you do not want to be logged. 7. Click the Apply button. Your settings are saved. View or clear the logs In addition to viewing the logs, you can clear them. To view or clear the logs: 1. Launch a web browser from a computer or mobile device that is connected to the router network. 2. Enter https://www.routerlogin.net. Your browser might display a security message, which you can ignore.
Insight Managed Business Router BR200 Monitor and meter Internet traffic Traffic metering allows you to monitor the volume of Internet traffic that passes through the router WAN port. With the traffic meter utility, you can set limits for traffic volume, set a monthly limit, and get a live update of traffic usage. Start the traffic meter without traffic restrictions You can monitor the traffic volume without setting a limit on the volume or connection time.
Insight Managed Business Router BR200 Restrict Internet traffic by volume You can record and restrict the traffic by volume in MB. This is useful when your ISP measures your traffic volume. To record and restrict the Internet traffic by volume: 1. Launch a web browser from a computer or mobile device that is connected to the router network. 2. Enter https://www.routerlogin.net. Your browser might display a security message, which you can ignore.
Insight Managed Business Router BR200 12. Select one or more of the following actions to occur when the limit is reached: • Turn the Internet LED to flashing green/amber. This setting is optional. When the traffic limit is reached, the Internet LED alternates blinking green and amber. • Disconnect and disable the Internet connection. This setting is optional. When the traffic limit is reached, the Internet connection is disconnected and disabled. 13. Click the Apply button. Your settings are saved.
Insight Managed Business Router BR200 The router must be connected to the Internet for you to be able to enter information in the Monthly Limit field. 8. In the Traffic Counter section, set the traffic counter to begin at a specific time and date. 9. In the Traffic Control section, enter a value in minutes to specify when the router issues a warning message before the monthly limit in hours is reached. This setting is optional.
Insight Managed Business Router BR200 4. Select ADVANCED > Traffic Meter. The Traffic Meter page displays. 5. Scroll down to the Internet Traffic Statistics section. The Internet Traffic Statistics section displays when the traffic counter was started and what the traffic balance is. The table displays information about the connection time and traffic volume in MB. 6. To refresh the information onscreen, click the Refresh button. The information is updated. 7.
Insight Managed Business Router BR200 5. In the Traffic Control section, clear the Disconnect and disable the Internet connection check box. 6. Click the Apply button. Your settings are saved.
7 Monitor the router and the router network This chapter describes how you can monitor the router and the router network.
Insight Managed Business Router BR200 View devices currently on the network You can view the active wired devices (also called attached devices) in the router network. To display the wired devices: 1. Launch a web browser from a computer or mobile device that is connected to the router network. 2. Enter https://www.routerlogin.net. Your browser might display a security message, which you can ignore. For more information, see Log in to the local browser interface on page 16. A login window opens. 3.
Insight Managed Business Router BR200 Check the Internet connection status and manage the connection To check the Internet connection status and manage the connection: 1. Launch a web browser from a computer or mobile device that is connected to the router network. 2. Enter https://www.routerlogin.net. Your browser might display a security message, which you can ignore. For more information, see Log in to the local browser interface on page 16. A login window opens. 3.
Insight Managed Business Router BR200 • Lease Expires. The date and time that the lease expires. 5. To release (stop) the Internet connection, click the Release button. 6. To renew (restart) the Internet connection, click the Renew button. Display the port statistics To display the port statistics: 1. Launch a web browser from a computer or mobile device that is connected to the router network. 2. Enter https://www.routerlogin.net. Your browser might display a security message, which you can ignore.
Insight Managed Business Router BR200 Display the router status, CPU and memory usage, and temperature To display the router status, CPU and memory usage, and temperature: 1. Launch a web browser from a computer or mobile device that is connected to the router network. 2. Enter https://www.routerlogin.net. Your browser might display a security message, which you can ignore. For more information, see Log in to the local browser interface on page 16. A login window opens. 3.
Insight Managed Business Router BR200 Display the WAN traffic processed on the router To display the uploaded and downloaded WAN traffic that the router processed. 1. Launch a web browser from a computer or mobile device that is connected to the router network. 2. Enter https://www.routerlogin.net. Your browser might display a security message, which you can ignore. For more information, see Log in to the local browser interface on page 16. A login window opens. 3. Enter the router user name and password.
Insight Managed Business Router BR200 The Dashboard displays. The DOWNLOAD THROUGHPUT pane and UPLOAD THROUGHPUT pane display the throughput rate in Bytes per second (B/s, see the vertical rate bar) over time (see the horizontal time bar) for the WAN port, for all LAN port together, and for each LAN port individually. 4. To view more information about the throughput, point to a node on the horizontal time bar. A pop-up window opens and displays specific throughput information. 5.
8 Set Up VPN Connections You can do the following to set up VPN connections: • Use IPSec VPN. With IPSec VPN, you can set up a site-to-site VPN connection between a NETGEAR BR200 and another VPN router, each at a different site. This setup lets you connect two local LANs and join separate networks together as if they were physically connected and colocated. • Use OpenVPN.
Insight Managed Business Router BR200 Set up an IPSec VPN connection You can set up a site-to-site VPN tunnel using IP security (IPSec) between two VPN routers. You do not need to install software such as OpenVPN to establish an IPSec tunnel, but the router at the other site must be capable of supporting IPSec VPN. The IPSec settings on each VPN router must be consistent for the tunnel to function.
Insight Managed Business Router BR200 For this phase, the routers use the following: - To secure the tunnel, the Encapsulating Security Protocol (ESP) - For encryption, an encryption algorithm (MD5 or an SHA version) - For an integrity check (that is, to verify that the network traffic is not altered during transmission in the tunnel), a hash algorithm (3DES or an AES version) - As an option for verification and exchange of keys, a Diffie-Hellman group algorithm from DH1 (less secure) to DH24 (more
Insight Managed Business Router BR200 Table 2. Default Phase 1 and Phase 2 settings for IKE1 and IKE2 (Continued) Setting Defaults DPD Interval 10 seconds Phase 2 settings Proposal esp, sha1, aes256 PFS (IKE1 only) Disabled SA Lifetime 28800 seconds For more information about these default settings, see Customize Phase 1 and Phase 2 settings for an IPSec policy on page 127. To add an IPSec VPN policy on the router and use the default Phase 1 and Phase 2 settings: 1.
Insight Managed Business Router BR200 The IP address is usually a public (WAN) IP address or DNS name. A DNS name can be up to 255 characters. 8. Specify the remote LAN and local LAN settings: • Remote Subnet. The LAN IP subnet address of the remote VPN router. • Remote Mask. The LAN IP subnet mask of the remote VPN router. • Local Subnet. The LAN IP subnet address of the local VPN router (that is, the router that you are currently configuring). • Local Mask.
Insight Managed Business Router BR200 To customize the Phase 1 and Phase 2 settings for an IPSec policy: 1. Launch a web browser from a computer or mobile device that is connected to the router network. 2. Enter https://www.routerlogin.net. Your browser might display a security message, which you can ignore. For more information, see Log in to the local browser interface on page 16. A login window opens. 3. Enter the router user name and password. The user name is admin.
Insight Managed Business Router BR200 Table 3. Phase 1 settings (Continued) Setting Options Exchange Mode Main Mode. This mode is slower than the aggressive mode but more secure. This is the default mode. Aggressive Mode. This mode is faster than the main mode but less secure. This mode is not available for IKE2. Negotiation Mode Initiator/Responder Mode. The router can both initiate a connection to the remote VPN router and respond to an IKE request from the remote VPN router.
Insight Managed Business Router BR200 Table 4. Phase 2 settings (Continued) Setting Options PFS For IKE1, you can enable Perfect Forward Secrecy (PFS) and select a Diffie-Hellman (DH) group algorithm. For IKE2, you cannot enable PFS. no (= DH is disabled, default) dh1, dh2, dh5, dh14, dh15, dh16, dh17, dh18, dh19, dh20, dh21, dh22, dh23, or dh24 Note: The higher the DH group, the more secure the exchange. SA Lifetime The period in seconds for which the IKE security association (SA) is valid.
Insight Managed Business Router BR200 The Dashboard displays. 4. Select ADVANCED > IPSec VPN. The IPSec VPN Policy List page displays. 5. For the VPN tunnel that you want enable or disable, do one of the following: • Enable. Click the button in the Operation column so that the button moves to the right and displays blue. • Disable. Click the button in the Operation column so that the button moves to the left and displays gray. 6. Click the Refresh button.
Insight Managed Business Router BR200 The user name is admin. The password is the one that you specified when you set up your router. If you didn’t change the password, enter password. The user name and password are case-sensitive. The Dashboard displays. 4. Select ADVANCED > IPSec VPN. The IPSec VPN Policy List page displays. 5. In the IPSec VPN Policy List, click the blue pencil icon for the VPN policy that you want to change. The Edit Policy slide-out panel opens. 6. Change the settings as needed.
Insight Managed Business Router BR200 The user name is admin. The password is the one that you specified when you set up your router. If you didn’t change the password, enter password. The user name and password are case-sensitive. The Dashboard displays. 4. Select ADVANCED > IPSec VPN. The IPSec VPN Policy List page displays. 5. In the IPSec VPN Policy List, click the red trash can icon for the VPN policy that you want to remove. A warning pop-up window opens. 6. Click the OK button.
Insight Managed Business Router BR200 Note: Make sure that remote clients install their VPN configuration files after you configure OpenVPN on the router. If you make changes to the OpenVPN configuration on the router, the VPN configuration files that the remote clients use might change, requiring the remote clients to download and install the new VPN configuration files. To enable and configure OpenVPN on the router: 1.
Insight Managed Business Router BR200 to the VPN client, or if a user cannot access some sites on the Internet, select another radio button. • All sites on the Internet & BR200 Network. The VPN client can access the Internet and all sites and services on the router network, that is, behind the router firewall. Accessing the Internet remotely through a VPN connection might be slower than accessing the Internet directly. • BR200 Network only.
Insight Managed Business Router BR200 The Dashboard displays. 5. Select ADVANCED > Open VPN. The Open VPN Service page displays. 6. Make sure that the Open VPN Service check box is selected. For more information, see Enable and configure OpenVPN on the router on page 133. 7. In the OpenVPN configuration package download section, click the For Windows button, and download the router’s VPN configuration files. 8.
Insight Managed Business Router BR200 Install the OpenVPN client utility and VPN configuration files on a Mac To download and install the OpenVPN client utility and the router’s VPN configuration files on a Mac: 1. Visit code.google.com/p/tunnelblick/, download the OpenVPN client utility for a Mac, and install it on the Mac. You might need administrative privileges to install the OpenVPN client utility. 2. Launch a web browser from a computer or mobile device that is connected to the router network. 3.
Insight Managed Business Router BR200 Install the OpenVPN client utility and VPN configuration files on an iOS device To download and install the OpenVPN client utility and the router’s VPN configuration files on an iOS device: 1. On your iOS device, visit the Apple app store and download and install the OpenVPN Connect app. 2. Launch a web browser from the iOS device or a computer that is connected to the router network. 3. Enter https://www.routerlogin.net.
Insight Managed Business Router BR200 Install the OpenVPN client utility and VPN configuration files on an Android device To download and install the OpenVPN client utility and the router’s VPN configuration files on an Android device: 1. On your Android device, visit the Google Play Store and download and install the OpenVPN Connect app. 2. Launch a web browser from the Android device or a computer that is connected to the router network. 3. Enter https://www.routerlogin.net.
9 Manage Port Forwarding and Port Triggering Traffic Rules As an advanced function of the firewall, you can use port forwarding and port triggering to set up port traffic rules for Internet services and applications. These rules apply specifically to ports. You need networking knowledge to set up port traffic rules.
Insight Managed Business Router BR200 Manage port forwarding to a local server for services and applications If a server is part of your network, you can allow certain types of incoming traffic to reach the server. For example, you might want to make a local web server, FTP server, or game server visible and available to the Internet. The router can forward incoming traffic with specific protocols to computers on your local network.
Insight Managed Business Router BR200 8. From the Service Name menu, select the service or application. If the service or application that you want to add is not in the list, create a port forwarding rule with a custom service or application (see Add a port forwarding rule for a custom service or application on page 142). 9. In the Server IP Address field, enter the IP address of the computer that must provide the service or that runs the application. 10. Click the Add button.
Insight Managed Business Router BR200 The Add Custom Services slide-out panel opens. 8. Set up a new port forwarding rule for a custom service or application by specifying the following settings: • Service Name. Enter the name of the custom service or application. • Service Type. Select the protocol (TCP or UDP) that is associated with the service or application. If you are unsure, select TCP/UDP. • External port range.
Insight Managed Business Router BR200 A login window opens. 3. Enter the router user name and password. The user name is admin. The password is the one that you specified when you set up your router. If you didn’t change the password, enter password. The user name and password are case-sensitive. The Dashboard displays. 4. Select ADVANCED > Firewall > Port Forwarding / Port Triggering. The Port Forwarding / Port Triggering page displays. 5. Make sure that the Port Forwarding radio button is selected. 6.
Insight Managed Business Router BR200 4. Select ADVANCED > Firewall > Port Forwarding / Port Triggering. The Port Forwarding / Port Triggering page displays. 5. Make sure that the Port Forwarding radio button is selected. 6. In the table, select the radio button for the service or application name. 7. Click the Delete Service button. A warning pop-up window opens. 8. Click the OK button. The rule is removed from the table. A default rule remains available in the Service Name menu. A custom rule is removed.
Insight Managed Business Router BR200 How the router implements a port forwarding rule The following sequence shows the effects of a port forwarding rule: 1. When you enter the URL www.example.com in your browser, the browser sends a web page request message with the following destination information: • Destination address. The IP address of www.example.com, which is the address of your router. • Destination port number. 80, which is the standard port number for a web server process. 2.
Insight Managed Business Router BR200 Note: If you use applications such as multiplayer gaming, peer-to-peer connections, real-time communications such as instant messaging, or remote assistance, enable Universal Plug-N-Play (UPnP, see Improve network connections with Universal Plug and Play on page 97). Add a port triggering rule The router does not provide default services and applications for port triggering rules. You must define a custom service or application for each port triggering rule.
Insight Managed Business Router BR200 - Single address. Restricts the service to a particular computer. Enter the IP address in the Service IP fields, which become available with this selection from the menu. • Service Type. Select the protocol (TCP or UDP) that is associated with the service or application. • Triggering Port. Enter the number of the outbound traffic port that must open the inbound ports. • Service Type.
Insight Managed Business Router BR200 The port triggering settings display. 6. In the Port Triggering Portmap Table, select the radio button for the service or application name. 7. Click the Edit Service button. The Edit Triggering Service slide-out panel opens. 8. Change the settings. For information about the settings, see Add a port triggering rule on page 147. 9. Click the Apply button. Your settings are saved.
Insight Managed Business Router BR200 A warning pop-up window opens. 8. Click the OK button. The rule is removed from the Port Triggering Portmap Table. If you want to reinstate the rule, you must redefine it. Specify the time-out for port triggering The time-out period for port triggering controls how long the inbound ports stay open when the router detects no activity. A time-out period is required because the router cannot detect when the service or application terminates.
Insight Managed Business Router BR200 Disable port triggering By default, port triggering is enabled. You can disable port triggering temporarily without removing any port triggering rules. To disable port triggering: 1. Launch a web browser from a computer or mobile device that is connected to the router network. 2. Enter https://www.routerlogin.net. Your browser might display a security message, which you can ignore. For more information, see Log in to the local browser interface on page 16.
Insight Managed Business Router BR200 The following sequence shows the effects of this port triggering rule: 1. You open an IRC client program to start a chat session on your computer. 2. Your IRC client composes a request message to an IRC server using a destination port number of 6667, the standard port number for an IRC server process. Your computer then sends this request message to your router. 3.
10 Troubleshooting This chapter provides information to help you diagnose and solve problems you might experience with your router. If you do not find the solution here, check the NETGEAR support site at netgear.com/support for product and contact information.
Insight Managed Business Router BR200 Reboot the router from the local browser interface You or NETGEAR technical support can reboot the router from its local browser interface, either locally or remotely, for example, when the router seems to be unstable or is not operating normally. To reboot the router from its local browser interface: 1. Launch a web browser from a computer or mobile device that is connected to the router network. 2. Enter https://www.routerlogin.net.
Insight Managed Business Router BR200 4. Turn on the router and wait two minutes. Check Ethernet cable connections If the router does not power on, make sure that the Ethernet cables are securely plugged in. The Internet LED on the router is lit if the Ethernet cable connecting the router and the modem is plugged in securely and the modem and router are turned on. If one or more powered-on devices are connected to the router by an Ethernet cable, the corresponding numbered router LAN port LED lights.
Insight Managed Business Router BR200 Power LED is off This could occur for a number of reasons. Check the following: • Make sure that you pressed the On/Off power button on the back of the router. • Make sure that the power adapter is securely connected to your router and securely connected to a working power outlet. • Make sure that you are using the power adapter that NETGEAR supplied for this product.
Insight Managed Business Router BR200 You cannot log in to the router If you are unable to log in to the router from a computer on your local network and use the router’s local browser interface, check the following: • If you are using an Ethernet-connected computer, check the Ethernet connection between the computer and the router. • Make sure that the IP address of your computer is on the same subnet as the LAN subnet or the router.
Insight Managed Business Router BR200 You cannot access the Internet If you can access your router but not the Internet, check if the router can obtain an IP address from your Internet service provider (ISP). Check the WAN IP address Unless your ISP provides a fixed IP address, your router requests an IP address from the ISP. You can determine whether the request was successful using the Dashboard. To check the WAN IP address: 1.
Insight Managed Business Router BR200 If your router is still unable to obtain an IP address from the ISP, the problem might be one of the following: • Your Internet service provider (ISP) might require a login program. Ask your ISP whether they require PPP over Ethernet (PPPoE) or some other type of login. • If your ISP requires a login, the login name and password might be set incorrectly. • Your ISP might check for your computer’s host name.
Insight Managed Business Router BR200 Troubleshoot PPPoE If you are using PPPoE, try troubleshooting your Internet connection. To troubleshoot a PPPoE connection: 1. Launch a web browser from a computer or mobile device that is connected to the router network. 2. Enter https://www.routerlogin.net. Your browser might display a security message, which you can ignore. For more information, see Log in to the local browser interface on page 16. A login window opens. 3. Enter the router user name and password.
Insight Managed Business Router BR200 Troubleshoot Internet browsing If your router can obtain an IP address but your computer is unable to load any web pages from the Internet, check the following: • The traffic meter is enabled, and the limit was reached. By configuring the traffic meter not to block Internet access when the traffic limit is reached, you can resume Internet access (see Unblock the traffic meter after the traffic limit is reached on page 114).
Insight Managed Business Router BR200 Troubleshoot your network using the ping utility of your computer Most network devices and routers contain a ping utility that sends an echo request packet to the designated device. The device then responds with an echo reply. You can easily troubleshoot a network using the ping utility in your computer. Test the LAN path from your computer to the router You can ping the router from your computer to verify that the LAN path to your router is set up correctly.
Insight Managed Business Router BR200 Test the path from your computer to a remote device To test the path from a Windows-based computer to a remote device: 1. From the Windows toolbar, click the Start button and select Run. 2. In the Windows Run window, type ping -n 10 in which is the IP address of a remote device such as your ISP DNS server.
A Supplemental information This appendix includes technical information about your router.
Insight Managed Business Router BR200 Factory settings You can reset the router to the factory default settings that are shown in the following table. For more information about resetting the router to its factory settings, see Return the router to its factory default settings on page 106. The following table shows the factory default settings. Table 5. Router factory default settings Feature Default Settings Router login User login URL www.routerlogin.net (or www.routerlogin.com or 192.168.1.
Insight Managed Business Router BR200 Table 5.
Insight Managed Business Router BR200 Technical specifications The following table shows the technical specifications. For more technical specifications, see the data sheet, which you can download by visiting netgear.com/support/download/. Table 6.