
User manual


Get Started
11
AC1900 WiFi Range Extender
To use WPS to connect the extender to your WiFi router:
1. Press the WPS button on the side panel of the extender.
The WPS LED
blinks.
2. Within two minutes, press the WPS button on your router or access point.
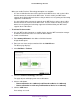
When the extender connects to your existing WiFi network, the WPS LED on the
extender lights solid green and the Router Link LED
lights. If the Router Link LED
does not light, try again. If it still does not light, see Connect With the NETGEAR
Installation Assistant on page 12.
3. If your WiFi router supports the 5 GHz band, repeat Steps 1 and 2 to connect the extender
to the 5 GHz band.
4. Unplug the extender and move it to a new location that is about halfway between your router
and the area with a poor router WiFi signal.
The location that you choose must be within the range of your existing WiFi router
network.
5. Plug the extender into an electrical outlet and wait for the Power LED to light green.
6. Use the Router Link LED
to help you choose a spot where the extender-to-router
connection is optimal.
7. If the Router Link LED does not light amber or green, plug the extender into an outlet closer
to the router and try again.
Keep moving the extender to outlets closer to the router until the Router Link LED lights
amber or green.
8. On your WiFi-enabled computer or mobile device, find and connect to the new extender
WiFi network.
The extender creates two new extender WiFi networks. The extender’s new WiFi network
names are based on your existing WiFi network name, with _EXT at the end of the name.
For example:
• Existing W
iFi network name. MyNetworkName
• New extender network names. MyNetworkName_2GEXT and
MyNetworkName_5GEXT
Use the same WiFi password that you use for your WiFi router.