
User Manual
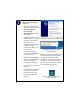
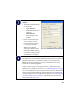
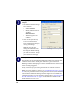
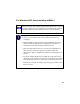
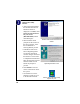
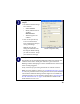
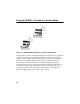
Table Of Contents
- Installation Guide for the Model MA401 802.11b Wireless PC Card
- Contents
- Chapter 1 Introduction
- Chapter 2 Installing the MA401 802.11b Wireless PC Card
- What You Will Need Before You Begin
- Two Basic Operating Modes
- MA401 Default Wireless Configuration Settings
- Using the MA401 to Connect to a Wireless Access Point Network in Infrastructure Mode
- Setup Instructions
- Using the MA401 to Connect in Ad-Hoc Mode
- MA401 Wireless Connection Indicators
- Troubleshooting Tips
- Chapter 3 Protecting Your Wireless Connection

8
Setup Instructions
Use the procedure below that corresponds to the version of Windows you are
using.
For Windows XP Users Installing a MA401
Note: If an earlier version of the Netgear MA401 Wireless PC Card was
previously installed on your notebook, you must remove the old driver
and utilities before you can install the new PC Card and software.
Insert the MA401 PC Card into your computer.
a. Power on your notebook and let the operating system boot up
completely.
b. Insert the Model MA401 Resource CD into your CD-ROM drive.
c. Locate an available PCMCIA or CardBus slot on the side of your
notebook. If your notebook computer has two PCMCIA or CardBus
slots, the MA401 wireless PC Card can be inserted into either slot.
d. Hold the PC Card with the Netgear logo facing up and insert it into
the PC card slot.