ReadyNAS OS 6.
ReadyNAS OS 6.0 Support Thank you for selecting NETGEAR products. After installing your device, locate the serial number on the label of your product and use it to register your product at https://my.netgear.com. You must register your product before you can use NETGEAR telephone support. NETGEAR recommends registering your product through the NETGEAR website. For product updates and web support, visit http://support.netgear.com. Phone (US & Canada only): 1-888-NETGEAR.
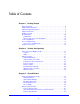
Table of Contents Chapter 1 Getting Started Quick-start Guide . . . . . . . . . . . . . . . . . . . . . . . . . . . . . . . . . . . . . . . . . . . . . 8 Additional Documentation. . . . . . . . . . . . . . . . . . . . . . . . . . . . . . . . . . . . . . . 8 Supported Operating Systems . . . . . . . . . . . . . . . . . . . . . . . . . . . . . . . . . . . 9 Supported Browsers . . . . . . . . . . . . . . . . . . . . . . . . . . . . . . . . . . . . . . . . . . . 9 Diskless Systems . . . . . . . . . . . . . . .
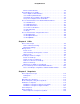
ReadyNAS OS 6.0 Browse a Shared Folder . . . . . . . . . . . . . . . . . . . . . . . . . . . . . . . . . . . . . 46 Shared Folder Access Rights . . . . . . . . . . . . . . . . . . . . . . . . . . . . . . . . . . . 47 Access Rights to Shared Folders . . . . . . . . . . . . . . . . . . . . . . . . . . . . . . 47 User and Group Authentication . . . . . . . . . . . . . . . . . . . . . . . . . . . . . . . 47 Set Network Access Rights to Shared Folders. . . . . . . . . . . . . . . . . . . .
ReadyNAS OS 6.0 Delete Snapshots Using the Timeline. . . . . . . . . . . . . . . . . . . . . . . . . . 131 Recover Data from a Snapshot . . . . . . . . . . . . . . . . . . . . . . . . . . . . . . . . 134 Recover Data from a Snapshot to a Network-Attached Device . . . . . . 134 Recover Data from a Snapshot to an iSCSI-Attached Device . . . . . . . 134 Chapter 6 Users and Groups Basic User and Group Concepts . . . . . . . . . . . . . . . . . . . . . . . . . . . . . . .
ReadyNAS OS 6.0 System Monitoring . . . . . . . . . . . . . . . . . . . . . . . . . . . . . . . . . . . . . . . . . . 197 System and Disk Health Information . . . . . . . . . . . . . . . . . . . . . . . . . . 197 System Real-Time and Historical Monitoring . . . . . . . . . . . . . . . . . . . . 198 System Logs . . . . . . . . . . . . . . . . . . . . . . . . . . . . . . . . . . . . . . . . . . . . . 201 SNMP Monitoring . . . . . . . . . . . . . . . . . . . . . . . . . . . . . . . . . . . . . . . . .
1. Getting Started 1 This manual describes how to configure and manage your ReadyNAS® storage system. Your ReadyNAS storage system relies on the following applications: • ReadyCLOUD. Use this online service to discover your ReadyNAS system on your local area network and access the local admin page. • Local admin page. Use this browser-based interface to configure and manage your ReadyNAS system.
ReadyNAS OS 6.0 Quick-start Guide This manual provides conceptual information about storage systems, detailed instructions about using your system, and NETGEAR’s recommendations about configuring, managing, and backing up your system. NETGEAR recommends that you read this manual to make the best use of your storage system. To quickly start using your system, review the following sections in this order: 1. Discover and Set Up Your ReadyNAS on page 10.
ReadyNAS OS 6.0 Supported Operating Systems The ReadyNAS supports the following operating systems: • Microsoft Windows 8 • Microsoft Windows 7 • Microsoft Windows Vista • Apple Macintosh OS X • Linux, Unix, Solaris • Apple iOS • Google Android Supported Browsers The ReadyNAS local admin page supports the following browsers: • Microsoft Internet Explorer 9.0+ • Apple Safari 5.
ReadyNAS OS 6.0 ReadyCLOUD ReadyCLOUD is an online service that you use to discover and set up ReadyNAS storage systems on your network. You can also use ReadyCLOUD to access and manage data on your ReadyNAS systems. In order to use ReadyCLOUD, your computer and storage system must have Internet access. Note: If your computer and storage system do not have Internet access, install and run the RAIDar utility instead. RAIDar is on the resource CD that came with your system.
ReadyNAS OS 6.0 Your new ReadyNAS system is marked with a NEW label. 3. Click the Setup button. 4. Select the mode that you want to use to set up your system. • Option 1. Select ReadyCLOUD Mode. a. Sign in to ReadyCLOUD or create a user account. Tip: If you have a ReadyNAS Remote account, you can sign in to ReadyCLOUD using your ReadyNAS Remote credentials. b. Follow the prompts to set up your ReadyNAS system. The ReadyCLOUD login page displays when setup is complete.
ReadyNAS OS 6.0 c. Follow the prompts of the setup wizard that launches in your browser. When you complete the setup wizard, the local admin page displays. Local Setup Wizard The first time you access the local admin page, a setup wizard prompts you to configure the basic settings of your ReadyNAS storage system. Note: The local setup wizard is for users who choose to set up their ReadyNAS system using Offline mode.
ReadyNAS OS 6.0 The Local Admin Page The local admin page is a browser-based interface that you use to configure and manage your ReadyNAS system. When you visit the local admin page, the Overview screen displays, as shown in the following figure. Figure 2. Local admin page (Overview screen) • To navigate through the local admin page, use the navigation bar across the top of the screen and the navigation icons below it. • Some screens are divided into multiple sections.
ReadyNAS OS 6.0 Access the Local Admin Page You can access the local admin page at any time by launching a web browser and visiting https://. is the name that you assigned to your ReadyNAS system or the default hostname if you did not change it. You can also access the local admin page from ReadyCLOUD (see Discover and Set Up Your ReadyNAS on page 10 and Use ReadyCLOUD on page 66).
ReadyNAS OS 6.0 Register Your System You must register your product before you can use NETGEAR telephone support. Register your ReadyNAS system at the NETGEAR Product Registration website. To register your ReadyNAS system: 1. Locate the serial number of the system. You can find the serial number on the Overview screen of local admin page or on the chassis label of your product. 2. Open a web browser and visit http://www.netgear.com/register. The product registration web page displays. 3.
2. Volume Configuration 2 This chapter describes how to configure and manage the volumes in your ReadyNAS storage system.
ReadyNAS OS 6.0 Basic Volume and RAID Concepts To get the most out of your ReadyNAS storage system, it is helpful to understand the basics of volumes and RAID. Understanding these concepts is the first step to making good decisions about how to configure, manage, and use your ReadyNAS storage system. Volumes In the most general sense, volumes are data storage devices. Your computer treats an internal hard drive as a volume. It also treats a portable USB thumb drive as a volume.
ReadyNAS OS 6.0 X-RAID2 X-RAID2 is an auto-expandable RAID technology that is available only on ReadyNAS systems. With X-RAID2, you do not need to know intricate details about RAID to administer your system. X-RAID2 allows you to add storage space without reformatting your drives or moving your data to another location. Because the expansion happens online, you can continue to use your ReadyNAS system while the volume capacity increases.
ReadyNAS OS 6.0 The following figure illustrates how X-RAID2 uses new disks. c b a Figure 3. X-RAID2 disk usage a. The first disk that you install is used for initial (unprotected) storage space. b. The second disk that you install is reserved for data protection (parity information). c. Installing additional disks increases your storage space. Note: X-RAID2 reserves the capacity of one disk for data protection. The actual space reserved for data protection is distributed across all disks.
ReadyNAS OS 6.0 • RAID 5. This RAID level also provides data redundancy, but it requires at least three disks. RAID 5 uses the capacity of one disk to protect you from data loss if one disk fails. Your data is distributed across multiple disks to improve disk performance. The total capacity of your storage system equals the capacity of all your disks minus the capacity of one disk. It is supported on systems with at least four drive bays. • RAID 6. This RAID level can recover from the loss of two disks.
ReadyNAS OS 6.0 Manage Volumes Change RAID Mode You can change the RAID mode that your ReadyNAS storage system uses. By default, your system’s hard disks are configured into a single X-RAID2 volume. Change from X-RAID2 to Flex-RAID Your ReadyNAS system can easily change a volume from X-RAID2 to Flex-RAID mode. Data on the X-RAID2 volume is preserved when you switch to Flex-RAID. The RAID level of the resulting Flex-RAID volume is automatically assigned based on the number of disks that are installed.
ReadyNAS OS 6.0 Change from Flex-RAID to X-RAID2 If your system contains only one volume, you can easily switch from Flex-RAID to X-RAID2. Data on the Flex-RAID volume is preserved when you switch to X-RAID2. If your system contains multiple volumes, you must first reconfigure your disks into a single volume. Note: When you switch to X-RAID2 mode, any extra disks installed in your system are automatically reformatted and used for storage expansion.
ReadyNAS OS 6.0 Change to a Different RAID Level In Flex-RAID mode, you assign one of several RAID levels to your volume. Available RAID levels depend on the number of disks that you want the volume to include. For more information, see Flex-RAID on page 19. You can reconfigure your volumes to use a different RAID level. Note: Changing the RAID level of a volume erases all data. If data is stored on your system, you must back up the data to another storage device before changing the RAID level.
ReadyNAS OS 6.0 The following summary information is displayed next to each volume. Item Description Data The storage space that is consumed by data in MB, GB, or TB. Free The storage space that is available in MB, GB, or TB. Type The configured RAID level. Health indicator The color of the indicator to the right of the volume icon indicates the health of the volume. • Green. The volume is healthy. • Yellow. The volume is degraded. • Red. The volume is bad or faulty.
ReadyNAS OS 6.0 A pop-up screen displays the I/O stats in the Summary tab. 4. Select the Disks tab. 5. From the Disk drop-down list, select one of the disks in the volume to view its status. Note: The disks are listed by their position in the enclosure: x. For example, Disk 3X1 is the third disk from the left in the top row of the enclosure.
ReadyNAS OS 6.0 Configure the Checksum Function Checksum functions help detect data transmission errors. The ReadyNAS uses a checksum function to improve accuracy and consistency when writing data to a volume. You can enable or disable the checksum function on each volume. Enabling the checksum function improves the integrity of your data but reduces performance speeds. Enable or disable the checksum function: 1. Select System > Volumes. 2.
ReadyNAS OS 6.0 5. Click Apply. 6. Click OK. Your changes are saved. Create a Volume To create a volume and select the RAID level: 1. Select System > Volumes. 2. From the enclosure graphic, select the disks that you want to include in the new volume. Available disks are colored black. 3. Click the New Volume button at the right of the screen. The New Volume pop-up screen displays. 4. Configure the following settings: • Name. Enter a name for the volume.
ReadyNAS OS 6.0 Delete a Volume Before you delete a volume, make sure that you back up any data (folders and LUNs) that you want to save to another volume or another storage device. To delete a volume: 1. Select System > Volumes. 2. Select the volume that you want to delete. 3. From the pop-up menu that displays, select Destroy. Note: The Destroy option is not available when the ReadyNAS has a single volume only. The Destroy option is available if you have at least two volumes.
ReadyNAS OS 6.0 The volume is deleted. The disks that were part of the volume become available again for other purposes (the color of the disks turns black). Expand Storage Capacity You can expand the storage capacity of an existing volume in two ways: • Horizontal expansion. Expand the volume by adding more disks to the volume. • Vertical expansion. Expand the volume by replacing disks in the volume with larger-capacity disks. X-RAID2 makes horizontal volume expansion easy.
ReadyNAS OS 6.0 Vertically Expand a Volume Both X-RAID2 and Flex-RAID volumes support vertical expansion. When you vertically expand a Flex-RAID volume, you must replace all disks in the volume with larger-capacity disks. Note: Vertical expansion is not available for RAID 0 volumes. When you vertically expand an X-RAID2 volume, you must replace disks in the volume according to the following table. Table 2.
ReadyNAS OS 6.0 You can continue to use your ReadyNAS system while the volume is resyncing. Resyncing can take several hours. The start and completion of the resyncing process is recorded in the system log (see System Logs on page 201). If you set up email notifications for your system, you receive an email message when the process finishes. For more information about alert notifications, see Configure System Alerts on page 155. 3.
ReadyNAS OS 6.0 Add Protection to a Volume Add Protection to an X-RAID2 Volume X-RAID2 requires a minimum of two hard disks to provide protection against disk failure. If you have a one-disk ReadyNAS storage system and want protection from disk failure, you need to add a second disk that is at least as large as the first. It can be added while the system is running. For more information about how to add a disk to your system, see the hardware manual for your system, which is available at http://support.
ReadyNAS OS 6.0 For more information about how to add a disk to your system, see the hardware manual for your system, which is available at http://support.netgear.com/product/ReadyNAS-OS6. 2. Select System > Volumes. The new disk is displayed in the enclosure graphic and is colored black. 3. Select the new disk from the enclosure graphic. 4. Select Add Parity next to a volume that allows or requires additional protection. A pop-up screen appears and asks you to confirm your decision. 5. Click Yes.
ReadyNAS OS 6.0 Maintain Volumes Scrub a Volume Scrubbing cleans and validates all data on a volume and checks the volume for errors. No data is deleted. Folders, LUNs, and snapshots on the volume remain intact. Note: Scrubbing is not an erase function. To scrub a volume: 1. Select System > Volumes. 2. Select the volume that you want to scrub. 3. From the pop-up menu that displays, select Scrub. The scrubbing process starts.
ReadyNAS OS 6.0 Defragment a Volume Over time, deletion, creation, and modification of files can fragment your data. Defragmenting a volume improves disk performance and reduces data fragmentation. To defragment a volume: 1. Select System > Volumes. 2. Select the volume that you want to defragment. 3. From the pop-up menu that displays, select Defrag. The defragmentation process starts. The start and completion of the volume defragmentation is recorded in the system log (see System Logs on page 201).
3. Shared Folders 3 This chapter describes how to create, manage, and access shared folders on the ReadyNAS. It includes the following sections: • Basic Shared Folder Concepts • Manage Shared Folders • Shared Folder Access Rights • Access Shared Folders from a Network-Attached Device • Access Shared Folders Using Cloud Services Note: Without a volume, you cannot configure any shared folders. For information about how to create volumes, see Create a Volume on page 27.
ReadyNAS OS 6.0 Basic Shared Folder Concepts The volumes on your ReadyNAS can be divided into shared folders and logical unit numbers (LUNs), both of which are logical entities on one or more disks. Shared folders and LUNs enable you to organize data in a volume by type, group, user, department, and so on. A single volume can contain multiple shared folders and LUNs. Shared folders are NAS data sets that allow data transfer and storage over a network.
ReadyNAS OS 6.0 • Sales • Personnel You can combine these schemes or come up with your own scheme. Shared Folder Defaults If you used the Setup Wizard (see Local Setup Wizard on page 12) to configure your ReadyNAS storage system, the following shared folders are created for you: • Backup • Documents • Music • Pictures • readydrop • Videos If you want, you can delete or rename these shared folders. You can create other shared folders to organize your data.
ReadyNAS OS 6.0 The following table lists the file-sharing protocols that your ReadyNAS storage system supports. Table 4. Supported file-sharing protocols Protocol Description Recommendation SMB (Server Message Block) If Windows users access your Used mainly by Microsoft Windows computers and sometimes by Mac OS X storage system, enable this protocol. computers, this protocol is enabled by default. It is sometimes referred to as the CIFS (Common Internet File Service) file-sharing protocol.
ReadyNAS OS 6.0 Access Rights For each shared folder you create, you can specify the access right to that shared folder for each user. The following table lists access right options available to you. Table 5. Access right options Access Right Description Read-only The user with this permission can read files on this shared folder, but cannot edit or create files on this shared folder. Read/write A user with this permission can read, edit, and create files on this shared folder.
ReadyNAS OS 6.0 Manage Shared Folders Create a Shared Folder After you create a volume (see Create a Volume on page 27), you can create shared folders on that volume. To create a shared folder: 1. Select Shares > Shares. A list of shared folders and LUNs on each volume displays. 2. Click the New Folder button to the right of the volume to which you want to add a shared folder.
ReadyNAS OS 6.0 3. Configure the settings as explained in the following table: Item Description Name A unique name to identify the shared folder. Do not include spaces in the name. Description An optional description to help identify the shared folder. Compression Select the Compression check box to enable data compression. Compression saves storage space and increases the speed of data transfers, but the compression and decompression processes require additional resources.
ReadyNAS OS 6.0 View and Change the Properties of a Shared Folder To view and change the properties of a shared folder: 1. Select Shares > Shares. A list of shared folders and LUNs on each volume displays. 2. Select the shared folder that you want to configure. 3. From the pop-up menu that displays, select Settings. The folder settings display in a pop-up screen.
ReadyNAS OS 6.0 4. Change the settings as explained in the following table. Item Description Properties Name A unique name to identify the shared folder. Do not include spaces in the name. All characters must be alphanumeric. Description An optional description to help identify the shared folder. Compression Select the Compression check box to enable data compression.
ReadyNAS OS 6.0 Delete a Shared Folder WARNING: Deleting a shared folder permanently removes the data within that shared folder, including its snapshots. To delete a shared folder from a volume: 1. Select Shares > Shares. A list of shared folders and LUNs on each volume displays. 2. Select the shared folder that you want to delete. 3. From the pop-up menu that displays, select Delete. 4. Confirm the deletion.
ReadyNAS OS 6.0 Browse a Shared Folder You can browse the contents of a shared folder from the local admin page. To browse a shared folder: 1. Select Shares > Browse. A list of shared folders on each volume displays. 2. Select the shared folder that you want to browse. The contents of the shared folder display. Tip: Use the forward and back ( ) arrows to browse through folders. You can view files and folders as a list with details, as small icons, or as ) at large icons.
ReadyNAS OS 6.0 Shared Folder Access Rights Access Rights to Shared Folders Access rights apply to individual shared folders. For each shared folder, you control the file-sharing protocols that can be used to access the shared folder and the access rights granted to each user, group, and host. For example, you might want to grant a user read/write permission on one shared folder, read-only permission on another shared folder, and no access rights at all on a third shared folder.
ReadyNAS OS 6.0 Set Network Access Rights to Shared Folders To set the network access rights to an individual shared folder, you configure the network access settings for each file-sharing protocol used to access the shared folder on your storage system. To set the network access rights for a shared folder: 1. Select Shares > Shares. A list of shared folders and LUNs on each volume displays. 2. Select the shared folder that you want to configure. 3. From the pop-up menu that displays, select Settings.
ReadyNAS OS 6.0 5. Click one of the file-sharing protocol buttons: • SMB • NFS • AFP • FTP • RSYNC • HTTP The screen adjusts to display the access properties for the selected protocol. 6. Configure the network access settings for the selected protocol. For more information, see the following sections (not all sections apply to all protocols): • Configure User and Group Settings on page 50. • Configure Host Settings on page 52. • Configure Rsync Credentials on page 53.
ReadyNAS OS 6.0 Configure User and Group Settings For SMB, AFP, FTP, and HTTP, you can configure access rights to an individual shared folder for users and groups. User and group settings do not apply to NFS and Rsync. To configure user and group network access settings: 1. On the folder settings pop-up screen, select the Access tab. 2. Select one of the file-sharing protocol buttons: • SMB • AFP • FTP • HTTP The screen adjusts to display the access properties for the selected protocol. 3.
ReadyNAS OS 6.0 Tip: To search for a particular user or group, use the search field next to the ). Search icon ( To update the user and group information, click the Refresh icon ( ). 5. For each group and individual user to which you want to grant access to the shared folder, select one of the following check boxes: • Read Only. The selected user or group is only permitted to read files on the shared folder. • Read/Write.
ReadyNAS OS 6.0 Configure Host Settings For SMB, NFS, FTP, Rsync, and HTTP, you can configure access rights for users on hosts. Host settings do not apply to AFP. The access rights that you configure for one host apply to all users on the host. For NFS, you can also configure the access rights that apply to any host, and, for individual hosts, you can configure whether root access is granted. To add a host and configure host access settings: 1.
ReadyNAS OS 6.0 The Add Host pop-up screen displays. 5. Enter the host IP address in the IP address field. 6. Click Add. The host is added to the host access list. Note: For SMB, the access rights for each host depend on the access rights of the user. 7. (Optional for Rsync) Set the default access rights for users on the listed hosts by selecting one of the following options from the drop-down list: • Read Only. The users on the listed hosts are only permitted to read files on the shared folder.
ReadyNAS OS 6.0 To require credentials for Rsync sessions: 1. On the folder settings pop-up screen, select the Access tab. 2. Click the RSYNC file-sharing protocol button. 3. Select the Security tab on the left side of the pop-up screen. 4. Select the Enable Password Protection check box. 5. Click the + button ( ) and create at least one Rsync user account and password. Note: Rsync credentials are completely separate from your ReadyNAS storage system’s user accounts. 6. Click Apply. 7. Click OK.
ReadyNAS OS 6.0 2. Click the SMB file-sharing protocol button. 3. Select the DFS tab on the left side of the pop-up screen. 4. Select the Enable DFS Root check box. 5. Click the + button ( ) above the list of remote shared folders. 6. In the pop-up screen that displays, enter the following information: • Name. The name of the remote shared folder, as you want it to appear on your ReadyNAS. • Address. The IP address of the network-attached device where the remote shared folder resides. • Remote share.
ReadyNAS OS 6.0 9. Click OK. Your changes are saved and the pop-up screen closes. 10. Make sure that the remote shared folder on the network-attached device is configured for file sharing. You can now access the remote shared folder from your ReadyNAS system using the SMB protocol. For information about how to access your system using the SMB protocol, see Use a Windows Device on page 61 or Use a Mac OS X Device on page 62. Hide a Shared Folder This feature is available for SMB only.
ReadyNAS OS 6.0 Set Up Access Rights to Files and Folders For each individual shared folder, you can configure the default access rights to files and folders. Change Default Access Rights to Files and Folders By default, owners, groups, and anyone else with access to the shared folder has read/write access to all files and folders on the shared folder. To change the default access rights to files and folders on an individual shared folder: 1. Select Shares > Shares.
ReadyNAS OS 6.0 4. Select the Security tab on the pop-up screen. 5. Configure the file and folder access rights as explained in the following table: Item Setting Folder Owner You can assign a single user or the administrator as the folder owner. By default, the folder owner is set to guest. Folder Group You can assign a single group, a single user, or the administrator as the folder group. By default, the folder group is set to guest. Folder Owner Rights Permissions granted to the folder owner.
ReadyNAS OS 6.0 To restore the default file and folder access rights on an individual shared folder: 1. Select Shares > Shares. A list of shared folders and LUNs on each volume displays. 2. Select the shared folder that you want to configure 3. From the pop-up menu that displays, select Settings. The shared folder settings display in a pop-up screen. 4. Select the Security tab on the pop-up screen. 5. Click Reset permissions. The default access rights are restored.
ReadyNAS OS 6.0 Access Shared Folders from a Network-Attached Device You can remotely access shared folders and snapshots on your storage system using other network-attached devices, such as a laptop or tablet. The network-attached device must support one of the enabled file-sharing protocols.
ReadyNAS OS 6.0 You are prompted to log in to your ReadyNAS system. Enter a user ID and password. You can log in with administrator or user credentials. If you log in as a user, your access is limited by the settings configured by the ReadyNAS system administrator. Your shared folders are displayed in a web page. Use a Windows Device You can access shared folders on your ReadyNAS system using a network-attached Windows-based device. To access a shared folder using a network-attached Windows device: 1.
ReadyNAS OS 6.0 Use a Mac OS X Device You can access shared folders on your ReadyNAS system using a network-attached OS X device. To access a shared folder using a network-attached OS X device: 1. Ensure that the AFP or SMB file-sharing protocol is enabled on your ReadyNAS system. For more information, see Set Network Access Rights to Shared Folders on page 48. 2. In Finder, select Go > Connect to Server. The Connect to Server dialog box displays. 3.
ReadyNAS OS 6.0 You can log in with administrator or user credentials. If you log in as a user, your access is limited by the settings configured by the ReadyNAS system administrator. You are prompted to select a volume. Mac OS X calls your ReadyNAS shared folders volumes. 6. Select the volume or volumes (shared folder or folders) you want to access and click the OK button. Finder displays the volume contents.
ReadyNAS OS 6.0 Use a Linux or Unix Device You can access shared folders on your ReadyNAS system using a network-attached Linux or Unix device. Note: Your ReadyNAS system does not support NIS because it is unable to correlate NIS information with SMB user accounts. In mixed environments where you want SMB and NFS integration, manually specify the user ID and group ID of the user and group accounts to match your NIS or other Linux or Unix server setting.
ReadyNAS OS 6.0 Use FTP and FTPS You can use FTP and FTPS to access any shared folders that are enabled for the FTP and FTPS file-sharing protocols. For better security, use an FTPS client to connect to your ReadyNAS using the FTP file-sharing protocol. With FTPS, your password and data are encrypted. If you are using FTPS, you must use explicit mode (also known as FTPES or AUTH TLS) in your FTP client. To access a shared folder using FTP: 1.
ReadyNAS OS 6.0 Access Shared Folders Using Cloud Services Several cloud-based services are preinstalled on your ReadyNAS system, including ReadyCLOUD, ReadyNAS Remote, and ReadyDROP. You can use these services to remotely access your storage system. Use ReadyCLOUD ReadyCLOUD is an online service that you use to discover and set up ReadyNAS storage systems on your network.
ReadyNAS OS 6.0 3. On the pop-up screen that displays, enter your ReadyCLOUD account credentials. 4. Click Join. Your system is added to your ReadyCLOUD account. Note: If you decide to remove your system from your ReadyCLOUD account, any Cloud users that you added will lose access to the system. For more information about Cloud users, see Cloud Users on page 148.
ReadyNAS OS 6.0 Access Your System Using ReadyCLOUD To access your data and manage your ReadyNAS using ReadyCLOUD: 1. Open a web browser and visit http://readycloud.netgear.com. 2. Click Sign In near the top right corner of the screen. 3. In the pop-up screen that displays, enter your ReadyCLOUD account credentials. You are logged in to ReadyCLOUD. You can now use the ReadyCLOUD web interface to access your data and manage any systems that you added to your ReadyCLOUD account.
ReadyNAS OS 6.0 Use ReadyNAS Remote ReadyNAS Remote is a web-based service that allows you to drag and drop files between your ReadyNAS system and your Windows or Mac computer using the SMB file-sharing protocol. All file permissions and shared folder security settings are retained as if you were on your LAN. All data is encrypted so that it is transmitted securely. ReadyNAS Remote uses preinstalled software on your ReadyNAS system and a small software program for your Windows or Mac computer.
ReadyNAS OS 6.0 ReadyNAS Remote is enabled. 3. (Optional) Configure advanced settings for the ReadyNAS Remote service. a. Click the ReadyNAS Remote icon. b. Select Settings from the pop-up menu that displays. c. Configure the options in the pop-up screen that displays. d. Click Apply. Your changes are saved and the pop-up screen closes.
ReadyNAS OS 6.0 Install the ReadyNAS Remote Client on Remote Devices Before you can access shared folders using ReadyNAS Remote, you must install the ReadyNAS Remote client software on your Windows or Mac computer. To install ReadyNAS Remote client on remote devices: 1. Using the device from which you want to remotely access a ReadyNAS system, visit http://www.netgear.com/ReadyNAS-remote. 2.
ReadyNAS OS 6.0 Access Shared Folders Using ReadyNAS Remote You can use ReadyNAS Remote to drag and drop files between your computer and your ReadyNAS system, even when your computer is not on the same LAN as your ReadyNAS system. To access shared folders using ReadyNAS Remote on a Windows computer: 1. Launch the ReadyNAS Remote client software on your computer. 2. Right-click the ReadyNAS Remote icon in the system tray. 3. From the pop-up menu that displays, select Log In.
ReadyNAS OS 6.0 To access shared folders using ReadyNAS Remote on a Mac computer: 1. Launch the ReadyNAS Remote client software on your computer. 2. Click the ReadyNAS Remote icon in the system tray. 3. From the drop-down menu that displays, select Shares. 4. From the menu that displays, select the ReadyNAS Remote device that you want to access. A list of shared folders on the selected device displays. 5. Select the shared folders you want to access and click OK. Your shared folders open in Finder.
ReadyNAS OS 6.0 Use ReadyDROP ReadyDROP allows you to synchronize files in real time between your ReadyNAS storage system and ReadyDROP-enabled remote devices. Any files that you put in a ReadyDROP folder on your ReadyNAS system or on ReadyDROP-enabled remote devices are synchronized automatically, in the background, as long as the devices have Internet access. Changes are synchronized to all of your ReadyDROP folders in the background, in real time. Using ReadyDROP involves these high-level steps: 1.
ReadyNAS OS 6.0 Enable ReadyDROP ReadyDROP uses ReadyNAS Remote technology. To use ReadyDROP, you must first set up ReadyNAS Remote (see Use ReadyNAS Remote on page 69.) To enable ReadyDROP: 1. Select Cloud > Cloud Services. 2. Select the check box next to the ReadyDROP icon. 3. (Optional) If you have more than one volume on your ReadyNAS system, specify the volume on which you want to create the ReadyDROP folder. a. Click the ReadyNAS Remote icon. b. Select Settings from the pop-up menu that displays.
ReadyNAS OS 6.0 Manage Files Using the ReadyDROP Portal The ReadyDROP portal is a web-based management interface for all of your synchronized ReadyDROP files. WARNING: If you add, create, or rename a file with the same name as an existing file, your browser cannot warn you of the overwrite risk. The existing file is immediately overwritten. To manage files using the ReadyDROP portal: 1. Visit the ReadyDROP portal at https://readydrop.netgear.com/. 2.
ReadyNAS OS 6.0 The ReadyDROP portal displays. Your ReadyDROP-enabled devices are listed on the left. 3. (Optional) Do one of the following: • Create a folder. a. Click the + icon( ) near the top right corner of the screen. The New Folder pop-up screen displays. • b. Enter a folder name and click the Create button. Delete a folder. a. Right-click a file or folder icon. b. From the menu that displays, select Delete. A pop-up screen displays asking you to confirm the delete command. c.
ReadyNAS OS 6.0 • Upload files. a. Click the Upload icon( ) near the top right corner of the screen. The Upload file pop-up screen displays. b. Click the Browse button and navigate to the file or folder that you want to upload. c. Click Upload. The file is added to the ReadyDROP folder. • Download files. a. Right-click a file or folder icon. b. From the menu that displays, select Download. The file or folder is downloaded to your device.
ReadyNAS OS 6.0 Manage ReadyDROP Files from a ReadyDROP-Enabled Device You can use your ReadyDROP-enabled device’s native interface to manage ReadyDROP files. To manage ReadyDROP files from a Windows device: 1. Launch the ReadyNAS Remote client software on your computer. 2. Right-click the ReadyNAS Remote icon in the system tray. 3. From the pop-up menu that displays, select Log In. The ReadyNAS Remote icon blinks while the device is connecting and displays as blue when it is connected. 4.
ReadyNAS OS 6.0 To manage ReadyDROP files from a Mac device: 1. Launch the ReadyNAS Remote client software on your computer. 2. Click the ReadyNAS Remote icon in the system tray. 3. From the drop-down menu that displays, select ReadyDROP. 4. From the drop-down menu, select the device that contains the ReadyDROP folder that you want to access. ReadyDROP launches and a ReadyDROP icon displays in the system tray. 5. Click the ReadyDROP icon in the system tray. 6.
4. LUNs 4 This chapter describes how to create, manage, and access LUNs on the ReadyNAS. It includes the following sections: • Basic LUN Concepts • Manage LUNs • LUN Groups and Access Rights • Access LUN Groups from an iSCSI-Attached Device Note: Without a volume, you cannot configure any LUNs. For information about how to create volumes, see Create a Volume on page 27.
ReadyNAS OS 6.0 Basic LUN Concepts The volumes on your ReadyNAS can be divided into shares and logical unit numbers (LUNs), both of which are logical entities on one or more disks. Shares and LUNs enable you to organize data in a volume by type, group, user, department, and so on. A single volume can contain multiple shares and LUNs. LUNs are SAN (storage area network) data sets that allow data transfer and storage over iSCSI and Fibre Channel devices. The ReadyNAS supports iSCSI devices only.
ReadyNAS OS 6.0 • Thick. All storage space that you specify when you create a thick LUN is allocated up front and the storage space is reserved on the volume. Snapshots, other LUNs, and shared folders on the volume cannot consume storage space that is reserved. The size of the LUN is reported as the total storage space that you specify when you create the LUN. You cannot assign more storage space than the available non-reserved storage space on the volume.
ReadyNAS OS 6.0 Manage LUNs Create a LUN After you create a volume (see Create a Volume on page 27), you can create LUNs on that volume. The following procedure describes how to create a LUN from the Shares screen, but you can also create a LUN from the iSCSI screen. To create a LUN: 1. Select Shares > Shares. A list of shared folders and LUNs on each volume displays. 2. Click the New LUN button to the right of the volume to which you want to add a LUN. The New LUN pop-up screen displays.
ReadyNAS OS 6.0 3. Configure the settings as explained in the following table: Item Description Name A unique name to identify the LUN. Do not include spaces in the name. All characters must be alphanumeric. Description An optional description to help identify the LUN. Compression Select the Compression check box to enable data compression. Compression saves storage space and increases the speed of data transfers, but the compression and decompression processes require additional resources.
ReadyNAS OS 6.0 View and Change the Properties of a LUN To view and change the properties of a LUN: 1. Select Shares > Shares. A list of shared folders and LUNs on each volume displays. 2. Select the LUN that you want to configure. 3. From the pop-up menu that displays, select Settings. The LUN settings display in a pop-up screen.
ReadyNAS OS 6.0 4. Change the settings as explained in the following table. Item Description Name A unique name to identify the LUN. Do not include spaces in the name. Description An optional description to help identify the LUN. Compression Select the Compression check box to enable data compression. Compression saves storage space and increases the speed of data transfers, but the compression and decompression processes require additional resources.
ReadyNAS OS 6.0 Expand the Size of a LUN After you create a LUN, you cannot change the provision setting (thin or thick), but you can expand the size of the LUN. Expansion is instant, regardless of the data size, but you first need to disconnect all users that are connected to the LUN. Disconnect access to the LUN by removing the LUN from the LUN group to which the users have access (see Create a LUN Group on page 91). To expand the size of a LUN: 1. Select Shares > Shares.
ReadyNAS OS 6.0 4. Select Expand Size. The size expansion options display: 5. Enter the following settings: • New Size. Specify the new size of the LUN. The maximum size that you can allocate to a thick LUN is stated above the New Size field. • Unit. Select the unit of measurement from the drop-down list (MB, GB, or TB). 6. Click Apply. The new LUN size takes effect. 7. Click OK. Your changes are saved and the pop-up screen closes. 8.
ReadyNAS OS 6.0 Delete a LUN WARNING: Deleting a LUN permanently removes the data within that LUN. To delete a LUN from a volume: 1. Select Shares > Shares. A list of shared folders and LUNs on each volume displays. 2. Select the LUN that you want to delete. 3. From the pop-up menu that displays, select Delete. 4. Confirm the deletion.
ReadyNAS OS 6.0 LUN Groups and Access Rights When you create a LUN, the LUN is unassigned. To access your storage system from an iSCSI-attached device, you need to create a LUN group and assign one or more LUNs to the LUN group. LUN groups allow you to organize LUNs and manage access rights to LUN groups. Access rights are either open or granted through internal CHAP authentication. Access rights apply to LUN groups, not to individual LUNs.
ReadyNAS OS 6.0 The default name is groupX, where X is a number in sequential and ascending order. The Target field is automatically populated. The target is the string that an iSCSI client needs to be able to connect to the LUN. 4. Click Create. The New LUN group is added to the iSCSI screen. By default, CHAP is disabled and no client is allowed to access the LUN group (see Manage Access Rights for LUN Groups on page 96). Assign a LUN to a LUN Group To assign a LUN to a LUN group: 1. Select iSCSI.
ReadyNAS OS 6.0 A pop-up screen displays. 4. From the drop-down list, select the LUN group to which you want to assign the LUN. 5. Click Apply.
ReadyNAS OS 6.0 Remove a LUN from a LUN Group To remove a LUN from a LUN group: 1. Select iSCSI. The iSCSI screen displays the LUNs and LUN groups that you created. 2. Select the assigned LUN that you want to remove from the group. 3. From the pop-up menu that displays, select Unassign. 4. Confirm that you want to remove the LUN from the group. The LUN is returned to the unassigned state.
ReadyNAS OS 6.0 Delete a LUN Group To delete a LUN group: 1. Select iSCSI. The iSCSI screen displays the LUNs and LUN groups that you created. 2. Click the Destroy button to the right of the LUN group that you want to delete. 3. Confirm that you want to delete the LUN group. If any LUNs were assigned to the group, they are returned to the unassigned state.
ReadyNAS OS 6.0 Manage Access Rights for LUN Groups Configure Access to a LUN Group To configure client access to a LUN group: 1. Select iSCSI. The iSCSI screen displays the LUNs and LUN groups that you created. 2. Click the Properties button to the right of the LUN group that you want to manage. A pop-up screen displays.
ReadyNAS OS 6.0 3. Configure the settings as explained in the following table: Item Description Name The name is provided for information only and cannot be changed. Target The target is the address that an iSCSI client (that is, an initiator) needs to access the LUN group. The Target field is automatically populated, but you can delete the content and then replace the content with a custom target address.
ReadyNAS OS 6.0 Add an iSCSI Initiator To add an iSCSI initiator and allow access to the LUN group: 1. Select iSCSI. The iSCSI screen displays the LUNs and LUN groups that you created. 2. Click the Properties button to the right of the LUN group that you want to manage. A pop-up screen displays. 3. Select the Selected radio button next to Allowed Initiators. 4. Click the + icon ( ) to the right of the list of initiators.
ReadyNAS OS 6.0 The Create Initiator pop-up screen displays. 5. In the Name field, enter an IQN in the format as defined by RFC3720. For example, iqn.2012-04.com.netgear:sj-tst-5200:a123b456 is a valid IQN. 6. Enter a CHAP password that is between 12 and 16 characters long. 7. Confirm the CHAP password. 8. Click Create. The IQN is added to the list of initiators on the LUN Group Properties pop-up screen. 9. In the Allowed column, select the check box to allow the initiator access to the LUN group. 10.
ReadyNAS OS 6.0 Remove an iSCSI Initiator To remove an iSCSI initiator from the LUN group: 1. Select iSCSI. The iSCSI screen displays the LUNs and LUN groups that you created. 2. Click the Properties button to the right of the LUN group that you want to manage. A pop-up screen displays. 3. Select the Selected radio button next to Allowed Initiators. 4. Select the initiator that you want to remove from the list.
ReadyNAS OS 6.0 5. Click the - icon ( ) to the right of the list of initiators. 6. Confirm that you want to remote the selected initiator. The selected initiator is removed from the list of initiators. 7. Click Apply. Your changes are saved. Edit the CHAP Password To edit the CHAP password for an iSCSI initiator: 1. Select iSCSI. The iSCSI screen displays the LUNs and LUN groups that you created. 2. Click the Properties button to the right of the LUN group that you want to manage.
ReadyNAS OS 6.0 A pop-up screen displays. 3. Select the Selected radio button next to Allowed Initiators. 4. Select the initiator that you want to edit from the list. 5. Click the gear icon ( ) to the right of the list of initiators. The Initiator Settings pop-up screen displays. 6. Enter a new password in the fields. 7. Click Apply on the Initiator Settings pop-up screen. 8. Click Apply on the LUN group properties screen. Your changes are saved.
ReadyNAS OS 6.0 Access LUN Groups from an iSCSI-Attached Device An iSCSI initiator application lets you set up a connection from a server to a LUN group (and therefore to individual LUNs). Normally, users would not initiate such a LUN connection. The network administrator would provide access to a LUN group through a server. The iSCSI targets (that is, the LUNs in the LUN group on the ReadyNAS) present themselves on the client system as virtual block devices and can be treated as a locally attached disks.
ReadyNAS OS 6.0 Access LUN Groups Using Microsoft iSCSI Software Initiator The following procedure uses the Microsoft iSCSI Software Initiator, which is freely available online and is integrated in Windows 7. Note: If you use an operating system other than Windows, the steps are different, but the basic tasks remain the same. To configure LUN access through an iSCSI initiator: 1. Open the iSCSI initiator and click the Configuration tab. 2. Copy the default name from the Initiator Name field. 3.
ReadyNAS OS 6.0 4. Click the Properties button to the right of the LUN group. A pop-up screen displays. 5. Select the Selected radio button next to Allowed Initiators. 6. Click the + icon ( ) to the right of the list of initiators.
ReadyNAS OS 6.0 The Create Initiator pop-up screen displays. 7. Paste the default iSCSI initiator name in the Name field. 8. Click Create. The IQN is added to the table on the LUN group properties pop-up screen. 9. In the Allowed column of the table, select the check box to allow the initiator access to the LUN group. 10. Click Apply. The new LUN group properties take effect immediately. 11. On the iSCSI Initiator Properties screen, click the Targets tab.
ReadyNAS OS 6.0 12. In the Target field, enter the IP address of the ReadyNAS. 13. Click Quick Connect. The server connects to the LUN group on the ReadyNAS, but the LUNs in the LUN group cannot yet be displayed in Windows Explorer. 14. Open the Windows Disk Management application. Each LUN in the LUN group displays as an unallocated disk that needs to be initialized and formatted. Tip: If the disks do not display, select Action > Refresh in the Disk Management window.
ReadyNAS OS 6.0 15. Initialize each new disk by selecting Action > All Tasks > Initialize Disk in the Disk Management window.
ReadyNAS OS 6.0 16. Format each new disk. a. Select the disk that you want to format. b. Select Action > All Tasks > New Simple Volume in the Disk Management window. The New Simple Volume Wizard pop-up screen displays. c. Follow the default wizard formatting steps. Alternately, you can give the volume label for the new disk that represents the LUN the same name as the LUN.
ReadyNAS OS 6.0 The following figure shows three LUNs: New Volume (F:), New Volume (H:), and Marketing (I:). Figure 8.
5. Snapshots 5 This chapter describes how to manage snapshots for folders and LUNs. It includes the following sections: • Basic Snapshot Concepts • Manually Take a Snapshot • Browse Snapshots Using Recovery Mode • Roll Back to a Snapshot • Clone Snapshots • Delete Snapshots • Recover Data from a Snapshot Note: Without a volume, you cannot configure any shared folders or LUNs. Without folders or LUNs, you cannot configure any snapshots.
ReadyNAS OS 6.0 Basic Snapshot Concepts The ReadyNAS can provide protection of folders and LUNs through snapshots. Snapshots contain references to data on a folder or LUN. Strictly speaking, snapshots are not backups, but they function as backups because you can recover data from snapshots. You can only take snapshots of folders or LUNs. You cannot take a snapshot of a volume. Snapshots reside on the same volume as the folder or LUN from which they were created.
ReadyNAS OS 6.0 Rolling back You can replace a folder or LUN with an earlier version by rolling back to a snapshot. When you roll back to a snapshot, the entire folder or LUN is replaced with the version captured by the snapshot. All snapshots that were taken after the snapshot that was used for rolling back are deleted. For information about how to roll back to a snapshot, see Roll Back to a Snapshot on page 118. Clones You can copy a snapshot to become a new independent folder or LUN.
ReadyNAS OS 6.0 Manually Take a Snapshot To manually take a snapshot of a folder or LUN: 1. Select Shares > Shares. A list of shared folders and LUNs on each volume displays. 2. Select the shared folder or LUN that you want to take a snapshot of. 3. From the pop-up menu that displays, select Snapshot. The New Snapshot pop-up screen displays. 4. Enter a name for the snapshot. 5. Click Create. The snapshot is created.
ReadyNAS OS 6.0 Browse Snapshots Using Recovery Mode Sometimes you might want to recover individual files or subfolders within a shared folder without rolling back the entire shared folder. Recovery mode allows you to browse snapshots of shared folders and recover individual files or subfolders to your ReadyNAS. Recovery mode is only available for shared folders. For information about now to recover data from a LUN snapshot, see Roll Back to a Snapshot Using the Timeline on page 121.
ReadyNAS OS 6.0 Tip: You can use the tabs and arrows at the bottom of the screen to browse snapshots by year, month, day, or hour. 4. Select the snapshot that you want to browse. 5. From the drop-down menu that displays, select Browse. 6. The contents of the selected snapshot display. 7. Continue browsing in recovery mode until you find the file or folder that you want to recover. 8. Select the file or folder that you want to recover.
ReadyNAS OS 6.0 9. From the drop-down menu that displays, select Restore. 10. In the pop-up screen that displays, enter the path to a recovery destination for the selected snapshot data. The recovery destination must be within the folder whose snapshots you are browsing. The recovered file or folder is recovered from the snapshot data and restored to the recovery destination that you specified.
ReadyNAS OS 6.0 Roll Back to a Snapshot You can replace a folder or LUN with an earlier version by rolling back to a snapshot of that folder or LUN. WARNING: Rolling back is a destructive process. All snapshots that were taken after the selected snapshot are deleted. Roll Back to a Snapshot Using Recovery Mode Recovery mode provides an easy way to browse your snapshots and roll back to earlier versions of your shared folders. Recovery mode is only available for shared folders.
ReadyNAS OS 6.0 Existing snapshots for the selected shared folder are displayed. Tip: You can use the tabs and arrows at the bottom of the screen to browse snapshots by year, month, day, or hour. 4. Select the snapshot that contains the version of the folder that you want to roll back to. 5. From the drop-down menu that displays, select Rollback.
ReadyNAS OS 6.0 6. Confirm that you want to roll back to the selected snapshot by typing DELETE DATA in the pop-up screen that displays. 7. Click Rollback. The shared folder is rolled back to the snapshot that you selected.
ReadyNAS OS 6.0 Roll Back to a Snapshot Using the Timeline To roll back to a snapshot using the snapshot timeline: 1. Select Shares > Timeline. The snapshot timeline displays. The folders and LUNs are displayed on the left of the screen. 2. Select the folder or LUN whose snapshots you want to view. 3. Locate the snapshot using the controls on the timeline. Snapshots are displayed as gray marker icons ( Snapshots 121 ) along the timeline.
ReadyNAS OS 6.0 • The timeline centers on the zoom icon ( ) as you zoom in and out. You can move the zoom icon by clicking anywhere along the timeline. Moving the zoom icon establishes a new center of focus when you zoom in and out. • Adjust the vertical slider on the right of the timeline as needed. To expand the timeline to years, click the + button. To limit the timeline to hours, click the - button.
ReadyNAS OS 6.0 Tip: Click the clock icon ( ) that is located in the middle of the Snapshot screen under the name of the selected folder or LUN. A calendar pop-up screen displays, allowing you to jump to a desired month and date. 4. Click the snapshot. 5. From the pop-up menu that displays, select Rollback.
ReadyNAS OS 6.0 6. Confirm that you want to roll back to the selected snapshot by typing DELETE DATA in the pop-up screen that displays. 7. Click Rollback. The shared folder is rolled back to the snapshot that you selected.
ReadyNAS OS 6.0 Clone Snapshots Cloning a snapshot copies the snapshot to create a new independent folder or LUN. To clone a snapshot: 1. Select Shares > Timeline. The snapshot timeline displays. The folders and LUNs are displayed on the left of the screen. 2. Select the folder or LUN that you want to clone. 3. Locate the snapshot using the controls on the timeline. Snapshots are displayed as gray marker icons ( Snapshots 125 ) along the timeline.
ReadyNAS OS 6.0 • The timeline centers on the zoom icon ( ) as you zoom in and out. You can move the zoom icon by clicking anywhere along the timeline. Moving the zoom icon establishes a new center of focus when you zoom in and out. • Adjust the vertical slider on the right of the timeline as needed. To expand the timeline to years, click the + button. To limit the timeline to hours, click the - button.
ReadyNAS OS 6.0 Tip: Click the clock icon ( ) that is located in the middle of the Snapshot screen under the name of the selected folder or LUN. A calendar pop-up screen displays, allowing you to jump to a desired month and date. 4. Click the snapshot. 5. From the pop-up menu that displays, select Clone.
ReadyNAS OS 6.0 6. In the pop-up screen that displays, enter a name for the new folder or LUN. 7. Click Apply. The cloned snapshot is added to the Shares screen as a new folder or LUN. Note: A new folder is immediately accessible to users. A new LUN first needs to be added to a LUN group before users can gain access to it.
ReadyNAS OS 6.0 Delete Snapshots Delete Snapshots Using Recovery Mode Recovery mode provides an easy way to manage and delete snapshots of your shared folders. Recovery mode is only available for shared folders. For information about how to delete snapshots of LUNs, see Delete Snapshots Using the Timeline on page 131. To delete a snapshot using recovery mode: 1. Select Shares > Browse. A list of shared folders on each volume displays. 2. Click the Recovery icon ( ).
ReadyNAS OS 6.0 Tip: You can use the tabs and arrows at the bottom of the screen to browse snapshots by year, month, day, or hour. 4. Select the snapshot that you want to delete. 5. From the drop-down menu that displays, select Delete. 6. Confirm the deletion. The snapshot is deleted.
ReadyNAS OS 6.0 Delete Snapshots Using the Timeline To delete a snapshot using the snapshot timeline: 1. Select Shares > Timeline. The snapshot timeline displays. The folders and LUNs are displayed on the left of the screen. 2. Select the folder or LUN whose snapshots you want to view. 3. Use the controls on the timeline to locate the snapshot. Snapshots are displayed as gray marker icons ( Snapshots 131 ) along the timeline.
ReadyNAS OS 6.0 • The timeline centers on the zoom icon ( ) as you zoom in and out. You can move the zoom icon by clicking anywhere along the timeline. Moving the zoom icon establishes a new center of focus when you zoom in and out. • Adjust the vertical slider on the right of the timeline as needed. To expand the timeline to years, click the + button. To limit the timeline to hours, click the - button.
ReadyNAS OS 6.0 Tip: Click the clock icon ( ) that is located in the middle of the Snapshot screen under the name of the selected folder or LUN. A calendar pop-up screen displays, allowing you to jump to a desired month and date. 4. Click the snapshot. From the pop-up menu that displays, select Delete. 5. Confirm the deletion. The snapshot is deleted.
ReadyNAS OS 6.0 Recover Data from a Snapshot The best way to protect against data loss is to back up your data. Regularly taking snapshots of your data can also help prevent loss, because you can recover data from snapshots. Recover Data from a Snapshot to a Network-Attached Device Recovering data from a snapshot to a network-attached device, such as a laptop or tablet, involves the following high-level steps: 1. Enable access to snapshots.
ReadyNAS OS 6.0 2. Assign the LUN clone to a LUN group that the users can access. See Assign a LUN to a LUN Group on page 92. The LUN clone appears on the iSCSI-attached device as a virtual block device. The iSCSI-attached device treats LUNs in the LUN group as locally-attached disks. Now users can access the LUN clone from the iSCSI-attached device. 3. Locate the snapshot data on the LUN clone from the iSCSI-attached device. Users can access data on the LUN clone according to their access rights.
6. Users and Groups 6 This chapter describes how to create and manage user and group accounts.
ReadyNAS OS 6.0 Basic User and Group Concepts Users are the people to whom you grant access to your storage system. If your company uses Windows Active Directory, you can use that to manage ReadyNAS users. Otherwise, when you want to allow someone to access your ReadyNAS system, you create a user account for that person. The ReadyNAS storage system administrator sets up user accounts and decides which folders and LUNs each user is permitted to access.
ReadyNAS OS 6.0 To configure Local Users mode: 1. Select Accounts > Authentication > Security. 2. From the Access Type drop-down list, select Local users. Except for the Workgroup Name field, all fields are dimmed. 3. (Optional) Enter a name for the workgroup. You can keep the default name of VOLUME. 4. Click Apply. For more information about managing users and groups in Local Users mode, see User Accounts on page 140 and Group Accounts on page 144. To configure Active Directory mode: 1.
ReadyNAS OS 6.0 3. Configure the settings as explained in the following table: Item Description NetBIOS Domain Name Enter the name of the NetBIOS domain, for example, company. Normally, the NetBIOS domain name is identical to the prefix of the DNS realm name. Note: If the NetBIOS domain name does not properly represent the organizational structure or does not match the prefix naming rules, the name will differ from the prefix of the DNS realm name.
ReadyNAS OS 6.0 User Accounts Use Local Users mode to manually create, manage, and delete user accounts on your ReadyNAS storage system. This section assumes that your ReadyNAS system is currently in Local Users mode. For more information about changing user and group management modes, see User and Group Management Modes on page 137. Create User Accounts Use the local admin page to create user accounts. To create a user account: 1. Select Accounts > Users. 2. Click the New User button.
ReadyNAS OS 6.0 The New User pop-up screen displays. 3. Enter the following information for the new user: • Name. User names can have a maximum of 31 characters in most non-Asian languages. If you use Asian language characters, the limit is lower. You can use most alphanumeric and punctuation characters for a user name. • UID. The UID is a unique user ID number assigned to each user. By default, the ID number is automatically set, but you can manually enter a number if you prefer. • Primary Group.
ReadyNAS OS 6.0 Edit User Accounts Use the local admin page to edit a user’s name, email address, or password. To edit a user account: 1. Select Accounts > Users. 2. From the list of users, select the user account that you want to edit. 3. Select Settings from the pop-up menu that displays. 4. In the pop-up screen that displays, edit the settings for the user as needed. You can edit the user’s name, primary group assignment, email address, and password.
ReadyNAS OS 6.0 Delete User Accounts Use the local admin page to delete user accounts. Files on your ReadyNAS system that are owned by the deleted user might become inaccessible. When you delete a user, your ReadyNAS system deletes that user’s private home folder and its contents. To delete a user: 1. Select Accounts > Users. 2. From the list of users, select the user account that you want to delete. 3. Select Delete from the pop-up menu that displays. 4. Confirm the deletion. The user is deleted.
ReadyNAS OS 6.0 Group Accounts Use Local Users mode to manually create, manage, and delete group accounts on your ReadyNAS storage system. This section assumes that your ReadyNAS system is currently in Local Users mode. For more information about changing user and group management modes, see User and Group Management Modes on page 137. Create Groups Use the local admin page to create groups. To create a group: 1. Select Accounts > Groups. 2. Click the New Group button.
ReadyNAS OS 6.0 • Name. Group names can have a maximum of 31 characters in most non-Asian languages. If you use Asian language characters, the limit is lower. You can use most alphanumeric and punctuation characters for a user name. • GID. The GID is a unique group ID number assigned to each group. By default, the ID number is automatically set, but you can manually enter a number if you prefer. 4. Click the Create button. The group is added to your system.
ReadyNAS OS 6.0 4. In the pop-up screen that displays, edit the settings for the group as needed. Use these guidelines to determine a user’s group membership status: • If the check box next to a user is selected and can be cleared, that user is a secondary member of the group. • If the check box next to a user is selected and cannot be cleared, that user is a primary member of the group. • If the check box next to a user is clear, that user is not a primary or secondary member of the group. 5.
ReadyNAS OS 6.0 Delete Groups Use the local admin page to delete a group. To be eligible for deletion, a group cannot contain any primary members. For more information about moving users to a different group, see Edit User Accounts on page 142. For more information about deleting users, see Delete User Accounts on page 143. To delete a group: 1. Select Accounts > Groups. 2. From the list of groups, select the group you want to delete. 3. From the pop-up menu that displays, select Delete. 4.
ReadyNAS OS 6.0 Cloud Users Cloud users can access your system using ReadyNAS Remote or ReadyCLOUD. Like local users, Cloud users can also access your ReadyNAS system using enabled file-sharing protocols. You grant or restrict file and folder access to Cloud users and local users in the same way. For more information about managing access to shared folders, see Set Network Access Rights to Shared Folders on page 48.
ReadyNAS OS 6.0 4. Click Search. • If that person has a ReadyNAS Remote account, that person’s user name appears in the search results list. Select the person’s user name and click Invite. That person’s user name appears in the Cloud Users list with a user icon. • If that person does not have a ReadyNAS Remote account, you are prompted to send the person an invitation to create a ReadyNAS Remote account. That person is added to the Cloud Users list with an envelope icon.
ReadyNAS OS 6.0 Remove Cloud Users To remove a Cloud user: 1. Select Cloud > Cloud users. 2. Select the user that you want to remove from the Cloud Users list. 3. From the pop-up menu that displays, select Remove. 4. Confirm the removal. The user no longer has access to your ReadyNAS system and is removed from the Cloud Users list.
7. System Settings 7 This chapter describes how to configure the basic settings of the ReadyNAS. It contains the following sections: • Customize the Basic System Settings • Configure the Network Settings • Configure Global Settings for File-Sharing Protocols • Configure Media Services • Manage genie Apps • Discovery Services Note: Without at least one volume, changes are not saved after you reload the ReadyNAS.
ReadyNAS OS 6.0 Customize the Basic System Settings NETGEAR recommends that you configure the basic system settings that are described in this section before you use the ReadyNAS. Set the Clock To enable the ReadyNAS to time-stamp files correctly, ensure that the time and date settings are accurate. To set system time and date: 1. Select System > Overview > Device. 2. Click the gear icon ( ) to the right of the Device Time field. The Date and Time screen displays. 3.
ReadyNAS OS 6.0 Note: So that your files are correctly time-stamped, NETGEAR recommends that you select the time zone in which the ReadyNAS is physically located. 4. Select the correct date and time by doing one of the following: • Select the Synchronize clock with an Internet server check box. When you select this check box, the calendar and time drop-down lists dim, and the system’s date and time are synchronized with a NETGEAR NTP server.
ReadyNAS OS 6.0 Set the Administrator Password It is important to safeguard the administrator password and to change it regularly to protect your data. Choose an administrator password that is different from the default password and keep it in a safe place. Anyone who obtains the administrator password can change settings or erase data that is stored on the ReadyNAS. To change the administrator password: 1. On the navigation bar of the local admin page, select Profile. 2.
ReadyNAS OS 6.0 3. Configure the settings as explained in the following table: Item Description Password Enter a new administrator password. Confirm Password Reenter the new password. Password Recovery Choose a question that few people can answer. For example, you might enter First dog’s name? or Complete these fields to be able Question Best friend in Kindergarten? as your password to recover a lost or forgotten recovery question.
ReadyNAS OS 6.0 To manage alert email contacts: 1. Select System > Settings > Alerts. 2. Configure the email settings as explained in the following table: Item Description Email Enter an email address. You can also edit an existing alert contact or delete it by clearing the field.
ReadyNAS OS 6.0 3. (Optional) To determine if you configured the contact information correctly, click the Send Test Message button. 4. Click the Apply button under the Alerts heading. Your changes are saved. Alert Event Settings The ReadyNAS is preconfigured to generate email alert messages when system events occur. You can determine which optional system events generate alerts. NETGEAR recommends that you keep all alerts enabled.
ReadyNAS OS 6.0 Configure the Hostname The ReadyNAS uses a hostname to advertise itself on the network. When you review the network using ReadyCLOUD, a computer, or any other interface, you can recognize the ReadyNAS by its hostname. The default hostname is nas-xx-xx-xx, where xx-xx-xx is the last 6 bytes of the system’s primary MAC address. You can change the hostname to one that is easier to remember and recognize. To change the host name: 1. Select System > Overview > Device. 2.
ReadyNAS OS 6.0 Enable Antivirus Your ReadyNAS system comes with free antivirus software that provides real-time virus scans using signature and heuristic algorithms. The antivirus software helps protect your system from viruses, malware, worms, and Trojans. Enabling the antivirus software is optional. To enable the free antivirus software: 1. Select System > Settings > Services. 2. Click the Antivirus button. 3.
ReadyNAS OS 6.0 Configure the Network Settings Network Basic Concepts The acronym NAS in ReadyNAS is short for network-attached storage. Your local area network (LAN) is an integral part of managing and using your ReadyNAS storage system. Connecting your ReadyNAS storage system to the Internet expands your ability to access data stored on your ReadyNAS system when you are away from it. It also allows you to share data with people located around the world.
ReadyNAS OS 6.0 Ethernet Your ReadyNAS storage system uses Ethernet technology to transfer information on your local area network. Ethernet technology divides data into smaller pieces, called packets or frames, before transmitting it on your network. Ethernet technology includes methods to check for data transmission errors. MTU You can also configure the maximum size of packets that are sent across a network. This setting is called MTU (maximum transmission unit).
ReadyNAS OS 6.0 Configure the Ethernet Interfaces The ReadyNAS system provides two physical 1 Gb Ethernet interfaces. The Ethernet interfaces can be used independently as individual links or combined into a bonded adapter. Bonding provides redundancy or increased throughput. For each Ethernet interface, you can configure the following settings: • VLAN membership • IPv4 and IPv6 settings • DNS servers The following table shows the default network configuration. Table 8.
ReadyNAS OS 6.0 Configure General and TCP/IP Settings To configure an Ethernet interface: 1. Select Network > Links. 2. Select the Ethernet interface that you want to configure. • Ethernet interfaces with active links are colored green. • Ethernet interfaces with inactive links are colored gray. 3. From the pop-up menu that displays, select Settings. A pop-up screen displays the settings for the selected Ethernet interface.
ReadyNAS OS 6.0 4. On the General tab, configure the settings as explained in the following table: Item Description Name Cannot be edited. Displays the name of the Ethernet interface. Bandwidth Cannot be edited. Displays the bandwidth of the Ethernet interface. MTU Enter the MTU in bytes. The default setting is 1500 bytes. VLAN ID Enter a VLAN ID. The default setting ID is 0. Note: If you use VLAN IDs, the switch to which you connect the ReadyNAS system needs to support VLAN tagging. 5.
ReadyNAS OS 6.0 Note: If you enter an IP address manually, you must provide DNS server information if you want to access your ReadyNAS system over the Internet. For more information, see DNS on page 161. If the IP address changes, your browser loses its connection to your storage system. To reconnect to your ReadyNAS system, use ReadyCLOUD to rediscover your device. See Discover and Set Up Your ReadyNAS on page 10.
ReadyNAS OS 6.0 Configure DNS Settings You can specify up to three DNS servers in your ReadyNAS storage system. If you selected the option to assign an IP address manually when you configured your Ethernet settings, you must manually specify the IP addresses of the DNS servers and the domain name to access your storage system over the Internet. Your network administrator can help you determine your Domain Name Server IP address. To add DNS information for an Ethernet interface: 1.
ReadyNAS OS 6.0 4. Click the DNS tab. 5. Click the + icon to the right of the list of DNS servers. 6. In the pop-up screen that displays, enter the server IP address. 7. Click Add. The DNS server is added to the list. 8. Click Apply. Your changes are saved.
ReadyNAS OS 6.0 Configure Bonded Adapters Creating a bonded adapter is optional. A bonded adapter combines two Ethernet interfaces into a single logical link. Network devices treat the bonded adapter as a single link, which increases fault tolerance and provides load sharing. Teaming Modes The ReadyNAS supports several teaming modes. Both the ReadyNAS and the device with which the bonded adapter is linked need to support the same teaming mode.
ReadyNAS OS 6.0 Hash Types If you select the IEEE 802.3ad LACP or the XOR teaming mode, you must select which hash type option you want to use: • Layer 2 • Layer 2+3 (uses Layer 2 and Layer 3 hash types simultaneously) • Layer 3+4 (uses Layer 3 and Layer 4 hash types simultaneously) Each hash type is described in the following table. Table 10. Hash type descriptions Hash type Description Layer 2 Based on the source and destination MAC addresses.
ReadyNAS OS 6.0 The options displayed depend on the teaming mode that is selected. 4. From the Bond with drop-down list, select another available Ethernet interface to include in the bonded adapter. 5. From the Teaming Mode drop-down list, select a teaming mode. For more information about teaming modes, see Teaming Modes on page 168. 6. (For IEEE 802.3ad LACP and XOR only) Select the radio button next to the hash type option that you want to use.
ReadyNAS OS 6.0 Configure General and TCP/IP Settings To configure a bonded adapter: 1. Select Network > Bonds. 2. Select the bonded adapter that you want to configure. 3. From the pop-up menu that displays, select Settings. The bond settings pop-up screen displays.
ReadyNAS OS 6.0 4. Configure the settings in the General tab as explained in the following table: Item Description Name Cannot be edited. Displays the name of the bonded adapter. MTU Enter the MTU in bytes. The default setting is 1500 bytes. VLAN ID Enter a VLAN ID. The default setting ID is 0. Note: If you use VLAN IDs, the switch to which you connect the ReadyNAS system needs to support VLAN tagging. 5. Click the TCP/IP tab. 6.
ReadyNAS OS 6.0 Note: If you enter an IP address manually, you must provide DNS server information if you want to access your ReadyNAS system over the Internet. For more information, see DNS on page 161. If the IP address changes, your browser loses its connection to your ReadyNAS storage system. To reconnect to your ReadyNAS system, use ReadyCLOUD to rediscover your device. See Discover and Set Up Your ReadyNAS on page 10.
ReadyNAS OS 6.0 Configure DNS Settings You can specify up to three DNS servers in your ReadyNAS storage system. If you selected the option to assign an IP address manually when you configured your Ethernet settings, you must manually specify the IP addresses of the DNS servers and the domain name to access your ReadyNAS system over the Internet. Your network administrator can help you determine your Domain Name Server IP address. To add DNS information for a bonded adapter: 1. Select Network > Bonds. 2.
ReadyNAS OS 6.0 4. Click the DNS tab. 5. Click the + icon ( ) to the right of the list of DNS servers. 6. In the pop-up screen that displays, enter the server IP address. 7. Click Add. The DNS server is added to the list. 8. Click Apply. Your changes are saved. 9. Configure the switch or router to which the ReadyNAS is attached to support the bonded adapter.
ReadyNAS OS 6.0 Change the Teaming Mode To change the teaming mode of a bonded adapter: 1. Select Network > Bonds. 2. Select the bonded adapter that you want to configure. 3. From the pop-up menu that displays, select Settings. The bond settings pop-up screen displays.
ReadyNAS OS 6.0 4. Click the Mode tab. 5. From the Teaming Mode drop-down list, select a teaming mode. For more information about teaming modes, see Teaming Modes on page 168. 6. (For IEEE 802.3ad LACP and XOR only) Select the radio button next to the hash type option that you want to use. For more information about hash types, see Hash Types on page 169. 7. (For Active Backup only) From the Primary Device drop-down list, select the Ethernet interface that is active by default.
ReadyNAS OS 6.0 Delete a Bonded Adapter To delete a bonded adapter and reestablish separate Ethernet links: 1. Select Network > Bonds. 2. Select the bonded adapter that you want to delete. 3. From the pop-up menu that displays, select Delete. 4. Confirm the deletion. The bonded Ethernet interfaces are separated into individual links. 5. Reconfigure the switch or router to which the ReadyNAS is attached for single interfaces.
ReadyNAS OS 6.0 Configure Global Settings for File-Sharing Protocols Basic File-Sharing Concepts Network access to data stored on your ReadyNAS system is managed by file-sharing protocols, which handle the transfer of data. For shares, you can enable several protocols. For LUNs, the protocol is always iSCSI. (iSCSI is enabled by default.) The ReadyNAS can handle a maximum of 1,024 concurrent connections. Global settings for file-sharing protocols apply to your entire ReadyNAS system.
ReadyNAS OS 6.0 Supported File-Sharing Protocols The ReadyNAS supports the following file-sharing protocols: Protocol Description Recommendation SMB (Server Message Block) Used mainly by Microsoft Windows If Windows users access your computers and sometimes by Mac OS X storage system, enable this protocol. computers, this protocol is enabled by default. It is sometimes referred to as the CIFS (Common Internet File Service) file-sharing protocol. SMB uses TCP/IP.
ReadyNAS OS 6.0 Configure File-Sharing Protocols To configure global settings for file-sharing protocols: 1. Select System > Settings > Services. Protocol buttons with a green indicator are globally enabled. Those with a gray indicator are globally disabled. Click a protocol button to display the protocol settings screen. 2. Configure one protocol at a time, as explained in the following sections. • Configure SMB, AFP, Rsync, or SSH on page 181. • Configure FTP on page 182.
ReadyNAS OS 6.0 Configure FTP To configure FTP: 1. Select System > Settings > Services. 2. Click the FTP button. The FTP Settings screen displays. 3. Configure the settings as explained in the following table: Item Description Enable FTP Select the check box to enable FTP globally. Clear the check box to disable FTP globally. Port Enter the number of the port that is used for FTP control traffic on the ReadyNAS. The default port number is 21.
ReadyNAS OS 6.0 Item Description Passive ports Enter the beginning port and ending port of the passive port range. This is the port range on the ReadyNAS that is available to clients who initiate a connection to the ReadyNAS. The default range is 32768–65535. Use Masquerade Address Select whether the ReadyNAS displays its real IP address or masks this with another IP address or DNS name by making a selection from the drop-down list: • Disabled. The real IP address is displayed. • Enabled.
ReadyNAS OS 6.0 3. Configure the NFS settings as explained in the following table: Item Description Enable NFS Select the check box to enable NFS globally. Clear the check box to disable NFS globally. Number of NFS Threads You can select from 8 to 32 threads. If many clients connect to the ReadyNAS using the NFS protocol, increasing the number of NFS threads can improve performance. 4. Click Apply. Your changes are saved. Configure HTTP To configure HTTP: 1. Select System > Settings > Services.
ReadyNAS OS 6.0 Configure HTTPS To configure HTTPS: 1. Select System > Settings > Services. 2. Click the HTTPS button. The HTTPS settings screen displays. 3. Configure the HTTPS settings as explained in the following table: Item Description Enable HTTPS HTTPS cannot be disabled. The local admin page requires HTTPS to be enabled. Port 1 Cannot be modified. Port 1 is reserved for your ReadyNAS system. Port 2 Modify to allow HTTPS connections over a port other than the standard 443.
ReadyNAS OS 6.0 Configure Media Services ReadyDLNA The ReadyDLNA service lets you stream media on your ReadyNAS to DLNA players such as the Sony Playstation 3, XBox 360, TiVo, and DLNA-enabled TVs. You can stream your media to any device that complies with the Digital Living Network Alliance (DLNA) standard, including mobile clients, such as iPads, iPhones, and Android devices. ReadyDLNA supports to following formats: • Music. wav, wma, pcm, ogg, mp3, m4a, flac, aac • Video.
ReadyNAS OS 6.0 A pop-up screen displays. 3. Select the Enable ReadyDLNA check box. 4. (Optional) From the Auto Scan drop-down list, select Enabled or Disabled. • Enabled. The system automatically searches for DLNA-compliant devices. • Disabled.The system does not search for DLNA-compliant devices. 5. Click Apply. Your changes are saved. Create a TiVo Archive You can use your ReadyNAS system to store videos and media recorded on your TiVo box.
ReadyNAS OS 6.0 A pop-up screen displays. 3. Select the Enable ReadyDLNA check box. 4. From the Auto Scan drop-down list, select Enabled. 5. From the TiVo Server drop-down list, select Enabled. The system detects TiVo devices on your LAN and displays them in the list. 6. When prompted, enter the media access key provided by your TiVo box. 7. Select the Activate check box next to the name of your TiVo box. 8.
ReadyNAS OS 6.0 iTunes Streaming Server iTunes Streaming Server enables iTunes clients to stream media files straight from your ReadyNAS system. The ReadyNAS supports the following iTunes formats: • Audio. mp3, m4a, m4p, wav, aif • Video. m4v, mov, mp4 • Playlist. m3u, wpl To set up iTunes Streaming Server: 1. Select System > Settings > Services. 2. Click the iTunes button. A pop-up screen displays.
ReadyNAS OS 6.0 3. Configure the iTunes server settings as explained in the following table: Item Description Enable iTunes Server Select the check box to enable the iTunes server. Clear the check box to disable the iTunes server. Server Name Enter a name that your ReadyNAS will use to advertise itself to your iTunes clients. By default, the server name is set to My Music on %h where %h is the hostname of your ReadyNAS system. Password Enter a password to limit access to your ReadyNAS iTunes server.
ReadyNAS OS 6.0 Manage genie Apps You can browse, buy, and manage apps for your ReadyNAS system from the local admin page. Using genie apps on your ReadyNAS system involves these high-level steps: 1. Enable the NETGEAR genie service on your ReadyNAS system. (See Enable the NETGEAR genie Service on page 191.) 2. Create a NETGEAR genie+ Marketplace account. (See Create a NETGEAR genie+ Marketplace Account on page 192.) 3. Browse, buy, install, and configure apps on your ReadyNAS system.
ReadyNAS OS 6.0 Create a NETGEAR genie+ Marketplace Account To create a NETGEAR genie+ Marketplace account: 1. Open a web browser and visit https://genie.netgear.com. 2. Click Log In at the top right corner of the screen. The NETGEAR genie+ Marketplace login screen displays. 3. Click New Account. 4. Follow the instructions to create a new account.
ReadyNAS OS 6.0 Manage genie Apps To browse and buy genie Apps for your ReadyNAS system: 1. On the local admin page, select Apps > Available. 2. In the pop-up login screen that displays, enter your NETGEAR genie+ Marketplace account credentials. Note: If a pop-up login screen does not display, click the Refresh icon ( ) at the right side of the screen. If you do not have a NETGEAR genie+ Marketplace account, click Create Account. See Create a NETGEAR genie+ Marketplace Account on page 192. 3.
ReadyNAS OS 6.0 NETGEAR genie+ Marketplace opens in a new browser window and asks you to confirm your purchase. b. Confirm your purchase. An email receipt is sent to the address associated with your genie+ Marketplace account. On the local admin page, the Apps > Installed screen displays your installed apps.
ReadyNAS OS 6.0 To manage installed apps: Select Apps > Installed on the local admin page. A list of apps installed on your ReadyNAS system displays. From this screen, you can launch, enable, disable, configure, or remove installed apps. Discovery Services Discovery services are protocols that allow network-enabled devices like computers or your storage system to discover each other across networks. Your storage system supports these discovery service protocols: • Bonjour.
8. System Maintenance 8 This chapter describes how to maintain your ReadyNAS system and monitor its performance.
ReadyNAS OS 6.0 System Monitoring The local admin page for your ReadyNAS system provides system and disk health information as well as system logs. Real-time historical monitoring is available for most models. You can also enable the SNMP protocol to remotely monitor your ReadyNAS system using an SNMP client. System and Disk Health Information The ReadyNAS provides basic system health information about the fans, temperatures, optional uninterruptible power supplies, and optional expansion disk arrays.
ReadyNAS OS 6.0 System Real-Time and Historical Monitoring The ReadyNAS provides status graphics for volume throughput, network throughput, volume utilization, and system temperatures. Note: Status graphics are not supported for ReadyNAS 102 and 104 systems. To display and configure the system status graphics: 1. Select System > Performance. 2. Scroll down to Volume, Network, Utilization, or Temperature to view the corresponding status graphics.
ReadyNAS OS 6.0 • Update. Select how often the information in the graphic is updated. You can select from 30 seconds to 5 minutes. Network The Network throughput graphic shows the network usage for Tx and Rx traffic in bytes per second. The range is flexible and depends on your selections from the drop-down lists above the graphic. For example, the range can be 0 to 60 bytes or from 0 to 40 KB.
ReadyNAS OS 6.0 Utilization The Volume utilization graphic shows the percentage of used storage space for an individual volume or for all volumes. The range is from 0 to 100 percent. From the drop-down lists above the graphic, you can adjust the following settings: • Volume. Select all volumes or individual volumes. • Period. Select the period over which the utilization is measured. You can select from 5 minutes to 1 year. • Update. Select how often the information in the table is updated.
ReadyNAS OS 6.0 From the drop-down lists above the graphic, you can adjust the following settings: • Temperature. Select all temperatures, the system (SYS) temperature, the CPU temperature, or the auxiliary (AUX) temperature. • Period. Select the period over which the temperatures are measured. You can select from 5 minutes to 1 year. • Update. Select how often the information in the table is updated. You can select from 30 seconds to 5 minutes.
ReadyNAS OS 6.0 To display and manage the system logs: 1. Select System > Logs and Alerts. 2. (Optional) Use the navigation box in the lower left corner of the screen to view additional messages. 3. Do any of the following: • Download the logs. Click the Download Logs button to download a zipped file with all log files to your browser’s default download location. The default name of the zipped file is System_log-.
ReadyNAS OS 6.0 SNMP Monitoring Use SNMP management systems such as HP OpenView or CA UniCenter for remote monitoring of the ReadyNAS. (Management over SNMP is not supported.) Configure SNMP To configure SNMP: 1. Select System > Settings > Services. 2. Click the SNMP button. The SNMP Settings screen displays. 3. Configure the settings as explained in the following table: Item Description Enable SNMP Select the check box to enable SNMP globally. Clear the check box to disable SNMP globally.
ReadyNAS OS 6.0 Item Description Trap Destination Enter the IP address to which the ReadyNAS sends the traps that it generates. For information about the types of messages that can be sent, see System Logs on page 201. Hosts Allowed Access Enter a network address that specifies the hosts that are allowed to access the ReadyNAS. 4. Click Apply. Your changes are saved.
ReadyNAS OS 6.0 System Maintenance Update Firmware Firmware is the software that operates your ReadyNAS storage system. It is written directly to your system’s read-only memory. NETGEAR periodically releases firmware updates to improve your storage system. Because firmware is stored in read-only memory, updating the firmware requires a special process. Updates are numbered chronologically, for example: • ReadyNAS OS 6.0.1 • ReadyNAS OS 6.0.
ReadyNAS OS 6.0 • If a firmware update is available, you are prompted to update your system. 3. If a firmware update is available, click the Update button on the pop-up screen that displays. The system downloads the new firmware. When the download is complete, you are prompted to reboot your system. 4. Click Reboot. Your system reboots and installs the new firmware. If you enabled email alerts, your ReadyNAS system sends a message when the firmware update finishes.
ReadyNAS OS 6.0 4. Click the Install Firmware button. The Update Firmware pop-up screen displays. 5. Click the Browse button. 6. In the pop-up file browser that displays, navigate to the file containing the updated firmware and select it. The Update Firmware pop-up screen displays the name of the selected file in the File Name field. 7. Click the Upload button. The firmware file uploads to your ReadyNAS system.
ReadyNAS OS 6.0 Reset the Firmware to Factory Defaults WARNING! Resetting the ReadyNAS to factory defaults deletes not only the configuration but also all stored data. Back up the stored data if you intend to use it again. To reset the ReadyNAS to factory defaults: 1. Select System > Settings > Update. 2. Click Perform Factory Default. The Perform Factory Default pop-up screen displays. 3. Type FACTORY (all capital letters) in the field. 4. Click OK.
ReadyNAS OS 6.0 Recover the Administrator Password You can recover a lost or forgotten administrator password in two ways: • Use NETGEAR’s password recovery tool. This web-based tool requires that you enable administrator password recovery on your storage system before you can use it. For more information, see Set the Administrator Password on page 154. • Perform an OS reinstall reboot.
ReadyNAS OS 6.0 Recover the Administrator Password Using an OS Reinstall Reboot This process does not remove data from the system, but resets the administrator user name and password to the factory defaults. The default credentials to log in to the local admin page are: • User name: admin • Password: password Both user name and password are case-sensitive.
ReadyNAS OS 6.0 Note: If you schedule this device to power off, data transfers will be interrupted and pending backup jobs will not run. To enable the power timer: 1. Select System > Settings > Power. 2. Select the Power Timer check box. 3. Click the gear icon ( ) next to the weekly calendar. The Power Timer pop-up screen displays. 4. Set the power schedule for the system by clicking squares on the grid. • Blue squares indicate time when the system is scheduled to be powered on.
ReadyNAS OS 6.0 By default, the system is scheduled to remain powered off. 5. Click Apply. Your changes are saved. Enable Wake-on-LAN Wake-on-LAN is a way to remotely power up a network-attached device, like a computer or storage system. This feature allows you to conserve power by keeping a device turned off when it is not needed, but allows a remote system to turn it on when it is needed.
ReadyNAS OS 6.0 Optional Uninterruptible Power Supplies Uninterruptible Power Supplies NETGEAR recommends that you physically connect the ReadyNAS to one or more uninterruptible power supply (UPS) devices to protect against data loss due to power failures. Once a UPS is connected, you can use the ReadyNAS local admin page to monitor and manage it. If you enable email alerts, the ReadyNAS sends a message when the status of a UPS changes.
ReadyNAS OS 6.0 Manage UPS Devices Add a UPS If your UPS is not automatically detected when you connect it to your ReadyNAS system, you must manually add the UPS. To add a UPS: 1. Select System > Settings > UPS. 2. Click the + icon next to the UPS heading. The Add UPS screen displays. The options displayed depend on the type of UPS that you want to add.
ReadyNAS OS 6.0 3. Configure the settings as explained in the following table: Item Description Name Enter a name to identify the UPS: • For an SNMP UPS, enter any name. • For a remote UPS, you must enter UPS. Description An optional description to help identify the UPS. Type From the drop-down list, select one of the following options: • SNMP UPS. An SNMP UPS lets the ReadyNAS query the manufacturer-specific MIB. The ReadyNAS monitors and manages the UPS through SNMP. • Remote UPS.
ReadyNAS OS 6.0 Monitor a UPS To monitor the status of a UPS: Select System > Settings > UPS. When the ReadyNAS system detects the UPS device, it displays the following information about the device in the UPS list: Item Description Status The status of the UPS: • On line power • On battery • Low battery • On battery and Low battery • On line power and Low battery • Unknown Name The name of the UPS. For a remote UPS, the name is always UPS. Description The description that you gave to the UPS.
ReadyNAS OS 6.0 Edit a UPS To edit a UPS in the UPS list: 1. Select System > Settings > UPS. 2. Select the UPS that you want to edit from the UPS list. 3. Click the gear icon ( ) to the right of the UPS list. 4. In the UPS list, highlight the UPS that you want to modify. A pop-up screen displays. The fields on this screen depend on the type of UPS. 5. Modify the settings as required. You cannot change the type settings. 6. Click Apply. Your changes are saved.
ReadyNAS OS 6.0 Remove a UPS To remove a UPS from the UPS list: 1. Select System > Settings > UPS. 2. Select the UPS that you want to remove from the UPS list. 3. Click the - icon to the right of the list. 4. Confirm the removal. The UPS is removed from the UPS list. Your ReadyNAS system stops monitoring and managing the UPS.
9. Backup and Recovery 9 If your data is important enough to store, it is important enough to back up. Data can be lost due to a number of events, including natural disaster (for example, fire or flood), theft, improper data deletion, and hard drive failure. By regularly backing up your data, you can recover your data if any of these situations occur. Note: The ReadyNAS Replicate service allows you to replicate data from one ReadyNAS system to another. For more information, visit http://www.netgear.
ReadyNAS OS 6.0 Back Up or Restore System Configuration In addition to backing up data, you can back up and restore your system configuration settings. The backup configuration file can also save your shared folder access settings, service settings, local users and groups, network settings, and more. iSCSI settings cannot be saved. It can also save up to 50MB of data from your volumes, including the contents of your files and folders. To back up your system configurations: 1.
ReadyNAS OS 6.0 Basic Data Backup and Recovery Concepts Your ReadyNAS system can manage backup and recovery for many devices on your network. For example, you can back up data that is stored on your ReadyNAS storage system to secondary devices, such as a USB drive. You can also use your ReadyNAS storage system to store backed-up data from other devices, like your laptop. Backup Concepts A backup is a copy of data that you use if your primary copy is deleted or damaged.
ReadyNAS OS 6.0 A full backup makes a copy of all of the data stored on the primary system. Your first backup of a primary system is always a full backup job. The amount of time a full backup takes depends on the amount of stored data. An incremental backup copies only the data that changed since your last backup process. An incremental backup job takes much less time than a full backup job. Note: RAID configuration of disks is not a substitute for backing up data.
ReadyNAS OS 6.0 Recovery Concepts The process of restoring backed-up data to the device where the primary copy is kept is called recovery. A recovery source is the place where you store the backed-up data. A recovery destination is the place to which you want to restore the backed-up data. The recovered data replaces a deleted or damaged primary copy. If you store backed-up data on the ReadyNAS system, you can create a recovery job to recover backed-up data to your computer or other primary device.
ReadyNAS OS 6.0 used when you backed up the data. The recovery source is the backup destination and the recovery destination is the backup source. Secure Cloud Backups A secure cloud backup lets you use online backup and recovery tools, such as ReadyNAS Vault, to save data over the Internet to a remote location and restore the data, if needed. For more information about backing up your data using ReadyNAS Vault, see ReadyNAS Vault on page 245.
ReadyNAS OS 6.0 Backup Job Recommendations By default, all backup jobs are scheduled to run every day. You can edit these settings after you create each backup job. For more information, see Schedule a Backup Job on page 236. The first few times you back up data, it is a good practice to perform the backup manually. With a manual backup, you can make sure that access is granted to the remote backup source or destination and determine how long the backup takes to run.
ReadyNAS OS 6.0 Manage Backup and Recovery Jobs Create a Backup Job To create a backup job: 1. Select Backup > Backups > Jobs. 2. Click the Add Backup button. A pop-up screen displays. 3. In the Name field, enter a name for the new backup job. The name you choose can have a maximum of 255 characters. 4. From the Source drop-down list, select the backup source (the place where you store the primary copy of your data). 5.
ReadyNAS OS 6.0 For more information about backup sources, destinations, and protocols, see Basic Data Backup and Recovery Concepts on page 221. Create a Recovery Job The ReadyNAS system treats recovery jobs like backup jobs. You use the Backup screen to create a recovery job. In a recovery job, you reverse the source and destination that you used when you backed up the data. The recovery source is the backup destination and the recovery destination is the backup source. To create a recovery job: 1.
ReadyNAS OS 6.0 6. Click the Create button. The recovery job is added to the list of jobs on the Backup screen. 7. Select the recovery job from the jobs list. 8. From the pop-up menu that displays, select Settings. A pop-up screen displays. 9. Click the Schedule tab. 10. Clear the Enabled check box. Clearing this check box forces the recovery procedure to be started manually, which ensures that the recovery job does not happen automatically.
ReadyNAS OS 6.0 The pop-up screen closes. 13. Configure the recovery job as described in Configure a Backup or Recovery Job on page 230. Note: Because you cleared the Enable check box, you must manually start the recovery job. For more information about manually starting a job, see Manually Start a Backup or Recovery Job on page 239. For more information about recovery sources, destinations, and protocols, see Basic Data Backup and Recovery Concepts on page 221.
ReadyNAS OS 6.0 Configure a Backup or Recovery Job After you create a backup or recovery job, you can configure the job name, source and destination, schedule, and other options. Change the Name of a Job To change the name of a backup or recovery job: 1. Select Backup > Backups > Jobs. 2. Select the backup or recovery job from the jobs list. 3. From the pop-up menu that displays, select Settings. A pop-up screen displays. 4. In the General tab, enter a new job name. 5. Click Apply.
ReadyNAS OS 6.0 Configure a Local Job Source or Destination To configure a local job source or destination: 1. Select Backup > Backups > Jobs. 2. Select the backup or recovery job from the jobs list. 3. From the pop-up menu that displays, select Settings. A pop-up screen displays. 4. Click the Source or Destination tab. 5. From the Type drop-down list, select one of the options described in the following table. Item Description share The source or destination is a shared folder on the ReadyNAS.
ReadyNAS OS 6.0 6. From the Name drop-down list, select the share, home share, volume, or external storage connection that you want to use. If you selected timemachine, the Name field is automatically populated. 7. (Optional) Enter the path to the folder that you want the job to target or click the Browse button to locate it.
ReadyNAS OS 6.0 A pop-up screen displays. 4. Click the Source or Destination tab. 5. From the Type drop-down list, select remote. 6. Select the protocol that you want to use. Item Description Windows/NAS (Timestamp) Source or destination is a share on a Windows computer. Incremental backups with this protocol use timestamps to determine whether files should be backed up. Windows (Archive Bit) Source or destination is a share on a Windows computer.
ReadyNAS OS 6.0 • If you select a backup destination that requires a path, use a forward slash (/) to separate directories, for example: // • Do not use a backslash (\) in paths. 9. If necessary, enter the login credentials required to access the source or destination. 10. (Optional) Click the Test Connection button to determine if your ReadyNAS system can access the remote destination. 11. Click Apply. Your changes are saved. 12. Click OK. The pop-up screen closes.
ReadyNAS OS 6.0 A pop-up screen displays. 4. Click the Advanced tab. 5. Configure the settings as described in the following table. Item Description Download SSH Key file If you are using Rsync over SSH, click this button to download the public SSH file key. Add the key to the authorized SSH key list of the remote Rsync server. Enable Compression Compresses data before transferring. This option is especially useful for slower network connections, such as when transferring data over a WAN.
ReadyNAS OS 6.0 Schedule a Backup Job You can schedule a backup job to automatically run as frequently as once every hour, daily, or just once a week. The backup schedule is offset by 5 minutes from the hour to allow you to schedule snapshots on the hour (snapshots are almost instantaneous) and perform backups of those snapshots. WARNING! To ensure the integrity of the data stored on your primary device, never schedule a recovery job to run automatically. To schedule a backup job: 1.
ReadyNAS OS 6.0 6. Specify a schedule for hte job using the drop-down lists and check boxes. 7. Click Apply. Your changes are saved. 8. Click OK. The pop-up screen closes. Configure the Job Options To configure the options for a backup or recovery job: 1. Select Backup > Backups > Jobs. 2. Select the backup or recovery job from the jobs list. 3. From the pop-up menu that displays, select Settings. A pop-up screen displays. 4. Click the Options tab.
ReadyNAS OS 6.0 5. Configure the options as described in the following table. Item Description Schedule full backup From the drop-down list, specify how often to run a full backup. The first full backup is performed at the next scheduled occurrence of the backup depending on the schedule that you specify. The next full backup is performed after the interval that you specify, calculated from this first backup. Incremental backups are performed between the full backup cycles.
ReadyNAS OS 6.0 Manually Start a Backup or Recovery Job To manually start a backup or recovery job: 1. Select Backup > Backups > Jobs. 2. Select the backup or recovery job from the jobs list. 3. From the pop-up menu that displays, select Run. The job starts. You can view its progress in the Status column of the jobs list. Delete a Backup or Recovery Job To delete a backup or recovery job: 1. Select Backup > Backups > Jobs. 2. Select the backup or recovery job from the jobs list. 3.
ReadyNAS OS 6.0 View or Clear a Job Log To view a backup or recovery job log: 1. Select Backup > Backups > Jobs. 2. Select the backup or recovery job from the jobs list. 3. From the pop-up menu that displays, select Log. The job log information displays in a pop-up screen. 4. (Optional) Click the Clear button to clear the job log.
ReadyNAS OS 6.0 Configure the Backup Button You can configure the backup button on your ReadyNAS storage system to execute one or more backup jobs that you previously created. When you press the backup button, the jobs are executed in the order that you specified in the backup schedule. If no jobs are scheduled for the button, pressing the backup button does nothing. To add a job to the backup button sequence: 1. Select Backup > Backup Button > Backup Sequence. 2. Click the Append button.
ReadyNAS OS 6.0 To remove a job from the backup button sequence: 1. Select Backup > Backup Button > Backup Sequence. 2. Select the job that you want to remove from the backup button sequence. 3. From the pop-up menu that displays, select the Remove. 4. Confirm the removal. The job is removed from the backup button list.
ReadyNAS OS 6.0 Time Machine You can use your ReadyNAS storage system to back up data stored on your Mac OS X Time Machine. To back up data stored on your Time Machine to your ReadyNAS system: 1. Select Backup > Time Machine. 2. Set the On-Off slider so the slider shows the On position. 3. In the Capacity field, enter the maximum amount of space on your ReadyNAS storage system that you want to devote to Time Machine backups.
ReadyNAS OS 6.0 7. Click the Select Backup Disk button. A pop-window displays that lists available disks, including your ReadyNAS system. 8. Select your ReadyNAS system and click the Use for Backup button. 9. In the Name field, enter ReadyNAS. 10. In the Password field, enter the password you created in step 4. 11. Click the Connect button. Time Machine begins the backup, which can take several minutes to start.
ReadyNAS OS 6.0 ReadyNAS Vault With ReadyNAS Vault, your ReadyNAS data can be backed up securely to a remote secure data center. Your data is encrypted before it is sent over the Internet. Backup administration is over a 128-bit SSL connection, the same method that banks and financial institutions use. The following figure illustrates two concepts: backing up data from a ReadyNAS system to the cloud and restoring backed-up data to a ReadyNAS system from the cloud. Restore from the cloud.
ReadyNAS OS 6.0 4. Enter your ReadyNAS Vault account credentials and click Login. Note: If you do not have an account yet, use the Click here to register link to set it up. You can use the same ReadyNAS Vault account for all of your ReadyNAS systems. The screen adjusts to display new options. 5. Click the Manage ReadyNAS Vault button. A setup wizard launches in a new browser window to help you configure ReadyNAS Vault backups for your ReadyNAS system.
ReadyNAS OS 6.0 Dropbox The ReadyNAS allows you to easily back up data from your system to your Dropbox account. From the local admin page, you can select a share on the ReadyNAS and sync it to a folder on your Dropbox account. For more information about Dropbox, visit https://www.dropbox.com. To set up Dropbox backup on your system: 1. Select Backup > Cloud Storage > Dropbox. 2. Set the On-Off slider so the slider shows the On position. 3.
ReadyNAS OS 6.0 The ReadyNAS system creates a folder called ReadyNAS inside the Apps folder of your Dropbox. 6. From the drop-down list on the local admin page, select a share to sync with your Dropbox. 7. Click Sync. The contents of the share on your ReadyNAS system are copied to the ReadyNAS folder on your Dropbox account. Note: The ReadyNAS can only back up shares to your Dropbox account.
A. Notification of Compliance N ETGE A R Wire d P ro d uct s A Regulatory Compliance Information This section includes user requirements for operating this product in accordance with National laws for usage of radio spectrum and operation of radio devices. Failure of the end-user to comply with the applicable requirements may result in unlawful operation and adverse action against the end-user by the applicable National regulatory authority.
ReadyNAS OS 6.0 FCC Guidelines for Human Exposure This equipment complies with FCC radiation exposure limits set forth for an uncontrolled environment. This equipment should be installed and operated with minimum distance of 20 cm between the radiator and your body. This transmitter must not be co-located or operating in conjunction with any other antenna or transmitter. FCC Declaration Of Conformity We, NETGEAR, Inc.