
User Manual
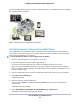

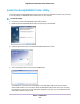
Table Of Contents
- Contents
- 1. Hardware Setup
- 2. Connect to the Network and Access the
- 3. Specify Your Internet Settings
- Use the Internet Setup Wizard
- Manually Set Up the Internet Connection
- Specify IPv6 Internet Connections
- Requirements for Entering IPv6 Addresses
- Use Auto Config for an IPv6 Internet Connection
- Use Auto Detect for an IPv6 Internet Connection
- Set Up an IPv6 6to4 Tunnel Internet Connection
- Set Up an IPv6 6rd Internet Connection
- Set Up an IPv6 Pass Through Internet Connection
- Set Up an IPv6 Fixed Internet Connection
- Set Up an IPv6 DHCP Internet Connection
- Set Up an IPv6 PPPoE Internet Connection
- Change the MTU Size
- 4. Control Access to the Internet
- 5. Network Settings
- View or Change WAN Settings
- Set Up a Default DMZ Server
- Change the ’s Device Name
- Change the LAN TCP/IP Settings
- Specify the IP Addresses That the Assigns
- Disable the DHCP Server Feature in the
- Manage Reserved LAN IP Addresses
- Use the WPS Wizard for WiFi Connections
- Specify Basic WiFi Settings
- Change the WiFi Mbps Settings
- Change the WiFi Password or Security Level
- Set Up a Guest WiFi Network
- Control the WiFi Radios
- Set Up a WiFi Schedule
- Specify WPS Settings
- Use the Router as a WiFi Access Point
- Set Up the Router in Bridge Mode
- Set Up a Bridge for a Port Group or VLAN Tag Group
- Custom Static Routes
- Ethernet Port Aggregation
- 6. Optimize Performance
- 7. Manage Your Network
- Update the Router Firmware
- Change the admin Password and Enable Password Recovery
- Set Up Password Recovery
- Recover the admin Password
- View Status
- Display Internet Port Statistics
- Check the Internet Connection Status
- View and Manage Logs of Router Activity
- View Devices Currently on the Network
- Monitor Internet Traffic
- Manage the Router Configuration File
- Remote Access
- Remotely Access Your Router Using the genie App
- 8. Share USB Storage Devices Attached to the Router
- USB Device Requirements
- Connect a USB Storage Device to the
- Access a Storage Device Connected to the Router From a Windows Computer
- Map a USB Device to a Windows Network Drive
- Access a Storage Device That Is Connected to the Router From a Mac
- Back Up Windows Computers With ReadySHARE Vault
- Back Up Mac Computers With Time Machine
- Install and Back Up Files to Amazon Drive
- Use FTP Within the Network
- View or Change Network Folders on a Storage Device
- Add a Network Folder on a USB Storage Device
- Edit a Network Folder on a USB Storage Device
- Set Up NETGEAR Downloader
- Safely Remove a USB Storage Device
- 9. Use Dynamic DNS to Access USB Storage Devices Through the Internet
- 10. Use the as a Media Server
- 11. Share a USB Printer
- 12. Use VPN to Access Your Network
- 13. Customize Internet Traffic Rules for Ports
- 14. Troubleshooting
- 15. Supplemental Information

Set Up Plex Media Server
Plex Media Server helps you manage your photos, videos, and audio files that are stored on an external
USB hard drive that is attached to your router. Plex allows you to stream media files to other devices that
are connected to your network.
For more information about Plex, visit https://www.plex.tv/.
To set up Plex Media Server on your router:
1. Connect your external USB hard drive to a USB port on your router.
If your USB storage device uses a power supply, you must use it when you connect the USB storage
device to the router.
When you connect the USB storage device to the router’s port, it might take up to two minutes before
it is ready for sharing. By default, the USB storage device is available to all computers on your local
area network (LAN).
2. Launch a web browser from a computer or mobile device that is connected to the network.
3. Enter http://www.routerlogin.net.
A login window opens.
4. Enter the router user name and password.
The user name is admin. The default password is password. The user name and password are
case-sensitive.
The BASIC Home page displays.
5. Select PLEX Media Server.
The Plex Media Server page displays.
6. Select the Download and enable PLEX Media Server check box.
7. Click the Apply button.
The Plex binary downloads and Plex Media Server is enabled.
The Enable Automatic Plex New Version Update check box is automatically
selected. If you do not want the router to check for new Plex version updates, clear
this check box and click the Apply button.
Note
8. Click the Open Plex button.
Follow the onscreen instructions to create your Plex account.
Use the Router as a Media Server
111
Nighthawk X10 AD7200 Smart WiFi Router