
User Manual
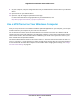
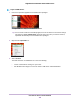
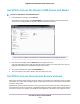
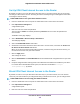

Table Of Contents
- Contents
- 1. Hardware Setup
- 2. Connect to the Network and Access the
- 3. Specify Your Internet Settings
- Use the Internet Setup Wizard
- Manually Set Up the Internet Connection
- Specify IPv6 Internet Connections
- Requirements for Entering IPv6 Addresses
- Use Auto Config for an IPv6 Internet Connection
- Use Auto Detect for an IPv6 Internet Connection
- Set Up an IPv6 6to4 Tunnel Internet Connection
- Set Up an IPv6 6rd Internet Connection
- Set Up an IPv6 Pass Through Internet Connection
- Set Up an IPv6 Fixed Internet Connection
- Set Up an IPv6 DHCP Internet Connection
- Set Up an IPv6 PPPoE Internet Connection
- Change the MTU Size
- 4. Control Access to the Internet
- 5. Network Settings
- View or Change WAN Settings
- Set Up a Default DMZ Server
- Change the ’s Device Name
- Change the LAN TCP/IP Settings
- Specify the IP Addresses That the Assigns
- Disable the DHCP Server Feature in the
- Manage Reserved LAN IP Addresses
- Use the WPS Wizard for WiFi Connections
- Specify Basic WiFi Settings
- Change the WiFi Mbps Settings
- Change the WiFi Password or Security Level
- Set Up a Guest WiFi Network
- Control the WiFi Radios
- Set Up a WiFi Schedule
- Specify WPS Settings
- Use the Router as a WiFi Access Point
- Set Up the Router in Bridge Mode
- Set Up a Bridge for a Port Group or VLAN Tag Group
- Custom Static Routes
- Ethernet Port Aggregation
- 6. Optimize Performance
- 7. Manage Your Network
- Update the Router Firmware
- Change the admin Password and Enable Password Recovery
- Set Up Password Recovery
- Recover the admin Password
- View Status
- Display Internet Port Statistics
- Check the Internet Connection Status
- View and Manage Logs of Router Activity
- View Devices Currently on the Network
- Monitor Internet Traffic
- Manage the Router Configuration File
- Remote Access
- Remotely Access Your Router Using the genie App
- 8. Share USB Storage Devices Attached to the Router
- USB Device Requirements
- Connect a USB Storage Device to the
- Access a Storage Device Connected to the Router From a Windows Computer
- Map a USB Device to a Windows Network Drive
- Access a Storage Device That Is Connected to the Router From a Mac
- Back Up Windows Computers With ReadySHARE Vault
- Back Up Mac Computers With Time Machine
- Install and Back Up Files to Amazon Drive
- Use FTP Within the Network
- View or Change Network Folders on a Storage Device
- Add a Network Folder on a USB Storage Device
- Edit a Network Folder on a USB Storage Device
- Set Up NETGEAR Downloader
- Safely Remove a USB Storage Device
- 9. Use Dynamic DNS to Access USB Storage Devices Through the Internet
- 10. Use the as a Media Server
- 11. Share a USB Printer
- 12. Use VPN to Access Your Network
- 13. Customize Internet Traffic Rules for Ports
- 14. Troubleshooting
- 15. Supplemental Information

Port Forwarding to a Local Server
If your home network includes a server, you can allow certain types of incoming traffic to reach the server.
For example, you might want to make a local web server, FTP server, or game server visible and available
to the Internet.
The router can forward incoming traffic with specific protocols to computers on your local network.You can
specify the servers for applications and you can also specify a default DMZ server to which the router
forwards all other incoming protocols.
Set Up Port Forwarding to a Local Server
To forward specific incoming protocols:
1. Decide which type of service, application, or game you want to provide.
2. Find the local IP address of the computer on your network that will provide the service.
You can usually find this information by contacting the publisher of the application or user groups or
news groups.
The server computer must always use the same IP address.
3. Assign the server computer a reserved IP address.
See Manage Reserved LAN IP Addresses on page 53.
4. Launch a web browser from a computer or mobile device that is connected to the network.
5. Enter http://www.routerlogin.net.
A login window opens.
6. Enter the router user name and password.
The user name is admin. The default password is password. The user name and password are
case-sensitive.
The BASIC Home page displays.
7. Select ADVANCED > Advanced Setup > Port Forwarding/Port Triggering.
8. Leave the Port Forwarding radio button selected as the service type.
9. From the Service Name menu, select the service name.
If the service that you want to add is not in the menu, create a custom service. See Add a Custom Port
Forwarding Service on page 140.
Customize Internet Traffic Rules for Ports
139
Nighthawk X10 AD7200 Smart WiFi Router