
User Manual


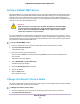
Table Of Contents
- Contents
- 1. Hardware Setup
- 2. Connect to the Network and Access the
- 3. Specify Your Internet Settings
- Use the Internet Setup Wizard
- Manually Set Up the Internet Connection
- Specify IPv6 Internet Connections
- Requirements for Entering IPv6 Addresses
- Use Auto Config for an IPv6 Internet Connection
- Use Auto Detect for an IPv6 Internet Connection
- Set Up an IPv6 6to4 Tunnel Internet Connection
- Set Up an IPv6 6rd Internet Connection
- Set Up an IPv6 Pass Through Internet Connection
- Set Up an IPv6 Fixed Internet Connection
- Set Up an IPv6 DHCP Internet Connection
- Set Up an IPv6 PPPoE Internet Connection
- Change the MTU Size
- 4. Control Access to the Internet
- 5. Network Settings
- View or Change WAN Settings
- Set Up a Default DMZ Server
- Change the ’s Device Name
- Change the LAN TCP/IP Settings
- Specify the IP Addresses That the Assigns
- Disable the DHCP Server Feature in the
- Manage Reserved LAN IP Addresses
- Use the WPS Wizard for WiFi Connections
- Specify Basic WiFi Settings
- Change the WiFi Mbps Settings
- Change the WiFi Password or Security Level
- Set Up a Guest WiFi Network
- Control the WiFi Radios
- Set Up a WiFi Schedule
- Specify WPS Settings
- Use the Router as a WiFi Access Point
- Set Up the Router in Bridge Mode
- Set Up a Bridge for a Port Group or VLAN Tag Group
- Custom Static Routes
- Ethernet Port Aggregation
- 6. Optimize Performance
- 7. Manage Your Network
- Update the Router Firmware
- Change the admin Password and Enable Password Recovery
- Set Up Password Recovery
- Recover the admin Password
- View Status
- Display Internet Port Statistics
- Check the Internet Connection Status
- View and Manage Logs of Router Activity
- View Devices Currently on the Network
- Monitor Internet Traffic
- Manage the Router Configuration File
- Remote Access
- Remotely Access Your Router Using the genie App
- 8. Share USB Storage Devices Attached to the Router
- USB Device Requirements
- Connect a USB Storage Device to the
- Access a Storage Device Connected to the Router From a Windows Computer
- Map a USB Device to a Windows Network Drive
- Access a Storage Device That Is Connected to the Router From a Mac
- Back Up Windows Computers With ReadySHARE Vault
- Back Up Mac Computers With Time Machine
- Install and Back Up Files to Amazon Drive
- Use FTP Within the Network
- View or Change Network Folders on a Storage Device
- Add a Network Folder on a USB Storage Device
- Edit a Network Folder on a USB Storage Device
- Set Up NETGEAR Downloader
- Safely Remove a USB Storage Device
- 9. Use Dynamic DNS to Access USB Storage Devices Through the Internet
- 10. Use the as a Media Server
- 11. Share a USB Printer
- 12. Use VPN to Access Your Network
- 13. Customize Internet Traffic Rules for Ports
- 14. Troubleshooting
- 15. Supplemental Information

View or Change WAN Settings
You can view or configure wide area network (WAN) settings for the Internet port.You can set up a DMZ
(demilitarized zone) server, change the maximum transmit unit (MTU) size, and enable the router to respond
to a ping to its WAN (Internet) port.
To view or change the WAN settings:
1. Launch a web browser from a computer or mobile device that is connected to the network.
2. Type http://www.routerlogin.net.
A login window opens.
3. Enter the router user name and password.
The user name is admin. The default password is password. The user name and password are
case-sensitive.
The BASIC Home page displays.
4. Select ADVANCED > Setup > WAN Setup.
The WAN Setup page displays.
The following settings display:
• Disable Port Scan and DoS Protection. DoS protection protects your LAN against denial of service
attacks such as Syn flood, Smurf Attack, Ping of Death, and many others. Select this check box
only in special circumstances.
• Default DMZ Server. This feature is sometimes helpful when you are playing online games or
videoconferencing, but it makes the firewall security less effective. See Set Up a Default DMZ Server
on page 49.
• Respond to Ping on Internet Port. This feature allows your router to be discovered. Use this
feature only as a diagnostic tool or for a specific reason.
• Disable IGMP Proxying. IGMP proxying allows a computer on the local area network (LAN) to
receive the multicast traffic it is interested in from the Internet. If you do not need this feature, you
can select this check box to disable it.
• MTU Size (in bytes).The normal MTU (maximum transmit unit) value for most Ethernet networks
is 1500 bytes, or 1492 bytes for PPPoE connections. Change the MTU only if you are sure that it
is necessary for your ISP connection. See Change the MTU Size on page 36.
• NAT Filtering. Network Address Translation (NAT) determines how the router processes inbound
traffic. Secured NAT protects computers on the LAN from attacks from the Internet but might prevent
some Internet games, point-to-point applications, or multimedia applications from working. Open
NAT provides a much less secured firewall but allows almost all Internet applications to work.
• Disable SIP ALG. Some voice and video communication applications do not work well with the SIP
ALG. Disabling the SIP ALG might help your voice and video applications to create and accept a
call through the router.
5. Click the Apply button.
Your settings are saved.
Network Settings
48
Nighthawk X10 AD7200 Smart WiFi Router