
User Guide


To create a VLAN:
1. Log in to the ReadyNAS.
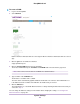
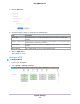
2. Select Network.
Ethernet interfaces with active links are colored green. Ethernet interfaces with inactive links are colored
gray.
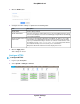
3. Click the gear icon for an Ethernet interface.
A pop-up window opens.
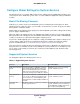
4. Click the Create VLAN button in the pop-up window.
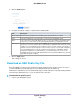
The Create VLAN window opens with Name and VLAN ID fields.The name field is grayed out.
There can be no more than one VLAN ID on a network interface.Note
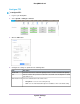
5. Type a number in the VLAN ID field.
The ID value is a number from 1 to 4094.
The name field is automatically populated with the VLAN name. The format is ethn.VLAN ID where n
is the Ethernet interface number and VLAN ID is the number that you entered.
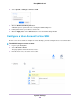
6. Click the Add button.
The VLAN interface is created with Ethernet interface settings matching the Ethernet interface that you
selected in Step 3.
You can change the Ethernet settings. For information about changing the settings, see Configure the
Ethernet Interfaces on page 161.
System Settings
171
ReadyNAS OS 6.7