User Manual Orbi Pro Models SRR60 SRS60 March 2019 202-11824-05 NETGEAR, Inc. 350 E.
Orbi Pro Support Thank you for purchasing this NETGEAR product. You can visit https://www.netgear.com/support/ to register your product, get help, access the latest downloads and user manuals, and join our community. We recommend that you use only official NETGEAR support resources. Compliance and Conformity For regulatory compliance information including the EU Declaration of Conformity, visit https://www.netgear.com/about/regulatory/.
Contents Chapter 1 Overview Supported Orbi Pro Models................................................................9 Orbi Pro Router and Satellite Hardware Overviews.........................9 Orbi Pro Router Model SRR60 Hardware Overview....................9 Orbi Pro Satellite Model SRS60 Hardware Overview................10 LED Behavior.......................................................................................10 Orbi Pro WiFi System LEDs........................................................
Orbi Pro Specify an Internet Connection That Uses a Login....................30 Specify IPv6 Internet Connections....................................................31 Requirements for Entering IPv6 Addresses....................................33 Use Auto Detect for an IPv6 Internet Connection..........................33 Use Auto Config for an IPV6 Internet Connection.........................34 Set Up an IPv6 6rd Tunnel Internet Connection.............................
Orbi Pro Change the admin WiFi Password or Security Level.................72 Manage the Employee WiFi Network Settings...............................73 Enable the Employee WiFi Network and Change the Settings.74 Change the Employee WiFi Password or Security Level..........75 Set Up a Guest Network With a Captive Portal...............................76 Set Up Facebook Wi-Fi......................................................................78 View or Change Advanced WiFi Settings..........................
Orbi Pro Chapter 7 Customize Internet Traffic Rules for Ports Port Forwarding to a Local Server..................................................108 Set Up Port Forwarding to a Local Server.................................108 Add a Custom Port Forwarding Service...................................109 Edit a Port Forwarding Service...................................................110 Delete a Port Forwarding Entry..................................................
Orbi Pro Appendix A Supplemental Information Factory Settings................................................................................138 Factory Settings for Orbi Pro Router Model SRR60.................138 Factory Settings for Orbi Pro Satellite Model SRS60..............139 Technical Specifications..................................................................141 Technical Specifications for Orbi Pro Router Model SRR60....141 Technical Specifications for Orbi Pro Satellite Model SRS60..
1 Overview The Orbi Pro creates dedicated high-speed WiFi connections to your Internet service. The Orbi Pro router connects to your modem or gateway. The Orbi Pro satellite extends the WiFi signal throughout your home.
Orbi Pro Supported Orbi Pro Models This user manual describes the following Orbi Pro models: • Orbi Pro Router (Model SRR60) • Orbi Pro Satellite (Model SRS60) This user manual does not describe the following Orbi Pro satellites: • Orbi Outdoor Satellite (Model RBS50Y) • Orbi Pro Ceiling Satellite (Model SRC60) For more information about these Orbi Pro satellites, see their user manuals, which are available at https://www.netgear.com/support/.
Orbi Pro 1. Ring LED (not shown in image) 2. Sync button (also used for WPS connection) 3. Internet port 4. Ethernet ports 5. Power On/Off button and Power LED 6. DC Power connector 7. Reset button Orbi Pro Satellite Model SRS60 Hardware Overview Figure 2. Orbi Pro satellite model SRS60, front and back views 1. Ring LED (not shown in image) 2. Sync button (also used for WPS connection) 3. Ethernet ports 4. Power On/Off button and Power LED 5. DC Power connector 6.
Orbi Pro Orbi Pro WiFi System LEDs The following table describes the LED behavior for an Orbi Pro router (model SRR60) and Orbi Pro satellite (model SRS60) that are purchased together and come in the same package. Table 1. Orbi ProWiFi System router and satellite LED descriptions LED LED Behavior Power LED The Power LED is located above the Power On/Off button on the rear panel. • Solid green. Power is on. • Solid amber. The router or satellite is booting. • Blinking amber.
Orbi Pro Table 2. Orbi Pro add-on satellite (model SRS60) LED description LED LED Behavior Power LED The Power LED is located above the Power On/Off button on the rear panel. • Solid green. Power is on. • Solid amber. The satellite is rebooting. • Blinking amber. The satellite is resetting to factory default settings. • Blinking red. The firmware is corrupted. • Off. Power is not supplied. Add-on satellite ring LED Optional add-on satellites are sold separately and can be added to your Orbi network.
Orbi Pro To wall mount your router or satellite: 1. Place your Orbi router or satellite on the mount base and attach the router or satellite to the base with the provided screws. 2. Attach the mount cover to the mount base. 3. Use the wall anchors with screws to attach the wall bracket to the wall. 4. Slide the mount base onto the wall bracket. Ceiling-Mount Your Orbi Pro The following instructions require a drop ceiling.
Orbi Pro To ceiling mount your router or satellite: 1. Place your Orbi router or satellite on the mount base and attach the router or satellite to the base with the provided screws. 2. Attach the mount cover to the mount base. 3. Attach the T-bracket to the ceiling bracket with the T-bracket screws. 4. Loosen the screw so that the locking plate can slide. 5. Secure the T-bracket to the T-bar and tighten the screw.
Orbi Pro 6. Slide the mount base into the ceiling bracket. Labels The Orbi Pro router label shows the login information, the WiFi network name and password, the router’s MAC address, and the router’s serial number. The following is an example of what the router label might look like: Figure 3. Orbi Pro router label The Orbi Pro satellite label shows the WiFi network name and password, the satellite’s MAC address, and the satellite’s serial number.
Orbi Pro Figure 4. Orbi Pro satellite label Connect Your Orbi Pro Router If you want to connect your Orbi Pro router to an existing gateway, we recommend that you turn off your existing gateway’s WiFi. To cable your router: 1. Unplug your modem’s power, leaving the modem connected to the wall jack for your Internet service. If your modem uses a battery backup, remove the battery, and then put the battery back in. 2. Plug in and turn on your modem. 3.
Orbi Pro Place Your Satellite Your satellites must be within range of your router’s WiFi signal in order for it to sync with the router. Use the satellite’s ring LED to help you determine where to place your satellite. Sync Your Orbi Pro Satellite The sync process for your Orbi Pro satellite depends on whether your satellite came with your Orbi Pro WiFi System, or if your satellite is an add-on satellite.
Orbi Pro 4. If the satellite ring LED is magenta, move the satellite closer to the router and then sync the satellite to the router: a. Press the Sync button on the back of the router. b. Within two minutes, press the Sync button on the back of the satellite. The satellite attempts to sync to the Orbi router. The satellite ring LED lights blue, amber, or magenta as described in Step 3 of this procedure and then turns off.
Orbi Pro To add a satellite to your Orbi network using the router web interface: 1. Launch a web browser from a computer or mobile device that is connected to your Orbi network. 2. Enter orbilogin.com. A login window opens. 3. Enter the router admin user name and password. The user name is admin. The default password is password. The user name and password are case-sensitive. The BASIC Home page displays. 4. Select Add Orbi Satellite. The Place Your Satellite page displays. 5.
Orbi Pro Set Up Your Orbi Network With the NETGEAR Insight App You can use the NETGEAR Insight app to set up your Orbi network. To find the app, search for NETGEAR Insight in the Apple App Store or Google Play Store. Then launch the NETGEAR Insight app on your mobile device and follow the prompts. For more information about the NETGEAR Insight app, visit https://www.netgear.com/insight/.
2 Connect to the Orbi Pro Network and Access the Router To manage your Orbi Pro router and any Orbi Pro satellites that are connected to your Orbi Pro network, you must manage them from your Orbi Pro router web interface.
Orbi Pro Connect to the Network You can connect to the Orbi network through a wired or WiFi connection. If you set up your computer to use a static IP address, change the settings so that it uses Dynamic Host Configuration Protocol (DHCP). Wired Connection You can connect your computer to the router using an Ethernet cable and join the router’s local area network (LAN). To connect your computer to the router with an Ethernet cable: 1. Make sure that the router is receiving power (its Power LED is lit). 2.
Orbi Pro To use WPS to connect to the WiFi network: 1. Make sure that the router is receiving power (its Power LED is lit). 2. Check the WPS instructions for your computer or WiFi device. 3. Press the Sync button on the router. 4. Within two minutes, on your WiFi-enabled computer or mobile device, press its WPS button or follow its instructions for WPS connections. Your computer or mobile device connects to the WiFi network. Types of Logins Separate types of logins serve different purposes.
Orbi Pro When your Internet service starts, your Internet service provider (ISP) typically gives you all the information needed to connect to the Internet. For DSL service, you might need the following information to set up your router: • The ISP configuration information for your DSL account • ISP login name and password • Fixed or static IP address settings (special deployment by ISP; this setting is rare) If you cannot locate this information, ask your ISP to provide it.
Orbi Pro • Browse to orbilogin.com. • If the computer is set to a static or fixed IP address (this setting is uncommon), change it to obtain an IP address automatically from the router. 6. If the router does not connect to the Internet, do the following: a. Review your settings. b. Make sure that you selected the correct options and typed everything correctly. c. Contact your ISP to verify that you are using the correct configuration information. d. Read Troubleshooting on page 128.
Orbi Pro 3. Enter the router admin user name and password. The user name is admin. The password is the one that you specified the first time that you logged in. The user name and password are case-sensitive. The BASIC Home page displays. 4. In the upper right corner, select a language from the menu. 5. When prompted, click the OK button to confirm this change. The page refreshes with the language that you selected.
3 Specify Your Internet Settings Usually, the quickest way to set up the router to use your Internet connection is to allow Orbi to detect the Internet connection when you first access the router with a web browser. You can also customize or specify your Internet settings.
Orbi Pro Use the Internet Setup Wizard You can use the Setup Wizard to detect your Internet settings and automatically set up your router. To use the Setup Wizard: 1. Launch a web browser from a computer or mobile device that is connected to your Orbi network. 2. Enter orbilogin.com. A login window opens. 3. Enter the admin user name and password. The user name is admin. The password is the one that you specified the first time that you logged in. The user name and password are case-sensitive.
Orbi Pro 3. Enter the admin user name and password. The user name is admin. The password is the one that you specified the first time that you logged in. The user name and password are case-sensitive. The BASIC Home page displays. 4. Select Internet. The Internet Setup page. 5. Leave the Does your Internet connection require a login No radio button selected. 6. If your Internet connection requires an account name or host name, type it in the Account Name (If Required) field. 7.
Orbi Pro 12. Click the Test button to test your Internet connection. If the NETGEAR website does not display within one minute, see Troubleshooting on page 128. Specify an Internet Connection That Uses a Login To view or change the basic Internet setup: 1. Launch a web browser from a computer or mobile device that is connected to your Orbi network. 2. Enter orbilogin.com. A login window opens. 3. Enter the admin user name and password. The user name is admin.
Orbi Pro 12. Select an Internet IP Address radio button: • Get Dynamically from ISP. Your ISP uses DHCP to assign your IP address. Your ISP automatically assigns these addresses. • Use Static IP Address. Enter the IP address, IP subnet mask, and gateway IP address that your ISP assigned. The gateway is the ISP router to which your router connects. 13. Select a Domain Name Server (DNS) radio button: • Get Automatically from ISP. Your ISP uses DHCP to assign your DNS servers.
Orbi Pro 3. Enter the admin user name and password. The user name is admin. The password is the one that you specified the first time that you logged in. The user name and password are case-sensitive. The BASIC Home page displays. 4. Select ADVANCED > Advanced Setup > IPv6. The IPv6 page displays. 5. From the Internet Connection Type menu, select the IPv6 connection type: • If you are not sure, select Auto Detect so that the router detects the IPv6 type that is in use.
Orbi Pro Requirements for Entering IPv6 Addresses IPv6 addresses are denoted by eight groups of hexadecimal quartets that are separated by colons. You can reduce any four-digit group of zeros within an IPv6 address to a single zero or omit it.
Orbi Pro 6. Select an IP Address Assignment radio button: • Use DHCP Server. This method passes more information to LAN devices, but some IPv6 systems might not support the DHCv6 client function. • Auto Config. This is the default setting. This setting specifies how the router assigns IPv6 addresses to the devices on your home network (the LAN). 7. (Optional) Select the Use This Interface ID check box and specify the interface ID to be used for the IPv6 address of the router’s LAN interface.
Orbi Pro length of the prefix, which is also indicated by the underline (_) under the IPv6 address. If no address is acquired, the field displays Not Available. • Router’s IPv6 Address on LAN. This field shows the IPv6 address that is acquired for the router’s LAN interface. The number after the slash (/) is the length of the prefix, which is also indicated by the underline (_) under the IPv6 address. If no address is acquired, the field displays Not Available. 6.
Orbi Pro With a 6rd Tunnel configuration, the router follows the RFC5969 standard, supporting two ways to establish a 6rd tunnel IPv6 WAN connection: • Auto Detect Mode. In IPv6 Auto Detect mode, when the router receives option 212 from the DHCPv4 option, auto detect selects the IPv6 as 6rd Tunnel setting. The router uses the 6rd option information to establish the 6rd connection. • Manual Mode. Select 6rd. If the router receives option 212, the fields are automatically completed.
Orbi Pro 6. Select an IPv6 Domain Name Server (DNS) Address radio button: • Get Automatically from ISP. Your ISP uses DHCP to assign your DNS servers. Your ISP automatically assigns this address. • Use These DNS Servers. If you know that your ISP requires specific servers, select this option. Enter the IP address of your ISP’s primary DNS server. If a secondary DNS server address is available, enter it also. 7. Select an IP Address Assignment radio button: • Use DHCP Server.
Orbi Pro The IPv6 page displays. 5. From the Internet Connection Type menu, select 6to4 Tunnel. The page adjusts. The router automatically detects the information in the Router’s IPv6 Address on LAN field. This field shows the IPv6 address that is acquired for the router’s LAN interface. The number after the slash (/) is the length of the prefix, which is also indicated by the underline (_) under the IPv6 address. If no address is acquired, the field displays Not Available. 6.
Orbi Pro Set Up an IPv6 Pass Through Internet Connection In pass-through mode, the router works as a Layer 2 Ethernet switch with two ports (LAN and WAN Ethernet ports) for IPv6 packets. The router does not process any IPv6 header packets. To set up a pass-through IPv6 Internet connection: 1. Launch a web browser from a computer or mobile device that is connected to your Orbi network. 2. Enter orbilogin.com. A login window opens. 3. Enter the admin user name and password. The user name is admin.
Orbi Pro 5. From the Internet Connection Type menu, select Fixed. The page adjusts. 6. Configure the fixed IPv6 addresses for the WAN connection: • IPv6 Address/Prefix Length. The IPv6 address and prefix length of the router WAN interface. • Default IPv6 Gateway. The IPv6 address of the default IPv6 gateway for the router’s WAN interface. • Primary DNS Server. The primary DNS server that resolves IPv6 domain name records for the router. • Secondary DNS Server.
Orbi Pro A login window opens. 3. Enter the admin user name and password. The user name is admin. The password is the one that you specified the first time that you logged in. The user name and password are case-sensitive. The BASIC Home page displays. 4. Select ADVANCED > Advanced Setup > IPv6. The IPv6 page displays. 5. From the Internet Connection Type menu, select DHCP. The page adjusts. The router automatically detects the information in the following fields: • Router’s IPv6 Address on WAN.
Orbi Pro 9. Select an IP Address Assignment radio button: • Use DHCP Server. This method passes more information to LAN devices, but some IPv6 systems might not support the DHCv6 client function. • Auto Config. This is the default setting. This setting specifies how the router assigns IPv6 addresses to the devices on your home network (the LAN). 10.
Orbi Pro length of the prefix, which is also indicated by the underline (_) under the IPv6 address. If no address is acquired, the field displays Not Available. • Router’s IPv6 Address on LAN. This field shows the IPv6 address that is acquired for the router’s LAN interface. The number after the slash (/) is the length of the prefix, which is also indicated by the underline (_) under the IPv6 address. If no address is acquired, the field displays Not Available. 6.
Orbi Pro Change the MTU Size The maximum transmission unit (MTU) is the largest data packet a network device transmits. When one network device communicates across the Internet with another, the data packets travel through many devices along the way. If a device in the data path uses a lower MTU setting than the other devices, the data packets must be split or “fragmented” to accommodate the device with the smallest MTU. The best MTU setting for NETGEAR equipment is often the default value.
Orbi Pro 5. In the MTU Size field, enter a value from 64 to 1500. 6. Click the Apply button. Your settings are saved. If you suspect an MTU problem, a common solution is to change the MTU to 1400. If you are willing to experiment, you can gradually reduce the MTU from the maximum value of 1500 until the problem goes away. The following table describes common MTU sizes and applications. Table 3. Common MTU sizes MTU Application 1500 The largest Ethernet packet size.
4 Control Access to the Internet The router comes with a built-in firewall that helps protect your home network from unwanted intrusions from the Internet.
Orbi Pro Allow or Block Access to Your Network You can use access control to block access to your network. To set up access control: 1. Launch a web browser from a computer or mobile device that is connected to your Orbi network. 2. Enter orbilogin.com. A login window opens. 3. Enter the admin user name and password. The user name is admin. The password is the one that you specified the first time that you logged in. The user name and password are case-sensitive. The BASIC Home page displays. 4.
Orbi Pro 8. To view a list of allowed or blocked devices that are not connected, click one of the following links: • View list of allowed devices not currently connected to the network • View list of blocked devices not currently connected to the network The list displays. 9. Click the Apply button. Your settings are saved. Use Keywords to Block Internet Sites You can use keywords to block certain Internet sites from your network. You can use blocking all the time or based on a schedule.
Orbi Pro For example: • Specify XXX to block http://www.badstuff.com/xxx.html. • Specify .com if you want to allow only sites with domain suffixes such as .edu or .gov. • Enter a period (.) to block all Internet browsing access. 7. Click the Add Keyword button. The keyword is added to the keyword list. The keyword list supports up to 32 entries. 8. Click the Apply button. Keyword blocking takes effect.
Orbi Pro Your settings are saved. Avoid Blocking on a Trusted Computer You can exempt one trusted computer from blocking. The computer that you exempt must be assigned a fixed IP address. You can use the reserved IP address feature to specify the IP address. See Manage Reserved LAN IP Addresses on page 66. To specify a trusted computer: 1. Launch a web browser from a computer or mobile device that is connected to your Orbi network. 2. Enter orbilogin.com. A login window opens. 3.
Orbi Pro 3. Enter the admin user name and password. The user name is admin. The password is the one that you specified the first time that you logged in. The user name and password are case-sensitive. The BASIC Home page displays. 4. Select ADVANCED > Security > Block Services. The Block Services page displays. 5. Specify when to block the services: • To block the services all the time, select the Always radio button. • To block the services based on a schedule, select the Per Schedule radio button.
Orbi Pro Your settings are saved. Manage Network Access Control Lists You can use access control to block or allow access to your network. To manage devices that are allowed or blocked: 1. Launch a web browser from a computer or mobile device that is connected to your Orbi network. 2. Enter orbilogin.com. A login window opens. 3. Enter the admin user name and password. The user name is admin. The password is the one that you specified the first time that you logged in.
Orbi Pro To schedule blocking: 1. Launch a web browser from a computer or mobile device that is connected to your Orbi network. 2. Enter orbilogin.com. A login window opens. 3. Enter the admin user name and password. The user name is admin. The password is the one that you specified the first time that you logged in. The user name and password are case-sensitive. The BASIC Home page displays. 4. Select ADVANCED > Security > Schedule. 5. Specify when to block keywords and services: • Days to Block.
Orbi Pro The user name is admin. The password is the one that you specified the first time that you logged in. The user name and password are case-sensitive. The BASIC Home page displays. 4. Select ADVANCED > Security > E-mail. The E-mail page displays. 5. Select the Turn Email Notification On check box. 6. In the Primary E-mail Address field, enter the email address to which logs and alerts are sent. This email address is also used for the From address.
Orbi Pro Logs are sent automatically. If the log fills before the specified time, it is sent. After the log is sent, it is cleared from the router memory. If the router cannot email the log and the log buffer fills, the router overwrites the log.
5 Specify Network Settings This chapter includes the following sections: • • • • • • • • • • • • • • • • • • • • • • View or Change WAN Settings Dynamic DNS Set Up a Default DMZ Server Change the Router’s Device Name Change the LAN TCP/IP Settings Use the Router as a DHCP Server Disable the DHCP Server Feature in the Router Manage Reserved LAN IP Addresses Custom Static Routes Change the admin WiFi Network Settings Manage the Employee WiFi Network Settings Set Up a Guest Network With a Captive Portal Set U
Orbi Pro View or Change WAN Settings You can view or configure wide area network (WAN) settings for the Internet port. You can set up a DMZ (demilitarized zone) server, change the maximum transmit unit (MTU) size, and enable the router to respond to a ping to its WAN (Internet) port. To view the WAN settings: 1. Launch a web browser from a computer or mobile device that is connected to your Orbi network. 2. Enter orbilogin.com. A login window opens. 3. Enter the admin user name and password.
Orbi Pro applications, or multimedia applications from working. Open NAT provides a much less secured firewall, but allows almost all Internet applications to work. 6. Click the Apply button. Your settings are saved. Dynamic DNS Internet service providers (ISPs) assign numbers called IP addresses to identify each Internet account. Most ISPs use dynamically assigned IP addresses. This means that the IP address can change at any time.
Orbi Pro 6. In the Service Provider list, select NETGEAR. 7. Select the No radio button. 8. In the Host Name field, type the name that you want to use for your URL. The host name is sometimes called the domain name. Your free URL includes the host name that you specify, and ends with mynetgear.com. For example, specify MyName.mynetgear.com. 9. In the Email field, type the email address that you want to use for your account. 10. In the Password (6-32 characters) field, type the password for your account.
Orbi Pro 8. In the Host Name field, type the host name (sometimes called the domain name) for your account. 9. For a no-IP Dyn account, in the User Name field, enter the user name for your account. 10. For a NETGEAR account at no-IP, in the Email field, type the email address for your account. 11. In the Password (6-32 characters) field, type the password for your DDNS account. 12. Click the Apply button. Your settings are saved. 13.
Orbi Pro correctly with them, but other applications might not function well. In some cases, one local computer can run the application correctly if the IP address for that computer is entered as the default DMZ server. DMZ servers pose a security risk. A computer designated as the default DMZ server loses much of the protection of the firewall and is exposed to exploits from the Internet. If compromised, the DMZ server computer can be used to attack other computers on your network.
Orbi Pro To change the router’s device name: 1. Launch a web browser from a computer or mobile device that is connected to your Orbi network. 2. Enter orbilogin.com. A login window opens. 3. Enter the admin user name and password. The user name is admin. The password is the one that you specified the first time that you logged in. The user name and password are case-sensitive. The BASIC Home page displays. 4. Select ADVANCED > Setup > Device Name. The Device Name page displays. 5.
Orbi Pro The user name is admin. The password is the one that you specified the first time that you logged in. The user name and password are case-sensitive. The BASIC Home page displays. 4. Select ADVANCED > Setup > LAN Setup. The LAN Setup page displays. 5. In the IP Address field, type the IP address. 6. In the IP Subnet Mask, type the subnet mask of the router. The IP address and subnet mask identifies which addresses are local to a specific device and which must be reached through a gateway or router.
Orbi Pro Use the Router as a DHCP Server By default, the router acts as a Dynamic Host Configuration Protocol (DHCP) server. The router assigns IP, DNS server, and default gateway addresses to all computers connected to the LAN. The assigned default gateway address is the LAN address of the router. These addresses must be part of the same IP address subnet as the router’s LAN IP address. Using the default addressing scheme, define a range between 192.168.1.2 and 192.168.1.
Orbi Pro The router delivers the following parameters to any LAN device that requests DHCP: • An IP address from the range that you defined • Subnet mask • Gateway IP address (the router’s LAN IP address) • DNS server IP address (the router’s LAN IP address) Disable the DHCP Server Feature in the Router By default, the router acts as a DHCP server. The router assigns IP, DNS server, and default gateway addresses to all computers connected to the LAN.
Orbi Pro Manage Reserved LAN IP Addresses When you specify a reserved IP address for a computer on the LAN, that computer always receives the same IP address each time it accesses the router’s DHCP server. Assign reserved IP addresses to computers or servers that require permanent IP settings. Reserve an IP Address To reserve an IP address: 1. Launch a web browser from a computer or mobile device that is connected to your Orbi network. 2. Enter orbilogin.com. A login window opens. 3.
Orbi Pro Edit a Reserved IP Address To edit a reserved address entry: 1. Launch a web browser from a computer or mobile device that is connected to your Orbi network. 2. Enter orbilogin.com. A login window opens. 3. Enter the admin user name and password. The user name is admin. The password is the one that you specified the first time that you logged in. The user name and password are case-sensitive. The BASIC Home page displays. 4. Select ADVANCED > Setup > LAN Setup. The LAN Setup page displays. 5.
Orbi Pro 5. Select the radio button next to the reserved address. 6. Click the Delete button. The address is removed. Custom Static Routes Typically, you do not need to add static routes unless you use multiple routers or multiple IP subnets on your network. As an example of when a static route is needed, consider the following case: • Your main Internet access is through a cable modem to an ISP. • Your home network includes an ISDN router for connecting to the company where you are employed.
Orbi Pro A login window opens. 3. Enter the admin user name and password. The user name is admin. The password is the one that you specified the first time that you logged in. The user name and password are case-sensitive. The BASIC Home page displays. 4. Select ADVANCED > Advanced Setup > Static Routes. The Static Routes page displays. 5. Click the Add button. The page adjusts. 6. In the Route Name field, type a name for this static route (for identification purposes only.) 7.
Orbi Pro 3. Enter the admin user name and password. The user name is admin. The password is the one that you specified the first time that you logged in. The user name and password are case-sensitive. The BASIC Home page displays. 4. Select ADVANCED > Advanced Setup > Static Routes. The Static Routes page displays. 5. In the table, select the radio button for the route. 6. Click the Edit button. The Static Routes page adjusts. 7. Edit the route information. 8. Click the Apply button.
Orbi Pro Change the admin WiFi Network Settings You can set up three WiFi networks for your Orbi Pro network: one for administrative access, one for employee access, and one for guest access. Your Orbi Pro router and satellite come preset with the same admin WiFi network name (SSID) and WiFi network key (password). You can find the admin SSID and password on the router label and on the satellite label. The preset WiFi settings on the labels are for your admin WiFi network.
Orbi Pro The name can be up to 32 characters long and it is case-sensitive. The default SSID is randomly generated and is on the router label. If you change the name, make sure to write down the new name and keep it in a safe place. 6. To change the 2.4 GHz or 5 GHz WiFi channel, select a number from the Channel menus. In some regions, not all channels are available. Do not change the channel unless you experience interference (shown by lost connections or slow data transfers).
Orbi Pro A login window opens. 3. Enter the admin user name and password. The user name is admin. The password is the one that you specified the first time that you logged in. The user name and password are case-sensitive. The BASIC Home page displays. 4. Select Wireless. The Wireless Settings page displays the admin WiFi settings. 5.
Orbi Pro Enable the Employee WiFi Network and Change the Settings Before you can set up the employee WiFi network, you must enable it. You must be connected to the admin network to cenable the employee WiFi network and change the settings. When employee devices connect to the employee WiFi network, they cannot see other devices that are connected to the network and cannot access the local area network (LAN).
Orbi Pro The name can be up to 32 characters long and it is case-sensitive. The default SSID is randomly generated and is on the router’s label. If you change the name, make sure to write down the new name and keep it in a safe place. 9. Click the Apply button. Your settings are saved. The router sends the new settings to the satellite. If you are using a WiFi connection and you changed the SSID, you are disconnected from the network. 10.
Orbi Pro 5. Under Security Options, select a WPA option: • WPA2-PSK [AES] • WPA-PSK [TKIP] + WPA2-PSK [AES] The WPA2 option uses the newest standard for the strongest security, but some older computers and WiFi devices cannot use WPA2. If your network includes old computers and WiFi devices, select the WPA-PSK [TKIP] + WPA2-PSK [AES] radio button. The Password (Network Key) field displays. 6. In the Password (Network Key) field, enter the network key (password) that you want to use.
Orbi Pro 5. Select the Enable Guest Portal check box. 6. Leave the Enable SSID Broadcast check box selected. Allowing the router to broadcast its WiFi network name (SSID) makes it easier to find your network and connect to it. If you clear this check box, that creates a hidden network. 7. To change the network name, type a new name in the Guest Portal Network Name (SSID) field. The name can be up to 32 characters long and it is case-sensitive.
Orbi Pro 16. To set up a redirect URL, select the URL radio button and enter the URL for the page to which you want to redirect users to in the field. After visitors agree to the terms and conditions, they are redirected to this page. 17. Click the APPLY button. Your settings are saved. Set Up Facebook Wi-Fi You can set up Facebook Wi-Fi on your Orbi WiFi network to offer your customers free WiFi access if they check in to your existing Facebook business page.
Orbi Pro The name can be up to 32 characters long and it is case-sensitive. If you change the name, make sure to write down the new name and keep it in a safe place. 8. In the Authentication Mode section, select the Facebook Wi-Fi radio button. The page adjust and displays the Add Page button. 9. Click the Add Page button. The Facebook Login page displays. 10. Log in to your Facebook business account. The Facebook Wi-Fi Configuration page displays. 11.
Orbi Pro View or Change Advanced WiFi Settings To view or change advanced WiFi settings: 1. Launch a web browser from a computer or mobile device that is connected to your Orbi network. 2. Enter orbilogin.com. A login window opens. 3. Enter the admin user name and password. The user name is admin. The password is the one that you specified the first time that you logged in. The user name and password are case-sensitive. The BASIC Home page displays. 4. Select ADVANCED > Advanced Setup > Wireless Settings.
Orbi Pro For example, you can use the Orbi router as a WiFi access point that connects to a gateway or modem router that you already use for your Internet service. In this situation, you do not need to change the settings for the gateway or modem router. To set up the Orbi router as an AP after you set up your Internet connection: 1. Use an Ethernet cable to connect the Internet port of this router to a LAN port on your existing router or gateway. 2.
Orbi Pro Set Up Router Mode If you set up your router as an access point, you can change it back to a router. To set up the Orbi router as a router 1. Use an Ethernet cable to connect the Internet port of this router to a LAN port on your existing router or gateway. 2. Launch a web browser from a computer or mobile device that is connected to your Orbi network. 3. Enter orbilogin.com. A login window opens. 4. Enter the admin user name and password. The user name is admin.
Orbi Pro 3. Enter the admin user name and password. The user name is admin. The password is the one that you specified the first time that you logged in. The user name and password are case-sensitive. The BASIC Home page displays. 4. Select ADVANCED > Advanced Setup > Wireless Settings. The Advanced Wireless Settings page displays. 5. In the Backhaul Password section, click the GENERATE button. The router generates a new backhaul password.
Orbi Pro Enable or Disable MU-MIMO Multiuser multiple input, multiple output (MU-MIMO) improves performance when multiple MU-MIMO-capable WiFi clients transfer data at the same time. WiFi clients must support MU-MIMO, and they must be connected to a 5 GHz WiFi band. This feature is enabled by default, but you can disable it. To enable or disable MU-MIMO: 1. Launch a web browser from a computer or mobile device that is connected to your Orbi network. 2. Enter orbilogin.com. A login window opens. 3.
Orbi Pro The user name is admin. The password is the one that you specified the first time that you logged in. The user name and password are case-sensitive. The BASIC Home page displays. 4. Select Speedtest. The Speedtest page displays. 5. Click the Take a Speedtest button. Your Internet’s download and upload speeds display. Set Up a Bridge for a Port Group or VLAN Tag Group Some devices, such as an IPTV, cannot function behind the router’s Network Address Translation (NAT) service or firewall.
Orbi Pro The user name is admin. The password is the one that you specified the first time that you logged in. The user name and password are case-sensitive. The BASIC Home page displays. 4. Select ADVANCED > Advanced Setup > VLAN/Bridge Settings. The VLAN/IPTV Setup page displays. 5. Select the Enable VLAN/Bridge Setup check box. The page expands. 6. Select the By bridge group radio button. 7. In the Wired Ports section, select the Ethernet port on the router that your device is connected to. 8.
Orbi Pro 4. Select ADVANCED > Advanced Setup > VLAN/Bridge Settings. The VLAN/Bridge Settings page displays. 5. Select the Enable VLAN/Bridge Group check box. The page expands. 6. Select the By VLAN tag group radio button. The section expands. 7. Click the Add button. The Add VLAN Rule page displays. 8. Specify the settings as described in the following table. Field Description Name Enter a name for the VLAN tag group. The name can be up to 10 characters. VLAN ID Enter a value from 1 to 4094.
Orbi Pro If you use applications such as multiplayer gaming, peer-to-peer connections, or real-time communications such as instant messaging or remote assistance (a feature in Windows XP), enable UPnP. To enable Universal Plug and Play: 1. Launch a web browser from a computer or mobile device that is connected to your Orbi network. 2. Enter orbilogin.com. A login window opens. 3. Enter the admin user name and password. The user name is admin.
Orbi Pro Portmap Table also displays what type of port is open and whether that port is still active for each IP address. 9. To refresh the information in the UPnP Portmap Table, click the Refresh button.
6 Manage Your Network This chapter describes the router settings for administering and maintaining your router and home network.
Orbi Pro Update the Router and Satellite Firmware You can use the router web interface to check if new firmware is available and update your router and satellite, or you can manually update the firmware for your router and satellite. Enable the Automatic Firmware Update Feature You can let the router automatically update its firmware and the firmware for any Orbi satellites on the network. To enable the automatic firmware update feature: 1.
Orbi Pro The BASIC Home page displays. 4. Select ADVANCED > Administration > Firmware Update. The Firmware Update page displays. 5. Click the Check button. The router checks to see if new firmware is available for the router and satellite. 6. If new firmware is available, click the Update All button. The router locates and downloads the firmware for the router and satellite and begins the update. Note: To avoid the risk of corrupting the firmware, do not interrupt the upgrade.
Orbi Pro To manually update your satellite’s firmware: 1. Launch a web browser from a computer or mobile device that is connected to your Orbi network. 2. Enter orbilogin.com. A login window opens. 3. Enter the router admin user name and password. The user name is admin. The password is the one that you specified the first time that you logged in. The user name and password are case-sensitive. The BASIC Home page displays. 4. Select ADVANCED > Administration > Firmware Update > Manual Update.
Orbi Pro The user name is admin. The password is the one that you specified the first time that you logged in. The user name and password are case-sensitive. The BASIC Home page displays. 4. Select ADVANCED > Administration > Firmware Update > Manual Update. The Firmware Update page displays. 5. Click the Browse button. 6. Locate and select the router firmware file you downloaded. The firmware file name ends in .img. 7. Click the Upload button. The firmware is updated.
Orbi Pro 6. To be able to recover the password, select the Enable Password Recovery check box. We recommend that you enable password recovery. 7. Click the Apply button. Your settings are saved. Set Up Password Recovery We recommend that you enable password recovery if you change the password for the router user name admin. Then you can recover the password if it is forgotten. This recovery process is supported in Internet Explorer, Firefox, and Chrome browsers, but not in the Safari browser.
Orbi Pro recovery process is supported in Internet Explorer, Firefox, and Chrome browsers, but not in the Safari browser. To recover your password: 1. Launch a web browser from a computer or mobile device that is connected to your Orbi network. 2. Enter orbilogin.com. A login window opens. 3. Click the Cancel button. If password recovery is enabled, you are prompted to answer two security questions. 4. Enter the saved answers to the security questions. 5. Enter the serial number of your router.
Orbi Pro Display Internet Port Statistics To display Internet port statistics: 1. Launch a web browser from a computer or mobile device that is connected to your Orbi network. 2. Enter orbilogin.com. A login window opens. 3. Enter the admin user name and password. The user name is admin. The password is the one that you specified the first time that you logged in. The user name and password are case-sensitive. The BASIC Home page displays. 4. Click the ADVANCED tab. 5.
Orbi Pro Check the Internet Connection Status To check the Internet connection status: 1. Launch a web browser from a computer or mobile device that is connected to your Orbi network. 2. Enter orbilogin.com. A login window opens. 3. Enter the admin user name and password. The user name is admin. The password is the one that you specified the first time that you logged in. The user name and password are case-sensitive. The BASIC Home page displays. 4. Click the ADVANCED tab. 5.
Orbi Pro To view your satellite’s status: 1. Launch a web browser from a computer or mobile device that is connected to your Orbi network. 2. Enter orbilogin.com. A login window opens. 3. Enter the router admin user name and password. The user name is admin. The password is the one that you specified the first time that you logged in. The user name and password are case-sensitive. The BASIC Home page displays. 4. Select Attached Devices. The Attached Devices page displays. 5.
Orbi Pro The Logs page displays the following information: • Date and time. The date and time the log entry was recorded. • Source IP. The IP address of the initiating device for this log entry. • Target address. The name or IP address of the website or news group visited or to which access was attempted. • Action. The action that occurred, such as whether Internet access was blocked or allowed. 5. To refresh the log page, click the Refresh button. 6.
Orbi Pro • Connection Type. This section displays how the device is connected to the Orbi network through a wired Ethernet connection or WiFi connection. • Connected Orbi. This section displays the Orbi router or satellite that the device is connected to. The Orbi router’s or satellite’s MAC address also displays. 5. To update this page, click the Refresh button. View Satellites Connected to the Network You can view the satellites that are connected to your Orbi network.
Orbi Pro Monitor Internet Traffic Traffic metering allows you to monitor the volume of Internet traffic that passes through the router Internet port. You can set limits for traffic volume. To monitor Internet traffic: 1. Launch a web browser from a computer or mobile device that is connected to your Orbi network. 2. Enter orbilogin.com. A login window opens. 3. Enter the admin user name and password. The user name is admin. The password is the one that you specified the first time that you logged in.
Orbi Pro 9. If you want the router to issue a warning message before the monthly limit of Mbytes or hours is reached, in the Traffic Control section, enter a numeric value. By default, the value is 0 and no warning message is issued. 10. To stop the Internet connection when the limit is attained, select the Disconnect and disable the Internet connection check box. 11. Click the Apply button. The Internet Traffic Statistics section helps you to monitor the data traffic. 12.
Orbi Pro Erase the Current Configuration Settings You can erase the current configuration and restore the factory default settings. You might want to do this if you move the router to a different network. To erase the configuration settings: 1. Launch a web browser from a computer or mobile device that is connected to your Orbi network. 2. Enter orbilogin.com. A login window opens. 3. Enter the admin user name and password. The user name is admin.
Orbi Pro The file is uploaded to the router and the router reboots. WARNING: Do not interrupt the reboot process. Set Up Remote Management You can access your router over the Internet to view or change its settings. You must know the router’s WAN IP address to use this feature. For information about Dynamic DNS, see Dynamic DNS on page 58. Note: Be sure to change the password for the user name admin to a secure password.
Orbi Pro Select one of the following: • To allow access from a single IP address on the Internet, select the Only This Computer radio button. Enter the IP address to be allowed access. • To allow access from a range of IP addresses on the Internet, select the IP Address Range radio button. Enter a beginning and ending IP address to define the allowed range. • To allow access from any IP address on the Internet, select the Everyone radio button. 7. Specify the port number for accessing the router.
7 Customize Internet Traffic Rules for Ports You can use port forwarding and port triggering to set up rules for Internet traffic. You need networking knowledge to set up these features.
Orbi Pro Port Forwarding to a Local Server If your home network includes a server, you can allow certain types of incoming traffic to reach the server. For example, you might want to make a local web server, FTP server, or game server visible and available to the Internet. The router can forward incoming traffic with specific protocols to computers on your local network.
Orbi Pro The service displays in the list. Add a Custom Port Forwarding Service To add a custom service: 1. Find out which port number or range of numbers the application uses. You can usually find this information by contacting the publisher of the application or user groups or news groups. 2. Launch a web browser from a computer or mobile device that is connected to your Orbi network. 3. Enter orbilogin.com. A login window opens. 4. Enter the admin user name and password. The user name is admin.
Orbi Pro Edit a Port Forwarding Service To edit a port forwarding entry: 1. Launch a web browser from a computer or mobile device that is connected to your Orbi network. 2. Enter orbilogin.com. A login window opens. 3. Enter the admin user name and password. The user name is admin. The password is the one that you specified the first time that you logged in. The user name and password are case-sensitive. The BASIC Home page displays. 4. Select ADVANCED > Advanced Setup > Port Forwarding/Port Triggering.
Orbi Pro Delete a Port Forwarding Entry To delete a port forwarding entry: 1. Launch a web browser from a computer or mobile device that is connected to your Orbi network. 2. Enter orbilogin.com. A login window opens. 3. Enter the admin user name and password. The user name is admin. The password is the one that you specified the first time that you logged in. The user name and password are case-sensitive. The BASIC Home page displays. 4. Select ADVANCED > Advanced Setup > Port Forwarding/Port Triggering.
Orbi Pro How the Router Implements the Port Forwarding Rule The following sequence shows the effects of a port forwarding rule: 1. When you type the URL www.example.com in your browser, the browser sends a web page request message with the following destination information: • Destination address. The IP address of www.example.com, which is the address of your router. • Destination port number. 80, which is the standard port number for a web server process. 2.
Orbi Pro Add a Port Triggering Service To add a port triggering service: 1. Launch a web browser from a computer or mobile device that is connected to your Orbi network. 2. Enter orbilogin.com. A login window opens. 3. Enter the admin user name and password. The user name is admin. The password is the one that you specified the first time that you logged in. The user name and password are case-sensitive. The BASIC Home page displays. 4. Select ADVANCED > Advanced Setup > Port Forwarding/Port Triggering.
Orbi Pro Enable Port Triggering To enable port triggering: 1. Launch a web browser from a computer or mobile device that is connected to your Orbi network. 2. Enter orbilogin.com. A login window opens. 3. Enter the admin user name and password. The user name is admin. The password is the one that you specified the first time that you logged in. The user name and password are case-sensitive. The BASIC Home page displays. 4. Select ADVANCED > Advanced Setup > Port Forwarding/Port Triggering.
Orbi Pro also allow incoming traffic on port 113 to reach the originating computer.” The following sequence shows the effects of the port triggering rule you define: 1. You open an IRC client program to start a chat session on your computer. 2. Your IRC client composes a request message to an IRC server using a destination port number of 6667, the standard port number for an IRC server process. Your computer then sends this request message to your router. 3.
8 Use VPN to Access Your Network You can use OpenVPN software to remotely access your router using virtual private networking (VPN). This chapter explains how to set up and use VPN access.
Orbi Pro Set Up a VPN Connection A virtual private network (VPN) lets you use the Internet to securely access your network when you aren’t home. This type of VPN access is called a client-to-gateway tunnel. The computer is the client, and the router is the gateway. To use the VPN feature, you must log in to the router and enable VPN, and you must install and run VPN client software on the computer. VPN uses DDNS or a static IP address to connect with your router.
Orbi Pro 6. To change the service type, scroll down and select the TCP radio button. 7. To change the port, scroll down to the Service Port field, and type the port number that you want to use. 8. Click the Apply button. Your settings are saved. VPN is enabled in the router, but you must install and set up OpenVPN software on your computer before you can use a VPN connection.
Orbi Pro 9. In the Windows Installer section of the page, double-click the openVPN-install-xxx.exe link. 10. Download and install the Open VPN software on your computer, click the openVPN-install-xxx.exe file. 11. Click the Next button. 12. When prompted, read the License Agreement and click the I Agree button. 13. Leave the check boxes selected, and click the Next button. 14. To specify the destination folder, click the Browse button and select a destination folder.
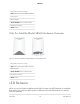
Orbi Pro Figure 5. A Windows Security window opens. 15. Click the Install button. The window displays the progress of the installation and then displays the final installation page. 16. Click the Finish button. 17. Unzip the configuration files that you downloaded and copy them to the folder where the VPN client is installed on your device. For a client device with Windows 64-bit system, the VPN client is installed at C:\Programfiles\OpenVPN\config\ by default. 18.
Orbi Pro For more information about using OpenVPN on your Windows computer, visit https://openvpn.net/index.php/open-source/documentation/howto.html#quick. Install OpenVPN Software on Your Mac Computer You must install this software on each Mac computer that you plan to use for VPN connections to your router. To install VPN client software on your Mac computer: 1. Launch a web browser from a computer or mobile device that is connected to your Orbi network. 2. Enter orbilogin.com. A login window opens. 3.
Orbi Pro Install OpenVPN Software on an iOS Device You must install this software on each iOS device that you plan to use for VPN connections to your router. To install VPN client software on an iOS device: 1. Launch a web browser from a computer or mobile device that is connected to your Orbi network. 2. Enter orbilogin.com. A login window opens. 3. Enter the admin user name and password. The user name is admin. The password is the one that you specified the first time that you logged in.
Orbi Pro To install VPN client software on an Android device: 1. Launch a web browser from a computer or mobile device that is connected to your Orbi network. 2. Enter orbilogin.com. A login window opens. 3. Enter the admin user name and password. The user name is admin. The password is the one that you specified the first time that you logged in. The user name and password are case-sensitive. The BASIC Home page displays. 4. Select ADVANCED > Advanced Setup > VPN Service. The VPN Service page displays. 5.
Orbi Pro connected. If both networks use the same LAN IP scheme, when the VPN tunnel is established, you cannot access your home router or your home network with the OpenVPN software. The default LAN IP address scheme for the router is 192.x.x.x.The most common IP schemes are 192.x.x.x, 172.x.x.x, and 10.x.x.x. If you experience a conflict, change the IP scheme either for your home network or for the network with the client VPN computer.
Orbi Pro Use VPN to Access Your Internet Service at Home When you’re away from home and you access the Internet, you usually use a local Internet service provider. For example, at a coffee shop you might be given a code that lets you use the coffee shop’s Internet service account to surf the web. Orbi Pro lets you use a VPN connection to access your own Internet service when you’re away from home.
Orbi Pro 8. Click the FOR WINDOWS or FOR MACOSX button and download the configuration files for your VPN clients. 9. Unzip the configuration files and copy them to the folder where the VPN client is installed on your device. For a client device with Windows 64-bit system, the VPN client is installed at C:\Programfiles\OpenVPN\config\ by default.
Orbi Pro 9. Unzip the configuration files and copy them to the folder where the VPN client is installed on your device. For a client device with Windows 64-bit system, the VPN client is installed at C:\Programfiles\OpenVPN\config\ by default. Use a VPN Tunnel to Access Your Internet Service at Home To access your Internet service: 1. Set up the router to allow VPN access to your Internet service. See Specify VPN Service in the Router on page 117. 2. On your computer, launch the OpenVPN application.
9 Troubleshooting This chapter provides information to help you diagnose and solve problems you might experience with your Orbi router or satellite. If you do not find the solution here, check the NETGEAR support site at support.netgear.com for product and contact information.
Orbi Pro Quick Tips This section describes tips for troubleshooting some common problems. Sequence to Restart Your Network When you restart your network, follow this sequence: 1. Turn off and unplug the modem. 2. Turn off the router. 3. Plug in the modem and turn it on. Wait two minutes. 4. Turn on the router and wait two minutes. WiFi Settings Make sure that the WiFi settings in the WiFi-enabled computer or mobile device and the router match.
Orbi Pro To sync the router and the satellite: 1. Place the satellite in the same room as the Orbi router. Use this satellite location only during the sync process. 2. Connect the satellite to a power source. 3. If the Power LED on the back of the satellite does not light, press the Power On/Off button. 4. Wait for the satellite’s ring LED to light solid white or magenta. 5. Press the Sync button on the router and then within two minutes, press the Sync button on the satellite. 6.
Orbi Pro 10. If the satellite’s ring LED lights magenta, the satellite did not resync with the router. If they successfully synced when they were placed in the same room, do one of the following: • Move the satellite closer to the router and try again. The router must be within the satellite’s WiFi cover area for a good or fair connection to the satellite. • Place another satellite between the router and the satellite that you are trying to sync. Then try to sync between the two satellites.
Orbi Pro 7. Check that an IP address is shown for the Internet port. If 0.0.0.0 is shown, your router did not obtain an IP address from your Internet service provider (ISP). If your router cannot obtain an IP address from the ISP, you can force your cable or DSL modem to recognize your new router by restarting your network. For more information, see Sequence to Restart Your Network on page 129.
Orbi Pro Reboot the computer and verify that the router address (www.routerlogin.net) is listed by your computer as the default gateway address. • You might be running login software that is no longer needed. If your ISP provided a program to log you in to the Internet (such as WinPoET), you no longer need to run that software after installing your router.You might need to go to Internet Explorer and select Tools > Internet Options, click the Connections tab, and select Never dial a connection.
Orbi Pro Troubleshoot WiFi Connectivity If you are experiencing trouble connecting to the Orbi WiFi network, try to isolate the problem: • Does the WiFi-enabled computer or mobile device that you are using find your WiFi network? If you disabled the router’s SSID broadcast, then your WiFi network is hidden and does not display in the list of networks that your computer or WiFi device finds. (By default, SSID broadcast is enabled.
Orbi Pro ping www.routerlogin.net 3. Click the OK button.
Orbi Pro If you do not receive replies, check the following: • Check to see that the IP address of your router is listed as the default gateway for your computer. If DHCP assigns the IP configuration of your computers, this information is not visible in your computer Network Control Panel. Verify that the IP address of the router is listed as the default gateway.
A Supplemental Information This appendix covers the following topics: • • Factory Settings Technical Specifications 137
Orbi Pro Factory Settings The following factory settings information are for the Orbi Pro router (model SRR60) and the Orbi Pro satellite (model SRS60). You can return the Orbi Pro router or satellite to its factory settings. Use the end of a paper clip or a similar object to press and hold the Reset button on the back of the router or satellite for at least seven seconds. The router or satellite resets, and returns to the factory settings.
Orbi Pro Table 4.
Orbi Pro Table 5. Factory default settings for the satellite Feature Router login Internet connection Local network (LAN) Firewall Default Setting User login URL orbilogin.com User name (case-sensitive) admin Login password (case-sensitive) password WAN MAC address Use default hardware address WAN MTU size 1500 Port speed AutoSensing LAN IP 192.168.1.250 Subnet mask 255.255.255.0 DHCP server Enabled DHCP range 192.168.1.2 to 192.168.1.254 DHCP starting IP address 192.168.1.
Orbi Pro Table 5. Factory default settings for the satellite (Continued) Feature WiFi Default Setting WiFi communication Enabled SSID name See satellite label Security WPA2-PSK (AES) Broadcast SSID Enabled Transmission speed Auto2 Country/region United States in the US; otherwise, varies by region RF channel 2.
Orbi Pro Table 6. Orbi Pro router specifications Feature Description Data and routing protocols TCP/IP, RIP-1, RIP-2, DHCP, PPPoE, PPTP, Bigpond, Dynamic DNS, UPnP, and SMB Power adapter • North America: 120V, 60 Hz, input • UK, Australia: 240V, 50 Hz, input • Europe: 230V, 50 Hz, input • All regions (output): 12V, 3.5A DC output Dimensions 6.8 x 3.3 x 9.7in (174 x 85 x 247 mm) Weight 2.06 lb (0.
Orbi Pro Table 6. Orbi Pro router specifications (Continued) Feature Description Operating frequency range 2.4 GHz: • 2.412–2.462 GHz (US) • 2.412–2.472 GHz (Europe ETSI) 5 GHz (US): • 5.18 GHz–5.24 GHz • 5.745 GHz–5.825 GHz 5 GHz (EU): • 5.18 GHz–5.24 GHz • 5.26 GHz–5.32 GHz • 5.5 GHz-5.7 GHz 802.11 security WPA-PSK [TKIP], WPA2-PSK [AES] 3 Maximum wireless signal rate derived from IEEE Standard 802.11 specifications. Actual throughput can vary.
Orbi Pro Table 7. Orbi Pro satellite specifications (Continued) Feature Description Electromagnetic emissions FCC Part 15 Class B VCCI Class B EN 55 022 (CISPR 22), Class B C-Tick N10947 LAN 10BASE-T or 100BASE-TX or 1000BASE-T, RJ-45 WAN 10BASE-T or 100BASE-TX or 1000BASE-T, RJ-45 WiFi Maximum wireless signal rate complies with the IEEE 802.11 standard.4 Radio data rates 2.4 GHz: Max. 400 Mbps 5 GHz Front haul: Max. 866 Mbps 5 GHz Back haul: Max. 1733 Mbps Data encoding standards IEEE 802.