ProSecure Web/Email Security Threat Management Appliance STM150, STM300, or STM600 Reference Manual 350 East Plumeria Drive San Jose, CA 95134 USA January 2011 202-10519-06 1.
ProSecure Web/Email Security Threat Management (STM) Appliance © 2009–2011 NETGEAR, Inc. All rights reserved. No part of this publication may be reproduced, transmitted, transcribed, stored in a retrieval system, or translated into any language in any form or by any means without the written permission of NETGEAR, Inc. Technical Support Thank you for choosing NETGEAR. To register your product, get the latest product updates, or get support online, visit us at http://support.netgear.com.
ProSecure Web/Email Security Threat Management (STM) Appliance 202-10519-06 (continued) 1.0 February 2011 (continued) (continued) • Revised the Setup Wizard update settings information (see Setup Wizard Step 7 of 11: Update Settings), software update information (see Updating the Software), and system status information (see Viewing System Status). 202-10519-05 1.
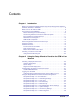
Contents Chapter 1 Introduction What Is the ProSecure Web/Email Security Threat Management Appliance STM150, STM300, or STM600?. . . . . . . . . . . . . . . . . . . . . . . . . . . . . . . . . . 8 What Can You Do with an STM? . . . . . . . . . . . . . . . . . . . . . . . . . . . . . . . . . 9 Key Features and Capabilities . . . . . . . . . . . . . . . . . . . . . . . . . . . . . . . . . . . 9 Stream Scanning for Content Filtering . . . . . . . . . . . . . . . . . . . . . . . . . .
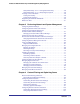
ProSecure Web/Email Security Threat Management (STM) Appliance Setup Wizard Step 10 of 11: Configuration Summary . . . . . . . . . . . . . .48 Setup Wizard Step 11 of 11: Restarting the System . . . . . . . . . . . . . . .49 Verifying Correct Installation. . . . . . . . . . . . . . . . . . . . . . . . . . . . . . . . . . . .49 Testing Connectivity . . . . . . . . . . . . . . . . . . . . . . . . . . . . . . . . . . . . . . . .49 Testing HTTP Scanning . . . . . . . . . . . . . . . . . . . . . . . . . . . . .
ProSecure Web/Email Security Threat Management (STM) Appliance Configuring Web Content Filtering . . . . . . . . . . . . . . . . . . . . . . . . . . . . 109 Configuring Web URL Filtering. . . . . . . . . . . . . . . . . . . . . . . . . . . . . . . 116 HTTPS Scan Settings. . . . . . . . . . . . . . . . . . . . . . . . . . . . . . . . . . . . . . 119 Specifying Trusted Hosts . . . . . . . . . . . . . . . . . . . . . . . . . . . . . . . . . . . 124 Configuring FTP Scans . . . . . . . . . . . . . . . . . . . .
ProSecure Web/Email Security Threat Management (STM) Appliance Log Management . . . . . . . . . . . . . . . . . . . . . . . . . . . . . . . . . . . . . . . . .199 Viewing, Scheduling, and Generating Reports. . . . . . . . . . . . . . . . . . . . .200 Report Templates . . . . . . . . . . . . . . . . . . . . . . . . . . . . . . . . . . . . . . . . .200 Generating Reports for Downloading . . . . . . . . . . . . . . . . . . . . . . . . . .202 Scheduling Automatic Generation and Emailing of Reports. . . . . . .
1. Introduction 1 This chapter provides an overview of the features and capabilities of the ProSecure Web/Email Security Threat Management Appliance STM150, STM300, and STM600. It also identifies the physical features of the appliances and the contents of the product packages.
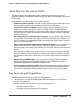
ProSecure Web/Email Security Threat Management (STM) Appliance What Can You Do with an STM? The STM combines robust protection against malware threats with ease of use and advanced reporting and notification features to help you deploy and manage the device with minimal effort. Here are some of the things that you can do with the STM: • Protect the network instantly. The STM is a plug-and-play security solution that can be instantly added to networks without the need for network reconfiguration.
ProSecure Web/Email Security Threat Management (STM) Appliance - Up to 239 MB/s HTTP throughput - Up to 960,000 emails per hour SMTP throughput • Stream Scanning technology that enables scanning of real-time protocols such as HTTP. • Comprehensive Web and email inbound and outbound security, covering six major network protocols: HTTP, HTTPS, FTP, SMTP, POP3, and IMAP. • URL content filtering with 64 categories.
ProSecure Web/Email Security Threat Management (STM) Appliance • Comprehensive protection. Provides both Web and email security, covering six major network protocols: HTTP, HTTPS, FTP, SMTP, POP3, and IMAP. The STM uses enterprise-class scan engines employing both signature-based and distributed spam analysis to stop both known and unknown threats. The malware database contains hundreds of thousands of signatures of spyware, viruses, and other malware. • Objectionable traffic protection.
ProSecure Web/Email Security Threat Management (STM) Appliance Maintenance and Support NETGEAR offers technical support seven days a week, 24 hours a day. Information about support is available on the NETGEAR ProSecure website at http://prosecure.netgear.com/support/index.php. STM Model Comparison The following table compares the three STM models to show the differences: Table 1.
ProSecure Web/Email Security Threat Management (STM) Appliance Figure 1. Note: If you reset the STM to the original factory default settings after you have entered the license keys to activate the STM (see Registering the STM with NETGEAR on page 50), the license keys are erased. The license keys and the different types of licenses that are available for the STM are no longer displayed on the Registration screen.
ProSecure Web/Email Security Threat Management (STM) Appliance • ProSecure™ Web/Email Security Threat Management Applliance STM150, STM300, or STM600 Installation Guide • Depending on the model purchased, service registration card with one or more license keys If any of the parts are incorrect, missing, or damaged, contact your NETGEAR dealer. Keep the carton, including the original packing materials, in case you need to return the product for repair.
ProSecure Web/Email Security Threat Management (STM) Appliance Note: All Gigabit Ethernet ports provide switched N-way, automatic speed-negotiating, auto MDI/MDIX technology. The function of each STM150 LED is described in the following table: Table 2. LED Descriptions for the STM150 Object Activity Description Power On (green) Power is supplied to the STM. Off Power is not supplied to the STM. On (amber) during startup The STM is initializing.
ProSecure Web/Email Security Threat Management (STM) Appliance Table 2. LED Descriptions for the STM150 (Continued) Object Activity Right LED Description Off The LAN port is operating at 10 Mbps. On (amber) The LAN port is operating at 100 Mbps. On (green) The LAN port is operating at 1000 Mbps.
ProSecure Web/Email Security Threat Management (STM) Appliance The function of each STM300 LED is described in the following table: Table 3. LED Descriptions for the STM300 Object Activity Description Power On (green) Power is supplied to the STM. Off Power is not supplied to the STM. On (amber) during startup The STM is initializing. After approximately 2 minutes, when the STM has completed its initialization, the Status LED turns off. If the Status LED remains on, the initialization has failed.
ProSecure Web/Email Security Threat Management (STM) Appliance Front Panel STM600 The following figure shows the front panel ports and LEDs of the STM600: 7) Pair 1 LEDs 2) Power LED 3) Status LED 1) Console port 6) Mgmt port 8) Pair 2 LEDs 5) USB port 8) Pair 2 ports 4) HDD LED 7) Pair 1 ports Figure 4. From left to right, the STM600’s front panel shows the following ports and LEDs: 1. Console port. Port for connecting to an optional console terminal. The ports has a DB9 male connector.
ProSecure Web/Email Security Threat Management (STM) Appliance The function of each STM600 LED is described in the following table: Table 4. LED Descriptions for the STM600 Object Activity Description Power On (green) Power is supplied to the STM. Off Power is not supplied to the STM. On (amber) during startup The STM is initializing. After approximately 2 minutes, when the STM has completed its initialization, the Status LED turns off. If the Status LED remains on, the initialization has failed.
ProSecure Web/Email Security Threat Management (STM) Appliance Rear Panel Features The rear panel of the STM150 differs from the rear panels of the STM300 and STM600. Rear Panel STM150 The following figure shows the rear panel components of the STM150: 1) Console port 2) Lock 4) Reset button 3) Power button 5) AC power socket Figure 5. From left to right, the STM150’s rear panel components are: 1. Console port. Port for connecting to an optional console terminal. The port has a DB9 male connector.
ProSecure Web/Email Security Threat Management (STM) Appliance Rear Panel STM300 and STM600 The rear panels of the STM300 and STM600 are identical. The following figure shows the rear panel components of the STM300 and STM600: 1) Power switch 2) AC power socket Figure 6. From left to right, the STM300’s and STM600’s rear panel components (excluding the four fan air outlets) are: 1. Power switch. Switch to turn the STM300 or STM600 on or off.
ProSecure Web/Email Security Threat Management (STM) Appliance Bottom Panel with Product Label The product label on the bottom of the STM’s enclosure displays the STM’s default IP address, default user name, and default password, as well as regulatory compliance, input power, and other information. STM150 Product Label Figure 7. STM300 Product Label Figure 8. 22 | Chapter 1.
ProSecure Web/Email Security Threat Management (STM) Appliance STM600 Product Label Figure 9. Choosing a Location for the STM The STM is suitable for use in an office environment where it can be freestanding (on its runner feet) or mounted into a standard 19-inch equipment rack. Alternatively, you can rack-mount the STM in a wiring closet or equipment room. A mounting kit, containing two mounting brackets and four screws, is provided in the STM package.
ProSecure Web/Email Security Threat Management (STM) Appliance Using the Rack-Mounting Kit Use the mounting kit for the STM to install the appliance in a rack. (A mounting kit is provided in the product package for the STM.) The mounting brackets that are supplied with the STM are usually installed before the unit is shipped out. If the brackets are not yet installed, attach them using the supplied hardware. Figure 10.
2. Using the Setup Wizard to Provision the STM in Your Network 2 This chapter describes provisioning the STM in your network.
ProSecure Web/Email Security Threat Management (STM) Appliance The following figure shows a typical gateway deployment scenario: Figure 11. Server Group In a server group deployment, one STM appliance is installed at the gateway and another in front of the server group to help protect the email server from threats from internal as well as external clients.
ProSecure Web/Email Security Threat Management (STM) Appliance Segmented LAN Deployment In a segmented LAN deployment, one STM appliance is installed in front of each network segment. VLAN traffic can pass through the STM and can be scanned by the STM. This type of deployment splits the network load and protects network segments from malware threats coming in through the gateway or originating from other segments. The following figure shows a typical segmented LAN deployment scenario: Figure 13.
ProSecure Web/Email Security Threat Management (STM) Appliance 4. Verify the installation. See Verifying Correct Installation on page 49. 5. Register the STM. See Registering the STM with NETGEAR on page 50. Each of these tasks is described separately in this chapter. Qualified Web Browsers To configure the STM, you need to use a Web browser such as Microsoft Internet Explorer 5.1 or later, Mozilla Firefox l.x or later, or Apple Safari 1.2 or later with JavaScript, cookies, and SSL enabled.
ProSecure Web/Email Security Threat Management (STM) Appliance Figure 15. 3. In the User Name field, type admin. Use lowercase letters. 4. In the Password field, type password. Here, too, use lowercase letters. Note: The STM user name and password are not the same as any user name or password you might use to log in to your Internet connection.
ProSecure Web/Email Security Threat Management (STM) Appliance 5. Click Login. The Web Management Interface displays, showing the Dashboard screen (see the following figure, which shows only the top part of the screen). For information about this screen, see Understanding the Information on the Dashboard Screen on page 184. Note: During the initial setup, the Setup Wizard displays when you first log in; afterward the login takes you to the Dashboard screen. Figure 16.
ProSecure Web/Email Security Threat Management (STM) Appliance 3rd level: Submenu tab (blue) 2nd level: Configuration menu link (gray) 1st level: Main navigation menu link (orange) Figure 17. The Web Management Interface menu consists of the following components: • 1st Level: Main navigation menu links. The main navigation menu in the orange bar across the top of the Web Management Interface provides access to all the configuration functions of the STM, and remains constant.
ProSecure Web/Email Security Threat Management (STM) Appliance • Cancel. Cancel the operation. • Send Now. Send a file or report. When a screen includes a table, table buttons are displayed to let you configure the table entries. The nature of the screen determines which table buttons are shown. The following figure shows an example: Figure 19. Any of the following table buttons might be displayed on screen: • Select All. Select all entries in the table. • Delete.
ProSecure Web/Email Security Threat Management (STM) Appliance Setup Wizard Step 1 of 10: Introduction Figure 20. The first Setup Wizard screen is just an introductory screen. Click Next to go to the following screen. Setup Wizard Step 2 of 11: Networking Settings Figure 21. Enter the settings as explained in the following table, and then click Next to go the following screen.
ProSecure Web/Email Security Threat Management (STM) Appliance Table 5. Setup Wizard Step 2: Network Settings Setting Description (or Subfield and Description) Management Interface Settings System Name The name for the STM for purposes of identification and management. The default name is the name of your model (STM150, STM300, or STM600). IP Address Enter the IP address of the STM through which you will access the Web Management Interface. The factory default IP address is 192.168.1.201.
ProSecure Web/Email Security Threat Management (STM) Appliance Setup Wizard Step 3 of 11: Time Zone Figure 22. Enter the settings as explained in the following table, and then click Next to go the following screen. Note: After you have completed the steps in the Setup Wizard, you can make changes to the date and time by selecting Administration > System Date & Time. For more information about these settings, see Configuring Date and Time Service on page 74. Table 6.
ProSecure Web/Email Security Threat Management (STM) Appliance Table 6. Setup Wizard Step 3: System Date and Time Settings (Continued) Setting Description (or Subfield and Description) Use Custom NTP Servers The STM regularly updates its RTC by contacting one of the two NTP servers (primary and backup), both of which you need to specify in the fields that become available when you select this option.
ProSecure Web/Email Security Threat Management (STM) Appliance Setup Wizard Step 4 of 11: Email Security Figure 23. Enter the settings as explained in the following table, and then click Next to go the following screen. Note: After you have completed the steps in the Setup Wizard, you can make changes to the email security settings by selecting Email Security > Policy or Email Security > Anti-Virus. The Email Anti-Virus screen also lets you specify notification settings and email alert settings.
ProSecure Web/Email Security Threat Management (STM) Appliance Table 7. Setup Wizard Step 4: Email Security Settings Setting Description (or Subfield and Description) Services to Scan SMTP SMTP scanning is enabled by default on standard service port 25. POP3 POP3 scanning is enabled by default on standard service port 110. IMAP IMAP scanning is enabled by default on standard service port 143. To disable any of these services, clear the corresponding check box.
ProSecure Web/Email Security Threat Management (STM) Appliance Table 7. Setup Wizard Step 4: Email Security Settings (Continued) Setting Description (or Subfield and Description) Scan Exceptions From the drop-down list, specify one of the following actions to be taken when an email attachment exceeds the size that you specify in the file size field: • Skip. The file is not scanned but skipped, leaving the end user vulnerable. This is the default setting. • Block.
ProSecure Web/Email Security Threat Management (STM) Appliance Note: After you have completed the steps in the Setup Wizard, you can make changes to the Web security settings by selecting Web Security > Policy or Web Security > HTTP/HTTPS > Malware Scan. The Malware Scan screen also lets you specify HTML scanning and notification settings. For more information about these settings, see Configuring Web and Services Protection on page 105. Table 8.
ProSecure Web/Email Security Threat Management (STM) Appliance Table 8. Setup Wizard Step 5: Web Security Settings (Continued) Setting Description (or Subfield and Description) HTTPS From the HTTPS drop-down list, specify one of the following actions to be taken when an infected Web file or object is detected: • Quarantine file. The Web file or object is removed and placed in the malware quarantine for further research.
ProSecure Web/Email Security Threat Management (STM) Appliance Setup Wizard Step 6 of 11: Email Notification Server Settings Figure 25. Enter the settings as explained in the following table, and then click Next to go the following screen. Note: After you have completed the steps in the Setup Wizard, you can make changes to the administrator email notification settings by selecting Global Settings > Email Notification Server.
ProSecure Web/Email Security Threat Management (STM) Appliance Setup Wizard Step 7 of 11: Update Settings Figure 26. Enter the settings as explained in the following table, and then click Next to go the following screen. Note: After you have completed the steps in the Setup Wizard, you can make changes to the security subscription update settings by selecting Administration > Software Update. For more information about these settings, see Updating the Software on page 71. Chapter 2.
ProSecure Web/Email Security Threat Management (STM) Appliance Table 10. Setup Wizard Step 7: Update Settings Setting Description (or Subfield and Description) System Information You cannot configure this section; it is shown for information only. For the software, scan engine, (signature) pattern file, and operating system (OS), the current version and the date of the last update are displayed.
ProSecure Web/Email Security Threat Management (STM) Appliance Setup Wizard Step 8 of 11: HTTP Proxy Settings Figure 27. Enter the settings as explained in the following table, and then click Next to go the following screen. Note: After you have completed the steps in the Setup Wizard, you can make changes to the security subscription update settings by selecting Global Settings> HTTP Proxy. For more information about these settings, see Configuring the HTTP Proxy Settings on page 60. Table 11.
ProSecure Web/Email Security Threat Management (STM) Appliance Setup Wizard Step 9 of 11: Web Categories Figure 28. Enter the settings as explained in the following table, and then click Next to go the following screen. 46 | Chapter 2.
ProSecure Web/Email Security Threat Management (STM) Appliance Note: After you have completed the steps in the Setup Wizard, you can make changes to the content filtering settings by selecting Web Security > HTTP/HTTPS > Content Filtering. The Content Filtering screen lets you specify additional filtering tasks and notification settings. For more information about these settings, see Configuring Web Content Filtering on page 109. Table 12.
ProSecure Web/Email Security Threat Management (STM) Appliance Setup Wizard Step 10 of 11: Configuration Summary Figure 29. Click Apply to save your settings and automatically restart the system, or click Back to make changes to the configuration. 48 | Chapter 2.
ProSecure Web/Email Security Threat Management (STM) Appliance Setup Wizard Step 11 of 11: Restarting the System Figure 30. Wizard screen 11 is just an informational screen to let you know that the system restarts automatically with the new configuration. Verifying Correct Installation Test the STM before deploying it in a live production environment. The following instructions walk you through a couple of quick tests designed to ensure that your STM is functioning correctly.
ProSecure Web/Email Security Threat Management (STM) Appliance Registering the STM with NETGEAR To receive threat management component updates and technical support, you need to register your STM with NETGEAR. The support registration keys are provided with the product package (see Service Registration Card with License Keys on page 12). The STM supports a bundle key, which is a single support registration key that provides all three licenses: Web protection, Email protection, and Support & Maintenance.
ProSecure Web/Email Security Threat Management (STM) Appliance 3. In the Registration Key field, enter the license key. 4. Fill out the customer and VAR fields. 5. Click Register. 6. Repeat step 3 and step 5 for additional license keys. The STM activates the licenses and registers the unit with the NETGEAR registration server.
3. Performing Network and System Management 3 This chapter describes the network settings, the system management features, and ways to improve the performance of the STM. If you have used the Setup Wizard, you have already configured some of these settings, but there are situations in which you might want to modify them.
ProSecure Web/Email Security Threat Management (STM) Appliance STM600 or STM300 uplink and downlink interfaces, or for the STM150’s WAN and LAN interfaces. To configure the STM’s network settings: 1. Select Global Settings > Network Settings from the menu. The Network Settings submenu tabs display with the Network Settings screen in view. (The following figure shows the STM600.) Figure 32.
ProSecure Web/Email Security Threat Management (STM) Appliance The following figure shows the Interface Speed & Duplex Settings section of the Network Settings screen of the STM150: Figure 34. STM150 2. Complete the fields and make your selections from the drop-down lists as explained in the following table: Table 13. Network Settings Setting Description (or Subfield and Description) Management Interface Settings System Name The name for the STM for purposes of identification and management.
ProSecure Web/Email Security Threat Management (STM) Appliance Table 13. Network Settings (Continued) Setting Description (or Subfield and Description) STM600 (see Figure 32 on page 53) MGMT PAIR1 UPLINK PAIR1 DOWNLINK PAIR2 UPLINK PAIR2 DOWNLINK STM300 (see Figure 33 on page 53) MGMT UPLINK DOWNLINK STM150 (see Figure 34 on page 54) LAN1 LAN2 LAN3 LAN4 WAN From the Set Speed/Duplex drop-down list, make one of the following selections: • auto. Speed autosensing. This is the default setting.
ProSecure Web/Email Security Threat Management (STM) Appliance Configuring Session Limits and Timeouts The Session Limits screen allows you to specify the total number of sessions per user (that is, per IP address or single source machine) that are allowed on the STM. Session limiting is disabled by default.
ProSecure Web/Email Security Threat Management (STM) Appliance 3. Select the radio buttons, make your selections from the drop-down list, and complete the fields as explained in the following table: Table 14. Session Limits Settings Setting Description (or Subfield and Description) Session Limits Do You Want to Select the Yes radio button to enable session limits, and then fill in the Limit Type and Enable per-user Limit Value fields. The No radio button is selected by default.
ProSecure Web/Email Security Threat Management (STM) Appliance To refresh the network and view the MAC Address Bindings table: 1. Select Global Settings > Network Settings from the menu. The Network Settings submenu tabs display with the Network Settings screen in view. 2. Click the Network Refresh submenu tab. The Network Refresh screen displays. (The following figure shows the STM150.) Figure 36. 58 | Chapter 3.
ProSecure Web/Email Security Threat Management (STM) Appliance 3. Select the check boxes and radio buttons and make your selections from the drop-down list as explained in the following table: Table 15. Network Refresh Settings Setting Description (or Subfield and Description) Automatically Refresh the Network Select this check box to enable the periodic refresh of the dynamic MAC address Periodically refresh the MAC bindings. Specify if the refresh occurs either weekly or daily.
ProSecure Web/Email Security Threat Management (STM) Appliance 4. Complete the fields and make your selections from the drop-down lists as explained in the following table: Table 16. MAC Address Binding Settings Setting Description MAC Address Enter the MAC address that you want to bind permanently. Port (STM150) or Interface From the drop-down list, select the interface to which the MAC address needs (STM300 and STM600) to be bound.
ProSecure Web/Email Security Threat Management (STM) Appliance Internet. The settings on the HTTP Proxy screen affect Web category filtering, distributed spam analysis, and software updates. To configure the HTTP proxy: 1. Select Global Settings > HTTP Proxy from the menu. The HTTP Proxy screen displays: Figure 37. 2. Select the check box and complete the fields as explained in the following table: Table 17.
ProSecure Web/Email Security Threat Management (STM) Appliance • Guest user. A user who can only view the STM configuration (that is, read-only access). The default user name for a guest is guest, and the default password for a guest is guest. NETGEAR recommends that you change these passwords to more secure passwords. The login window that is presented to the administrator and guest user is the NETGEAR Configuration Manager Login screen (see Figure 87 on page 155).
ProSecure Web/Email Security Threat Management (STM) Appliance 2. To modify the administrator or guest settings, select the check box and complete the fields as explained in the following table: Table 18. Set Password Settings Screen: Administrator and Guest Settings Setting Description (or Subfield and Description) User Selection Select one of the following radio buttons: • Edit Administrator Settings. Allows you to modify the administrator settings, while the guest settings are masked out.
ProSecure Web/Email Security Threat Management (STM) Appliance Configuring Remote Management Access An administrator can configure, upgrade, and check the status of the STM over the Internet via a Secure Sockets Layer (SSL) VPN connection. You need to use an SSL VPN connection to access the STM from the Internet: type https:// (not http://) followed by the STM’s WAN IP address into your browser. For example, if the STM’s WAN IP address is 172.16.0.123, type the following in your browser: https://172.16.0.
ProSecure Web/Email Security Threat Management (STM) Appliance 2. In the Secure HTTPS Management section of the screen, enter number of the port that you want to use to access Web Management Interface of the STM. The default setting is port 443, but you can enter a port ranging from 1024 to 65535. You cannot use some ports such as 2080 and 8088 that might be used by the STM. This section of the screen also displays the HTTPS hyperlink through which you can access the Web Management Interface of the STM.
ProSecure Web/Email Security Threat Management (STM) Appliance To enable SNMP and to configure the SNMP settings: 1. Select Administration > SNMP from the menu. The SNMP screen displays: Figure 40. 2. Select the radio buttons and complete the fields as explained in the following table: Table 20. SNMP Settings Setting Description (or Subfield and Description) SNMP Settings Do You Want to Enable SNMP? Select one of the following radio buttons: • Yes. Enable SNMP. • No. Disable SNMP.
ProSecure Web/Email Security Threat Management (STM) Appliance Table 20. SNMP Settings (Continued) Setting Description (or Subfield and Description) Do You Want to Enable SNMP? (continued) Contact The SNMP system contact information that is available to the SNMP manager. This setting is optional. Location The physical location of the STM. This setting is optional.
ProSecure Web/Email Security Threat Management (STM) Appliance The Backup and Restore Settings screen lets you: • Back up and save a copy of the current settings • Restore saved settings from the backed-up file • Revert to the factory default settings. To display the Backup and Restore Settings screen, select Administration > Backup and Restore Settings from the menu: Figure 41. Backing Up Settings The backup feature saves all STM settings to a file. These settings include: • Network settings.
ProSecure Web/Email Security Threat Management (STM) Appliance To back up settings: 1. On the Backup and Restore Settings screen (see the previous figure), next to Save a copy of current settings, click the Backup button to save a copy of your current settings. A dialog box displays, showing the file name of the backup file. Note: The backup file has the following format: backup_$hostname_$productversion_$yyyymmdd.gpg.
ProSecure Web/Email Security Threat Management (STM) Appliance To restore settings from a backup file: 1. On the Backup and Restore Settings screen (see Figure 41 on page 68), next to Restore save settings from file, click Browse. 2. Locate and select the previously saved backup file. 3. When you have located the file, click the Restore button. A warning screen might appear, and you might have to confirm that you want to restore the configuration. The STM restarts.
ProSecure Web/Email Security Threat Management (STM) Appliance Note: For the STM150 only, there is an alternate way to return the settings to factory defaults: Using a sharp object, press and hold the Reset button on the rear panel of the STM150 (see Rear Panel STM150 on page 20) for about 10 seconds until the front panel Test LED flashes and the STM150 returns to factory default settings.
ProSecure Web/Email Security Threat Management (STM) Appliance To configure scheduled updates: 1. Select Administration > Software Update from the menu. The Software Update screen displays: Figure 42. 2. Select the radio buttons, complete the field, and make your selections from the drop-down lists as explained in the following table: Table 21.
ProSecure Web/Email Security Threat Management (STM) Appliance Table 21. Software Update Settings (Continued) Setting Description (or Subfield and Description) Update Settings Update From Select one of the following radio buttons: • Default Update Server. The scan engine and signatures are updated from the NETGEAR default update server. • Another Update Server.
ProSecure Web/Email Security Threat Management (STM) Appliance 3. After the update has finished, click Apply to activate the newly updated software. Critical Updates That Require a Restart If a downloaded update requires a restart, you are prompted to perform the update when you log in to the STM. The following figure shows an example of a Critical Update screen, which provides information about the update and allows you to install it immediately or at sa later time.
ProSecure Web/Email Security Threat Management (STM) Appliance To set time, date, and NTP servers: 1. Select Administration > System Date and Time from the menu. The System Date and Time screen displays: Figure 45. The top of the screen displays the current weekday, date, time, time zone, and year (in the example in the previous figure: Current Time: 2009-08-02 00:19:30). 2.
ProSecure Web/Email Security Threat Management (STM) Appliance Table 22. System Date and Time Settings (Continued) Setting Description (or Subfield and Description) Use Custom NTP Servers The STM regularly updates its RTC by contacting one of the two NTP servers (primary and backup), both of which you need to specify in the fields that become available when you select this option.
ProSecure Web/Email Security Threat Management (STM) Appliance The STM uses digital certificates to authenticate connecting HTTPS servers, and to allow HTTPS clients to be authenticated by remote entities. A digital certificate that authenticates a server, for example, is a file that contains the following elements: • A public encryption key to be used by clients for encrypting messages to the server. • Information identifying the operator of the server.
ProSecure Web/Email Security Threat Management (STM) Appliance Managing the Certificate for HTTPS Scans To manage the STM’s active certificate that is used for HTTPS scans, select Web Security > Certificate Management from the menu. The Certificate Management screen displays. The following figure shows only the Certificate Used for HTTPS Scans section of the screen: Figure 47.
ProSecure Web/Email Security Threat Management (STM) Appliance To import a new certificate: 1. Select the Use imported certificate (PKCS12 format) radio button. 2. Click Browse next to the Import from File field. 3. Navigate to a trusted certificate file on your computer. Follow the instructions of your browser to place the certificate file in the Import from File field. 4. If required, enter the appropriate password in the Certificate password field. 5. Click the Upload button.
ProSecure Web/Email Security Threat Management (STM) Appliance To view details of a trusted certificate: 1. From the Trusted Certificate Authorities table, select the certificate. 2. Click View Details. A new screen opens that displays the details of the certificate. To delete a trusted certificate: 1. From the Trusted Certificate Authorities table, select the certificate. 2. Click Delete Selected. To import a trusted certificate: 1. Click Browse next to the Import from File field. 2.
ProSecure Web/Email Security Threat Management (STM) Appliance To delete an untrusted certificate: 1. From the Untrusted Certificates table, select the certificate. 2. Click Delete Selected. To move an untrusted certificate to the Trusted Certificate Authorities table: 1. From the Untrusted Certificates table, select the certificate. 2. Click Add to Trusted List. The previously untrusted certificate is added to the Trusted Certificate Authorities table.
ProSecure Web/Email Security Threat Management (STM) Appliance 2. Select the radio buttons, complete the field, and make your selections from the drop-down lists as explained in the following table: Table 23. Quarantine Settings Setting Description (or Subfield and Description) Malware Quarantine Area Size Specify the maximum amount of memory in MB that is allocated to malware quarantine. This limit is cumulative for all users.
ProSecure Web/Email Security Threat Management (STM) Appliance You can adjust the following features of the STM in such a way that the traffic load on the WAN side decreases. • • Email content filtering. To reduce incoming email traffic, you can block emails with large attachments, reject emails based on keywords, file extensions, or file names, and set spam protection rules. There are several ways you can reduce unwanted email traffic: - Setting the size of email files to be scanned.
4. Content Filtering and Optimizing Scans 4 This chapter describes how to apply the content filtering features of the STM and how to optimize scans to protect your network.
ProSecure Web/Email Security Threat Management (STM) Appliance Default Email and Web Scan Settings For most network environments, the default scan settings and actions that are shown in the following table work well, but you can adjust these to meet the needs of your specific environment. Table 24.
ProSecure Web/Email Security Threat Management (STM) Appliance Table 24.
ProSecure Web/Email Security Threat Management (STM) Appliance Configuring Email Protection The STM lets you configure the following settings to protect the network’s email communication: • The email protocols that are scanned for malware threats • Actions that are taken when infected emails are detected • The maximum file sizes that are scanned • Keywords, file types, and file names in emails that are filtered to block objectionable or high-risk content • Customer notifications and email alerts t
ProSecure Web/Email Security Threat Management (STM) Appliance 2. Select the check boxes and complete the fields and as explained in the following table: Table 25. Email Policy Settings Setting Description Services to Scan SMTP Select the SMTP check box to enable Simple Mail Transfer Protocol (SMTP) scanning. This service is enabled by default and uses default port 25. POP3 Select the POP3 check box to enable Post Office Protocol 3 (POP3). This service is enabled by default and uses default port 110.
ProSecure Web/Email Security Threat Management (STM) Appliance Action Settings To configure the email antivirus action settings: 1. Select Email Security > Anti-Virus from the menu. The Anti-Virus submenu tabs display with the Action screen in view: Figure 52. 2. Make your selections from the drop-down lists as explained in the following table: Table 26.
ProSecure Web/Email Security Threat Management (STM) Appliance Table 26. Email Anti-Virus Action Settings (Continued) Setting Description POP3 From the POP3 drop-down list, specify one of the following actions to be taken when an infected email is detected: • Quarantine attachment. The email is not blocked, but the attachment is removed and placed in the malware quarantine for further research.
ProSecure Web/Email Security Threat Management (STM) Appliance 3. Make your selection from the drop-down list and complete the field as explained in the following table: Table 27. Email Anti-Virus Exception Settings Setting Description Scan Exceptions From the drop-down list, specify one of the following actions to be taken when an email attachment exceeds the size that you specify in the file size field: • Skip. The file is not scanned but skipped, leaving the end user vulnerable.
ProSecure Web/Email Security Threat Management (STM) Appliance Notification Settings To configure the email antivirus notification settings: 1. Select Email Security > Anti-Virus from the menu. The Anti-Virus submenu tabs display with the Action screen in view. 2. Click the Notifications submenu tab. The Notifications screen displays: Figure 54. 92 | Chapter 4.
ProSecure Web/Email Security Threat Management (STM) Appliance 3. Complete the fields, select the check boxes, and make your selections from the drop-down lists as explained in the following table: Table 28. Email Anti-Virus Notification Settings Setting Description Notification Settings Insert Warning into Email Subject (SMTP) For SMTP email messages, select this check box to insert a warning into the email subject line: • Malware Found.
ProSecure Web/Email Security Threat Management (STM) Appliance Table 28. Email Anti-Virus Notification Settings (Continued) Setting Description Subject The default subject line for the notification email is “Malware detected!” You can change this subject line. Message The warning message informs the sender, the recipient, or both about the name of the malware threat. You can change the default message to include more information.
ProSecure Web/Email Security Threat Management (STM) Appliance To configure email content filtering: 1. Select Email Security > Filters from the menu. The Filters screen displays: Figure 55. Chapter 4.
ProSecure Web/Email Security Threat Management (STM) Appliance 2. Complete the fields and make your selections from the drop-down lists as explained in the following table: Table 29. Email Filter Settings Setting Description (or Subfield and Description) Filter by Subject Keywords Keywords Enter keywords that are detected in the email subject line. Use commas to separate different keywords. The total maximum length of this field is 2048 characters, excluding duplicate words and delimiter commas.
ProSecure Web/Email Security Threat Management (STM) Appliance Table 29. Email Filter Settings (Continued) Setting Description (or Subfield and Description) Filter by File Type File Extension By default, the File Extension field lists the most common file extensions that are detected. You can manually add or delete extensions. Use commas to separate different extensions.
ProSecure Web/Email Security Threat Management (STM) Appliance This order of implementation ensures the optimum balance between spam prevention and system performance. For example, if an email originates from a whitelisted source, the STM delivers the email immediately to its destination inbox without implementing the other spam prevention technologies, thereby speeding up mail delivery and conserving the STM system resources.
ProSecure Web/Email Security Threat Management (STM) Appliance To configure the whitelist and blacklist: 1. Select Email Security > Anti-Spam from the menu. The Anti-Spam submenu tabs display, with the Whitelist/Blacklist screen in view: Figure 56. Chapter 4.
ProSecure Web/Email Security Threat Management (STM) Appliance 2. Complete the fields as explained in the following table: Table 30. Whitelist/Blacklist Settings Setting Description Sender IP Address (SMTP) Whitelist Enter the source IP addresses from which emails can be trusted. Blacklist Enter the source IP addresses from which emails are blocked. Click Apply to save your settings, or click Reset to clear all entries from these fields.
ProSecure Web/Email Security Threat Management (STM) Appliance Note: By default, the STM comes with two pre-defined blacklist providers: Spamhaus, and Spamcop. You can add a maximum of 16 blacklist providers to the RBL sources. To enable the real-time blacklist: 1. Select Email Security > Anti-Spam from the menu. The Anti-Spam submenu tabs display, with the Whitelist/Blacklist screen in view. 2. Click the Real-Time Blacklist submenu tab. The Real-Time Blacklist screen displays: Figure 57. 3.
ProSecure Web/Email Security Threat Management (STM) Appliance To add a blacklist provider to the real-time blacklist: 1. In the Add Real-time Blacklist section, add the following information: • In the Provider field, add the name of the blacklist provider. • In the RBL Domain Suffix field, enter the domain suffix of the blacklist provider. 2. Click the Add table button in the Add column. The new blacklist provider is added to the Real-Time Blacklist (SMTP) table, and it is disabled by default.
ProSecure Web/Email Security Threat Management (STM) Appliance To configure distributed spam analysis and the antispam engine settings: 1. Select Email Security > Anti-Spam from the menu. The Anti-Spam submenu tabs display, with the Whitelist/Blacklist screen in view. 2. Click the Distributed Spam Analysis submenu tab. The Distributed Spam Analysis screen displays: Figure 58. 3.
ProSecure Web/Email Security Threat Management (STM) Appliance Table 31. Distributed Spam Analysis Settings (Continued) Setting Description (or Subfield and Description) Action SMTP From the SMTP drop-down list, select the action that is taken when spam is detected by the antispam engine: • Tag spam email. This is the default setting. The email is tagged as spam, and a spam log entry is created. • Block spam email. The email is blocked, and a spam log entry is created. • Quarantine spam email.
ProSecure Web/Email Security Threat Management (STM) Appliance Table 31. Distributed Spam Analysis Settings (Continued) Setting Description (or Subfield and Description) The management port of the STM usually has a LAN IP address assigned, preventing Set Public Host/IP Address users from outside the LAN from accessing the STM to look at their quarantined spam email. Select this check box to enable users from outside the LAN to access their and Port quarantined spam email. Complete the Host/IP fields.
ProSecure Web/Email Security Threat Management (STM) Appliance To specify the Web protocols and ports that are scanned for malware threats. 1. Select Web Security > Polices from the menu. The (Web) Policy screen displays: Figure 59. 2. Select the check boxes and complete the fields and as explained in the following table: Table 32. Web Policy Settings Setting Description Services to Scan HTTP Select the HTTP check box to enable Hypertext Transfer Protocol (HTTP) scanning.
ProSecure Web/Email Security Threat Management (STM) Appliance Configuring Web Malware Scans If you have used the Setup Wizard, you might have already configured the Web malware action and exception scan settings; the Malware Scan screen allows you to modify these settings.
ProSecure Web/Email Security Threat Management (STM) Appliance 2. Complete the fields, select the check boxes, and make your selections from the drop-down lists as explained in the following table: Table 33. Malware Scan Settings Setting Description Action HTTP and HTTPS Action From the HTTP or HTTPS drop-down list, specify one of the following actions to be taken when an infected Web file or object is detected: • Quarantine file.
ProSecure Web/Email Security Threat Management (STM) Appliance Table 33. Malware Scan Settings (Continued) Setting Description Note: You can customize this text. Make sure that you keep the %VIRUSINFO% metaword in the text to enable the STM to insert the correct malware threat information. In addition to the %VIRUSINFO% metaword, you can insert the following metawords in your customized message: %TIME%, %PROTOCOL%, %FROM%, %TO%, %SUBJECT%, %FILENAME%, %ACTION%, %VIRUSNAME%.
ProSecure Web/Email Security Threat Management (STM) Appliance Note: For information about creating custom categories that allow you to set access exceptions for combinations of Web categories, see Creating Custom Categories for Web Access Exceptions on page 142. If you have used the Setup Wizard, you might have already configured the Web category blocking settings; the Content Filtering screen allows you to modify these settings. To configure Web content filtering: 1.
ProSecure Web/Email Security Threat Management (STM) Appliance Figure 62. Content Filtering, screen 2 of 3 Chapter 4.
ProSecure Web/Email Security Threat Management (STM) Appliance . Figure 63. Content Filtering, screen 3 of 3 3. Complete the fields, select the check boxes, and make your selections from the drop-down lists as explained in the following table: Table 34. Content Filtering Settings Setting Description Content Filtering Log HTTP Traffic Select this check box to log HTTP traffic. For information about how to view the logged traffic, see Querying Logs on page 194. By default, HTTP traffic is not logged.
ProSecure Web/Email Security Threat Management (STM) Appliance Table 34. Content Filtering Settings (Continued) Setting Description Block Files with the Following Extensions Select the check box to enable file extension blocking. By default, the File Extension field lists the most common file extensions that are detected. You can manually add or delete extensions. Use commas to separate different extensions.
ProSecure Web/Email Security Threat Management (STM) Appliance Table 34. Content Filtering Settings (Continued) Setting Description Select the Web Categories You Wish to Block Select the Enable Blocking check box to enable blocking of Web categories, which is the default setting. Select the check boxes of any Web categories that you want to block. Use the action buttons at the top of the section in the following way: • Allow All. All Web categories are allowed. • Block All.
ProSecure Web/Email Security Threat Management (STM) Appliance Table 34. Content Filtering Settings (Continued) Setting Description As an option, you can select one or both of the following check boxes: • Allow Users to Submit a "Report a URL Misclassification" Form. When you select this check box, the screen that displays when a user attempts to access blocked content includes a hyperlink to report a URL misclassification.
ProSecure Web/Email Security Threat Management (STM) Appliance Configuring Web URL Filtering If you want to allow or block internal LAN users from access to certain sites on the Internet, use the STM’s Web URL filtering. You can create or import a whitelist that contains domain names and URLs that are accepted, and a blacklist with domain names and URLs that are blocked. The whitelist takes precedence over the blacklist.
ProSecure Web/Email Security Threat Management (STM) Appliance To configure Web URL filtering: 1. Select Web Security > HTTP/HTTPS from the menu. The HTTP/HTTPS submenu tabs display, with the Malware Scan screen in view. 2. Click the URL Filtering submenu tab. The URL Filtering screen displays: Figure 64. Chapter 4.
ProSecure Web/Email Security Threat Management (STM) Appliance 3. Select the check boxes and complete the fields and as explained in the following table: Table 35. URL Filtering Settings Setting Description Whitelist (takes precedence over Blacklist) Enable Select this check box to bypass scanning of the URLs that are listed in the URL field. Users are allowed to access the URLs that are listed in the URL field. URL This field contains the URLs for which scanning is bypassed.
ProSecure Web/Email Security Threat Management (STM) Appliance Table 35. URL Filtering Settings (Continued) Setting Description Add URL Type or copy a URL in the Add URL field. Then click the Add table button to add the URL to the URL field. Import from File To import a list with URLs into the URL field, click the Browse button and navigate to a file in .txt format that contains line-delimited URLs (that is, one URL per line). Then click the Upload table button to add the URLs to the URL field.
ProSecure Web/Email Security Threat Management (STM) Appliance The following figure shows the HTTPS scanning traffic flow: Figure 65.
ProSecure Web/Email Security Threat Management (STM) Appliance If one of these is not satisfied, a security alert message displays in the browser window: Figure 66. However, even when a certificate is trusted or still valid, or when the name of a certificate does match the name of the website, a security alert message still displays when a user who is connected to the STM visits an HTTPS site.
ProSecure Web/Email Security Threat Management (STM) Appliance To configure the HTTPS scan settings: 1. Select Web Security > HTTP/HTTPS from the menu. The HTTP/HTTPS submenu tabs display, with the Malware Scan screen in view. 2. Click the HTTPS Settings submenu tab. The HTTPS Settings screen displays: Figure 67. 122 | Chapter 4.
ProSecure Web/Email Security Threat Management (STM) Appliance 3. Select the check boxes and complete the field and as explained in the following table: Table 36. HTTPS Settings Setting Description HTTP Tunneling Select this check box to allow scanning of HTTPS connections through an HTTP proxy, which is disabled by default. Traffic from trusted hosts is not scanned (see Specifying Trusted Hosts on page 124).
ProSecure Web/Email Security Threat Management (STM) Appliance Specifying Trusted Hosts You can specify trusted hosts for which the STM bypasses HTTPS traffic scanning and security certificate authentication. The security certificate is sent directly to the client for authentication, which means that the user does not receive a security alert for trusted hosts. For more information about security alerts, see Managing Digital Certificates on page 76.
ProSecure Web/Email Security Threat Management (STM) Appliance 3. Complete the fields and select the check box as explained in the following table: Table 37. Trusted Hosts Settings Setting Description Do Not Intercept HTTPS Connections for the following Hosts Enable Select this check box to bypass scanning of trusted hosts that are listed in the Hosts field. Users do not receive a security alert for trusted hosts that are listed in the Hosts field.
ProSecure Web/Email Security Threat Management (STM) Appliance To configure the FTP scan settings: 1. Select Web Security > FTP from the menu. The FTP screen displays: Figure 69. 2. Complete the fields, select the check boxes, and make your selections from the drop-down lists as explained in the following table: Table 38.
ProSecure Web/Email Security Threat Management (STM) Appliance Table 38. FTP Scan Settings (Continued) Setting Description Scan Exception From the drop-down list, specify one of the following actions to be taken when a file or object exceeds the size that you specify in the file size field: • Skip. The file or object is not scanned but skipped, leaving the end user vulnerable. This is the default setting. • Block. The file or object is blocked and does not reach the end user.
ProSecure Web/Email Security Threat Management (STM) Appliance To enable and configure application control: 1. Select Application from the menu. The Application Control screen displays.
ProSecure Web/Email Security Threat Management (STM) Appliance Figure 71. Application Control, screen 2 of 3 Figure 72. Application Control, screen 3 of 3 5. After you have configured each section, first click Apply to save the settings before you continue with the next section. You need to save the configuration changes for each section individually. Chapter 4.
ProSecure Web/Email Security Threat Management (STM) Appliance For reference, you can specify access control for the following applications: • • • • Instant Messaging: - Google Talk - ICQ - mIRC - MSN Messenger - QQ - Yahoo Messenger Media Applications: - iTunes (Music Store, update) - Quicktime (Update) - Real Player (Guide) - Rhapsody (Guide, Music Store) - Winamp (Internet Radio/TV) Peer to Peer: - BitTorrent - eDonkey - Gnutella Tools - Alexa Toolbar - GoToMyPC - We
ProSecure Web/Email Security Threat Management (STM) Appliance To configure scanning exclusion rules: 1. Select Global Settings > Scanning Exclusions from the menu. The Scanning Exclusions screen displays. This screen shows the Scanning Exclusions table, which is empty if you have not specified any exclusions. (The following figure shows one exclusion rule in the table as an example.) Figure 73. 2.
ProSecure Web/Email Security Threat Management (STM) Appliance Setting Access Exception Rules for Web Access You can set up to 200 exception rules for users and members of a group to allow access to applications, file extensions and protocols, Web categories, and URLs that you have blocked for all other users, or the other way around, to block access to applications, file extensions and protocols, Web categories, and URLs that you have allowed access to for all other users.
ProSecure Web/Email Security Threat Management (STM) Appliance To set Web access exception rules: 1. Select Global Settings > Exceptions from the menu. The Exceptions submenu tabs display, with the Exceptions screen in view. This screen shows the Exceptions table, which is empty if you have not specified any exception rules. (The following figure shows several exception rules in the table as an example.) Figure 74.
ProSecure Web/Email Security Threat Management (STM) Appliance 3. Complete the fields and make your selections from the drop-down lists as explained in the following table: Table 40. Add Exception Settings Setting Description Action From the drop-down list, select the action that the STM applies: • Allow. The exception allows access to an application, Web category, or URL that is otherwise blocked. • Block. The exception blocks access to an application, Web category, or URL that is otherwise allowed.
ProSecure Web/Email Security Threat Management (STM) Appliance Table 40. Add Exception Settings (Continued) Setting Description Domain User/Group (continued) All Users Click the Apply button to apply the exception to all users, both authenticated and unauthenticated. Authenticated Click the Apply button to apply the exception to all authenticated users. These are users who have actively logged in to the STM and who have been authenticated.
ProSecure Web/Email Security Threat Management (STM) Appliance Table 40. Add Exception Settings (Continued) Setting Description Domain User/Group (continued) LDAP User/Group Search Do the following: 1. From the Domain drop-down list, select an LDAP domain. 2. From the Type drop-down list, select User, Group, or User&Group. 3. In the Name field, enter the name of the user, group, or user and group, or leave this field blank. 4. Click the Lookup button.
ProSecure Web/Email Security Threat Management (STM) Appliance Table 40. Add Exception Settings (Continued) Setting Description Category (and related information) From the Category drop-down list, select the category to which the action applies. Your selection determines which drop-down lists, fields, radio buttons, and check boxes display onscreen. Applications The action applies to an application. Select an application from the Sub Category drop-down list.
ProSecure Web/Email Security Threat Management (STM) Appliance Table 40. Add Exception Settings (Continued) Setting Description Category (and related information) (continued) Web Categories Note A description of the exception rule for identification and management purposes or any other relevant information that you wish to include. The action applies to a Web category. Select a Web category from the Sub Category drop-down list.
ProSecure Web/Email Security Threat Management (STM) Appliance Creating Custom Groups for Web Access Exceptions After you have specified groups and users (see Managing Users, Groups, and Authentication in Chapter 5), you can create up to 200 custom groups, each of which can include a combination of local groups and local users, groups and users that are defined by their IP address, LDAP groups and users, and RADIUS groups and users.
ProSecure Web/Email Security Threat Management (STM) Appliance 3. Under the Custom Groups table, click the Add table button to specify a custom group. The Add Custom Group screen displays: Figure 77. 4. Complete the fields and make your selections from the drop-down lists as explained in the following table: Table 41. Add Custom Group Settings Setting Description Name A name of the custom group for identification and management purposes.
ProSecure Web/Email Security Threat Management (STM) Appliance Table 41. Add Custom Group Settings (Continued) Setting Description Local Groups Add Users/Groups to this group Do the following: 1. From the Name drop-down list, select a local group. 2. Click the Add button to add the selected local group to the custom group. Repeat this step to add more local groups to the custom group. You can specify local groups on the Groups screen (see Creating and Deleting Groups by Name on page 149).
ProSecure Web/Email Security Threat Management (STM) Appliance Table 41. Add Custom Group Settings (Continued) Setting Description Add RADIUS User Users/Groups to this group (continued) Do the following: 1. From the Domain drop-down list, select a RADIUS domain. 2. From the VLAN ID/Name drop-down list, select a VLAN ID or VLAN name. 3. Click the Add button to add the selected VLAN ID or VLAN name to the custom group. Repeat this step to add more VLAN IDs or VLAN names to the custom group.
ProSecure Web/Email Security Threat Management (STM) Appliance To create and manage custom categories: 1. Select Global Settings > Exceptions from the menu. The Exceptions submenu tabs display, with the Exceptions screen in view. 2. Click the Custom Categories submenu tab. The Custom Categories screen displays. This screen shows the Custom Categories table, which is empty if you have not specified any custom categories. (The following figure shows three custom categories in the table as an example.
ProSecure Web/Email Security Threat Management (STM) Appliance Figure 80. Category Type: URL Filtering Figure 81. Category Type: Web Categories 144 | Chapter 4.
ProSecure Web/Email Security Threat Management (STM) Appliance 4. Complete the fields and make your selections from the drop-down lists as explained in the following table: Table 42. Add Custom Category Settings Setting Description Name A name of the custom category for identification and management purposes. Brief Description A description of the category group for identification and management purposes.
ProSecure Web/Email Security Threat Management (STM) Appliance Table 42. Add Custom Category Settings (Continued) Setting Description Category Type (continued) Web Categories Use the move buttons to move entire Web categories (for example, Commerce), individual applications (for example, Commerce - Shopping), or combinations of both from the Web Categories outside this Category field to the Web Categories in this Category field (or the other way around).
5. Managing Users, Groups, and Authentication 5 This chapter describes how to manage users, groups, and authentication on the STM.
ProSecure Web/Email Security Threat Management (STM) Appliance The STM supports both unauthenticated and authenticated users: • Unauthenticated users. Anonymous users who do not log in to the STM and to which the STM’s default email and Web access policies apply. • Authenticated users. Users who have a computer behind the STM, who log in to the STM with a user name and password, and who are assigned an access policy that normally differs from the STM’s default email and Web access policies.
ProSecure Web/Email Security Threat Management (STM) Appliance You can define groups either by name or by IP address and subnet: • Groups defined by name. These are local groups on the STM to which you can add users from the STM’s local user database. Local groups are automatically assigned to the STM’s prosecuredomain default domain. Note: For information about groups that are defined by VLANs, see Creating and Deleting VLANs for Use with RADIUS Domains on page 170.
ProSecure Web/Email Security Threat Management (STM) Appliance 2. In the Add New Group section of the screen, complete the fields as explained in the following table: Table 43. Group Settings Setting Description Name A descriptive (alphanumeric) name of the group for identification and management purposes. Description A brief description of the group for identification and management purposes. This description is optional. 3. Click the Add table button.
ProSecure Web/Email Security Threat Management (STM) Appliance 3. Change the field and move the users as explained in the following table: Table 44. Edit Group Settings Setting Description Edit Description You can edit the brief description of the group for identification and management purposes. Use the move buttons to move all users or only selected users from the Local users field to the Users in this group field (or the other way around).
ProSecure Web/Email Security Threat Management (STM) Appliance 2. In the Add New IP Subnets/Groups section of the screen, complete the fields as explained in the following table: Table 45. IP Subnet/Group Settings Setting Description IP Address An IP address on your local network or on a remote device to which the users are assigned. Netmask The subnet mask to which the users are assigned. For an individual IP address, specify 255.255.255.255.
ProSecure Web/Email Security Threat Management (STM) Appliance Creating and Deleting User Accounts To create an individual user account: 1. Select Users > Users from the menu. The Users screen displays: Figure 85. The List of Users table displays the users with the following fields: • Enable. The check box allows you to enable or disable the user. • Name. The name of the user. • Group. The group to which the user is assigned. If no group is displayed, the user is not assigned to any group.
ProSecure Web/Email Security Threat Management (STM) Appliance 3. Click the Add table button. The new user is added to the List of Users table. To delete a user from the List of Users table, click the Delete table button in the Action column for the user that you want to delete. Editing User Accounts The only field that you can change for a user account is the password. To modify the password for a user: 1. Select Users > Users from the menu. The Users screen displays (see the previous figure). 2.
ProSecure Web/Email Security Threat Management (STM) Appliance • Downloading ProSecure DC Agent Software, and Creating and Deleting DC Agents on page 165 • Creating and Deleting RADIUS Domains on page 167 • Editing RADIUS Domains and Configuring VLANs on page 169 Understanding the STM’s Authentication Options The login screen and authentication on the STM depend on the user type.
ProSecure Web/Email Security Threat Management (STM) Appliance The lower part of the NETGEAR Configuration Manager Login screen (see the previous figure) provides a User Portal Login Link that lets you open the User Portal Login screen: Figure 88. After a user has logged in through the User Portal Login screen, the Authentication screen displays: Figure 89. The Authentication screen shows the IP address with which the user has logged in and lets a user change his or her password.
ProSecure Web/Email Security Threat Management (STM) Appliance 2. Log in again. 3. On the Authentication screen (see the previous figure), click the Logout link. WARNING! Ensure that users understand that they need to log out after completing a session in order to prevent subsequent users from inheriting access privileges that were not assigned to them.
ProSecure Web/Email Security Threat Management (STM) Appliance How an Active Directory Works Understanding how a typical Active Directory (AD) works might be of help when you are specifying the settings for the LDAP and Active Directory domains on the STM. The following applies to a typical AD: • Organizational unit (OU), common name (CN), and domain controller (DC) can all be used to build a search base in the AD.
ProSecure Web/Email Security Threat Management (STM) Appliance 3. Click the General tab. The general properties for Jamie Hanson display: Figure 90. 4. To verify Jamie Hanson’s user login name, click the Account tab. The account properties for Jamie Hanson display: Figure 91. 5. Log in to the STM. 6. Select User Management > Authentications from the menu. The LDAP screen displays. Chapter 5.
ProSecure Web/Email Security Threat Management (STM) Appliance 7. In the List of LDAP table, click the Edit button in the Action column of domain ABC.com. The Edit LDAP screen displays. 8. To bind the user Jamie Hanson to the LDAP server for authentication on the STM, use one of the following two formats in the Bind DN field of the Edit LDAP screen: • The display name in DN format: cn=Jamie Hanson,cn=users,dc=testAD,dc=com (see the example in the following figure). Figure 92.
ProSecure Web/Email Security Threat Management (STM) Appliance Creating and Deleting LDAP and Active Directory Domains To configure LDAP and Active Directory authentication: 1. Select User Management > Authentication from the menu. The authentication submenu tabs display with the LDAP screen in view: Figure 94. The List of LDAP table displays the following fields: • Domain Name. The name of the STM’s domain to which the server has been assigned. • Server.
ProSecure Web/Email Security Threat Management (STM) Appliance 2. Complete the fields and make your selections from the drop-down list as explained in the following table: Table 47. LDAP Settings Setting Description Domain A descriptive (alphanumeric) name of the LDAP or Active Directory authentication server for identification and management purposes. Server The server IP address or server host name of the LDAP or Active Directory authentication server.
ProSecure Web/Email Security Threat Management (STM) Appliance Table 47. LDAP Settings (Continued) Setting Description Group Members This field is optional. The attribute that is used to identify the members of a group. Attribute For an Active Directory, enter member. For OpenLDAP, you can enter a customized attribute to identify the members of a group. Additional Filter This field is optional. A filter that is used when searching the LDAP server for matching entries while excluding others.
ProSecure Web/Email Security Threat Management (STM) Appliance Editing LDAP and Active Directory Domains To edit an LDAP or Active Directory domain: 1. Select User Management > Authentication from the menu. The authentication submenu tabs display with the LDAP screen in view (see Figure 94 on page 161). 2. In the Action column of the List of LDAP table, click the Edit table button for the domain and server that you want to edit. The Edit LDAP screen displays.
ProSecure Web/Email Security Threat Management (STM) Appliance Requirements for the ProSecure DC Agent Software and DC Agent Server Note the following requirements for the ProSecure DC agent software and domain controller (DC) servers: • If the DC server is located behind a firewall or there is a firewall on the DC server, ensure that the firewall does not block the server’s listening port. The default port that is used by the DC agent is 5182.
ProSecure Web/Email Security Threat Management (STM) Appliance To download ProSecure DC Agent software and add a DC agent: 1. Select User Management > Authentication from the menu. The authentication submenu tabs display with the LDAP screen in view. Locate the List of DC Agents table at the bottom of the screen. (See this section of the screen in the following figure.) Figure 95. 2. Under the List of DC Agents table, click the Download/Install link to download the ProSecure DC Agent software.
ProSecure Web/Email Security Threat Management (STM) Appliance To edit a DC agent: 1. In the Domain column, locate the DC agent that you want to edit, and make changes in the columns to the right of the Domain column. 2. Click Apply to save your changes. Creating and Deleting RADIUS Domains To configure RADIUS authentication: 1. Select User Management > Authentication from the menu. The authentication submenu tabs display with the LDAP screen in view. 2. Click the RADIUS submenu tab.
ProSecure Web/Email Security Threat Management (STM) Appliance 3. Complete the fields and make your selections from the drop-down list as explained in the following table: Table 49. RADIUS Settings Setting Description Domain A descriptive (alphanumeric) name of the RADIUS authentication server for identification and management purposes. Server The server IP address or server host name of the RADIUS authentication server. Port The port number for the RADIUS authentication server.
ProSecure Web/Email Security Threat Management (STM) Appliance Editing RADIUS Domains and Configuring VLANs To edit a RADIUS domain: 1. Select User Management > Authentication from the menu. The authentication submenu tabs display with the LDAP screen in view. 2. Click the RADIUS submenu tab. The RADIUS screen displays (see Figure 96 on page 167). 3. In the Action column of the List of RADIUS table, click the Edit table button for the domain and server that you want to edit.
ProSecure Web/Email Security Threat Management (STM) Appliance Creating and Deleting VLANs for Use with RADIUS Domains After you have created a RADIUS domain by specifying a RADIUS server, you can add a virtual LAN (VLAN), and then set access exceptions for the logged-in RADIUS users (see Setting Access Exception Rules for Web Access on page 132). In order to use the VLAN to set access exceptions on the STM, the following is required: • You need to have defined a VLAN policy on another platform.
ProSecure Web/Email Security Threat Management (STM) Appliance To specify the global user configuration settings: 1. Select User Management > Configuration from the menu. The Configuration screen displays: Figure 98. 2. Locate the Sessions Parameters section on screen. Specify the session settings: • Session Expiration Length. The period after which a session expires and a user needs to log in again. This setting applies to all users. From the drop-down list, select either Minutes or Hours.
ProSecure Web/Email Security Threat Management (STM) Appliance 4. Locate the Users Portal Login Settings section on screen. Specify the default domain settings: • From the Default Domain drop-down list, select a domain that is presented as the default domain on the User Portal Login screen. The default domain that is presented is prosecuredomain. Users can still select another domain (if there are other domains configured on the STM) from the drop-down list on the User Portal Login screen.
ProSecure Web/Email Security Threat Management (STM) Appliance To view all or selected users: 1. On the Active Users screen (see the previous figure), select one of the following radio buttons: • View All. This selection returns all active users after you click the Search button. • Search Criteria. This selection lets you enter the following search criteria so that only selected users are returned after you click the Search button. Use either the IP Address field or the Domain and User fields.
ProSecure Web/Email Security Threat Management (STM) Appliance To log out selected active users: 1. On the search results screen select the check boxes to the left of the users that you want to log out. 2. Click Logout. 174 | Chapter 5.
6. Monitoring System Access and Performance 6 This chapter describes the system monitoring features of the STM. You can be alerted to important events such as attacks and login failures. You can also view the system status and real-time traffic and security information. In addition, the diagnostics utilities are described.
ProSecure Web/Email Security Threat Management (STM) Appliance For more information about logs, see Querying Logs on page 194. Configuring the Email Notification Server If you have used the Setup Wizard, you might have already configured the email notification server; the Email Notification Server screen allows you to modify these settings. The STM can automatically send information such as notifications and reports to an administrator.
ProSecure Web/Email Security Threat Management (STM) Appliance Table 50. Email Notification Settings (Continued) Setting Description (or Subfield and Description) Mail Server Requires Authentication If the SMTP server requires authentication, select the Mail Server Requires Authentication check box and enter the following settings: User Name The user name for SMTP server authentication. Password The password for SMTP server authentication. 3. Click Apply to save your settings.
ProSecure Web/Email Security Threat Management (STM) Appliance Figure 102. Log Management, screen 1 of 3 3. Complete the fields, select the radio button and check boxes, and make your selections from the drop-down lists as explained in the following table: Table 51. Email Logs Settings Setting Description (or Subfield and Description) Send to The email address of the recipient of the log file. This is normally a user with administrative privileges.
ProSecure Web/Email Security Threat Management (STM) Appliance Table 51. Email Logs Settings (Continued) Setting Description (or Subfield and Description) Select Logs to Send Select the check boxes to specify which logs are sent via email: • System logs. The system event logs that include all system errors, informational messages, configuration changes, and system software updates. • Email traffic logs. All scanned incoming and outgoing email traffic. • Web traffic logs.
ProSecure Web/Email Security Threat Management (STM) Appliance Figure 103. Log Management, screen 2 of 3 3. Complete the fields, select the check boxes, and make your selections from the drop-down lists as explained in the following table: Table 52. Syslog Settings Setting Description (or Subfield and Description) IP Address The IP address of the syslog server. Port The port number that the syslog server uses to receive logs. The default port number is 514.
ProSecure Web/Email Security Threat Management (STM) Appliance Table 52. Syslog Settings (Continued) Setting Description (or Subfield and Description) Facility The facility indicates from which internal part of the STM the log message originates. For each log that you have selected to be sent to the syslog server (see earlier in this table), select one of the following facilities from the drop-down list: • auth. Security and authorization log messages. • authpriv.
ProSecure Web/Email Security Threat Management (STM) Appliance Clearing Logs To clear logs: 1. Select Monitoring > Logs from the menu. The Logs submenu tabs display, with the Log Management screen in view (see Figure 102 on page 178). Locate the Clear the Following Log Information section at the bottom of the screen: Figure 104. Log Management, screen 3 of 3 2. Select one ore more check boxes to specify which logs are cleared: • System. The system event logs are cleared. • Email traffic.
ProSecure Web/Email Security Threat Management (STM) Appliance To configure and activate the email alerts: 1. Select Monitoring > Alerts from the menu. The Alerts screen displays: Figure 105. 2. Select the check boxes and complete the fields as explained in the following table: Table 53. Alerts Settings Setting Description (or Subfield and Description) Enable Update Failure Alerts Select this check box to enable update failure alerts.
ProSecure Web/Email Security Threat Management (STM) Appliance Table 53. Alerts Settings (Continued) Setting Description (or Subfield and Description) Enable Malware Outbreak Alerts Select this check box to enable malware outbreak alerts, and configure the Outbreak Criteria, Protocol, and Subject fields. Outbreak Criteria To define a malware outbreak, specify the following fields: • malware found within. The number of malware incidents that are detected. • minutes (maximum 90 minutes).
ProSecure Web/Email Security Threat Management (STM) Appliance To display the Dashboard screen, select Monitoring > Dashboard from the menu. The Dashboard submenu tabs display with the Dashboard screen in view. Because of the size of this screen, it is divided and presented in this manual in three figures (the following figure, Figure 107 on page 187, and Figure 108 on page 189), each with its own table that explains the fields. Figure 106.
ProSecure Web/Email Security Threat Management (STM) Appliance To set the poll interval: 1. Click the Stop button. 2. From the Poll Interval drop-down list, select a new interval (the minimum is 5 seconds, the maximum is 5 minutes). 3. Click the Set Interval button. To clear the statistics, click Clear Statistics. The following table explains the fields of the Status, Total Threats, and Threats (Last 7 Days) sections of the Dashboard screen: Table 54.
ProSecure Web/Email Security Threat Management (STM) Appliance Table 54. Dashboard: Status, Total Threats, and Threats (Last 7 Days) Information (Continued) Item Description Application Displays the total number of: • IM blocked. • Tools blocked. • Media blocked. • P2P blocked. Note: For information about how to configure these applications, see Configuring Application Control on page 127.
ProSecure Web/Email Security Threat Management (STM) Appliance The following table explains the fields of the Total Scanned Services Traffic, Most Recent 5, and Top 5 sections of the Dashboard screen: Table 55. Dashboard: Total Scanned Services Traffic and Most Recent 5 and Top 5 Information Item Description Total Scanned Services Traffic (Last 7 Days) This is a graphic that shows the relative number of traffic in bytes over the last week.
ProSecure Web/Email Security Threat Management (STM) Appliance Figure 108. Dashboard, screen 3 of 3 Note: The previous figure shows the Interface Statistics section of the STM600. The STM300 and STM150 have different interfaces (see the following table). The following table explains the fields of the Service Statistics and Interface Statistics sections of the Dashboard screen: Table 56.
ProSecure Web/Email Security Threat Management (STM) Appliance Table 56. Dashboard: Service Statistics and Interface Statistics Information (Continued) Item Description Total Malwares Found The total number of detected malware threats. Total Emails/Files Blocked Virus The total number of detected viruses. Spyware The total number of detected spyware threats. The total number of blocked emails and files.
ProSecure Web/Email Security Threat Management (STM) Appliance To view the STM’s Web usage: 1. Select Monitoring > Dashboard from the menu. The Dashboard submenu tabs display with the Dashboard screen in view. 2. Click the Web Usage submenu tab. The Web Usage screen displays: Figure 109. 3. Use the From drop-down list to select the start date of the Web usage report (year, month, date) and the To drop-down list to select the end date of the report (year, month, date). 4. Click View.
ProSecure Web/Email Security Threat Management (STM) Appliance Viewing System Status The System Status screen provides real-time information about the following components of the STM: • Firmware versions and update information of the STM, software versions and update information of the components, license expiration dates for each type of license, and hardware serial number • Management interface information • MAC addresses for the STM’s interfaces To view the System Status screen select Monitoring >
ProSecure Web/Email Security Threat Management (STM) Appliance The following table explains the fields of the System Information, Management Interface Information, and Interfaces sections of the System Status screen: Table 57. System Status Information Setting Description System Information Firmware Information The current version and most recent update (that is, the most recently downloaded version) for the software, scan engine, pattern file, and operating system (OS).
ProSecure Web/Email Security Threat Management (STM) Appliance Querying Logs The extensive log querying functions of the STM can help you to monitor the protection of the network and fine-tune the performance of the STM. For information about emailing logs and sending logs to a syslog server, see Configuring and Activating System, Email, and Syslog Logs on page 177. The STM generates logs that provide detailed information about malware threats and traffic activities on the network.
ProSecure Web/Email Security Threat Management (STM) Appliance • Recipient email address • URL or subject To query and download logs: 1. Select Monitoring > Logs from the menu. The Logs submenu tabs display, with the Log Management screen in view. 2. Click the Logs Query submenu tab. The Logs Query screen displays (see the following figure). Depending on the selection that you make from the Log Type drop-down list, the screen adjusts to display the settings for the selected type of log.
ProSecure Web/Email Security Threat Management (STM) Appliance 3. Select the check boxes and radio buttons, make your selections from the drop-down lists, and complete the fields as explained in the following table: Table 58. Log Query Settings Setting Description (or Subfield and Description) Log Type Select one of the following log types from the drop-down list: • Email traffic. All scanned incoming and outgoing email traffic. • Web traffic. All scanned incoming and outgoing email traffic. • Virus.
ProSecure Web/Email Security Threat Management (STM) Appliance Table 58. Log Query Settings (Continued) Setting Description (or Subfield and Description) Search Criteria (continued) Domain The domain name that is queried. This field is available for the following logs: Email traffic, Web traffic, Virus, Spyware, Spam, Email filters, Content filters, and Application. User The user name that is queried.
ProSecure Web/Email Security Threat Management (STM) Appliance Table 58. Log Query Settings (Continued) Setting Description (or Subfield and Description) Search Criteria (continued) Recipient Email The email address of the recipient that is queried. This field is available for the following logs: Email traffic, Virus, Spyware, Spam, and Email filters. URL/Subject The URL and subject that are queried. This field is available for the following logs: Traffic, Virus, and Spyware.
ProSecure Web/Email Security Threat Management (STM) Appliance Example: Using Logs to Identify Infected Clients You can use the STM logs to help identify potentially infected clients on the network. For example, clients that are generating abnormally high volumes of HTTP traffic might be infected with spyware or a virus.
ProSecure Web/Email Security Threat Management (STM) Appliance Viewing, Scheduling, and Generating Reports The extensive reporting functions of the STM let you perform the following tasks that help you to monitor the protection of the network and the performance of the STM: • Generating, viewing, and downloading Web, email, application, and system reports • Scheduling automatic Web, email, application, and system reports, and emailing these reports to specified recipients You can view the reports onscr
ProSecure Web/Email Security Threat Management (STM) Appliance To display the report templates and view reports onscreen: 1. Select Monitoring > Reports from the menu. The Reports screen displays. The following figure shows only the Report Templates section of the screen with the preconfigured report templates. Figure 112. 2. Click the red + More button for a report category to display the advanced report templates for that category. The System Information category contains only a single report template.
ProSecure Web/Email Security Threat Management (STM) Appliance Generating Reports for Downloading To generate a report: 1. Select Monitoring > Reports from the menu. The Reports screen displays. By default, the Generate Report radio button is selected. The following figure shows the Reports screen without the Template Reports section, and shows some samples in the Generated Report List. For information about report templates, see the Report Templates section. Figure 113. 2.
ProSecure Web/Email Security Threat Management (STM) Appliance in the advanced filtering options section of the screen (see Advanced Report Filtering Options on page 204). Scheduling Automatic Generation and Emailing of Reports To schedule a report and enable the STM to email the report: 1. Select Monitoring > Reports from the menu. The Reports screen displays. 2. In the Report Selection section of the screen, select the Schedule Report radio button.
ProSecure Web/Email Security Threat Management (STM) Appliance • Weekly. By default, the report is generated weekly on Sunday at 3:00 a.m. You can use the drop-down lists to change the day of the week and the time. • Monthly. If you do not use the drop-down lists to change the time, the report is generated on the first of the month at 3:00 a.m. You cannot change the day of the month. For advanced filtering options, see Advanced Report Filtering Options on page 204. 4.
ProSecure Web/Email Security Threat Management (STM) Appliance are identical for both types of reports but need to be specified separately for each generated report and each scheduled report. To configure advanced filtering options: 1. Select Monitoring > Reports from the menu. The Reports screen displays. 2. In the Report Selection section, select one of the following radio buttons: • Generate Report. • Schedule Report. 3.
ProSecure Web/Email Security Threat Management (STM) Appliance 5. Configure the advanced filtering options as explained in the following table: Table 60. Advanced Filtering Options Settings Setting Description Top Count Enter a number between 1 and 100 to specify how many entries are included in reports that provide a top count, such as the Top Users by Requests report or the Top Spam Senders by Requests report.
ProSecure Web/Email Security Threat Management (STM) Appliance Table 60. Advanced Filtering Options Settings (Continued) Setting Description Users (continued) Local User Enter the name of a local user, or use wildcards to specify a group of users. To specify all local users, enter *. Then click the Add table button. Alternately, click the Lookup table button to open a table that displays all local users, each user with an individual Add table button that lets you add the user to the User table.
ProSecure Web/Email Security Threat Management (STM) Appliance Table 60. Advanced Filtering Options Settings (Continued) Setting Description Destination (continued) Category From the drop-down list to the right of the Limit to drop-down list, select one of the following options: • Web Categories. The screen displays a table with all Web categories, each one with an individual Add table button that lets you add the category to the Destination table.
ProSecure Web/Email Security Threat Management (STM) Appliance You can query and view the spam quarantine file and the malware quarantine file separately and filter the information based on a number of criteria.
ProSecure Web/Email Security Threat Management (STM) Appliance To query the quarantine files: 1. Select Monitoring > Quarantine from the menu. The Quarantine screen displays (see the following figure). 2. Depending on the selection that you make from the Quarantine File Type drop-down list, the screen adjusts to display the settings for the selected type of quarantine file. The following figure displays the spam quarantine file settings as an example. Figure 116. 3.
ProSecure Web/Email Security Threat Management (STM) Appliance Table 61. Quarantine File Settings (Continued) Setting Description (or Subfield and Description) Search Criteria (continued) Start Date/Time From the drop-down lists, select the year, month, day, hours, and minutes for the start date and time. End Date/Time From the drop-down lists, select the year, month, day, hours, and minutes for the end date and time.
ProSecure Web/Email Security Threat Management (STM) Appliance Viewing and Managing the Quarantined Spam Table When you query the spam quarantine file, the Quarantine screen with the Quarantined Spam table displays: Figure 117. The Quarantined Spam table shows the following columns: • Check box. Lets you select the table entry. • Date. The date that the email was received. • Protocol. The protocol (SMTP) in which the spam was found. • Domain. The domain in which the spam was found. • User.
ProSecure Web/Email Security Threat Management (STM) Appliance • Delete. The selected spam email files are removed from quarantine and deleted. Viewing and Managing the Quarantined Infected Files Table When you query the malware quarantine file, the Quarantine screen with the Quarantined Infected Files table displays: Figure 119. The Quarantined Infected Files table shows the following columns: • Check box. Lets you select the table entry. • Date. The date that the file was received. • Protocol.
ProSecure Web/Email Security Threat Management (STM) Appliance Figure 120. After you have selected one or more table entries, take one of the following actions (or click the Return link to return to the previous screen): • Resend to Admin. The selected malware files are removed from quarantine, zipped together as an email attachment, and then send to the recipient that you have specified on the Email Notification Server screen (see Configuring the Email Notification Server on page 176). • Delete.
ProSecure Web/Email Security Threat Management (STM) Appliance Note: The report includes only quarantined spam emails that contain the email address that is specified in the Send to field. 4. Click Send Report. The report provides summary information such as time, sender, recipient, subject, and size, and a retrieve link. The user can retrieve an individual email by clicking the internal or external retrieve link for the email.
ProSecure Web/Email Security Threat Management (STM) Appliance Using the Network Diagnostic Tools This section discusses the Ping or Trace an IP Address section, the Perform a DNS Lookup section, and the Test URL section of the Diagnostics screen: Figure 123. Diagnostics, screen 1 of 3 Sending a Ping Packet Use the ping utility to send a ping packet request to check the connection between the STM and a specific IP address.
ProSecure Web/Email Security Threat Management (STM) Appliance Looking Up a DNS Address A Domain Name Server (DNS) converts the Internet name (for example, www.netgear.com) to an IP address. If you need the IP address of a Web, FTP, mail, or other server on the Internet, request a DNS lookup to find the IP address. To look up a DNS address: 1. Locate the Perform a DNS Lookup section on the Diagnostics screen. In the Domain Name field, enter a domain name. 2. Click the Lookup button.
ProSecure Web/Email Security Threat Management (STM) Appliance out which applications are using most bandwidth, which users use most bandwidth, how long users are connected, and other information. To use the realtime traffic diagnostics tool: 1. Locate the Realtime Traffic Diagnostics section on the Diagnostics screen. Select one or more check boxes to specify the protocols for which you want to capture the traffic flow. The check boxes that you can select are HTTP, SMTP, POP3, IMAP, and FTP. 2.
ProSecure Web/Email Security Threat Management (STM) Appliance Gathering Important Log Information To gather log information about your STM: 1. Locate the Gather Important Log Information section on the Diagnostics screen. Click Download Now. You are prompted to save the downloaded log information file to your computer. The default file name is importantlog.gpg. 2. When the download is complete, browse to the download location you specified and verify that the file has been downloaded successfully.
ProSecure Web/Email Security Threat Management (STM) Appliance Note: For the STM150 only, there is an alternate way to restart: Press the Power button on the rear panel of the STM150 (see Rear Panel STM150 on page 20). The front panel Test LED flashes, and the STM150 reboots. To shut down the STM: Locate the Restart & Shutdown section on the Diagnostics screen (this section is not shown on any of the Diagnostics screen figures in this manual). Click the Shutdown button. The STM shuts down.
7. Troubleshooting and Using Online Support 7 This chapter provides troubleshooting tips and information for the STM. After each problem description, instructions are provided to help you diagnose and solve the problem. For the common problems listed, go to the section indicated. • Is the STM on? Go to Basic Functioning on page 223. • Have I connected the STM correctly? Go to Basic Functioning on page 223. • I cannot access the STM’s Web Management Interface.
ProSecure Web/Email Security Threat Management (STM) Appliance Basic Functioning After you turn on power to the STM, check that the following sequence of events occurs: 1. When power is first applied, verify that the Power LED is on. 2. After approximately 2 minutes, verify that: a. The Test LED (STM150) or Status LED (STM300 and STM600) is no longer lit. b. The left LAN port LEDs are lit for any local ports that are connected. c. The left WAN port LEDs are lit for any WAN ports that are connected.
ProSecure Web/Email Security Threat Management (STM) Appliance If all LEDs are still on more than several minutes minute after power-up, do the following: • Turn the power off, and then turn it on again to see if the STM recovers. • Clear the STM’s configuration to factory defaults. Doing so sets the STM’s IP address to 192.168.1.201. This procedure is explained in Restoring the Default Configuration and Password on page 227.
ProSecure Web/Email Security Threat Management (STM) Appliance • Make sure that your browser has Java, JavaScript, or ActiveX enabled. If you are using Internet Explorer, click Refresh to be sure that the Java applet is loaded. • Try quitting the browser and launching it again. • Make sure that you are using the correct login information. The factory default login name is admin and the password is password. Make sure that Caps Lock is off when entering this information.
ProSecure Web/Email Security Threat Management (STM) Appliance Testing the LAN Path to Your STM You can ping the STM from your PC to verify that the LAN path to the STM is set up correctly. To ping the STM from a PC running Windows 95 or later: 1. From the Windows toolbar, click Start and select Run. 2. In the field provided, type ping followed by the IP address of the STM; for example: ping 192.168.1.201 3. Click OK.
ProSecure Web/Email Security Threat Management (STM) Appliance • Check to see that the network address of your PC (the portion of the IP address that is specified by the netmask) is different from the network address of the remote device. • Check that the modem or router is connected and functioning. Restoring the Default Configuration and Password To reset the STM to its original factory default settings: 1. Select Administration > Backup and Restore Settings from the menu.
ProSecure Web/Email Security Threat Management (STM) Appliance Note: For the STM150 only, there is an alternate way to return the settings to factory default: Using a sharp object, press and hold the Reset button on the rear panel of the STM150 (see Rear Panel STM150 on page 20) for about 10 seconds until the front panel Test LED flashes and the STM150 returns to factory default settings.
ProSecure Web/Email Security Threat Management (STM) Appliance To initiate the support tunnel: 1. Select Support > Online Support from the menu. The Online Support screen displays: Figure 128. 2. In the Support Key field, enter the support key that was given to you by NETGEAR. 3. Click Connect. When the tunnel is established, the tunnel status field displays ON. To terminate the tunnel, click Disconnect. The Tunnel Status field displays OFF.
ProSecure Web/Email Security Threat Management (STM) Appliance The Hot Fixes table displays the installed hot fixes with the following fields: • Installed At. The date and time when the hot fix was installed on the STM. • Component. The component for which the hot fix provides a patch. • Base Version. The base software version for the hot fix. The hot fix cannot be installed on an earlier or later software version, but only on the software version for which it is intended. • Hot Fix Name.
ProSecure Web/Email Security Threat Management (STM) Appliance To submit a file to NETGEAR for analysis: 1. Select Support > Malware Analysis from the menu. The Malware Analysis screen displays: Figure 130. 2. Complete the fields as explained in the following table: Table 62. Malware Analysis Settings Setting Description Email Address The email address of the submitter to enable NETGEAR to contact the submitter if needed.
A. Report Templates A The following table provides information about the preconfigured report templates. These report templates are accessible from the Reports screen (see Viewing, Scheduling, and Generating Reports on page 200). In the Filtering Options columns of the following table, a indicates that the option is supported; an indicates that the option is not supported.
ProSecure Web/Email Security Threat Management (STM) Appliance Table 63.
ProSecure Web/Email Security Threat Management (STM) Appliance Table 63.
ProSecure Web/Email Security Threat Management (STM) Appliance Table 63.
ProSecure Web/Email Security Threat Management (STM) Appliance Table 63.
ProSecure Web/Email Security Threat Management (STM) Appliance Table 63.
ProSecure Web/Email Security Threat Management (STM) Appliance Table 63.
ProSecure Web/Email Security Threat Management (STM) Appliance Table 63.
ProSecure Web/Email Security Threat Management (STM) Appliance Table 63.
ProSecure Web/Email Security Threat Management (STM) Appliance Table 63.
ProSecure Web/Email Security Threat Management (STM) Appliance Table 63.
ProSecure Web/Email Security Threat Management (STM) Appliance Table 63.
B. Default Settings and Technical Specifications B To return the STM to the default factory configuration settings that are shown in the following table, click the Default button on the Backup and Restore Settings screen (see Reverting to Factory Default Settings on page 70). Table 64. STM Default Configuration Settings Feature Default Login User Login URL https://192.168.1.
ProSecure Web/Email Security Threat Management (STM) Appliance Table 64. STM Default Configuration Settings (Continued) Feature Default LAN Connections MAC Address Default address MTU Size 1500 Ports STM150: 5 AutoSense 10/100/1000BASE-T, RJ-45 STM300: 3 AutoSense 10/100/1000BASE-T, RJ-45 STM600: 5 AutoSense 10/100/1000BASE-T, RJ-45 LAN IP Address In line transparent bridged Subnet Mask 255.255.255.0 The following table shows the STM specifications. Table 65.
ProSecure Web/Email Security Threat Management (STM) Appliance Table 65. STM Specifications (Continued) Feature Specification Electromagnetic Emissions Meets requirements of FCC Part 15 Class A VCCI Class A CE mark, commercial Meets requirements of UL listed C-Tick Safety Appendix B.
C. Related Documents C This appendix provides links to reference documents you can use to gain a more complete understanding of the technologies used in your NETGEAR product. Document Link TCP/IP Networking Basics http://documentation.netgear.com/reference/enu/tcpip/index.htm Wireless Networking Basics http://documentation.netgear.com/reference/enu/wireless/index.htm Preparing Your Network http://documentation.netgear.com/reference/enu/wsdhcp/index.
D. Notification of Compliance NETGEAR Wired Products D Regulatory Compliance Information This section includes user requirements for operating this product in accordance with National laws for usage of radio spectrum and operation of radio devices. Failure of the end-user to comply with the applicable requirements may result in unlawful operation and adverse action against the end-user by the applicable National regulatory authority.
ProSecure Web/Email Security Threat Management (STM) Appliance Operation is subject to the following two conditions: • This device may not cause harmful interference, and • This device must accept any interference received, including interference that may cause undesired operation. FCC Radio Frequency Interference Warnings & Instructions This equipment has been tested and found to comply with the limits for a Class B digital device, pursuant to Part 15 of the FCC Rules.
ProSecure Web/Email Security Threat Management (STM) Appliance Additional Copyrights AES Copyright (c) 2001, Dr. Brian Gladman, brg@gladman.uk.net, Worcester, UK. All rights reserved. TERMS Redistribution and use in source and binary forms, with or without modification, are permitted subject to the following conditions: 1. Redistributions of source code must retain the above copyright notice, this list of conditions, and the following disclaimer. 2.
ProSecure Web/Email Security Threat Management (STM) Appliance MD5 Copyright (C) 1990, RSA Data Security, Inc. All rights reserved. License to copy and use this software is granted provided that it is identified as the “RSA Data Security, Inc. MD5 Message-Digest Algorithm” in all material mentioning or referencing this software or this function. License is also granted to make and use derivative works provided that such works are identified as “derived from the RSA Data Security, Inc.
Index Numerics 10BaseT, 100BaseT, and 1000BaseT 55 A AC input STM150 20 STM300 21 STM600 21 access preventing inherited privileges 156 read/write and read-only 61 remote management 64 rules for Web access 132 action buttons (Web Management Interface) 31 activating service licenses 12, 50 Active Directory (AD) domains 161 how it works 158 overview 157 ActiveX objects 86 address binding, permanent 57, 59 administrator (admin) overview 61 receiving alerts by email 182 logs by email 178 reports by email 204 se
ProSecure Web/Email Security Threat Management (STM) Appliance buttons (hardware) Power STM150 20 STM300 21 STM600 21 Reset (STM150 only) 20, 71 buttons (software) 31, 32 C CA (Certification Authority) 76 cache, clearing Web categories 115 capabilities and features 9 card, service registration 12 categories, Web content 47, 114 certificates authentication 120 commercial CAs 77 exchange 120 managing 76 NETGEAR default 78 self-signed 77 third party website 123 trusted 79 untrusted 80 warning messages 29, 65
ProSecure Web/Email Security Threat Management (STM) Appliance documentation online 231 reference 248 domain controller (DC) agent 164 domains default 172 LDAP and Active Directory (AD) 161 overview 147 RADIUS 167 trusted 109 Web access exceptions, applying to 134 downlink (LAN) ports 14, 16 downloading DC agent software 165 SSL certificate 29 STM software 73 dropped packets, session limit exceeded 57 duplex, settings 54 dust 23 dynamic MAC bindings 60 E eDonkey 85, 130 EICAR 49 electrical noise 23 email
ProSecure Web/Email Security Threat Management (STM) Appliance GoToMyPC 86, 130 groups by IP address and subnet, managing 151 by IP membership, authentication 135, 141 by name, managing 149 local 135, 141 membership 148 overview 147 Web access exceptions applying to 134 creating custom groups 139 guest users 61, 63 guidelines, performance and sizing 12 H hard disk usage 186 Hard drive (HDD) LED STM150, not applicable STM300 17 STM600 19 hardware serial number 193 STM150 bottom panel and label 22 front pan
ProSecure Web/Email Security Threat Management (STM) Appliance intrusion detection systems (IDS) and intrusion prevention systems (IPS) 8 IP addresses DNS servers 34, 54 public 105 STM 34, 54 subnet mask, STM 34, 54 IPS (intrusion prevention system) 8 iTunes 85, 130 J Java objects 86 Javascript 86, 113 K KDE (MIB browser) 67 Kensington lock (STM150 only) 20 key (bundle), for registering 50 keywords, blocking in emails 94, 96 kit, rack-mounting 24 Knowledge Base 231 L LAN default settings 246 LAN LEDs ST
ProSecure Web/Email Security Threat Management (STM) Appliance M MAC addresses, binding 59 main navigation menu (Web Management Interface) 31 malware alerts and outbreak alerts 182, 183 blocked page, user notification settings 108 detected, statistics 190 infected files, viewing 213 logs 179, 180 quarantine area size 82 quarantined querying and viewing 209 statistics 190 recent 5 and top 5 threats 188 management default settings 245 digital certificates 76 performance 82 Management Information Base (MIB) 6
ProSecure Web/Email Security Threat Management (STM) Appliance blocking (keywords, password-protected attachments, file extensions, and file names) 96 default port 38, 88 distributed spam analysis 103 enabling scanning 38, 88 ports console STM150 20 STM300 16 STM600 18 LAN speed 223 STM150 14 STM300 16 STM600 18 locations STM150 14 STM300 16 STM600 18 management STM150, not applicable STM300 16 STM600 18 public 105 WAN STM150 14 STM300 16 STM600 18 Post Office Protocol 3. See POP3.
ProSecure Web/Email Security Threat Management (STM) Appliance removing, embedded objects 113 reports email address for sending reports 176 filtering options 204, 233 generating 202 scheduling 203 templates 200, 233 user-generated spam report 214 Web resource usage 191 Reset button, STM150 (only) 20, 71 restoring factory default settings 70, 227 settings from backup file 69 Rhapsody 85, 130 routes, tracing 216 RTC (real-time clock) 35, 75 rules, Web access exceptions 132 S safety compliance 247 scan engin
ProSecure Web/Email Security Threat Management (STM) Appliance speed settings and autosensing 54 spyware logs 194, 196 See also anti virus, See also emails.
ProSecure Web/Email Security Threat Management (STM) Appliance Transmission Control Protocol (TCP) time-out 57 Transport Layer Security (TLS) 162 traps, SNMP 67 trial period, service licenses 50 troubleshooting basic functioning 223 browsers 225 configuration settings, using sniffer 224 defaults 225 LEDs 223, 224 NTP 228 remotely 228 testing your setup 226 time-out error 225 Web Management Interface 224 trusted certificates 79 trusted domains 109 trusted hosts 124 trusted URLs 109 STM300 16 STM600 18 User
ProSecure Web/Email Security Threat Management (STM) Appliance default settings 86 filtering, using the Setup Wizard 46 setting access exceptions 138 Web content filtering audio, compressed, executable, and video files 113, 137 blocked malware, user notifications 108 blocked page, user notifications 113, 114 blocked URL, user notifications 119 defaults 85 files and objects, sizes 41, 108 logs 179, 180, 194, 196 overview 109 security settings, using the Setup Wizard 39 Web Management Interface 31 browsers,