
User's Manual

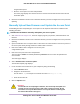
Table Of Contents
- Contents
- 1. Hardware Overview of the Access Point
- 2. Install and Access the Access Point in Your Network
- Position Your Access Point
- Set Up and Connect the Access Point to Your Router or DHCP Server
- Connect and Log In to the Access Point for Initial Configuration
- Log In to the Access Point After Setup to View or Change Settings
- Change the Language
- Change the admin Password
- Set Up Password Recovery
- Set the Time Zone and Adjust the Daylight Saving Time
- Connect a Wired or WiFi Device to the Access Point’s Network After Installation
- 3. Manage the Basic WiFi Network Settings
- 4. Manage the Access Point and Monitor the Traffic
- Update the Firmware of the Access Point
- Manage the Configuration File of the Access Point
- Recover the admin Password
- Return the Access Point to Its Factory Default Settings
- Change the IP Address Settings of the Access Point
- View Devices Currently on the Network
- View the Status and Statistics of the Access Point
- View or Clear the Logs
- 5. Manage the Advanced WiFi Features
- 6. Troubleshooting
- A. Factory Default Settings and Technical Specifications

A progress bar shows the progress of the firmware upload process.The firmware upload process takes
several minutes.When the upload is complete, the access point restarts.
9. Verify that the access point runs the new firmware version by doing the following:
a. Open a web browser from the computer that is connected to the same network as the access point
or to the access point directly through an Ethernet cable or WiFi connection.
b. Enter the IP address that is assigned to the access point.
A login window opens.
c. Enter the access point user name and password.
The Home page displays.The firmware version is stated in the Firmware Version field of the AP
Information panel.
Manage the Configuration File of the Access Point
The configuration settings of the access point are stored within the access point in a configuration file.You
can back up (save) this file to your computer or restore it.
Back Up the Settings
You can save a copy of the current configuration settings. If necessary, you can restore the configuration
settings later.
To back up the access point’s configuration settings:
1. Open a web browser from a computer that is connected to the same network as the access point or to
the access point directly through an Ethernet cable or WiFi connection.
2. Enter the IP address that is assigned to the access point.
A login window opens.
3. Enter the access point user name and password.
The user name is admin. The default password is password.The user name and password are
case-sensitive.
The Home page displays.
4. Select Administration > Backup Settings.
The Backup Settings page displays.
5. Click the Backup button.
6. Choose a location to store the file on your computer.
The name of the backup file is NETGEAR_WAC104.cfg.
7. Follow the directions of your browser to save the file.
Manage the Access Point and Monitor the Traffic
36
802.11ac Wireless Access Point Model WAC104