ProSAFE Dual-Band Wireless AC Access Points WAC720 and WAC730 User Manual March 2016 202-11624-04 350 East Plumeria Drive San Jose, CA 95134 USA
ProSAFE Dual-Band Wireless AC Access Points WAC720 and WAC730 Support Thank you for purchasing this NETGEAR product. You can visit www.netgear.com/support to register your product, get help, access the latest downloads and user manuals, and join our community. We recommend that you use only official NETGEAR support resources. Conformity For the current EU Declaration of Conformity, visit http://kb.netgear.com/app/answers/detail/a_id/11621.
Contents Chapter 1 Hardware Setup Unpack Your Access Point . . . . . . . . . . . . . . . . . . . . . . . . . . . . . . . . . . . . . . . . . . . . . Hardware Description . . . . . . . . . . . . . . . . . . . . . . . . . . . . . . . . . . . . . . . . . . . . . . . . . Top Panel . . . . . . . . . . . . . . . . . . . . . . . . . . . . . . . . . . . . . . . . . . . . . . . . . . . . . . . . . Rear Panel . . . . . . . . . . . . . . . . . . . . . . . . . . . . . . . . . . . . . . . . . . . . . . . . . . . . . .
ProSAFE Dual-Band Wireless AC Access Points WAC720 and WAC730 Enable Rogue AP Detection . . . . . . . . . . . . . . . . . . . . . . . . . . . . . . . . . . . . . . . . . . . 49 Schedule the WiFi Radios to Be Turned Off. . . . . . . . . . . . . . . . . . . . . . . . . . . . . . 51 Configure Basic WiFi Quality of Service. . . . . . . . . . . . . . . . . . . . . . . . . . . . . . . . . 52 Chapter 4 Management and Monitoring Enable Remote Management. . . . . . . . . . . . . . . . . . . . . . . . . . . . . .
ProSAFE Dual-Band Wireless AC Access Points WAC720 and WAC730 Configure a New QoS Policy . . . . . . . . . . . . . . . . . . . . . . . . . . . . . . . . . . . . . . . 106 Modify a QoS Policy . . . . . . . . . . . . . . . . . . . . . . . . . . . . . . . . . . . . . . . . . . . . . . 111 Delete a QoS Policy . . . . . . . . . . . . . . . . . . . . . . . . . . . . . . . . . . . . . . . . . . . . . . 111 Configure Load Balancing. . . . . . . . . . . . . . . . . . . . . . . . . . . . . . . . . . . . . . . . . .
1. 1 Hardware Setup This chapter covers the following topics: • Unpack Your Access Point • Hardware Description Note: For more information about the topics covered in this manual, visit the support website at support.netgear.com. Note: Firmware updates with new features and bug fixes are made available from time to time at downloadcenter.netgear.com. Some products can regularly check the site and download new firmware, or you can check for and download new firmware manually.
ProSAFE Dual-Band Wireless AC Access Points WAC720 and WAC730 Unpack Your Access Point Your package contains the following items: • ProSAFE Dual-Band Wireless AC Access Point • Straight-through Category 5 Ethernet cable • Ceiling and wall installation kit • Installation guide Contact your reseller or customer support in your area if any parts are missing or damaged. Visit the NETGEAR website at support.netgear.com/general/contact/default.
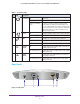
ProSAFE Dual-Band Wireless AC Access Points WAC720 and WAC730 Table 1. Top panel LEDs Item LED 1 Power/Test Off 2 Active 3 4 Description LAN 2.4 Ghz 2.4 GHz WLAN Power is off. On (green) Power is on. Amber, then blinking green A self-test is running or software is being loaded. During startup, the LED is first steady amber, then goes off, and then blinks green before turning steady green after about 45 seconds.
ProSAFE Dual-Band Wireless AC Access Points WAC720 and WAC730 The rear panel components of the access point, from left to right, are described in the following list: 1. Cable security lock receptacle for an optional lock. 2. Console port for connecting to an optional console terminal. The port provides an RJ-45 connector and supports the following settings: 115200 K default baud rate, 8 data bits, no (N) parity bit, and one (1) stop bit. 3. Factory default Reset button.
2.
ProSAFE Dual-Band Wireless AC Access Points WAC720 and WAC730 What You Need Before You Begin You must consider the following guidelines and requirements before you can set up your access point.
ProSAFE Dual-Band Wireless AC Access Points WAC720 and WAC730 • Placing an external antenna in a vertical position provides best side-to-side coverage. Placing an external antenna in a horizontal position provides best up-and-down coverage. (An external antenna does not come standard with the access point.) If you are using multiple access points, it is better if adjacent access points use different radio frequency channels to reduce interference.
ProSAFE Dual-Band Wireless AC Access Points WAC720 and WAC730 Requirements for Entering IP Addresses IP addresses assigned to the access points must follow the following requirements for IPv4 and IPv6 addresses. IPv4 The fourth octet of an IP address must be between 0 and 255 (both inclusive). This requirement applies to any IP address that you enter on the access point’s web management interface. IPv6 IPv6 addresses are denoted by eight groups of hexadecimal quartets that are separated by colons.
ProSAFE Dual-Band Wireless AC Access Points WAC720 and WAC730 Connect the Access Point to a Computer Tip: Before you place the access point in an elevated position that is difficult to reach, first set up and test the access point to verify WiFi network connectivity. To set up the access point: 1. Unpack the box and verify the contents. 2. Prepare a computer with an Ethernet adapter. If this computer is already part of your network, record its TCP/IP configuration settings.
ProSAFE Dual-Band Wireless AC Access Points WAC720 and WAC730 Log In to the Access Point The default IP address of your access point is 192.168.0.100. By default, the access point functions as a DHCP client. If the access point is installed in a network that includes a DHCP server, the IP address of the access point is issued by the DHCP server. You can find the IP address of the access point by accessing the DHCP server or by using an IP address scanner utility.
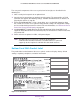
ProSAFE Dual-Band Wireless AC Access Points WAC720 and WAC730 5. Enter the user name and password. The user name is admin. The default password is password. The user name and password are case-sensitive. 6. Click the Login button. The web browser displays the General page under the Configuration tab.
ProSAFE Dual-Band Wireless AC Access Points WAC720 and WAC730 The web browser displays the General page under the Configuration tab. If you are using the access point as a standalone access point or as an access point with a wireless controller, you must disable the cloud mode (see Disable the Cloud Mode for a Standalone Access Point on page 17). After you disable the cloud mode and you log in to the access point, the web browser displays the Dashboard page under the Monitoring tab of the main menu.
ProSAFE Dual-Band Wireless AC Access Points WAC720 and WAC730 4. Next to Cloud Enabled, select the No radio button. 5. Click the Apply button. The access point restarts with factory default settings but retains its IP configuration and management VLAN. The access point is now ready for standalone operation with a full web management interface. Configure Basic General System Settings To configure basic system settings: 1.
ProSAFE Dual-Band Wireless AC Access Points WAC720 and WAC730 5. Configure the settings as described in the following table. Setting Description Access Point Name This unique name is the access point NetBIOS name. The name is printed on the rear label of the access point. The default is netgearxxxxxx, in which xxxxxx represents the last 6 digits of the access point MAC address. You can replace the default name with a unique name up to 15 characters long.
ProSAFE Dual-Band Wireless AC Access Points WAC720 and WAC730 A login window opens. 3. Enter the user name and password. The user name is admin. The default password is password. The user name and password are case-sensitive. 4. Select Configuration > System > Basic > Time. 5. Configure the settings as described in the following table. Setting Description Time Zone Select the time zone to match your location. Current Time This is a nonconfigurable field that displays the current date and time.
ProSAFE Dual-Band Wireless AC Access Points WAC720 and WAC730 Configure the IPv4 Settings Note: For information about how to configure the IPv6 settings, see Configure IPv6 Settings on page 95. WARNING: If you enable the DHCP client, the IP address of the access point changes when you click the Apply button, causing you to lose your connection to the access point. You must use the new IP address to reconnect to the access point.
ProSAFE Dual-Band Wireless AC Access Points WAC720 and WAC730 5. Configure the IPv4 settings as described in the following table. Setting Description DHCP Client By default, the Dynamic Host Configuration Protocol (DHCP) client is enabled. The access point receives its IP address, subnet mask, and default gateway settings automatically from the DHCP server on your network when you connect the access point to your LAN. IP Address Enter the IP address of your access point. The default IP address is 192.
ProSAFE Dual-Band Wireless AC Access Points WAC720 and WAC730 Configure 802.11bg/ng/bgn WiFi Settings To configure the 802.11bg/ng/bgn WiFi settings: 1. Open a web browser from a computer that is connected to the same network as the access point or to the access point directly through an Ethernet cable. For more information, see Log In to the Access Point on page 15. 2. In the address bar, enter the IP address of the access point. A login window opens. 3. Enter the user name and password.
ProSAFE Dual-Band Wireless AC Access Points WAC720 and WAC730 When you change the WiFi mode, the Turn Radio On check box is automatically cleared, and all fields, buttons, and menus on the page are masked out. 6. Turn on the radio by selecting the Turn Radio On check box. A pop-up window opens. Note: Under normal conditions, you want the radio to be turned on.
ProSAFE Dual-Band Wireless AC Access Points WAC720 and WAC730 Setting Descriptions 11ng and 11bgn modes only MCS Index / Data From the menu, select a Modulation and Coding Scheme Rate (MCS) index and transmit data rate for the WiFi network. The default setting is Best. For a list of all options that you can select from in 11ng and 11bgn modes, see Factory Default Settings on page 138. Note: For most networks, the default settings work fine. Channel Width From the menu, select a channel width.
ProSAFE Dual-Band Wireless AC Access Points WAC720 and WAC730 4. Select Configuration > Wireless > Basic > Wireless Settings. 5. Select the WiFi mode in the 5 GHz band: • 11a. 802.11n-compliant devices can connect to the access point because they are backward compatible. • 11a-na-ac. This is the default setting. If you keep the default setting, go to Step 8. When you change the WiFi mode, the Turn Radio On check box is automatically cleared, and all fields, buttons, and menus on the page are masked out.
ProSAFE Dual-Band Wireless AC Access Points WAC720 and WAC730 8. Specify the remaining WiFi settings as described the following table. Setting Descriptions Wireless Network Name Enter a 32-character (maximum) service set identifier (SSID); the characters are (SSID) case-sensitive. The default is NETGEAR_11ac. The SSID assigned to a WiFi device must match the access point’s SSID for the WiFi device to communicate with the access point.
ProSAFE Dual-Band Wireless AC Access Points WAC720 and WAC730 Setting Descriptions Output Power From the menu, select the transmission power of the access point: Full, Half, Quarter, Eighth, Minimum. The default is Full. Note: Increasing the power improves performance, but if two or more access points are operating in the same area and on the same channel, interference can occur. Note: Make sure that you comply with the regulatory requirements for total radio frequency (RF) output power in your country.
ProSAFE Dual-Band Wireless AC Access Points WAC720 and WAC730 Mount the Access Point The following sections explain how to mount your access point. We recommend that you review the information in WiFi Equipment Placement and Range Guidelines on page 11 before you mount the access point at its permanent position. • Package Content of the Ceiling and Wall Installation Kit • Drop Ceiling Installation • Wall Installation Package Content of the Ceiling and Wall Installation Kit 3 6 2 5 1 4 Figure 4.
ProSAFE Dual-Band Wireless AC Access Points WAC720 and WAC730 Before mounting the access point in a high location, first set up and test the access point to verify WiFi network connectivity. If you are mounting the access point on a hard ceiling, use the wall installation instructions. Note: Do not place the access point in a false ceiling space facing up. To mount your access point to a drop ceiling: 1. Attach the access point mounting bracket to the access point using the four mounting screws. 2.
ProSAFE Dual-Band Wireless AC Access Points WAC720 and WAC730 3. Twist the access point to hang it from the ceiling rail. 4. Secure the access point to the ceiling rail using the T-bar screw.
ProSAFE Dual-Band Wireless AC Access Points WAC720 and WAC730 Wall Installation The best location for wall installation is at the center of your WiFi coverage area, and within line of sight of all mobile devices. Make sure that the top (the dome side) of the access point is directed toward the users and not the wall. To mount your access point to a wall: 1. Place the wall mounting bracket on the wall where you want to mount the access point. 2.
ProSAFE Dual-Band Wireless AC Access Points WAC720 and WAC730 5. Using the wall anchors and screws, attach the wall mounting bracket to the wall where you previously marked. The following figures show a side view of the wall. The left figure includes a schematic view of the wall mounting bracket.
ProSAFE Dual-Band Wireless AC Access Points WAC720 and WAC730 Note: Although the product package includes four wall anchors and screws, two screws are sufficient to attach the wall mounting bracket as shown in the previous figure. However, if you prefer, you can use four screws and insert them through the mounting holes in the corners of the wall mounting bracket. 6.
3. WiFi Configuration and Security 3 This chapter describes how to configure the WiFi features of the access point.
ProSAFE Dual-Band Wireless AC Access Points WAC720 and WAC730 WiFi Data Security Options Indoors, computers can connect over 802.11ac WiFi networks at a maximum range of 300 feet. Typically, a access point inside a building works best with devices within a 100-foot radius. Such distances can allow for others outside your immediate area to access your network. Unlike wired network data, your WiFi data transmissions can extend beyond your walls and can be received by anyone with a compatible WiFi device.
ProSAFE Dual-Band Wireless AC Access Points WAC720 and WAC730 impossible to compromise. You can also use a combination of Temporal Key Integrity Protocol (TKIP) and AES encryption. WPA2-PSK uses a pre-shared key (PSK) for authentication. For more information, see Configure and Enable WiFi Security Profiles on page 38 and About WPA2-PSK and WPA-PSK & WPA2-PSK on page 44. • WPA2 with RADIUS.
ProSAFE Dual-Band Wireless AC Access Points WAC720 and WAC730 • Data encryption Select the data encryption that you want to use. The available options depend on the network authentication setting (otherwise, the default is None). The data encryption settings are explained in Configure and Enable WiFi Security Profiles on page 38. • WiFi client security separation If this feature is enabled, the associated WiFi clients (using the same SSID) are not able to communicate with each other.
ProSAFE Dual-Band Wireless AC Access Points WAC720 and WAC730 2. In the address bar, enter the IP address of the access point. A login window opens. 3. Enter the user name and password. The user name is admin. The default password is password. The user name and password are case-sensitive. 4. Select Configuration > Security > Profile Settings. The Profile Settings page for the 802.11bg/ng/bgn and 802.11a/a-na-ac modes shows eight WiFi security profiles for each mode. (If the 2.
ProSAFE Dual-Band Wireless AC Access Points WAC720 and WAC730 Setting Description Enable The check box that specifies whether the security profile is enabled. If you select the check box and click the Apply button, the security profile is enabled. Note: You cannot disable security profile #0 (NETGEAR) for either radio band. To disable this security profile, turn off the radio for the radio band (see Configure 802.11bg/ng/bgn WiFi Settings on page 23 and Configure 802.
ProSAFE Dual-Band Wireless AC Access Points WAC720 and WAC730 7. Specify the settings of the Profile Definition section as described in the following table. Setting Description Profile Name Enter a unique name of the security profile that makes it easy to recognize the profile. The default names are NETGEAR, NETGEAR-1, NETGEAR-2, and so on, through NETGEAR-7. You can enter a value of up to 32 alphanumeric characters. Wireless Network Name (SSID) The WiFi network name (SSID) for the security profile.
ProSAFE Dual-Band Wireless AC Access Points WAC720 and WAC730 Setting Description Network Authentication and Data Encryption Open System Note: The data WPA2 with encryption fields that RADIUS display on the page depend on your selection from the Network Authentication menu. This is the default setting. An open system does not provide any security or encryption. Configure the RADIUS server settings and select AES or TKIP + AES encryption.
ProSAFE Dual-Band Wireless AC Access Points WAC720 and WAC730 Setting Description Mode Select the Mode check box to enable the selection of QoS policies and bandwidth limits. Policy Details Select a QoS policy from the Incoming menu, Outgoing menu, or both menus. Depending on your selection, the policy is applied to incoming packets, outgoing packets, or both incoming and outgoing packets, and is displayed in the Policy Details fields.
ProSAFE Dual-Band Wireless AC Access Points WAC720 and WAC730 The selections that are available from the Data Encryption menu depend on the type of WPA authentication that you select from the Network Authentication menu and are shown in the following table. Table 2. Encryption options for WPA with RADIUS and WPA & WPA2 with RADIUS Setting Descriptions AES Advanced Encryption Standard (AES) is the standard encryption method used with WPA2.
ProSAFE Dual-Band Wireless AC Access Points WAC720 and WAC730 Change the QoS Policy for a WiFi Security Profile To change the QoS policy for a WiFi security profile: 1. Open a web browser from a computer that is connected to the same network as the access point or to the access point directly through an Ethernet cable. For more information, see Log In to the Access Point on page 15. 2. In the address bar, enter the IP address of the access point. A login window opens. 3.
ProSAFE Dual-Band Wireless AC Access Points WAC720 and WAC730 A login window opens. 3. Enter the user name and password. The user name is admin. The default password is password. The user name and password are case-sensitive. 4. Select Configuration > Security > Advanced > RADIUS Server Settings. 5. Specify the settings as described in the following table.
ProSAFE Dual-Band Wireless AC Access Points WAC720 and WAC730 Setting Descriptions Primary Accounting Server IPv4 Address or Enter the IP address of the primary RADIUS server for IPv6 Address accounting. Secondary Accounting Server Port Enter the number of the UDP port on the access point that is used to access the primary RADIUS server for accounting. The default port number is 1813.
ProSAFE Dual-Band Wireless AC Access Points WAC720 and WAC730 The user name is admin. The default password is password. The user name and password are case-sensitive. 4. Select Configuration > Security > Advanced > MAC Authentication. You can configure access control for 802.11 bg/ng/bgn devices, 802.11 a/a-na-ac devices, or both types of devices. 5. Select the Turn Access Control On check box to enable the access control feature. 6.
ProSAFE Dual-Band Wireless AC Access Points WAC720 and WAC730 • Enter MAC addresses manually by doing the following: a. Enter a MAC address directly in the Trusted Wireless Stations table. • b. Click the Add button. Import a list of trusted MAC addresses by doing the following: a. Click the Replace or Merge button. The imported list either replaces the Trusted Wireless Stations table or merges with the Trusted Wireless Stations table. b.
ProSAFE Dual-Band Wireless AC Access Points WAC720 and WAC730 To enable rogue AP detection: 1. Open a web browser from a computer that is connected to the same network as the access point or to the access point directly through an Ethernet cable. For more information, see Log In to the Access Point on page 15. 2. In the address bar, enter the IP address of the access point. A login window opens. 3. Enter the user name and password. The user name is admin. The default password is password.
ProSAFE Dual-Band Wireless AC Access Points WAC720 and WAC730 b. Click the Move button to transfer the MAC addresses from the Unknown AP List to the Known AP List. 8. To import a list of known APs, do the following: a. Click the Replace or Merge button. The imported list either replaces the Known AP List or merges with the Known AP List. b. Click the Choose File button and navigate to and select the file with access points. The file that you import must be a plain-text file with a .txt or .cfg extension.
ProSAFE Dual-Band Wireless AC Access Points WAC720 and WAC730 5. Specify the settings as described in the following table. Setting Description Wireless Scheduling Select the Enable radio button to enable the timer. By default, the Disable radio button is selected. Radio Off Schedule Select check boxes to specify the days when you want to schedule the radios to be turned off. By default, Saturday and Sunday are selected. Radio On Time Enter the time that you want the radios to be turned back on.
ProSAFE Dual-Band Wireless AC Access Points WAC720 and WAC730 To configure basic WiFi QoS: 1. Open a web browser from a computer that is connected to the same network as the access point or to the access point directly through an Ethernet cable. For more information, see Log In to the Access Point on page 15. 2. In the address bar, enter the IP address of the access point. A login window opens. 3. Enter the user name and password. The user name is admin. The default password is password.
4. Management and Monitoring 4 This chapter describes how to use the management and monitoring features of the access point.
ProSAFE Dual-Band Wireless AC Access Points WAC720 and WAC730 Enable Remote Management Both Simple Network Management Protocol (SNMP) and the remote console Secure Shell (SSH) are enabled by default, which allows for remote management of the access point from a client running SNMP management software, as well as from an SSH client. The Telnet console is disabled by default.
ProSAFE Dual-Band Wireless AC Access Points WAC720 and WAC730 Setting Description Read-Write Community Name Enter the community string to allow the SNMP manager to read and write the access point’s MIB objects. The default is private. Trap Community Name Enter the community string to allow the SNMP manager to send traps. The default is trap. IP Address to Receive Traps Enter the IP address of the SNMP manager to receive traps sent from the access point.
ProSAFE Dual-Band Wireless AC Access Points WAC720 and WAC730 Your settings are saved. Manage the Access Point over a Telnet Connection To manage the access point over a Telnet connection: 1. Connect an Ethernet cable to the console port of the access point. 2. Connect the other end of the cable to a VT100/ANSI terminal or a computer.
ProSAFE Dual-Band Wireless AC Access Points WAC720 and WAC730 Upgrade the Access Point Software The software of the access point is stored in flash memory and can be upgraded as NETGEAR releases new software. You can download upgrade files from the NETGEAR website. If the upgrade file is compressed (.zip file), you first must extract the image (.rmt) file before sending it to the access point. You can send the upgrade file using your browser.
ProSAFE Dual-Band Wireless AC Access Points WAC720 and WAC730 3. If available, read the release notes before upgrading the software. 4. Open a web browser from a computer that is connected to the same network as the access point or to the access point directly through an Ethernet cable. For more information, see Log In to the Access Point on page 15. 5. In the address bar, enter the IP address of the access point. A login window opens. 6. Enter the user name and password. The user name is admin.
ProSAFE Dual-Band Wireless AC Access Points WAC720 and WAC730 5. In the address bar, enter the IP address of the access point. A login window opens. 6. Enter the user name and password. The user name is admin. The default password is password. The user name and password are case-sensitive. 7. Select Maintenance > Upgrade > Firmware Upgrade TFTP. 8. Specify the following information: • Firmware File Name. The name of the software file. • TFTP Server IP. The IP address of your TFTP server. 9.
ProSAFE Dual-Band Wireless AC Access Points WAC720 and WAC730 Save the Configuration To save your settings: 1. Open a web browser from a computer that is connected to the same network as the access point or to the access point directly through an Ethernet cable. For more information, see Log In to the Access Point on page 15. 2. In the address bar, enter the IP address of the access point. A login window opens. 3. Enter the user name and password. The user name is admin.
ProSAFE Dual-Band Wireless AC Access Points WAC720 and WAC730 5. Click the Choose File button and locate and select the backup configuration file (the file name is config). IMPORTANT: During the restoration process, do not try to go online, turn off the access point, shut down the computer, or do anything else to the access point until it finishes restarting! 6. Click the Apply button to initiate the restoration process. During the restoration process, the access point automatically restarts.
ProSAFE Dual-Band Wireless AC Access Points WAC720 and WAC730 Use the Web Management Interface to Restore Factory Default Settings To restore the factory default settings using the web management interface: 1. Open a web browser from a computer that is connected to the same network as the access point or to the access point directly through an Ethernet cable. For more information, see Log In to the Access Point on page 15. 2. In the address bar, enter the IP address of the access point.
ProSAFE Dual-Band Wireless AC Access Points WAC720 and WAC730 To restore the factory default settings using the Reset button: 1. Using a sharp object, press and hold the Reset button for about five seconds (until the Test LED blinks rapidly) to reset the access point to factory defaults settings. Pressing the Reset button for a shorter time simply causes the access point to reboot. 2. Release the Reset button. During the restoration process, the access point automatically restarts.
ProSAFE Dual-Band Wireless AC Access Points WAC720 and WAC730 Change the Administrator Password The default password is password. We recommend that you change this password to a more secure password. You cannot change the administrator login name (admin). The ideal password contains no dictionary words from any language and is a mixture of letters (both uppercase and lowercase), numbers, and symbols. Your password can be up to 30 characters. To change the administrator password: 1.
ProSAFE Dual-Band Wireless AC Access Points WAC720 and WAC730 Manage User Accounts The admin user account is the default user account, which you cannot delete. However, you can add other user accounts, modify them, and delete them. Users for whom you set up an account can access the web management interface with read-only or read/write privileges. Note: Only the administrator can create, change, and delete user accounts. Add a New User Account To add a new user account: 1.
ProSAFE Dual-Band Wireless AC Access Points WAC720 and WAC730 5. Configure the settings in the upper part of the page as described in the following table. Setting Description User Name Enter a new user name. Password Enter a password between 4 and 12 characters in length. Privilege From the Privilege menu, select Read Write or Read Only. 6. Click the Add button. The user account is added. 7. Click the Apply button. Your settings are saved.
ProSAFE Dual-Band Wireless AC Access Points WAC720 and WAC730 Change the Privilege for a User Account To change the privilege for a user account: 1. Open a web browser from a computer that is connected to the same network as the access point or to the access point directly through an Ethernet cable. For more information, see Log In to the Access Point on page 15. 2. In the address bar, enter the IP address of the access point. A login window opens. 3. Enter the user name and password.
ProSAFE Dual-Band Wireless AC Access Points WAC720 and WAC730 The password is reset to the default password, which is password. 7. Click the Apply button. Your settings are saved. Note: If you want to modify a password, delete the user account, and then recreate the user account with the password of your choice. Delete a User Account To delete a user account: 1.
ProSAFE Dual-Band Wireless AC Access Points WAC720 and WAC730 3. Enter the user name and password. The user name is admin. The default password is password. The user name and password are case-sensitive. 4. Select Configuration > System > Advanced > Syslog. Specify the settings as described in the following table. Setting Description Enable Syslog Select the check box to enable the syslog option. By default, the syslog option is disabled.
ProSAFE Dual-Band Wireless AC Access Points WAC720 and WAC730 To view the System page: 1. Open a web browser from a computer that is connected to the same network as the access point or to the access point directly through an Ethernet cable. For more information, see Log In to the Access Point on page 15. 2. In the address bar, enter the IP address of the access point. A login window opens. 3. Enter the user name and password. The user name is admin. The default password is password.
ProSAFE Dual-Band Wireless AC Access Points WAC720 and WAC730 Setting Description Wireless MAC Address for 2.4 GHz The MAC address of the access point’s 2.4 GHz WiFi radio. Wireless MAC Address for 5 GHz The MAC address of the access point’s 5 GHz WiFi radio. Ethernet LLDP Enabled indicates that LLDP is enabled. Disabled indicates that it is not. Country/Region The country or region for which the access point is licensed for use.
ProSAFE Dual-Band Wireless AC Access Points WAC720 and WAC730 Setting Description Current Wireless Settings for 802.11 bg/ng/bgn and Current Wireless Settings for 802.11 a/a-na-ac Access Point Mode The WiFi operation mode of the access point for the radio band. By default, the mode is 11bgn for the 2.4 GHz radio band and 11a-na-ac for the 5 GHz radio band. Channel / Frequency The channel that the WiFi port is using. For information about how to change the channel and frequency, see Configure 802.
ProSAFE Dual-Band Wireless AC Access Points WAC720 and WAC730 6. To view more information, point to a graph. 7. To view real-time information for 5 GHz clients and traffic, click the 5 GHz button. By default, the 2.4 GHz button is selected. 8. To view historical traffic information, click the Traffic button. By default, the Clients button is selected. 9. To view historical information for another period, select the period from the menu below the Clients and Traffic buttons.
ProSAFE Dual-Band Wireless AC Access Points WAC720 and WAC730 4. Select Monitoring > Dashboard. The Dashboard page displays. 5. Click the Ensemble button. The Dashboard page displays information for the access point in ensemble mode. The upper figure shows the left and middle of the page. The lower figure shows the right of the page. 6. To view more information, point to a graph.
ProSAFE Dual-Band Wireless AC Access Points WAC720 and WAC730 7. To view historical traffic information for the past 24 hours, click the Traffic button in the lower right of the page. By default, the Clients button is selected and the page shows historical client information. 8. To view details about access point in the ensemble, click the Access Points box on the left. By default, the Wireless Networks box is selected. 9.
ProSAFE Dual-Band Wireless AC Access Points WAC720 and WAC730 The Wireless Stations table shows the information for each device. For information about these and more fields, see the following table. 5. To update the list, click the Refresh button. If the access point is rebooted, the WiFi station data is lost until the access point rediscovers the devices. To force the access point to look for associated devices, click the Refresh button. 6.
ProSAFE Dual-Band Wireless AC Access Points WAC720 and WAC730 Setting Description Recv. Bytes The number of bytes received on the WiFi station since it last started. Trans. bytes The number of bytes transmitted by the WiFi station since it last started. Assoc. Time Stamp The time when these details of the WiFi station were retrieved. IP Address The IP address of the WiFi station. Channel Width The channel width at which the WiFi station operates.
ProSAFE Dual-Band Wireless AC Access Points WAC720 and WAC730 View the Traffic Statistics The Statistics page displays information for both wired (LAN) and WiFi (WLAN) network traffic. To display the Statistics page: 1. Open a web browser from a computer that is connected to the same network as the access point or to the access point directly through an Ethernet cable. For more information, see Log In to the Access Point on page 15. 2. In the address bar, enter the IP address of the access point.
ProSAFE Dual-Band Wireless AC Access Points WAC720 and WAC730 The following table explains the fields of the Statistics page: Setting Description Wired Ethernet Packets The number of packets received and transmitted over the Ethernet connection since the access point was restarted. Bytes The number of bytes received and transmitted over the Ethernet connection since the access point was restarted. Wireless 802.11bgn and Wireless 802.
ProSAFE Dual-Band Wireless AC Access Points WAC720 and WAC730 An ensemble can be formed between two more APs if the following conditions are met: • The APs are of the same model. • The APs use the same country or region settings and the same radio mode. • The APs are connected on the same bridged segment. • The ensemble names of the APs that are joining are the same. • Ensemble mode is enabled on all APs.
ProSAFE Dual-Band Wireless AC Access Points WAC720 and WAC730 Manage an Ensemble You can manage an ensemble through the master access point’s web management interface or you can specify a computer with an IP address in the same subnet as the management IP address. Through the master access point or management IP address you can run an ensemble’s channel assignment, manage an ensemble’s channel assignment settings, manage the firmware upgrade settings, and manage security settings.
ProSAFE Dual-Band Wireless AC Access Points WAC720 and WAC730 Configure Ensemble Security With a Passphrase By default, access points can become members of an ensemble without using authentication. That is, when access points form an ensemble, they do not authenticate each other. However, you can enable security for an ensemble by configuring the same passphrase on each access point that must become a member of the ensemble.
ProSAFE Dual-Band Wireless AC Access Points WAC720 and WAC730 Specify an Ensemble’s Channel Assignment Settings Before you enable automatic channel assignment for an ensemble (see Manage Automatic Channel Assignment for an Ensemble on page 85), you might want to specify a custom channel interference limit, which triggers channel reassignment. You can also specify the channel selection interval, which determines the schedule at which automatic channel assignment occurs.
ProSAFE Dual-Band Wireless AC Access Points WAC720 and WAC730 Manage Automatic Channel Assignment for an Ensemble You can enable automatic channel assignment for an ensemble. The assignment is based on the channel assignment settings (see Specify an Ensemble’s Channel Assignment Settings on page 84). Automatic channel assignment reduces both mutual interference between the access points in an ensemble and interference with other access points outside the ensemble.
ProSAFE Dual-Band Wireless AC Access Points WAC720 and WAC730 6. To select channels that must remain static, do the following: a. For each channel that must remain static, select the check box in the Assign to Static column. b. Click the Apply button. The selected channels are not changed during the automatic channel assignment process. When automatic channel assignment is running, the Channel Assignment page shows the proposed channels a the bottom.
ProSAFE Dual-Band Wireless AC Access Points WAC720 and WAC730 At any time, you can disable automatic channel assignment by clicking the Stop button. Upgrade the Firmware of Ensemble Members From a Downloaded Image You can upgrade the firmware on all access points in an ensemble from the master access point. If you do not use a TFTP server, download the firmware to a computer and upload it to the master access point.
ProSAFE Dual-Band Wireless AC Access Points WAC720 and WAC730 The Member Selection table shows the members of the ensemble, including the firmware versions of the members. 8. Click the Browse button. A pop-up window opens. 9. Navigate to and select a firmware file to upload. 10. Click the Upgrade button. An Alert pop-up window opens. The firmware is uploaded to the master access point’s memory. Note: The firmware is uploaded to but not upgraded on the master access point.
ProSAFE Dual-Band Wireless AC Access Points WAC720 and WAC730 Upgrade the Firmware of Ensemble Members Over a TFTP Server You can upgrade the firmware on all access points in an ensemble from the master access point. If you use a TFTP server, download the firmware from the TFTP server directly to the master access point. Then, from the master access point, initiate the firmware for all or selected access points in the ensemble, including, if you want, the master access point.
ProSAFE Dual-Band Wireless AC Access Points WAC720 and WAC730 An Alert pop-up window opens. The firmware is uploaded to the master access point’s memory. Note: The firmware is uploaded to but not upgraded on the master access point. However, in Step 13 you can select the firmware to be upgraded on the master access point. 10. In the Alert pop-up window, click the OK button. The pop-up window closes. In the Upload Firmware section, a status bar shows the progress of the upload process.
ProSAFE Dual-Band Wireless AC Access Points WAC720 and WAC730 The user name is admin. The default password is password. The user name and password are case-sensitive. 4. Select Monitor > Ensemble > Access Point. 5. Click the Refresh button. The information on the page refreshes. Monitor the Devices Connected to the Ensemble You can monitor the WiFi clients that are connected to all members of the ensemble.
ProSAFE Dual-Band Wireless AC Access Points WAC720 and WAC730 5. Click the Refresh button. The devices connected to the ensemble display, listed by MAC address. Monitor the Access Points and Networks Neighboring the Ensemble You can display the access points (and their associated WiFi networks) that are the neighbors of the ensemble. To monitor the networks neighboring the ensemble: 1.
ProSAFE Dual-Band Wireless AC Access Points WAC720 and WAC730 • Both. Both the access points that are in the ensemble and that are not in the ensemble are displayed. (The following figure shows this option.
5. Advanced Configuration 5 This chapter describes how to configure the advanced features of the access point. The chapter includes the following sections: • Configure IPv6 Settings • Configure Spanning Tree Protocol, 802.
ProSAFE Dual-Band Wireless AC Access Points WAC720 and WAC730 Configure IPv6 Settings The access point supports IPv6. You can manage the access point from an IPv6 address. The access point can also function as an IPv6 DHCP client. Note: For information about how to configure the IPv4 settings, see Configure the IPv4 Settings on page 21.
ProSAFE Dual-Band Wireless AC Access Points WAC720 and WAC730 5. Configure the IPv6 settings as described in the following table. Setting Description DHCP Client By default, the Dynamic Host Configuration Protocol (DHCP) client is disabled.
ProSAFE Dual-Band Wireless AC Access Points WAC720 and WAC730 The 802.1Q VLAN protocol on the access point logically separates traffic on the same physical network. The access point supports the following types of VLANs: • Untagged VLAN. When the access point sends frames that are associated with the untagged VLAN from its Ethernet interface, those frames are untagged. When the access point receives untagged frames over its Ethernet interface, those frames are assigned to the untagged VLAN.
ProSAFE Dual-Band Wireless AC Access Points WAC720 and WAC730 5. Specify the settings as described in the following table. Setting Description Spanning Tree Protocol Spanning Tree Protocol Select the Enable radio button to enable STP to prevent path redundancy. By default, the Disable radio button is selected. 802.1Q VLAN Untagged VLAN Select the Untagged VLAN check box to configure one VLAN as an untagged VLAN. By default, the Untagged VLAN check box is selected. Specify a VLAN ID.
ProSAFE Dual-Band Wireless AC Access Points WAC720 and WAC730 To turn off LLDP: 1. Open a web browser from a computer that is connected to the same network as the access point or to the access point directly through an Ethernet cable. For more information, see Log In to the Access Point on page 15. 2. In the address bar, enter the IP address of the access point. A login window opens. 3. Enter the user name and password. The user name is admin. The default password is password.
ProSAFE Dual-Band Wireless AC Access Points WAC720 and WAC730 The user name is admin. The default password is password. The user name and password are case-sensitive. 4. Select Configuration > System > Advanced > Bonjour. 5. Select the Disable radio button. 6. Click the Apply button. Your settings are saved. Configure Advanced WiFi Settings You can enable various WLAN features and configure WLAN settings for the 802.11b/bg/ng and 802.11a/na modes. The default WLAN settings normally work well.
ProSAFE Dual-Band Wireless AC Access Points WAC720 and WAC730 5. Next to Antenna, select a radio button to specify whether the settings apply to the default internal antenna or to one or more optional external antennas: • Internal. Enables the internal antenna. This is the default setting. • External. Enables an optional external antenna or antennas. 6. Specify the settings as described in the following table. Setting Description RTS Threshold (0–2347) Enter the Request to Send (RTS) threshold.
ProSAFE Dual-Band Wireless AC Access Points WAC720 and WAC730 Setting Description Beacon Interval (100–1000) Enter the interval between 100 ms and 1000 ms for each beacon transmission, which allows the access point to synchronize the WiFi network. The default setting is 100. AMPDU Select the Enable radio button to allow the aggregation of several MAC frames into a single large frame to achieve higher throughput.
ProSAFE Dual-Band Wireless AC Access Points WAC720 and WAC730 7. Click the Apply button. Your settings are saved. Configure Advanced Quality of Service Settings For most networks, the default Quality of Service (QoS) queue settings work well. For information about how to configure basic QoS, see Configure Basic WiFi Quality of Service on page 52.
ProSAFE Dual-Band Wireless AC Access Points WAC720 and WAC730 To configure advanced QoS: 1. Open a web browser from a computer that is connected to the same network as the access point or to the access point directly through an Ethernet cable. For more information, see Log In to the Access Point on page 15. 2. In the address bar, enter the IP address of the access point. A login window opens. 3. Enter the user name and password. The user name is admin. The default password is password.
ProSAFE Dual-Band Wireless AC Access Points WAC720 and WAC730 Setting Description cwMin Enter the minimum contention window (cwMin) value that specifies the upper limit (in milliseconds) of a range from which the initial random back-off wait time is determined. Decreasing this value increases the priority of the queue. The value for cwMin must be lower than the value for cwMax. Valid values are 0, 1, 3, 7, 15, 31, 63, 127, 255, 511, and 1023.
ProSAFE Dual-Band Wireless AC Access Points WAC720 and WAC730 Configure and Manage Quality of Service Policies The access point lets you configure and apply QoS policies to WiFi clients. In each QoS policy, you can specify multiple classifications (match clauses) and apply traffic to eight priority queues based on the following information in the Layer 2, Layer 3, Layer 3 IP headers, and Layer 4: • IP precedence. Indicates the IP Type of Service (ToS) or precedence in the IP headers. • IP DSCP.
ProSAFE Dual-Band Wireless AC Access Points WAC720 and WAC730 You can configure QoS policies for 802.11 bg/ng/bgn devices, 802.11 a/a-na-ac devices, or both types of devices. 5. From the Create Policy menu, select NEW. If you did not yet set up any QoS policies, NEW is the only selection possible. 6. In the Policy Name field, enter a name for the new QoS policy. 7. Specify a classification for the QoS policy as described in the following table.
ProSAFE Dual-Band Wireless AC Access Points WAC720 and WAC730 Setting Description IP DCSP Match Frame Fields and Match Classifications (continued) From the Match Classifications menu, select the DSCP marking against which the information in the IP header must be matched: • Best Effort • Assured Forwarding - Class 1 Low • Assured Forwarding - Class 1 Medium • Assured Forwarding - Class 1 High • Assured Forwarding - Class 2 Low • Assured Forwarding - Class 2 Medium • Assured Forwarding - Class 2 High • As
ProSAFE Dual-Band Wireless AC Access Points WAC720 and WAC730 Setting Description Source MAC Match Frame Fields and Match Classifications (continued) In the Match Classifications field, select or enter the source MAC address against which the information in the IP header must be matched. To select the MAC address of a WiFi client that is connected to the access point: 1. Select the radio button to the left of the Match Classifications menu. 2. From the menu, select a MAC address.
ProSAFE Dual-Band Wireless AC Access Points WAC720 and WAC730 Setting Description Apply Classification From the Apply Classification menu, select the traffic class that must be applied to the packets that match the selection in the Match Classifications field: • Best Effort(0) • Background(1) • Spare(2) • Excellent(3) • Control Load(4) • Video < 100 ms Latency(5) • Voice < 10 ms Latency(6) • Network Control(7) 8.
ProSAFE Dual-Band Wireless AC Access Points WAC720 and WAC730 Modify a QoS Policy To modify a QoS policy: 1. Open a web browser from a computer that is connected to the same network as the access point or to the access point directly through an Ethernet cable. For more information, see Log In to the Access Point on page 15. 2. In the address bar, enter the IP address of the access point. A login window opens. 3. Enter the user name and password. The user name is admin. The default password is password.
ProSAFE Dual-Band Wireless AC Access Points WAC720 and WAC730 4. Select Configuration > Wireless > Advanced > QoS Policies. The QoS Policies page displays. 5. From the Create Policy menu, select the policy that you want to delete. 6. Click the Delete Policy button. 7. Click the Apply button. Your settings are saved.
ProSAFE Dual-Band Wireless AC Access Points WAC720 and WAC730 5. To enable load balancing, select the Enabled radio button. By default, the Disabled radio button is selected and load balancing is disabled. 6. In the Utilization For No New Associations (%) field, enter the percentage of network bandwidth utilization that is allowed on the radios before the access point stops accepting new client associations.
ProSAFE Dual-Band Wireless AC Access Points WAC720 and WAC730 3. (Optional) Upload a Custom Logo Follow this procedure only if you want to be able to select a custom logo when you configure a custom splash page. 4. Configure a Default or Custom Captive Portal Splash Page You can use the default splash page that the access point provides or set up a custom splash page. 5. Enable the Global Captive Portal Mode You only need to enable the captive portal mode once on the access point.
ProSAFE Dual-Band Wireless AC Access Points WAC720 and WAC730 5. Select the radio button to the left of the WiFi network name (SSID) with which you want to associate the captive portal. 6. Click the Edit button. 7. Specify the profile settings as described in the following table. Field Description Profile Name This is a nonconfigurable field that shows the SSID that is used for the captive portal.
ProSAFE Dual-Band Wireless AC Access Points WAC720 and WAC730 Field Description Session Timeout (0-1440 minutes) Enter the period after which a captive portal session is automatically terminated and a user is logged out. The range is from 0 to 1440 minutes. The default value is 0, which effectively disables the session time-out. Authentication Mode From the Authentication Mode menu, select the authentication database against which captive portal users are authenticated: • Guest.
ProSAFE Dual-Band Wireless AC Access Points WAC720 and WAC730 If the Admin Mode check box is cleared, the captive portal instance is administratively disabled and does not become available after you select the instance for a WiFi security profile. 11. Click the Apply button. The captive portal instance is administratively enabled.
ProSAFE Dual-Band Wireless AC Access Points WAC720 and WAC730 5. Enter the name of the user in the Captive Portal User Name field. 6. Click the Apply button. The user is added. 7. Select the user from the user list. 8. Click the Edit button. 9. In the User Password field, enter a password. The user must use the assigned user name and password to gain access through the captive portal. 10. In the Away Time field, enter a time-out period between 0 and 1440 minutes.
ProSAFE Dual-Band Wireless AC Access Points WAC720 and WAC730 A login window opens. 3. Enter the user name and password. The user name is admin. The default password is password. The user name and password are case-sensitive. 4. Select Configuration > Captive Portal > Upload Logo. 5. Click the Choose File button. 6. Navigate to and select the logo file. The file name including the file extension (.jpg or .gif) is limited to 32 characters and the file size cannot exceed 5 KB. 7. Click the Upload button.
ProSAFE Dual-Band Wireless AC Access Points WAC720 and WAC730 4. Select Configuration > Captive Portal > Web Customization. 5. From the Captive Portal Web Locale menu, select Create. 6. In the Web Local Name field, enter a name for the splash page. A splash page is also referred to as web locale. This name that you specify is for internal management purposes only. A user does not see this name. 7.
ProSAFE Dual-Band Wireless AC Access Points WAC720 and WAC730 Note: If you want to use the default splash page settings, skip this step and go to the next step. Field Description Logo Image Name This menu displays the names of image files that you uploaded (see Upload a Custom Logo on page 118). Browser Title The browser title appears in the title bar of the browser. Browser Content This is the text that will appear on the body of the page.
ProSAFE Dual-Band Wireless AC Access Points WAC720 and WAC730 5. Select the Enable radio button. 6. Click the Apply button. Your settings are saved. IMPORTANT: Before you can use a captive portal that you configured, you must select the captive portal instance for a WiFi security profile (see Configure and Enable WiFi Security Profiles on page 38). After you do so, the WiFi network that is associated with the WiFi security profile becomes accessible only through the captive portal.
ProSAFE Dual-Band Wireless AC Access Points WAC720 and WAC730 WiFi client WiFi client AP1 in point-to-point bridge mode AP2 in point-to-point bridge mode Internet LAN segment 1 LAN segment 2 Figure 6. Point-to-point WiFi network • WiFi point-to-multipoint bridge. The access point is the master for a group of bridge-mode access points. You can configure up to four WiFi bridges.
ProSAFE Dual-Band Wireless AC Access Points WAC720 and WAC730 Configure a WiFi Bridge In bridge mode, the access point communicates with one or more other bridge-mode access points. By default, the connection is an open system but you can use WPA2-PSK security to protect this communication. Note: You cannot configure WiFi bridging when automatic channel selection is enabled.
ProSAFE Dual-Band Wireless AC Access Points WAC720 and WAC730 You can configure up to four profiles. By default, a profile does not provide security (it is an open system), but you can configure WPA2-PSK. The Local MAC Address field is a nonconfigurable field that shows the MAC address of the access point. d. Select the radio button for a profile. e. From the Radio menu, select the WiFi band (2.4 GHz or 5 GHz) on which the bridge must be established.
ProSAFE Dual-Band Wireless AC Access Points WAC720 and WAC730 6. Verify the following settings for both access points: • Both access points must operate in the same LAN network address range as the LAN devices. • Both access points must use the same channel, authentication mode, and security settings. 7. Go back to the Bridging page on your access point and select the Enable check box for the profile. 8. Click the Apply button. Your settings are saved. 9. Enable bridging on the other access point. 10.
6. 6 Troubleshooting This chapter provides information about troubleshooting the access point. After each problem description, instructions are given to help you diagnose and solve the problem. For the common problems listed, go to the section indicated. • Is the access point on? Go to Troubleshoot the Basic Functions on page 128. • Did I connected the access point correctly? Go to Troubleshoot the Basic Functions on page 128. • I cannot access the Internet or the LAN.
ProSAFE Dual-Band Wireless AC Access Points WAC720 and WAC730 Troubleshoot the Basic Functions The following sections describe how you can troubleshoot the basic functions of the access point: • Verify the Correct Sequence of Events at Startup • No LEDs Are Lit on the Access Point • The Active LED or the LAN LED Is Not Lit • The WLAN LED Does Not Light Note: For descriptions of the LEDs, see Top Panel on page 7.
ProSAFE Dual-Band Wireless AC Access Points WAC720 and WAC730 • If you use a power cord to provide power to the access point, check these items: - Make sure that the power cord is connected to the access point. - Make sure that the power adapter is connected to a functioning power outlet. If it is in a power strip, make sure that the power strip is turned on. If it is plugged directly into the wall, verify that it is not a switched outlet.
ProSAFE Dual-Band Wireless AC Access Points WAC720 and WAC730 • Ping the IP address of the access point to verify that a WiFi connection exists between the WiFi computer and the access point. If the ping fails, check the network configuration (for the access point, see Configure the IPv4 Settings on page 21). • Ping the default gateway to verify that a path exists from the WiFi computer to the default gateway.
ProSAFE Dual-Band Wireless AC Access Points WAC720 and WAC730 When You Enter a URL or IP Address a Time-Out Error Occurs A number of things could be causing this situation. Try the following troubleshooting steps: • Check to see whether other computers on the LAN work correctly. If they do, ensure that your computer’s TCP/IP settings are correct.
ProSAFE Dual-Band Wireless AC Access Points WAC720 and WAC730 If the path is not working, you see this message: Request timed out If the path is not functioning correctly, one of the following problems could be occurring: • - Make sure that the Active LED and LAN LED are on. If one or both of these LEDs are off, follow the instructions in The Active LED or the LAN LED Is Not Lit on page 129.
ProSAFE Dual-Band Wireless AC Access Points WAC720 and WAC730 Problems With Date and Time The Time Settings page that is accessible through the Configuration > System > Basic > Time menu choices displays the current date and time of day. The access point uses the Network Time Protocol (NTP) to obtain the current time from a network time server on the Internet that you specify in the Time Settings page (see Configure Basic General System Settings on page 18).
ProSAFE Dual-Band Wireless AC Access Points WAC720 and WAC730 5. Click the Start button to start capturing WiFi packets leaving or entering the access point on the active operating channel. Packets on the 2.4 GHz interface and 5 GHz interface are captured. Normal functioning of the access point is not affected during the packet capture process. If any previously captured packets exist, you are prompted to delete them, and only then can you capture new packets. 6.
A. Supplemental Information A This appendix provides factory default settings and technical specifications for the ProSAFE Dual-Band Wireless AC Access Points WAC720 and WAC730.
ProSAFE Dual-Band Wireless AC Access Points WAC720 and WAC730 Technical Specifications Table 4. Technical specifications Feature Description 802.11bg/ng/bgn WiFi specifications 802.11b data rates 1, 2, 5.5, and 11 Mbps, and auto-rate capable 802.11bg data rates 1, 2, 5.5, 6, 9, 11, 12, 18, 24, 36, 48, 54 Mbps, and auto-rate capable 802.11bgn MCS index and data rates Data rates for a 20 MHz channel width and an automatic guard interval: 0 / 7.2 Mbps, 1 / 14.4 Mbps, 2 / 21.7 Mbps, 3 / 28.
ProSAFE Dual-Band Wireless AC Access Points WAC720 and WAC730 Table 4. Technical specifications (continued) Feature Description 802.11a/a-na-ac WiFi specifications 802.11a data rates 6, 9, 12, 18, 24, 36, 48, 54 Mbps, and auto-rate capable 802.11a/a-na-ac data rates Data rates for a 20 MHz channel width and an automatic guard interval: 0 / 7.2 Mbps, 1 / 14.4 Mbps, 2 / 21.7 Mbps, 3 / 28.9 Mbps, 4 / 43.3 Mbps, 5 / 57.8 Mbps, 6 / 65 Mbps, 7 / 72.2 Mbps, 8 / 14.44 Mbps, 9 / 28.88 Mbps, 10 / 43.
ProSAFE Dual-Band Wireless AC Access Points WAC720 and WAC730 Table 4. Technical specifications (continued) Feature Description 802.11 a-na-ac encryption • • • WPA-PSK & WPA2-PSK AES TKIP Management and Other Specifications Network management • • Remote configuration and management through the web management interface, through SNMP, or through Telnet or SSH with the command-line interface (CLI). SNMP management supports SNMP MIB II, 802.11 MIB and proprietary configuration MIB.
ProSAFE Dual-Band Wireless AC Access Points WAC720 and WAC730 Note: Pressing the Reset button for a shorter period of time simply causes the access point to reboot. Table 5. Default configuration settings Feature Description Login for management and configuration LAN IPv4 management address 192.168.0.100 Subnet mask for IPv4 management address 255.255.255.
ProSAFE Dual-Band Wireless AC Access Points WAC720 and WAC730 Table 5. Default configuration settings (continued) Feature Description Radio and WiFi settings Operating mode Access point, infrastructure mode WiFi access point name netgearxxxxxx, where xxxxxx are the last 6 digits of the WiFi access point MAC address Country and region Varies by region WiFi communication 2.
ProSAFE Dual-Band Wireless AC Access Points WAC720 and WAC730 Table 5. Default configuration settings (continued) Feature Description Preamble type Auto Antenna Internal 802.11d Enabled Maximum WiFi clients 400 Wi-Fi Multimedia (WMM) Enabled WMM powersave Enabled AP EDCA parameters (QoS settings) See Configure and Manage Quality of Service Policies on page 106.