Table of Contents Introduction . . . . . . . . . . . . . . . . . . . . . . . . . . . . . . . . . . . . . . . . . . . . . . . . .1 System Requirements . . . . . . . . . . . . . . . . . . . . . . . . . . . . . . . . . . . . . .1 WGE101 Operating Modes . . . . . . . . . . . . . . . . . . . . . . . . . . . . . . . . . .1 WGE101 Default Wireless Configuration Settings . . . . . . . . . . . . . . . . .2 1: Preparing To Use the Smart Navigator . . . . . . . . . . . . . . . . . . . . . . . . . . . .
Introduction Thank you for purchasing a NETGEAR WGE101 54 Mbps Wireless Ethernet Bridge. If the default settings on the bridge do not work, you will need to configure the bridge. If the default settings do work, you only need to configure the bridge if the network is in a country or region other than the United States or if there are multiple WGE101 bridges on the network. If you have a Windows® computer you may use the NETGEAR Smart Navigator software to configure basic connection settings on the bridge.
WGE101 Default Wireless Configuration Settings The factory default settings for your WGE101 54 Mbps Wireless Ethernet Bridge are: • Mode (Infrastructure or Ad-Hoc): Infrastructure • Wireless network name Service Set Identification (SSID): Any Note: Any means the bridge will connect to the access point or wireless router that has the strongest signal. This may not be the closest access point or wireless router.
1 Preparing To Use the Smart Navigator Before you can use the Smart Navigator to configure a WGE101 bridge, you must install the software on a Windows computer and connect the bridge to that computer. Installing the Smart Navigator Software You install the Smart Navigator software from the WGE101 54 Mbps Wireless Ethernet Bridge Resource CD. To install from the CD: 1. Insert the WGE101 54 Mbps Wireless Ethernet Bridge Resource CD in the CD-ROM drive of a Windows computer.
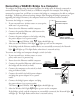
Connecting a WGE101 Bridge to a Computer To configure the bridge using the Smart Navigator, the bridge must be directly connected or connected through a switch (or hub) to a Windows computer. For example, if the bridge is connected to a game box, you’ll have to connect the bridge to a computer to be able to configure the bridge. To make any advanced settings changes (like changing the bridge’s password or upgrading the bridge’s firmware), the computer must have an Internet browser installed.
Identifying Your Wireless Network Settings You may want to print this page separately, fill in the configuration parameters, and put it in a safe place for possible future reference. For an existing wireless network, the person who set up the network will be able to provide this information. Note: For wireless devices and the bridge to communicate with each other, each must be configured with the same SSID, WEP security settings, and the same IP subset address.
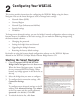
2 Configuring Your WGE101 This section provides instructions for configuring the WGE101 Bridge using the Smart Navigator. You use the Smart Navigator, itself, to change basic settings: • Network Name (SSID) • Country/Region • Network Type (Infrastructure/Ad-Hoc) • Security Settings • IP Address To change more advanced settings, you use the bridge’s internal configuration software using an Internet browser.
Getting Status Information 1. Choose Programs>NETGEAR WGE101 Bridge>Smart Navigator from the Start menu. When the Smart Navigator opens, it searches for any connected WGE101 Bridge. When located, any bridge appears in the Smart Navigator device list at the top of the window. 2. Select the bridge about which you want status information. 3. Click Status.
Changing the Country/Region Setting Before making any other changes you should make sure that the bridge is configured to operate where the network is located. 1. Choose Programs>NETGEAR WGE101 Bridge>Smart Navigator from the Start menu. 2. Select the bridge in the device list. 3. Click Connection Settings. 4. To change the Country/Region, select a different country or region and click OK. Note: Having the wrong Country/Region setting may violate local laws. 5.
Selecting a Specific Wireless Network By default, the WGE101 connects to the wireless router or access point with the strongest signal. This may not be the closest or the desired network. To have the bridge connect to a specific network, you change the Network Name (SSID) setting. If you filled in the Network Name (SSID) on page 5, you may want to refer to it for this procedure. 1. Choose Programs>NETGEAR WGE101 Bridge>Smart Navigator from the Start menu. 2. Select the bridge in the device list. 3.
Enabling WEP Security on the Bridge To prevent others from accessing your wireless network, you may want to enable WEP (Wired Equivalent Privacy) security in your wireless router or access point. If you do so, you’ll need to enable WEP security in the bridge, too. If you filled in the parameters on page 5, you may want to refer to them for this procedure. Note: The default security setting has WEP security disabled. 1. Choose Programs>NETGEAR WGE101 Bridge>Smart Navigator from the Start menu. 2.
Changing the Bridge’s IP Address If your wireless network has an IP address other than 192.168.0.yyy, you need to change the IP address on the bridge or set it to be configured automatically by the router. Note: All NETGEAR products use 192.168.0.yyy. If you have NETGEAR wireless products working in your wireless network without configuration changes, you won’t need to change the bridge’s IP address unless you have more than one WGE101 bridge on the network. 1.
Configuring the Bridge for an Ad-Hoc Network You may use this bridge in a wireless-only network where the wireless devices are all set to AdHoc mode. By default, the bridge is set to Infrastructure mode; therefore, you’ll need to change the Network Type. Note: In an Ad-Hoc network, all devices must have the same SSID, WEP settings, and IP network subset address with a unique identifying number (xxx.xxx.xxx.yyy). 1. Choose Programs>NETGEAR WGE101 Bridge>Smart Navigator from the Start menu. 2.
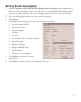
Making Advanced Settings Changes You can use the bridge’s internal configuration software to make basic settings changes and any advanced setting changes such as: • Changing the password. • Upgrading the bridge’s firmware. • Restoring the factory default settings. • Changing the IP address if the default address does work with your network. You can access the bridge’s internal configuration software either through the Smart Navigator or through an Internet browser.
Troubleshooting Tips If you have problems using the Smart Navigator software, check these tips. Symptom Cause Solution The WGE101 doesn’t show up in the device list. There’s a hardware problem. • Check that the bridge’s power light is on. • Check that the Ethernet cable is securely connected to both the computer and the bridge. • If operating through a switch (or hub), check that the bridge’s and the switch’s (or hub’s) power lights are on.
Technical Support PLEASE REFER TO THE SUPPORT INFORMATION CARD THAT SHIPPED WITH YOUR PRODUCT. By registering your product at www.NETGEAR.com/register, we can provide you with faster expert technical support and timely notices of product and software upgrades. NETGEAR, INC. Support Information Phone: 1-888-NETGEAR (for US & Canada only), available 24x7. For other countries see your Support Information card. E-mail: support@NETGEAR.com (24x7 online support) www.NETGEAR.