NETGEAR Wireless VOIP Setup Manual NETGEAR, Inc. 4500 Great America Parkway Santa Clara, CA 95054 USA 1.0 Version 1.
© 2004 by NETGEAR, Inc. All rights reserved. September 2004. Trademarks NETGEAR is a trademark of Netgear, Inc. Microsoft, Windows, and Windows NT are registered trademarks of Microsoft Corporation. Other brand and product names are registered trademarks or trademarks of their respective holders.
Contents Chapter 1 About This Guide Audience, Conventions, and Formats ............................................................................1-1 Chapter 2 Getting to Know Your NETGEAR Wireless Router Package Contents ..........................................................................................................2-1 The Front Panel .......................................................................................................2-2 The Rear Panel .........................................
Troubleshooting the Web Configuration Interface ..........................................................6-2 Troubleshooting the ISP Connection ..............................................................................6-3 Troubleshooting a TCP/IP Network Using a Ping Utility .................................................6-5 Testing the LAN Path to Your Router .......................................................................6-5 Testing the Path from Your Computer to a Remote Device ............
What Is Your Configuration Information? .............................................................. B-20 Obtaining ISP Configuration Information for Windows Computers ....................... B-21 Obtaining ISP Configuration Information for Macintosh Computers ..................... B-22 Restarting the Network ................................................................................................ B-23 Glossary List of Glossary Terms .................................................................
Customer Support Refer to the Support Information Card that shipped with your Wireless Router. World Wide Web NETGEAR maintains a World Wide Web home page that you can access at the universal resource locator (URL) http://www .netgear.com. A direct connection to the Internet and a Web browser such as Internet Explorer or Netscape are required.
Chapter 1 About This Guide This chapter describes the intended audience, scope, conventions, and formats of this manual. Audience, Conventions, and Formats This reference manual assumes that the reader has basic computer and Internet skills. However, basic computer network, Internet, and firewall technologies tutorial information is provided in the Appendices and on the Netgear Web site. This guide uses the following typographical conventions: Table 1-1.
NETGEAR Wireless Router Setup Manual 2 About This Guide September 2004
Chapter 2 Getting to Know Your NETGEAR Wireless Router NETGEAR wireless routers provide connections for multiple computers to the Internet through an external broadband access device such as a cable modem or DSL modem that is normally intended for use by a single computer. This chapter introduces the NETGEAR Wireless Router. Package Contents The product package should contain the following items: • • • • Wireless Router. AC power adapter. A Category 5 (CAT5) Ethernet cable.
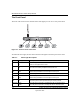
NETGEAR Wireless Router Setup Manual The Front Panel The front of the wireless router includes these status lights you can use to verify connections. 0OWER 4EST )NTERNET 0ORT 7IRELESS ,!. 0ORT 0HONE Figure 2-1: wireless router Front Panel Viewed from left to right, the table below describes the lights on the front panel of the router. Table 2-1. Status Light Descriptions Label Activity Description Power On Green Solid Off Power is supplied to the router.
NETGEAR Wireless Router Setup Manual The Rear Panel The rear panel of the wireless router router contains the items listed below. Wireless Antenna 3 2 1 2 1 Power 2 Phone Ports Reset Button 3 LAN Ports Internet Port Figure 1-2: wireless router Rear Panel Viewed from left to right, the rear panel contains the following features: • • • • • • Outlet for 12V DC @ 1.
NETGEAR Wireless Router Setup Manual 2-4 Getting to Know Your NETGEAR Wireless Router September 2004
Chapter 3 Connecting the Router to the Internet This chapter describes how to set up the router on your local area network (LAN) and connect to the Internet. You will find out how to configure your wireless router for Internet access. Follow these instructions to set up your router. Prepare to Install Your Wireless Router • For Cable Modem Service: When you perform the wireless router setup steps be sure to use the computer you first registered with your cable ISP.
NETGEAR Wireless Router Setup Manual c. Locate the Ethernet cable (cable 1 in the diagram) that connects your PC to the modem. &DEOH A ,QWHUQHW FRPSXWHU PRGHP Figure 3-1: Disconnect the Ethernet cable from the computer d. Disconnect the cable at the computer end only, point A in the diagram above. e. Look at the label on the bottom of the wireless router. Locate the Internet port.
NETGEAR Wireless Router Setup Manual f. Securely insert the cable that came with your wireless router (the NETGEAR cable in the diagram below) into a LAN port on the router such as LAN port 4 (point C in the diagram), and the other end into the Ethernet port of your computer (point D in the diagram).
NETGEAR Wireless Router Setup Manual 0OWER 4EST )NTERNET 0ORT 7IRELESS ,!. 0ORT 0HONE Figure 3-4: Verify the connections according to the status lights on the wireless router d. Check the wireless router status lights to verify the following: • Power: The power light should turn solid green. If it does not, see “Troubleshooting Tips” on page 3-7. • Test: The test light should be off. The test light blinks when the router is first turned on then goes off.
NETGEAR Wireless Router Setup Manual 3. OPEN A BROWSER AND LOG IN TO THE ROUTER For DSL customers, if your Internet service provider had you install software logs you in to the Internet, do not run that software. If such software automatically starts when you open a browser, you may need to go to the Internet Explorer Tools menu, Internet Options, Connections tab page where you can select “Never dial a connection.” 1.
NETGEAR Wireless Router Setup Manual After logging in to the router, you will see the Internet connection Smart Wizard on the settings main page. Use the Smart Wizard to Configure Your Wireless Router 1. You are now connected to the router. If you do not see the menu above, click the Setup Wizard link on the upper left of the main menu. 2. Click Next to proceed. Input your ISP settings, as needed.
NETGEAR Wireless Router Setup Manual Now, Set Up a Computer for Wireless Connectivity :LUHOHVV $GDSWHU LQ D 1RWHERRN &RPSXWHU Configure the wireless adapter to match your wireless router settings exactly. If you changed the default Network Name (SSID), be sure to use what you set in the wireless router. WIRELESS FEATURE 802.11g Network Name (SSID) WEP or WPA Security DEFAULT SETTING NETGEAR Disabled Warning: The Network Name (SSID) is case sensitive. Typing nETgear for the SSID will not work.
NETGEAR Wireless Router Setup Manual Be sure to restart your network in this sequence: 1. Turn off and unplug the modem, turn off the wireless router, and turn off the computer 2. Turn on the modem, wait two minutes 3. Turn on the wireless router and wait 1 minute 4. Turn on the computer. Make sure the Ethernet cables are securely plugged in.
NETGEAR Wireless Router Setup Manual How to Manually Configure Your Internet Connection You can manually configure your router using the menu below, or you can allow the Setup Wizard to determine your configuration as described in the previous section. ISP Does Not Require Login ISP Does Require Login Figure 3-6: Browser-based configuration Basic Settings menus You can manually configure the router using the Basic Settings menu shown in Figure 3-6 using these steps: 1.
NETGEAR Wireless Router Setup Manual b. Internet IP Address: If your ISP has assigned you a permanent, fixed (static) IP address for your computer, select “Use static IP address”. Enter the IP address that your ISP assigned. Also enter the netmask and the Gateway IP address. The Gateway is the ISP’s router to which your router will connect. c.
NETGEAR Wireless Router Setup Manual Figure 3-7: Basic Settings ISP list Note: Not all ISPs are listed here. The ones on this list have special requirements. b. The screen will change according to the ISP settings requirements of the ISP you select. c. Fill in the parameters for your Internet service provider. d. Click Apply to save your settings. Click the Test button to verify you have Internet access.
NETGEAR Wireless Router Setup Manual 3-12 Connecting the Router to the Internet September 2004
Chapter 4 Optimizing Wireless Connectivity and Security This chapter describes how to configure the wireless features of your wireless router. In planning your wireless network, you should consider the level of security required. You should also select the physical placement of your firewall in order to maximize the network speed. The full manual with detailed how to instructions is available via the Documentation link in the configuration utility of the wireless router.
NETGEAR Wireless Router Setup Manual Implement Appropriate Wireless Security Note: Indoors, computers can connect over 802.11b/g wireless networks at ranges of up to 300 feet. Such distances can allow for others outside of your immediate area to access your network. Unlike wired network data, your wireless data transmissions can be received well beyond your walls by anyone with a compatible adapter. For this reason, use the security features of your wireless equipment.
NETGEAR Wireless Router Setup Manual • • WPA-PSK. Wi-Fi Protected Access (WPA) data encryption provides strong data security. WPA-PSK will block eavesdropping. Because this is a new standard, wireless device driver and software availability may be limited. Turn Off the Wired LAN. If you disable the wireless LAN, wireless devices cannot communicate with the router at all. You might choose to turn off the wireless the LAN when you are away and the others in the household all use wired connections.
NETGEAR Wireless Router Setup Manual Table 4-1. Basic Wireless Security Options Field Description Automatic No wireless security. WEP WEP offers the following options: • Open System With Open Network Authentication and 64- or 128-bit WEP Data Encryption, the wireless router does perform 64- or 128-bit data encryption but does not perform any authentication. • Shared Key Shared Key authentication encrypts the SSID and data. Choose the Encryption Strength (64- or 128-bit data encryption).
NETGEAR Wireless Router Setup Manual Information to Gather Before Changing Basic Wireless Settings Before customizing your wireless settings, print this form and record the following information. • 802.11g Wireless Network Name (SSID): ______________________________ The SSID, identifies the wireless network. You can use up to 32 alphanumeric characters. The SSID is case sensitive. The SSID in the wireless adapter card must match the SSID of the wireless router.
NETGEAR Wireless Router Setup Manual Default Factory Settings When you first receive your wireless router, the default factory settings are shown below. You can restore these defaults with the Factory Default Restore button on the rear panel. After you install the wireless router, use the procedures below to customize any of the settings to better meet your networking needs.
Chapter 5 Doing Basic Router Housekeeping This chapter describes how to use some of the maintenance features of your Wireless Router. These features can be found by clicking on the Maintenance heading in the Main Menu of the browser interface. Other maintenance features not presented in this chapter can be found accessed via links in the browser interface of the wireless router to the documentation and in the help screens.
NETGEAR Wireless Router Setup Manual Upgrading the Wireless Router Software From the Main Menu of the browser interface, under the Maintenance heading, select the Router Upgrade link display the menu shown below. Figure 5-2: Router Upgrade menu To upload new firmware: 1. Download and unzip the new software file from NETGEAR. In the Router Upgrade menu, click the Browse button and browse to the location of the upgrade file 3. Click Upload.
Chapter 6 Troubleshooting Common Problems This chapter gives information about troubleshooting your Wireless Router. After each problem description, instructions are provided to help you diagnose and solve the problem. Basic Functioning After you turn on power to the router, the following sequence of events should occur: 1. When power is first applied, verify that the Power light 2. After approximately 10 seconds, verify that: is on. a. The power light is solid green. b.
NETGEAR Wireless Router Setup Manual Lights Never Turn Off When the router is turned on, the lights turns on for about 10 seconds and then turn off. If all the lights stay on, there is a fault within the router. If all lights are still on one minute after power up: • Cycle the power to see if the router recovers. • Clear the router’s configuration to factory defaults. This will set the router’s IP address to 192.168.61.1.
NETGEAR Wireless Router Setup Manual • Make sure your computer’s IP address is on the same subnet as the router. If you are using the default addressing schemes, your computer’s address should be in the range of 192.168.61.2 to 192.168.61.253. Refer to “Verifying TCP/IP Properties” on page B-8 or “Verifying TCP/IP Properties for Macintosh Computers” on page B-19 to find your computer’s IP address. Follow the instructions in Appendix B to configure your computer.
NETGEAR Wireless Router Setup Manual 3. Under the Maintenance heading, select Router Status 4. Check that an IP address is shown for the WAN Port If 0.0.0.0 is shown, your router has not obtained an IP address from your ISP. If your router is unable to obtain an IP address from the ISP, you may need to force your cable or DSL modem to recognize your new router by performing the following procedure: 1. Turn off power to the cable or DSL modem. 2. Turn off power to your router. 3.
NETGEAR Wireless Router Setup Manual A DNS server is a host on the Internet that translates Internet names (such as www addresses) to numeric IP addresses. Typically your ISP will provide the addresses of one or two DNS servers for your use. If you entered a DNS address during the router’s configuration, reboot your computer and verify the DNS address as described in “Install or Verify Windows Networking Components” on page B-9.
NETGEAR Wireless Router Setup Manual If the path is not functioning correctly, you could have one of the following problems: • Wrong physical connections — Make sure the LAN port LED is on. If the LED is off, follow the instructions in “LAN or Internet (WAN) Port Lights Not On” on page 6-2. — Check that the corresponding Link LEDs are on for your network interface card and for the hub ports (if any) that are connected to your workstation and router.
NETGEAR Wireless Router Setup Manual — Your ISP could be rejecting the Ethernet MAC addresses of all but one of your computers. Many broadband ISPs restrict access by only allowing traffic from the MAC address of your broadband modem, but some ISPs additionally restrict access to the MAC address of a single computer connected to that modem.
NETGEAR Wireless Router Setup Manual 6-8 Troubleshooting Common Problems September 2004
Appendix A Technical Specifications This appendix provides technical specifications for the Wireless VOIP. Network Protocol and Standards Compatibility Data and Routing Protocols: TCP/IP, RIP-1, DHCP PPP over Ethernet (PPPoE) Power Adapter All regions (output): 12V DC @ 1.
NETGEAR Wireless Router Setup Manual A-2 Technical Specifications September 2004
Appendix B Preparing Your Network This appendix describes how to prepare your network to connect to the Internet through the Wireless Router and how to verify the readiness of broadband Internet service from an Internet service provider (ISP).
NETGEAR Wireless Router Setup Manual For the initial setup of your router, you will need to connect a computer to the router. This computer has to be set to automatically get its TCP/IP configuration from the router via DHCP. Note: For help with DHCP configuration, please use the Windows TCP/IP Configuration Tutorials on the NETGEAR Wireless Router Setup CD, or in this appendix.
NETGEAR Wireless Router Setup Manual Record Your Internet Connection Information Print this page. Fill in the configuration parameters from your Internet Service Provider (ISP). ISP Login Name: The login name and password are case sensitive and must be entered exactly as given by your ISP. Some ISPs use your full e-mail address as the login name. The Service Name is not required by all ISPs.
NETGEAR Wireless Router Setup Manual Most operating systems include the software components you need for networking with TCP/IP: • Windows® 95 or later includes the software components for establishing a TCP/IP network. • Windows 3.1 does not include a TCP/IP component. You need to purchase a third-party TCP/ IP application package such as NetManage Chameleon. • Macintosh Operating System 7 or later includes the software components for establishing a TCP/IP network.
NETGEAR Wireless Router Setup Manual 2. Double-click the Network icon. The Network window opens, which displays a list of installed components: You must have an Ethernet adapter, the TCP/IP protocol, and Client for Microsoft Networks. Note: It is not necessary to remove any other network components shown in the Network window in order to install the adapter, TCP/IP, or Client for Microsoft Networks. If you need to install a new adapter, follow these steps: a. Click the Add button. b.
NETGEAR Wireless Router Setup Manual c. Select Microsoft. d. Select TCP/IP, and then click OK. If you need Client for Microsoft Networks: 3. a. Click the Add button. b. Select Client, and then click Add. c. Select Microsoft. d. Select Client for Microsoft Networks, and then click OK. Restart your PC for the changes to take effect.
NETGEAR Wireless Router Setup Manual Locate your Network Neighborhood icon. • If the Network Neighborhood icon is on the Windows desktop, position your mouse pointer over it and right-click your mouse button. • If the icon is not on the desktop, • Click Start on the task bar located at the bottom left of the window. • Choose Settings, and then Control Panel. • Locate the Network Neighborhood icon and click on it. This will open the Network panel as shown below.
NETGEAR Wireless Router Setup Manual • By default, the IP Address tab is open on this window. • Verify the following: Obtain an IP address automatically is selected. If not selected, click in the radio button to the left of it to select it. This setting is required to enable the DHCP server to automatically assign an IP address. • Click OK to continue. Restart the PC. Repeat these steps for each PC with this version of Windows on your network. Selecting Windows’ Internet Access Method 1.
NETGEAR Wireless Router Setup Manual 2. Type winipcfg, and then click OK. The IP Configuration window opens, which lists (among other things), your IP address, subnet mask, and default gateway. 3. From the drop-down box, select your Ethernet adapter. The window is updated to show your settings, which should match the values below if you are using the default TCP/IP settings that NETGEAR recommends for connecting through a router or gateway: • The IP address is between 192.168.61.2 and 192.168.61.
NETGEAR Wireless Router Setup Manual DHCP Configuration of TCP/IP in Windows XP, 2000, or NT4 You will find there are many similarities in the procedures for different Windows systems when using DHCP to configure TCP/IP. The following steps will walk you through the configuration process for each of these versions of Windows. DHCP Configuration of TCP/IP in Windows XP Locate your Network Neighborhood icon. • Select Control Panel from the Windows XP new Start Menu.
NETGEAR Wireless Router Setup Manual • Now you should be at the Local Area Network Connection Status window. This box displays the connection status, duration, speed, and activity statistics. • Administrator logon access rights are needed to use this window. • Click the Properties button to view details about the connection. • The TCP/IP details are presented on the Support tab page. • Select Internet Protocol, and click Properties to view the configuration information.
NETGEAR Wireless Router Setup Manual • Verify that the Obtain an IP address automatically radio button is selected. • Verify that Obtain DNS server address automatically radio button is selected. • Click the OK button. This completes the DHCP configuration of TCP/ IP in Windows XP. Repeat these steps for each PC with this version of Windows on your network. DHCP Configuration of TCP/IP in Windows 2000 Once again, after you have installed the network card, TCP/IP for Windows 2000 is configured.
NETGEAR Wireless Router Setup Manual • Click on the My Network Places icon on the Windows desktop. This will bring up a window called Network and Dial-up Connections. • Right click on Local Area Connection and select Properties. • The Local Area Connection Properties dialog box appears. • Verify that you have the correct Ethernet card selected in the Connect using: box.
NETGEAR Wireless Router Setup Manual • With Internet Protocol (TCP/IP) selected, click on Properties to open the Internet Protocol (TCP/IP) Properties dialogue box. • Verify that • Obtain an IP address automatically is selected. • Obtain DNS server address automatically is selected. • Click OK to return to Local Area Connection Properties. • Click OK again to complete the configuration process for Windows 2000. Restart the PC.
NETGEAR Wireless Router Setup Manual DHCP Configuration of TCP/IP in Windows NT4 Once you have installed the network card, you need to configure the TCP/IP environment for Windows NT 4.0. Follow this procedure to configure TCP/IP with DHCP in Windows NT 4.0. • Choose Settings from the Start Menu, and then select Control Panel. This will display Control Panel window. • Double-click the Network icon in the Control Panel window. The Network panel will display. • Select the Protocols tab to continue.
NETGEAR Wireless Router Setup Manual • Highlight the TCP/IP Protocol in the Network Protocols box, and click on the Properties button.
NETGEAR Wireless Router Setup Manual • The TCP/IP Properties dialog box now displays. • Click the IP Address tab. • Select the radio button marked Obtain an IP address from a DHCP server. • Click OK. This completes the configuration of TCP/IP in Windows NT. Restart the PC. Repeat these steps for each PC with this version of Windows on your network. Verifying TCP/IP Properties for Windows XP, 2000, and NT4 To check your PC’s TCP/IP configuration: 1.
NETGEAR Wireless Router Setup Manual • 4. The default gateway is 192.168.61.1 Type exit Configuring the Macintosh for TCP/IP Networking Beginning with Macintosh Operating System 7, TCP/IP is already installed on the Macintosh. On each networked Macintosh, you will need to configure TCP/IP to use DHCP. MacOS 8.6 or 9.x 1. From the Apple menu, select Control Panels, then TCP/IP. The TCP/IP Control Panel opens: 2. From the “Connect via” box, select your Macintosh’s Ethernet interface. 3.
NETGEAR Wireless Router Setup Manual 2. If not already selected, select Built-in Ethernet in the Configure list. 3. If not already selected, Select Using DHCP in the TCP/IP tab. 4. Click Save. Verifying TCP/IP Properties for Macintosh Computers After your Macintosh is configured and has rebooted, you can check the TCP/IP configuration by returning to the TCP/IP Control Panel. From the Apple menu, select Control Panels, then TCP/IP.
NETGEAR Wireless Router Setup Manual Verifying the Readiness of Your Internet Account For broadband access to the Internet, you need to contract with an Internet service provider (ISP) for a single-user Internet access account using a cable modem or DSL modem. This modem must be a separate physical box (not a card) and must provide an Ethernet port intended for connection to a Network Interface Card (NIC) in a computer. Your firewall does not support a USB-connected broadband modem.
NETGEAR Wireless Router Setup Manual • An IP address and subnet mask • A gateway IP address, which is the address of the ISP’s router • One or more domain name server (DNS) IP addresses • Host name and domain suffix For example, your account’s full server names may look like this: mail.xxx.yyy.com In this example, the domain suffix is xxx.yyy.com. If any of these items are dynamically supplied by the ISP, your firewall automatically acquires them.
NETGEAR Wireless Router Setup Manual If an IP address appears under Installed Gateways, write down the address. This is the ISP’s gateway address. Select the address and then click Remove to remove the gateway address. 6. Select the DNS Configuration tab. If any DNS server addresses are shown, write down the addresses. If any information appears in the Host or Domain information box, write it down. Click Disable DNS. 7. Click OK to save your changes and close the TCP/IP Properties dialog box.
NETGEAR Wireless Router Setup Manual Restarting the Network Once you’ve set up your computers to work with the firewall, you must reset the network for the devices to be able to communicate correctly. Restart any computer that is connected to the firewall. After configuring all of your computers for TCP/IP networking and restarting them, and connecting them to the local network of your wireless router, you are ready to access and configure the firewall.
NETGEAR Wireless Router Setup Manual B-24 Preparing Your Network September 2004
Glossary Use the list below to find definitions for technical terms used in this manual. List of Glossary Terms 802.11b IEEE specification for wireless networking at 11 Mbps using direct-sequence spread-spectrum (DSSS) technology and operating in the unlicensed radio spectrum at 2.5GHz. 802.11g A soon to be ratified IEEE specification for wireless networking at 54 Mbps using direct-sequence spread-spectrum (DSSS) technology and operating in the unlicensed radio spectrum at 2.5GHz. 802.
NETGEAR Wireless Router Setup Manual Domain Name A descriptive name for an address or group of addresses on the Internet. Domain names are of the form of a registered entity name plus one of a number of predefined top level suffixes such as .com, .edu, .uk, etc. For example, in the address mail.NETGEAR.com, mail is a server name and NETGEAR.com is the domain.
NETGEAR Wireless Router Setup Manual MAC address The Media Access Control address is a unique 48-bit hardware address assigned to every network interface card. Usually written in the form 01:23:45:67:89:ab. Mbps Megabits per second. Point-to-Point Protocol PPP. A protocol allowing a computer using TCP/IP to connect directly to the Internet. PPPoE PPPoE. PPP over Ethernet is a protocol for connecting remote hosts to the Internet over an always-on connection by simulating a dial-up connection.
NETGEAR Wireless Router Setup Manual The subnet mask is the network address plus the bits reserved for identifying the subnetwork. (By convention, the bits for the network address are all set to 1, though it would also work if the bits were set exactly as in the network address.) In this case, therefore, the subnet mask would be 11111111.11111111.11110000.00000000.