
User Manual
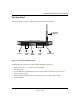
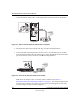
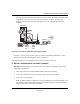
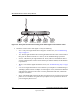
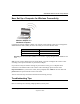
Table Of Contents
- NETGEAR Wireless Router Setup Manual
- Contents
- Chapter 1 About This Guide
- Chapter 2 Getting to Know Your NETGEAR Wireless Router
- Chapter 3 Connecting the Router to the Internet
- Chapter 4 Optimizing Wireless Connectivity and Security
- Chapter 5 Doing Basic Router Housekeeping
- Chapter 6 Troubleshooting Common Problems
- Appendix A Technical Specifications
- Appendix C Preparing Your Network
- What You Need To Use a Router with a Broadband Modem
- Preparing Your Computers for TCP/IP Networking
- Configuring Windows 95, 98, and Me for TCP/IP Networking
- Configuring Windows NT4, 2000 or XP for IP Networking
- Configuring the Macintosh for TCP/IP Networking
- Verifying the Readiness of Your Internet Account
- Restarting the Network
- Glossary

NETGEAR Wireless Router Setup Manual
Connecting the Router to the Internet 3-7
September 2004
Now, Set Up a Computer for Wireless Connectivity
Configure the wireless adapter to match your wireless router settings exactly. If you changed the
default Network Name (SSID), be sure to use what you set in the wireless router.
Warning: The Network Name (SSID) is case sensitive. Typing nETgear for the SSID will not
work.
Note: If your wireless adapter does not support WPA, you must reconfigure the wireless router
according to the options available on your wireless adapter.
If you need to verify the wireless settings of your wireless router, go to a computer that is
connected via an Ethernet cable to the wireless router and simply open a browser. Enter
http://192.168.61.1 in your browser. Then, when prompted, enter admin as the user name and
password for the password both in lower case letters.
You are now wirelessly connected to the Internet with strong security!
Troubleshooting Tips
Here are some tips for correcting simple problems you may have.
WIRELESS FEATURE DEFAULT SETTING
802.11g Network Name (SSID) NETGEAR
WEP or WPA Security Disabled
:LUHOHVV$GDSWHULQD
1RWHERRN&RPSXWHU