
Use and Care Manual
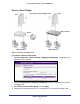
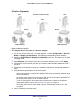
Table Of Contents
- ProSafe Wireless-N Access Point WNAP210
- Contents
- 1. Getting Started
- 2. Installation and Configuration
- Wireless Equipment Placement and Range Guidelines
- Prepare to Install the Access Point
- Connect to the Access Point
- Log In to the Access Point
- Configure LAN Settings
- Set Basic IP Options
- Set Up and Test Basic Wireless Connectivity
- QoS Settings
- Deploy the Access Point
- Wireless Security Options
- Security Profiles
- Restrict Wireless Access by MAC Address
- 3. Management
- 4. Monitoring
- 5. Advanced Configuration
- 6. Troubleshooting and Debugging
- A. Supplemental Information
- B. Command Line Reference
- C. Notification of Compliance
- Index
Advanced Configuration
54
ProSafe Wireless-N Access Point WNAP210
5. Configure the other access point (AP 2) on LAN Segment 2 in point-to-point bridge mode.
AP 1 needs to have AP 2’s MAC address in its Remote MAC Address field, and AP 2
needs to have AP 1’s MAC address in its Remote MAC Address field.
6. Configure and verify the following parameters for both access points:
• Verify that both access points are configured to operate in the same LAN network
address range as the LAN devices.
• Both use the same ESSID, channel, authentication mode, if any, and security
settings.
7. Verify connectivity across LAN 1 and LAN 2.
A computer on either LAN segment should be able to connect to the Internet or share files
and printers of any other computers or servers connected to LAN Segment 1 or LAN
Segment 2.
8. Click Apply to save your settings.
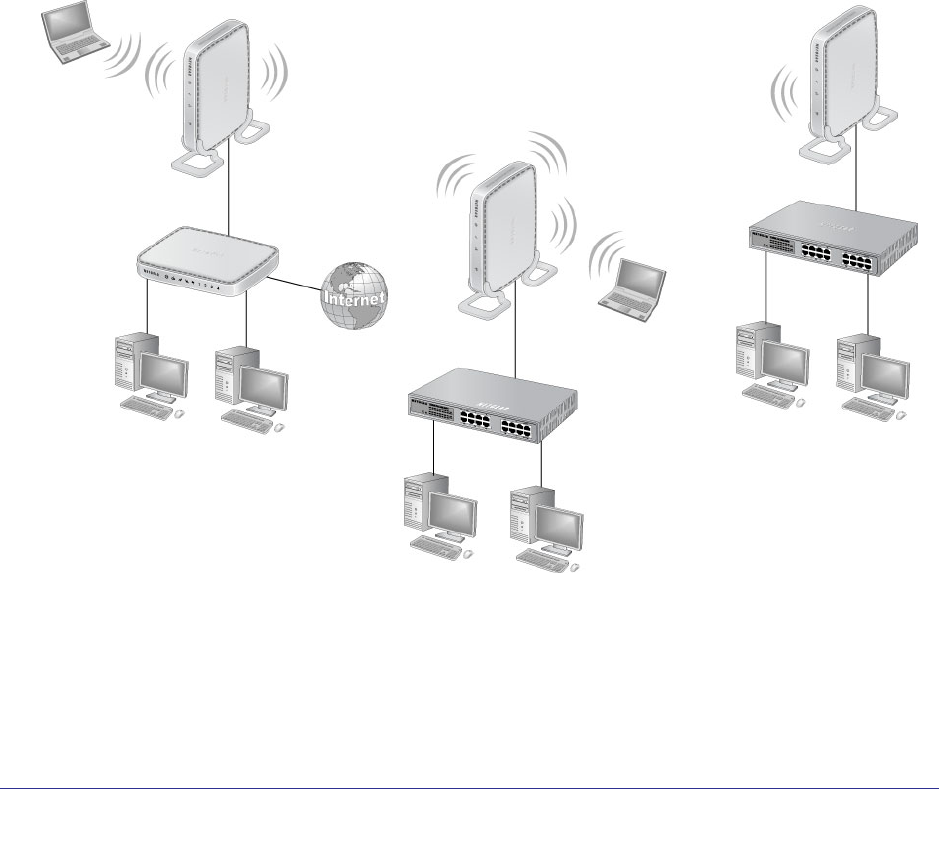
Point-to-Multi-Point Wireless Bridge
LAN Segment 3
LAN Segment 1
Hub or switch
AP 3
AP 1
Router
APs in point-to-multi-point bridge mode
Hub or switch
AP 2
LAN Segment 2
Figure 4. Point-to-multi-point-bridge mode