
Use and Care Manual
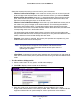
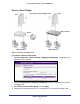
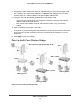
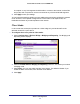
Table Of Contents
- ProSafe Wireless-N Access Point WNAP210
- Contents
- 1. Getting Started
- 2. Installation and Configuration
- Wireless Equipment Placement and Range Guidelines
- Prepare to Install the Access Point
- Connect to the Access Point
- Log In to the Access Point
- Configure LAN Settings
- Set Basic IP Options
- Set Up and Test Basic Wireless Connectivity
- QoS Settings
- Deploy the Access Point
- Wireless Security Options
- Security Profiles
- Restrict Wireless Access by MAC Address
- 3. Management
- 4. Monitoring
- 5. Advanced Configuration
- 6. Troubleshooting and Debugging
- A. Supplemental Information
- B. Command Line Reference
- C. Notification of Compliance
- Index
Advanced Configuration
57
ProSafe Wireless-N Access Point WNAP210
A computer on any LAN segment should be able to connect to the Internet or share files
and printers with computers or servers connected to any of the three WLAN segments.
8. Click Apply to save your settings.
You can extend repeating by adding up to two additional access points configured in repeater
mode. However, since repeater configurations communicate in half-duplex mode, the
bandwidth decreases as you add repeaters to the network.
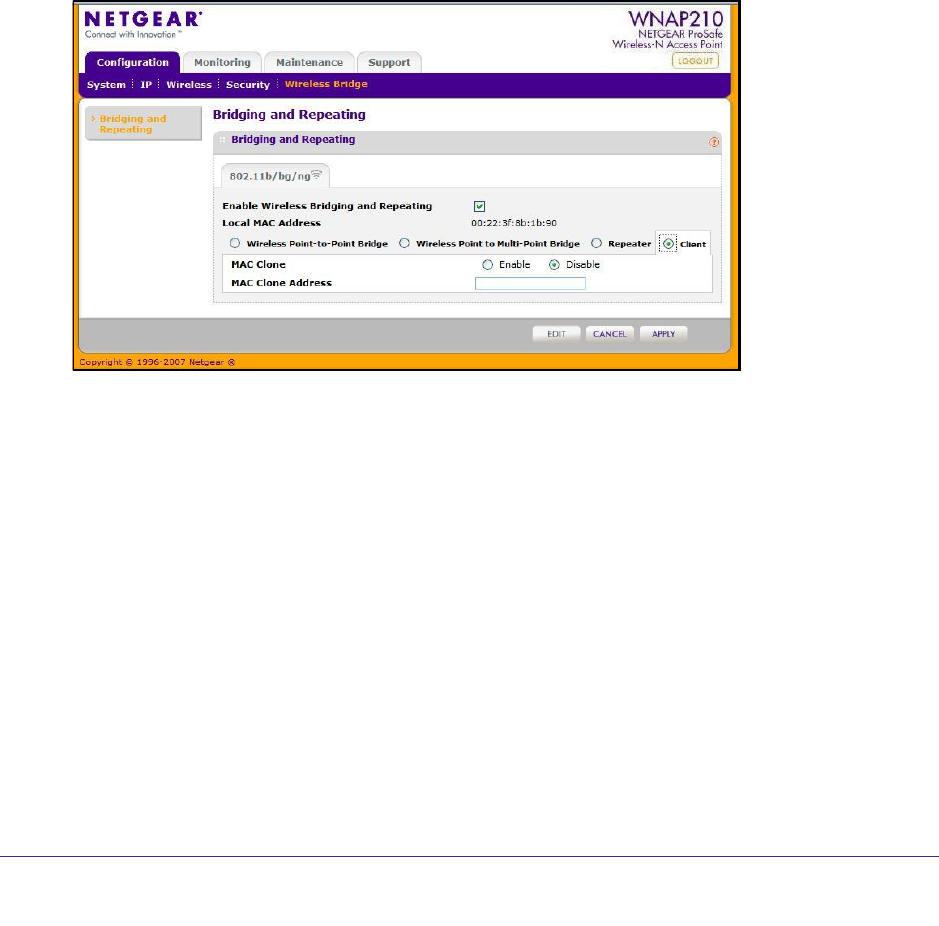
Client Mode
In client mode the access point operates as a client bridge only and sends traffic to the
selected remote AP or peer device.
To configure the access point for client mode:
1. Select Configuration > Wireless Bridge > Bridging and Repeating. The Bridging and
Repeating screen displays.
2. Select the Enable Wireless Bridging and Repeating check box. This allows you to select
a bridging mode.
3. Select Client. You can now enable the MAC clone feature. The default is Disable. If you
enable the MAC clone feature, enter the MAC clone address.
4. Click Apply.