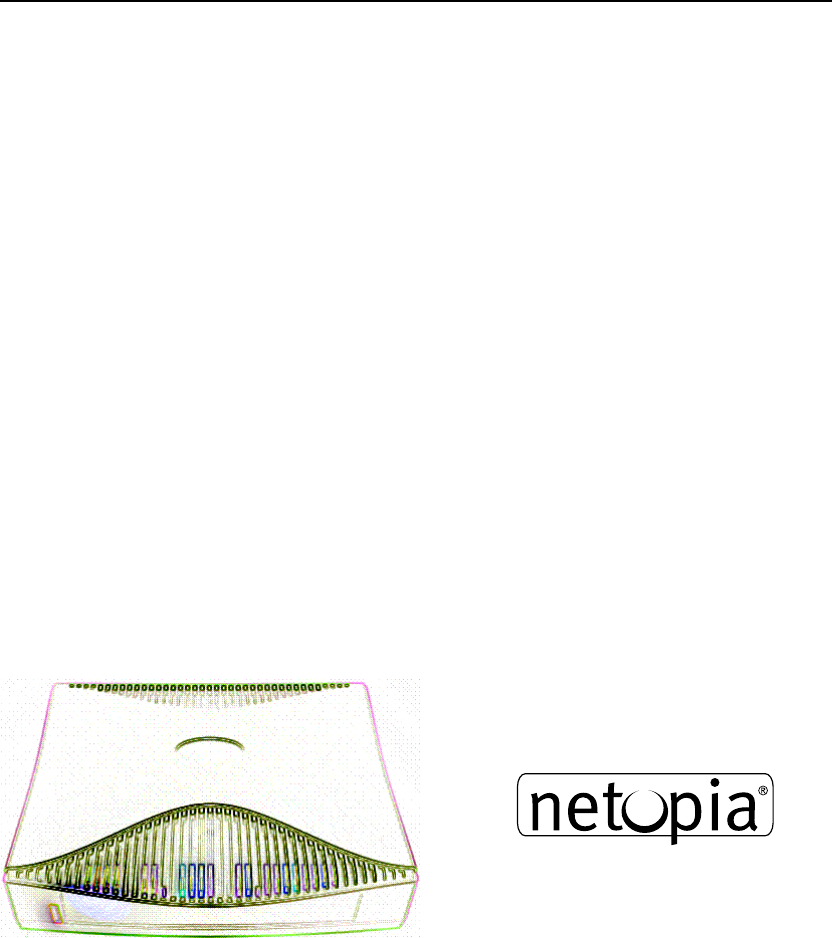
™ Netopia D-Series DSL DSUs D3100-I D3232 D7100 D7171 IDSL IDSL SDSL SDSL User’s Reference Guide
Copyright ©2000, Netopia, Inc., v.0300 All rights reserved. Printed in the U.S.A. This manual and any associated artwork, software, and product designs are copyrighted with all rights reserved. Under the copyright laws such materials may not be copied, in whole or part, without the prior written consent of Netopia, Inc. Under the law, copying includes translation to another language or format. Netopia, Inc. 2470 Mariner Square Loop Alameda, CA 94501-1010 U.S.A.
Contents Part I: Getting Started Chapter 1 — Introduction..........................................................1-9 Overview ....................................................................... 1-9 Features and capabilities ............................................. 1-10 In DSU mode ..................................................... 1-10 In Ethernet filtering bridge mode.......................... 1-10 About DSL Bonding ......................................................
iv User’s Reference Guide Chapter 4 — Configuring TCP/IP.............................................4-25 Configuring TCP/IP on Windows 95, 98, or NT computers 4-26 Configuring TCP/IP on Macintosh computers.................. 4-28 Part II: Advanced Configuration Chapter 5 — Console-Based Management ...............................5-33 Connecting a console cable to your Netopia D-Series...... 5-34 Connecting through a Telnet session ............................. 5-35 Configuring Telnet software ............
Contents Statistics & Logs ......................................................... General Statistics .............................................. Event histories ............................................................ System Information...................................................... SNMP ......................................................................... The SNMP Setup screen ..................................... SNMP traps .......................................................
vi User’s Reference Guide Chapter 9 — Utilities and Diagnostics .....................................9-89 Ping ............................................................................ 9-90 Trace Route................................................................. 9-92 Telnet client................................................................. 9-93 Disconnect Telnet console session ............................... 9-94 Factory defaults...........................................................
Contents Description................................................................ Power requirements ......................................... Environment .................................................... Software and protocols..................................... Agency approvals....................................................... Regulatory notices ........................................... Important safety instructions ............................
viii User’s Reference Guide
Part I: Getting Started
User’s Reference Guide
Introduction 1-11 Chapter 1 Introduction Overview The Netopia D-Series DSL DSUs are Digital Service Units or intelligent Ethernet filtering bridges for SDSL or IDSL connections. They feature the ability to sense the connection type (Frame Relay or RFC 1483 DSL) and automatically configure themselves for use as a DSU to Ethernet bridge. In either configuration the Netopia D-Series offers management features available locally or remotely, either in-band or out-of-band.
1-12 User’s Reference Guide Features and capabilities The Netopia D-Series DSL DSUs all provide the following features: ■ Status lights (LEDs) for easy monitoring and troubleshooting. ■ Support for console-based management over Telnet or serial cable connection. ■ Wall-mountable, bookshelf (side-stackable), or desktop-stackable design for efficient space usage. In DSU mode ■ DSU mode (Frame Relay): Copper Mountain DSL to V.35 for connection to an external router using RFC1490 Frame Relay protocol.
Introduction 1-13 How to use this guide This guide is designed to be your single source for information about your Netopia D-Series DSL DSU. It is intended to be viewed on-line, using the powerful features of the Adobe Acrobat Reader. The information display has been deliberately designed to present the maximum information in the minimum space on your screen.
1-14 User’s Reference Guide
Making the Physical Connections 2-15 Chapter 2 Making the Physical Connections This section tells you how to make the physical connections to your Netopia D-Series DSL DSU.
2-16 User’s Reference Guide You will need: ■ A Windows 95-, 98-, 2000-, or NT–based PC or a Macintosh computer with Ethernet connectivity for configuring the Netopia D-Series. This may be built-in Ethernet or an add-on card, with TCP/IP installed and configured. See Chapter 4, “Configuring TCP/IP.” ■ An SDSL or IDSL wall outlet wired for a connection to a Competitive Local Exchange Carrier (CLEC) that supports Digital Subscriber Line connections.
Making the Physical Connections 2-17 2. Connect one end one of the RJ-45 cables to the Line 1 port, and the other end to your SDSL or IDSL wall outlet. 3. Connect one end of one of the RJ-45 Ethernet cables to any of the Ethernet ports on the Netopia D-Series and the other end to your computer or to your network. (If you are connecting the Netopia D-Series to an existing Ethernet hub, use Ethernet port #1 on the Netopia D-Series and set the crossover switch to the Uplink position.
2-18 User’s Reference Guide Port Description 8-port Ethernet hub Eight 10Base-T Ethernet jacks. You will use one of these to configure the Netopia D-Series. For a new installation, use the Ethernet connection. Alternatively, you can use the console connection to run console-based management using a direct serial connection.
Making the Physical Connections 2-19 When this happens... the LEDs... Data is transmitted or received on the WAN on Channel 2 5 or 11 flashes yellow. (D3232 only) Console cable is attached and has carrier 6 and 7 are green. Data is transmitted or received 6 and 7 flash yellow. Data is transmitted or received by the ethernet controller 12 flashes yellow. The Ethernet interface detects a collision 13 flashes red. Link is detected 14 though 21 are solid green.
2-20 User’s Reference Guide
Connecting to Your Local Area Network 3-21 Chapter 3 Connecting to Your Local Area Network This chapter describes how to physically connect the Netopia D-Series to your local area network (LAN). Before you proceed, make sure the Netopia D-Series is properly configured. You can customize the Netopia D-Series’s configuration for your particular LAN requirements using console-based management (see “Console-Based Management” on page 5-35).
3-22 User’s Reference Guide In bridge mode the Netopia D-Series performs a simple algorithm. When the Netopia D-Series receives a packet on the Ethernet hub, the packet is examined for its destination Media Access Control (MAC) address. The MAC address is the physical address of a device connected to a network, expressed as a 48-bit hexadecimal number. Sometimes this is called the hardware address, and is a unique number assigned to each device by the manufacturer.
Connecting to Your Local Area Network 3-23 Readying computers on your local network PC and Macintosh computers must have certain components installed before they can communicate through the Netopia D-Series. The following illustration shows the minimal requirements for a typical PC or Macintosh computer.
3-24 User’s Reference Guide Connecting to an Ethernet network The Netopia D-Series supports Ethernet connections through its eight Ethernet ports. The Netopia D-Series automatically detects which Ethernet port is in use. 10Base-T You can connect a standard 10Base-T Ethernet network to the Netopia D-Series using any of its available Ethernet ports.
Connecting to Your Local Area Network 3-25 If you add devices connected through a hub, connect the hub to Ethernet port number 1 on the Netopia D-Series and set the Normal/Uplink switch to Uplink.
3-26 User’s Reference Guide
Configuring TCP/IP 4-27 Chapter 4 Configuring TCP/IP Computers on your network must have TCP/IP installed and configured. This chapter tells you how to configure TCP/IP on the desktop computers on your network. This chapter covers the following topics: ■ “Configuring TCP/IP on Windows 95 or 98 computers” on page 28 ■ “Configuring TCP/IP on Macintosh computers” on page 30 Note: For information on configuring TCP/IP on Windows 2000 or NT computers, please see the Microsoft documentation.
4-28 User’s Reference Guide Configuring TCP/IP on Windows 95 or 98 computers Configuring TCP/IP on a Windows computer requires the following: ■ An Ethernet card (also known as a network adapter) ■ The TCP/IP protocol must be “bound” to the adapter or card If you are manually configuring for a fixed or static IP address, perform the following: 1. Go to Start Menu/Settings/Control Panels and double click the Network icon. From the Network components list, select the Configuration tab. 2.
Configuring TCP/IP 4-29 3. Click on the Gateway tab (shown below). Under “New gateway,” enter 192.168.1.1. Click Add. This is the Netopia D-Series’s pre-assigned IP address. Click on the DNS Configuration tab. Click Enable DNS. Enter the following information: Host: Type the name you want to give to this computer. Domain: Type your domain name. If you don't have a domain name, type your ISP's domain name; for example, netopia.com.
4-30 User’s Reference Guide Configuring TCP/IP on Macintosh computers The following is a quick guide to configuring TCP/IP for MacOS computers. Configuring TCP/IP in a Macintosh computer requires the following: ■ You must have either Open Transport or Classic Networking (MacTCP) installed. ■ You must have built-in Ethernet or a third-party Ethernet card and its associated drivers installed in your Macintosh. If you are manually configuring for a fixed or static IP address, perform the following: 1.
Configuring TCP/IP 4-31 Option: Implicit Search Path: Starting domain name: Select/Type: Enter your domain name; if you do not have a domain name, enter the domain name of your ISP 4. Close the TCP/IP or MacTCP control panel and save the settings. 5. If you are using MacTCP, you must restart the computer. If you are using Open Transport, you do not need to restart. These are the only fields you need to modify in this screen.
4-32 User’s Reference Guide
Part II: Advanced Configuration
User’s Reference Guide
Console-Based Management 5-35 Chapter 5 Console-Based Management Console-based management is a menu-driven interface for the capabilities built in to the Netopia D-Series. Console-based management provides access to a wide variety of features that the Netopia D-Series supports. You can customize these features for your individual setup. This chapter describes how to access the console-based management screens.
5-36 User’s Reference Guide ■ Filter Sets (Firewalls). See “Security” on page 8-61. ■ Date and time. See “Date and time” on page 6-43. ■ Console configuration. See “Connecting a console cable to your Netopia D-Series” on page 5-36. ■ SNMP (Simple Network Management Protocol). See “SNMP” on page 7-57. ■ Security. See “Security” on page 8-61. ■ Upgrade feature set. See “Upgrade feature set” on page 6-44. ■ Logging. See “Event histories” on page 7-54.
Console-Based Management 5-37 To connect the Netopia D-Series to your computer for serial console communication, use the supplied dual console cable connector end appropriate to your platform: ■ One DB-9 connector end attaches to a PC. ■ The mini-DIN8 connector end attaches to a Macintosh computer. ■ The DB-9 end of the Console cable attaches to the Netopia D-Series’s Console port.
5-38 User’s Reference Guide Alternatively, you can have a direct serial console cable connection using the provided console cable for your platform (PC or Macintosh) and the Console port on the back of the Netopia D-Series. For more information on attaching the console cable, see “Connecting a console cable to your Netopia D-Series” on page 5-36.
WAN and System Configuration 6-39 Chapter 6 WAN and System Configuration This chapter describes how to use the console-based management screens to access and configure advanced features of your Netopia D-Series DSL DSU. You can customize these features for your individual setup. These menus provide a powerful method for experienced users to set up their Netopia D-Series’s connection and system configuration.
6-40 User’s Reference Guide System Configuration screens You can connect to the Netopia D-Series’s system configuration screens in either of two ways: ■ By using Telnet with the Netopia D-Series’s Ethernet port IP address. The default is 192.168.1.1, subnet mask 255.255.255.0.
WAN and System Configuration 6-41 Navigating through the system configuration screens To help you find your way to particular screens, some sections in this guide begin with a graphical path guide similar to the following example: Main Menu System Configuration Management IP Setup IP Setup This particular path guide shows how to get to the Management IP Setup screens. The path guide represents these steps: 1. Beginning in the Main Menu, select System Configuration and press Return.
6-42 User’s Reference Guide Management IP setup Consult your network administrator or Internet service provider to obtain the IP setup information such as the Ethernet IP address, Ethernet subnet mask, default IP gateway. You will need this information before changing any of the settings in this screen. Changes made in this screen will take effect only after the Netopia D-Series is reset.
WAN and System Configuration 6-43 Filter sets When using the Netopia D-Series in bridge mode only, these screens allow you to configure security on your network by means of filter sets. Details are given in “About filters and filter sets” on page 8-64. Date and time You can set the system’s date and time in the Set Date and Time screen. Select Date and Time in the System Configuration screen and press Return. The Set Date and Time screen appears.
6-44 User’s Reference Guide You can change the default terminal communications parameters to suit your requirements. To go to the Console Configuration screen, select Console Configuration in the System Configuration screen. Console Configuration Baud Rate... 57600 Hardware Flow Control: No SET CONFIG NOW CANCEL Follow these steps to change a parameter’s value: 1. Select the parameter you want to change. 2. Select a new value for the parameter.
WAN and System Configuration 6-45 You can configure a UNIX-style syslog client for the PC to report a number of subsets of the events entered in the Netopia D-Series’s WAN Event History. See “WAN Event History” on page 7-55.The Syslog client daemon program (for the PC only) is supplied as a .ZIP file on the CustomerCare CD. Select Logging from the System Configuration menu. The Logging Configuration screen appears.
6-46 User’s Reference Guide The following screen shows a sample syslog dump of WAN events: 6, 6, 6, 6, 6, 6, 6, 6, 6, 6, 6, 6, 6, 6, 6, 6, 6, 6, 152, 173.166.107.100, 3/10/99, 9:55:03 AM, RFC1483: IP up, channel 2, gateway: 163.176.107.1 152, 173.166.107.100, 3/10/99, 9:55:08 AM, RFC1483-2 rate set to 576 Kbps 152, 173.166.107.100, 3/10/99, 9:55:09 AM, DML-4 up 152, 173.166.107.100, 3/10/99, 9:55:10 AM, RFC1483-2 rate set to 432 Kbps 152, 173.166.107.
WAN and System Configuration 6-47 same order in which they were transmitted, and the reconstructed packet is sent on to the recipient’s networking equipment. From the point of view of the routers or other devices connected to the inverse multiplexers, they are communicating via a single high-speed WAN channel at some multiple of the SDSL or IDSL rate. This is especially important when an application’s bandwidth requirements are high.
6-48 User’s Reference Guide The screen below shows the ISDN/IDSL option for the WAN to be configured on the D3100-I or D3232. Choose Interface to Configure ISDN/IDSL (Wan Module 1 and 2) Setup... Auxiliary Serial Port Setup... The screen below shows the D7171’s SDSL option. Choose Interface to Configure CMN SDSL (Wan Module 1 and 2) Setup... Auxiliary Serial Port Setup...
WAN and System Configuration 6-49 The Line Configuration screen appears, IDSL Line Configuration for the D3100-I or D3232, IDSL Line Configuration +----------+ +----------+ Clock Source... | Network | | Internal | +----------+ Bridge Mode Filter Set... Filter Set Remove Filter Set 1 Return/Enter goes to new screen. or SDSL Line Configuration for the D7100. SDSL Line Configuration +----------+ +----------+ Clock Source... | Network | | Internal | +----------+ Bridge Mode Filter Set...
6-50 User’s Reference Guide ■ The Clock Source may be either Network or Internal. If you select Network (the default), the Netopia D-Series IDSL interface functions in customer premise equipment (CPE) mode. This mode is the normal mode for communicating with an ISP. If you select Internal, the Netopia D-Series functions in central office equipment (COE) mode, simulating a DSLAM. This allows for back-to-back short haul applications with another Netopia IDSL device operating in CPE mode.
Monitoring Tools 7-51 Chapter 7 Monitoring Tools This chapter discusses the Netopia D-Series’s device and network monitoring tools. These tools can provide statistical information, report on current network status, record events, and help in diagnosing and locating problems.
7-52 User’s Reference Guide General status Quick View Default IP Gateway: 0.0.0.0 Domain Name Server: 0.0.0.0 Domain Name: None Provided 11/5/1999 12:42:24 PM CPU Load: 10% Unused Memory: 228 KB WAN Interface Group -- ISDN/IDSL ----------------MAC Address--------IP Address-------IPX Address--------------Ethernet Hub: 00-00-c5-70-03-48 192.168.1.1 DSL Bond: 00-00-c5-70-03-4a 0.0.0.
Monitoring Tools 7-53 R: The letter “R” means the LED is red. G: The letter “G” means the LED is green. Y: The letter “Y” means the LED is yellow. The section “Netopia D-Series DSL DSU status lights” on page 2-18 describes the meanings of the colors for each LED. Statistics & Logs Main Menu Statistics & Logs General Statistics When you are troubleshooting your Netopia D-Series, the Statistics & Logs screens provide insight into the recent event activities of the Netopia D-Series.
7-54 User’s Reference Guide Physical Interface The top left side of the screen lists total packets received and total packets transmitted for the following data ports: ■ Ethernet Hub ■ Aux Sync ■ IDSL 1 or SDSL 1 Network Interface The bottom left side of the screen lists total packets received and total packets transmitted for the following protocols: ■ IP (IP packets on the Ethernet) The right side of the table lists the total number of occurrences of each of six types of communication statistics:
Monitoring Tools 7-55 WAN Event History The WAN Event History screen lists a total of 128 events on the WAN. The most recent events appear at the top. WAN Event History Current Date -- 11/5/99 11:48:19 AM -Date-----Time-----Event---------------------------------------------------------------------------------------SCROLL UP----------------------------------11/04/99 17:46:21 RFC1483: IP up, channel 2, gateway: 163.176.107.
7-56 User’s Reference Guide Device Event History The Device Event History screen lists a total of 128 port and system events, giving the time and date for each event, as well as a brief description. The most recent events appear at the top. In the Statistics & Logs screen, select Device Event History. The Device Event History screen appears.
Monitoring Tools 7-57 System Information The System Information screen gives a summary view of the general system level values in the Netopia D-Series DSL DSU. From the Statistics & Logs menu select System Information. The System Information screen appears. System Information Serial Number Firmware Version 70-03-48 (7340872) 4.
7-58 User’s Reference Guide The SNMP Setup screen From the Main Menu, select SNMP in the System Configuration screen and press Return. The SNMP Setup screen appears. Main Menu System Configuration SNMP SNMP Setup System Name: System Location: System Contact: Read-Only Community String: Read/Write Community String: public private Authentication Traps Enable: Off IP Trap Receivers... Configure optional SNMP parameters from here.
Monitoring Tools 7-59 By default, the read-only and read/write community strings are set to “public” and “private,” respectively. You should change both of the default community strings to values known only to you and trusted system administrators. To change a community string, select it and enter a new value. Setting the Read-Only and Read-Write community strings to the empty string will block all SNMP requests to the Netopia D-Series.
7-60 User’s Reference Guide IP Trap Receivers Display/Change IP Trap Receiver... Add IP Trap Receiver... Delete IP Trap Receiver... Return/Enter to modify an existing Trap Receiver. Navigate from here to view, add, modify and delete IP Trap Receivers. Setting the IP trap receivers 1. Select Add IP Trap Receiver. 2. Select Receiver IP Address or Domain Name. Enter the IP address or domain name of the SNMP manager you want to receive the trap. 3.
Security 8-61 Chapter 8 Security The Netopia D-Series provides a number of security features to help protect its configuration screens and your local network from unauthorized access. Although these features are optional, it is strongly recommended that you use them.
8-62 User’s Reference Guide To set up user accounts, in the System Configuration screen select Security and press Return. Main Menu System Configuration Security The Security Options screen appears. Security Options Enable Telnet Console Access: Enable Telnet Access to SNMP Screens: Yes Yes Show Users... Add User... Delete User... Password for This Screen (11 chars max): Return/Enter accepts * Tab toggles * ESC cancels. Set up configuration access options here.
Security 8-63 To add a new user account, select Add User in the Security Options screen and press Return. The Add Name With Write Access screen appears. Add Name With Write Access Enter Name: Enter Password (11 characters max): ADD NAME/PASSWORD NOW CANCEL Follow these steps to configure the new account: 1. Select Enter Name and enter a descriptive name (for example, the user’s first name). 2. Select Enter Password and enter a password. 3.
8-64 User’s Reference Guide To restrict Telnet access to all of the configuration screens, select Enable Telnet Console Access and toggle it to No. About filters and filter sets Important Note: The Netopia D-Series’s filter sets only work when the unit is in bridge mode. They have no effect when the unit is in DSU mode. Security should be a high priority for anyone administering a network connected to the Internet.
Security 8-65 Filter priority Continuing the customs inspectors analogy, imagine the inspectors lined up to examine a package. If the package matches the first inspector’s criteria, the package is either rejected or passed on to its destination, depending on the first inspector’s particular orders. In this case, the package is never seen by the remaining inspectors.
8-66 User’s Reference Guide How individual filters work As described above, a filter applies criteria to an IP packet and then takes one of three actions: A filter’s actions ■ Passes the packet to the local or remote network ■ Blocks (discards) the packet ■ Ignores the packet A filter passes or blocks a packet only if it finds a match after applying its criteria. When no match occurs, the filter ignores the packet. A filtering rule The criteria are based on information contained in the packets.
Security 8-67 By matching on a port number, an IP filter can be applied to selected services, such as Telnet, FTP, and World Wide Web. The tables below show a few common services and their associated port numbers.
8-68 User’s Reference Guide Other filter attributes There are three other attributes to each filter: ■ The filter’s order (i.e., priority) in the filter set ■ Whether the filter is currently active ■ Whether the filter is set to pass (forward) packets or to block (discard) packets Putting the parts together When you display a filter set, its filters are displayed as rows in a table: +-#---Source IP Addr---Dest IP Addr-----Proto-Src.Port-D.
Security 8-69 Src. Port: The source port to match. This is the port on the sending host that originated the packet. D. Port: The destination port to match. This is the port on the receiving host for which the packet is intended. On?: Displays Yes when the filter is in effect or No when it is not. Fwd: Shows whether the filter forwards (Yes) a packet or discards (No) it when there’s a match.
8-70 User’s Reference Guide Filtering example #2 Suppose a filter is configured to block all incoming IP packets with the source IP address of 200.233.14.0, regardless of the type of connection or its destination. The filter would look like this: +-#---Source IP Addr---Dest IP Addr-----Proto-Src.Port-D.Port--On?-Fwd-+ +----------------------------------------------------------------------+ | 1 200.233.14.0 0.0.0.
Security 8-71 your network may be vulnerable. An approach to using filters The ultimate goal of network security is to prevent unauthorized access to the network without compromising authorized access. Using filter sets is part of reaching that goal. Each filter set you design will be based on one of the following approaches: ■ “That which is not expressly permitted is prohibited.” ■ “That which is not expressly prohibited is permitted.
8-72 User’s Reference Guide This header information is what the packet filter uses to make filtering decisions. It is important to note that an IP packet filter does not look into the IP data stream (the User Data from above) to make filtering decisions. Generic filters can look into the data. Basic protocol types TCP: Transmission Control Protocol. TCP provides reliable packet delivery and has a retransmission mechanism (so packets are not lost). RFC 793 is the specification for TCP.
Security 8-73 0 AND 0 = 0 0 AND 1 = 0 1 AND 0 = 0 1 AND 1 = 1 For example: Filter rule: Deny IP: 163.176.1.15BINARY: 10100011.10110000.00000001.00001111 Mask: 255.255.255.255BINARY:11111111.11111111.11111111.11111111 Incoming Packet: IP 163.176.1.15BINARY: 10100011.10110000.00000001.00001111 If you put the incoming packet and subnet mask together with AND, the result is: 10100011.10110000.00000001.00001111 which matches the IP address in the filter rule and the packet is denied.
8-74 User’s Reference Guide Example IP Filter set screen This is an example of the Netopia Filter set screen: Change Input Filter 1 Enabled: Forward: Type... Yes No IP Source IP Address: Source IP Address Mask: 0.0.0.0 0.0.0.0 Dest. IP Address: Dest. IP Address Mask: 0.0.0.0 0.0.0.0 Protocol Type: Source Port Compare... Source Port ID: Dest. Port Compare... Dest. Port ID: Established TCP Conns. Only: TCP No Compare 0 Equal 2000 No Return/Enter accepts * Tab toggles * ESC cancels.
Security 8-75 Example IP filters Example 1 Write a filter rule that blocks the class C subnet represented by 200.1.1.0/25 from accessing the net. Filter Rule: 200.1.1.0 (Source IP Network Address) 255.255.255.128 (Source IP Mask) Forward = No (What happens on match) Incoming packet has the source address of 200.1.1.
8-76 User’s Reference Guide 255.255.255.128 10000000 (Perform the logical AND) 10000000 (Logical AND result) This incoming IP packet (10000000) has a source IP address that does not match the network address in the Source IP Address field (00000000) in the Netopia D-Series. This rule will forward this packet because the packet does not match. Example 3 Filter Rule: 200.1.1.96 (Source IP Network Address) 255.255.255.
Security 8-77 255.255.255.240 11110000 (Perform the logical AND) 01100000 (Logical AND result) Since the Source IP Network Address in the Netopia D-Series’s filter rule is 01100000 (=96 decimal), and the source IP address after the logical AND is 01100000, this rule does match and this packet will not be passed. Example 5 Filter Rule: 200.1.1.96 (Source IP Network Address) 255.255.255.255 (Source IP Mask) Forward = No (What happens on match) Incoming packet has the source address of 200.1.1.96.
8-78 User’s Reference Guide Filter Sets Add Filter Set... Display/Change Filter Set... Delete Filter Set... Return/Enter to modify an existing Filter Set. Set Up IP Filter Sets (Firewalls) from this and the following Menus. The procedure for creating and maintaining filter sets is as follows: 1. Add a new filter set. 2. Create the filters for the new filter set. 3. View, change, or delete individual filters and filter sets. The following sections explain how to execute these steps.
Security 8-79 Add Filter Set... Filter Set Name: Filter Set ADD FILTER SET CANCEL 1 Configure the Filter Set name and its associated Filters. Naming a new filter set All new filter sets have a default name. The first filter set you add will be called Filter Set 1, the next filter will be Filter Set 2, and so on. To give a new filter set a different name, select Filter Set Name and enter a new name for the filter set. To save the filter set, select ADD FILTER SET.
8-80 User’s Reference Guide Input and output filters—source and destination There are two kinds of filters you can add to a filter set: input and output. Input filters check packets received from the Internet, destined for your network. Output filters check packets transmitted from your network to the Internet.
Security 8-81 The Display/Change Filter Set screen appears. Display/Change Filter Set... Filter Set Name: Filter Set 1 Add Input Filter to Filter Set... Display/Change Input Filter... Delete Input Filter... Move Input Filter... Add Output Filter to Filter Set... Display/Change Output Filter... Delete Output Filter... Move Output Filter... To add an input filter, select Add Input Filter to Filter Set. The Add Filter screen appears. (To add an output filter, select Add Output Filter.
8-82 User’s Reference Guide 3. Select Type. A popup menu offers the option of either IP or Generic. If you choose IP, continue with the next step. If you choose Generic filtering, skip to the section “Generic filters” on page 8-86. Warning: Changing the filter Type clears the filter values if any were previously entered. 4. Select Source IP Address and enter the source IP address this filter will match on. You can enter a subnet or a host address. 5.
Security 8-83 Moving filters The Move Input/Output Filter permits reordering of rules in a filter set. +#----Source IP Addr---Dest IP Addr-----Proto-Src.Port-D.Port--On?-Fwd-+ +----------------------------------------------------------------------+ | 1 1.1.1.1 0.0.0.0 ANY --Yes No | | 2 000000000000 000000000000 0 = No Yes No | | 3 4.4.4.4 0.0.0.0 ANY --Yes No | | 4 3.3.3.3 0.0.0.0 ANY --Yes No | | 5 5.5.5.5 0.0.0.
8-84 User’s Reference Guide Change Filter Enabled: Forward: No No Source IP Address: Source IP Address Mask: 0.0.0.0 0.0.0.0 Dest. IP Address: Dest. IP Address Mask: 0.0.0.0 0.0.0.0 Protocol Type: 0 Source Port Compare... Source Port ID: Dest. Port Compare... Dest. Port ID: No Compare 0 No Compare 0 Enter the IP specific information for this filter. Deleting filters To delete a filter, select Delete Input Filter or Delete Output Filter in the Add Filter Set screen to display a table of filters.
Security 8-85 Modifying filter sets To modify a filter set, select Display/Change Filter Set in the Filter Sets screen to display a list of filter sets. Select a filter set from the list and press Return. The Change Filter Set screen appears. The items in this screen are the same as the ones in the Add Filter screen (see “Adding filters to a filter set” on page 8-80). Display/Change Filter Set... Filter Set Name: Filter Set 1 Add Input Filter to Filter Set... Display/Change Input Filter...
8-86 User’s Reference Guide Generic filters If you chose Generic filtering in step 3. on page 8-82, the Add Filter screen changes as shown: Add Filter Enabled: Forward: Type... Yes No Generic Value: Mask: Offset: 000000000000 000000000000 0 Compare: Equal Chain to Next Filter: No ADD THIS FILTER NOW CANCEL Enter the IP specific information for this filter. Note: Generic filters are more complicated to use than IP filters.
Security 8-87 About generic filters One of the more difficult aspects of writing Generic filter sets is determining how many bytes into the packet (the Offset) the value you want to test is. In order to find the Offset value a good understanding of packet formats is helpful. The following figure depicts a typical packet format structure for purposes of this example.
8-88 User’s Reference Guide Add Input Filter Enabled: Forward: Type... Yes No Generic Value: Mask: Offset: 0000C8E395000000 FFFFFFFFFF000000 6 Compare: Equal Chain to Next Filter: No ADD THIS FILTER NOW CANCEL Enter the packet specific information for this filter. Note the Offset is set to look at a value six bytes into the packet, the Value is 0000C8E395000000 and the Mask is set to match only the hexidecimal digits we're interested in -- the ones that represent the MAC address.
Security 8-89 The following example further illustrates filter rule chaining, different sized masks and the full 8 bytes of the Value field. Create a filter set designed to block telnet access from a given external node (the example below uses 176.163.52.18) to a given internal node (176.163.107.254).
8-90 User’s Reference Guide
Utilities and Diagnostics 9-91 Chapter 9 Utilities and Diagnostics A number of utilities and tests are available for system diagnostic and control purposes.
9-92 User’s Reference Guide Ping The Netopia D-Series includes a standard Ping test utility. A Ping test generates IP packets destined for a particular (Ping-capable) IP host. Each time the target host receives a Ping packet, it returns a packet to the original sender. Ping allows you to see whether a particular IP destination is reachable from the Netopia D-Series. You can also ascertain the quality and reliability of the connection to the desired destination by studying the Ping test’s statistics.
Utilities and Diagnostics 9-93 Status: The current status of the Ping test. This item can display the status messages shown in the table below: Message Description Resolving host name Finding the IP address for the domain name-style address Can’t resolve host name IP address can’t be found for the domain name–style name Pinging Ping test is in progress Complete Ping test was completed Cancelled by user Ping test was cancelled manually Destination unreachable from w.x.y.
9-94 User’s Reference Guide Packets Lost: The number of packets unaccounted for, shown in total and as a percentage of total packets sent. This statistic may be updated during the Ping test, and may not be accurate until after the test is over. However, if an escalating one-to-one correspondence is seen between Packets Out and Packets Lost, and Packets In is noticeably lagging behind Packets Out, the destination is probably unreachable. In this case, use STOP PING.
Utilities and Diagnostics 9-95 4. Select Use Reverse DNS to learn the names of the routers between the Netopia D-Series and the destination router. The default is Yes. 5. Select START TRACE ROUTE and press Return. A scrolling screen will appear that lists the destination, number of hops, IP addresses of each hop, and DNS names, if selected. 6. Cancel the trace by pressing Escape. Return to the Trace Route screen by pressing Escape twice.
9-96 User’s Reference Guide Disconnect Telnet console session If you want to close your Telnet Console session, select Disconnect Telnet Console Session and press Return. A dialog box appears asking you to cancel or continue your selection.
Utilities and Diagnostics 9-97 Trivial File Transfer Protocol (TFTP) TFTP Server Name: Firmware File Name: GET ROUTER FIRMWARE FROM SERVER... GET WAN MODULE FIRMWARE FROM SERVER... Config File Name: GET CONFIG FROM SERVER... SEND CONFIG TO SERVER... TFTP Transfer State -- Idle TFTP Current Transfer Bytes -- 0 The sections below describe how to update the Netopia D-Series’s firmware and how to download and upload configuration files.
9-98 User’s Reference Guide press Return. You will see the following dialog box: +-----------------------------------------------------------+ +-----------------------------------------------------------+ | | | Are you sure you want to read the firmware now? | | The device will reset when the transfer is complete. | | | | CANCEL CONTINUE | | | +-----------------------------------------------------------+ ■ Select CANCEL to exit without downloading the file, or select CONTINUE to download the file.
Utilities and Diagnostics 9-99 ■ Select GET CONFIG FROM SERVER and press Return. You will see the following dialog box: +-----------------------------------------------------------+ +-----------------------------------------------------------+ | | | Are you sure you want to read the configuration now? | | The device will reset when the transfer is complete.
9-100 User’s Reference Guide X-Modem File Transfer Send Firmware to Netopia... Send Config to Netopia... Receive Config from Netopia... Send Firmware to Netopia WAN module... WAN module Firmware Status: IDLE Updating firmware Firmware updates may be available periodically from Netopia or from a site maintained by your organization’s network administration. The procedure below applies whether you are using the console or the WAN interface module.
Utilities and Diagnostics 9-101 The system will reset at the end of a successful file transfer to put the new firmware into effect. While the system resets, the LEDs will blink on and off. Caution! Do not manually power down or reset the Netopia D-Series while it is automatically resetting or it could be damaged. Downloading configuration files The Netopia D-Series can be configured by downloading a configuration file. The downloaded file reconfigures all of the Netopia D-Series’s parameters.
9-102 User’s Reference Guide 2. Select Receive Config from Netopia and press Return. The following dialog box appears: +--------------------------------------------------------------------+ | | | Are you sure you want to save your current Netopia configuration? | | If so, when you hit Return/Enter on the CONTINUE button, you will | | have 10 seconds to begin the transfer from your terminal program. | | | | CANCEL CONTINUE | | | +--------------------------------------------------------------------+ 3.
Part III: Appendixes
User’s Reference Guide
Troubleshooting A-105 Appendix A Troubleshooting This appendix is intended to help you troubleshoot problems you may encounter while setting up and using the Netopia D-Series. It also includes information on how to contact Netopia Technical Support. Important information on these problems can be found in the event histories kept by the Netopia D-Series. These event histories can be accessed in the Statistics & Logs screen.
A-106 User’s Reference Guide Console connection problems Can’t see the configuration screens (nothing appears) ■ Make sure the cable connection from the Netopia D-Series’s console port to the computer being used as a console is securely connected. ■ Make sure the terminal emulation software is accessing the correct port on the computer that’s being used as a console. ■ Try pressing Ctrl-L or Return or the ▲ up or down▼ key several times to refresh the terminal screen.
Troubleshooting A-107 How to reset the Netopia D-Series to factory defaults Lose your password? This section shows how to reset the Netopia D-Series so that you can access the console screens once again. Keep in mind that all of your connection profiles and settings will need to be reconfigured. If you don't have a password, the only way to get back into the Netopia D-Series is the following: 1. Turn the Netopia D-Series upside down. 2.
A-108 User’s Reference Guide Technical support Netopia, Inc. is committed to providing its customers with reliable products and documentation, backed by excellent technical support. Before contacting Netopia Look in this guide for a solution to your problem. You may find a solution in this troubleshooting appendix or in other sections. Check the index for a reference to the topic of concern. If you cannot find a solution, complete the environment profile below before contacting Netopia technical support.
Troubleshooting A-109 Netopia Bulletin Board Service: 1 510-865-1321 Online product information Product information can be found in the following: Netopia World Wide Web server via http://www.netopia.com Internet via anonymous FTP to ftp.netopia.com/pub FAX-Back This service provides technical notes that answer the most commonly asked questions, and offers solutions for many common problems encountered with Netopia products.
A-110 User’s Reference Guide
Binary Conversion Table B-111 Appendix B Binary Conversion Table This table is provided to help you choose subnet numbers and host numbers for IP and MacIP networks that use subnetting for IP addresses.
B-112 User’s Reference Guide Table 1: Decimal Binary Decimal Binary Decimal Binary Decimal Binary 23 10111 55 110111 87 1010111 119 1110111 24 11000 56 111000 88 1011000 120 1111000 25 11001 57 111001 89 1011001 121 1111001 26 11010 58 111010 90 1011010 122 1111010 27 11011 59 111011 91 1011011 123 1111011 28 11100 60 111100 92 1011100 124 1111100 29 11101 61 111101 93 1011101 125 1111101 30 11110 62 111110 94 1011110 126 1111110 31 1
Binary Conversion Table B-113 Table 2: Decimal Binary Decimal Binary Decimal Binary Decimal Binary 146 10010010 178 10110010 210 11010010 242 11110010 147 10010011 179 10110011 211 11010011 243 11110011 148 10010100 180 10110100 212 11010100 244 11110100 149 10010101 181 10110101 213 11010101 245 11110101 150 10010110 182 10110110 214 11010110 246 11110110 151 10010111 183 10110111 215 11010111 247 11110111 152 10011000 184 10111000 216 11011000
B-114 User’s Reference Guide
Further Reading C-115 Appendix C Further Reading Alexander, S. & R. Droms, DHCP Options and BOOTP Vendor Extensions, RFC 2131, Silicon Graphics, Inc., Bucknell University, March 1997. Angell, David. ISDN for Dummies Foster City, CA: IDG Books Worldwide, 1995. Thorough introduction to ISDN for beginners. Apple Computer, Inc. AppleTalk Network System Overview. Reading, MA: Addison-Wesley Publishing Company, Inc., 1989. Apple Computer, Inc. Planning and Managing AppleTalk Networks.
C-116 User’s Reference Guide Garcia-Luna-Aceves, J.J. "Loop-Free Routing Using Diffusing Computations." Publication pending in IEEE/ACM Transactions on Networking, Vol. 1, No. 1, 1993. Garfinkel, Simson. PGP: Pretty Good Privacy Sebastopol, CA: O’Reilly & Associates, 1991. A guide to the free data encryption program PGP and the issues surrounding encryption. Green, J.K. Telecommunications, 2nd ed. Homewood, IL: Business One Irwin, 1992. Heinanen, J.
Further Reading C-117 Sidhu, G.S., R.F. Andrews, and A.B. Oppenheimer. Inside AppleTalk, 2nd ed. Reading, MA: Addison-Wesley Publishing Company, 1990. Siyan, Karanjit. Internet Firewall and Network Security Indianapolis, IN: New Riders Publishing, 1995. Similar to the Chapman and Zwicky book. Smith, Philip. Frame Relay Principles and Applications Reading, MA: Addison-Wesley Publishing Company, 1996.
C-118 User’s Reference Guide
Technical Specifications and Safety Information D-119 Appendix D Technical Specifications and Safety Information Pinouts for V.
D-120 User’s Reference Guide HD-15 Pin Pin Pin Pin Pin Pin Pin Pin Pin Pin Pin Pin Pin Pin Pin 1 2 3 4 5 6 7 8 9 10 11 12 13 14 15 V.
Technical Specifications and Safety Information D-121 Pinouts for D3232 Splitter 1 2 3 4 5 6 7 8 TCP2 TCN2 TCP1 RCP1 (TIP1) RCN1 (RING1) TCN1 B8 B7 B6 B5 B4 B3 B2 B1 RCP2 (TIP2) RCN2 (RING2) A8 A7 A6 A5 A4 A3 A2 A1
D-122 User’s Reference Guide Description Dimensions: 124.0 cm (w) x 20.0 cm (d) x 5.3 cm (h) 9.4” (w) x 7.9” (d) x 2.1” (h) Communications interfaces: The Netopia D-Series DSL DSU has an RJ-45 jack for IDSL or SDSL connections; an 8–port 10Base-T Ethernet hub for your LAN connection; a DB-9 Console port; and an HD-15 Auxiliary port that can be used as either a serial or LocalTalk port. Power requirements ■ 12 VDC input ■ 1.
Technical Specifications and Safety Information D-123 Regulatory notices Warning This is a Class A product. In a domestic environment this product may cause radio interference, in which case the user may be required to take adequate measures. Adequate measures include increasing the physical distance between this product and other electrical devices. United States. This equipment has been tested and found to comply with the limits for a Class A digital device, pursuant to Part 15 of the FCC Rules.
D-124 User’s Reference Guide Users should ensure for their own protection that the electrical ground connections of the power utility, telephone lines, and internal metallic water pipe system, if present, are connected together. This precaution may be particularly important in rural areas. Caution Users should not attempt to make such connections themselves, but should contact the appropriate electric inspection authority, or electrician, as appropriate.
Glossary-125 Glossary access line: A telephone line reaching from the telephone company central office to a point usually on your premises. Beyond this point the wire is considered inside wiring. analog: In telecommunications, telephone transmission and/or switching that is not digital. An analog phone transmission is one that was originally intended to carry speech or voice, but may with appropriate modifications be used to carry data of other types.
User’s Reference Guide byte: A group of bits, normally eight, which represent one data character. CallerID: See CND. CCITT (Comite Consultatif International Telegraphique et Telephonique): International Consultative Committee for Telegraphy and Telephony, a standards organization that devises and proposes recommendations for international communications. See also ANSI (American National Standards Institute).
Glossary-127 DTE (Data Terminal Equipment): Term defined by standards committees, that applies to communications equipment, typically personal computers or data terminals, as distinct from other devices that attach to the network, typically modems or printers (DCE). The distinction generally refers to which pins in an RS-232-C connection transmit or receive data. Pins 2 and 3 are reversed. Also see DCE. EIA (Electronic Industry Association): A North American standards association.
User’s Reference Guide internet: A set of networks connected together by routers. This is a general term, not to be confused with the large, multi-organizational collection of IP networks known as the Internet. An internet is sometimes also known as an internetwork. internet address, IP address: Any computing device that uses the Internet Protocol (IP) must be assigned an internet or IP address.
Glossary-129 network administrator: A person who coordinates the design, installation, and management of a network. A network administrator is also responsible for troubleshooting and for adding new users to the network. network log: A record of the names of devices, location of wire pairs, wall-jack numbers, and other information about the network. network number: A unique number for each network in an internet.
User’s Reference Guide RJ-45: A telephone-industry standard connector type usually containing eight pins. router: A device that supports network communications. A router can connect identical network types, such as LocalTalk-to-LocalTalk, or dissimilar network types, such as LocalTalk-to-Ethernet. However—unless a gateway is available—a common protocol, such as TCP/IP, must be used over both networks. Routers may be equipped to provide WAN line support to the LAN devices they serve.
Glossary-131 TFTP (Trivial File Transfer Protocol): A protocol used to transfer files between IP nodes. TFTP is often used to transfer firmware and configuration information from a UNIX computer acting as a TFTP server to an IP networking device, such as the Netopia ISDN Router. thicknet: Industry jargon for 10Base5 coaxial cable, the original Ethernet cabling. thinnet: Industry jargon for 10Base2 coaxial cable, which is thinner (smaller in diameter) than the original Ethernet cabling.
User’s Reference Guide
Index-133 Index Numerics 10Base-T 24 10Base-T, connecting 24 A advanced configuration features 41 application software 23 B back panel 16 ports 17 C capabilities 12 community strings 58 configuration troubleshooting PC 105 configuration files downloading with TFTP 98 downloading with XMODEM 101 uploading with TFTP 99 uploading with XMODEM 101 configuration screens protecting 62 configuring with console-based management 35, 39 configuring terminal emulation software 38 configuring the console 44 connecting
Index-134 defined 64 deleting 84 disadvantages of 70 Generic 86 input 80 IP 66 modifying 83 output 80 using 71, 77 viewing 83 firmware files updating with TFTP 97 updating with XMODEM 100 further reading 115 N navigating Easy Setup 38 NCSA Telnet 38 Netopia connecting to Ethernet, rules 24 monitoring 51 security 61 system utilities and diagnostics 91 network problems 106 network status overview 51 G general statistics 53 Generic filters 86 Glossary 125 P password to protect security screen 62 user accou
Index-135 Simple Network Management Protocol, see SNMP SNMP community strings 58 MIBs supported 57 setup screen 58 traps 59 src.
Index-136
Limited Warranty and Limitation of Remedies-137 Limited Warranty and Limitation of Remedies Netopia warrants to you, the end user, that the Netopia D-Series DSL DSU (the “Product”) will be free from defects in materials and workmanship under normal use for a period of one (1) year from date of purchase. Netopia’s entire liability and your sole remedy under this warranty during the warranty period is that Netopia shall, at its sole option, either repair or replace the Product.
User’s Reference Guide