EN User Manual Oven BIDO2SS
Contents Safety information Safety Instructions Product description Before first use Daily use Clock functions 2 3 5 5 6 7 Using the accessories Additional functions Hints and tips Care and cleaning Troubleshooting GREAT BRITAIN – Customer Care and Service 8 9 9 14 16 17 Subject to change without notice. Safety information Before the installation and use of the appliance, carefully read the supplied instructions.
• • • • • • Ensure that the appliance is switched off before replacing the lamp to avoid the possibility of electric shock. Do not use a steam cleaner to clean the appliance. Do not use harsh abrasive cleaners or sharp metal scrapers to clean the glass door since they can scratch the surface, which may result in shattering of the glass. If the supply cord is damaged, it must be replaced by the manufacturer, its Authorised Service Centre or similarly qualified persons in order to avoid a hazard.
• • • • • • • • • • • • • • • Make sure that the ventilation openings are not blocked. Do not let the appliance stay unattended during operation. Deactivate the appliance after each use. Be careful when you open the appliance door while the appliance is in operation. Hot air can release. Do not operate the appliance with wet hands or when it has contact with water. Do not apply pressure on the open door. Do not use the appliance as a work surface or as a storage surface.
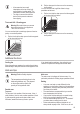
Product description General overview 1 2 3 4 5 2 6 4 7 8 12 4 3 2 9 1 11 9 5 4 12 3 10 2 1 • Knob for the top oven functions Power lamp / symbol / indicator Knob for the top oven temperature Temperature lamp / symbol / indicator Electronic programmer Knob for the main oven functions Knob for the main oven temperature Heating element Lamp Fan Shelf support, removable Shelf positions 11 Accessories • 1 2 3 4 5 6 7 8 9 10 11 12 Wire shelf For cookware, cake tins, roasts.
Preheating Let the appliance operate for 1 hour. Preheat the empty appliance to burn off the remaining grease. Set the function Set the function and the temperature to 250ºC. Let the appliance operate for 15 minutes. 3. Preheat the two ovens. Heat up one oven at a time. Set the functions listed below, if applicable. 1. 2. and the temperature to 250ºC. Set the function and the temperature to 250ºC. Let the appliance operate for 15 minutes. Accessories can become hotter than usual.
Main oven functions Symbol Oven function Application Light To activate the lamp without a cooking function. True Fan Cooking To bake on up to 2 shelf positions at the same time and to dry food. Set the temperature 20 - 40 °C lower than for Conventional Cooking. Defrost To defrost frozen food. Display The electronic programmer works only with the main oven. A B C A) Function indicators B) Time display C) Function indicator Buttons Button Function Description MINUS To set the time.
Clock function Application Duration To set the cooking time of the oven. End To set the time of day when the oven should deactivate. You can use the functions Duration and End at the same time to set the time for how long the appliance should operate and when the appliance should deactivate. This lets you activate the appliance with a delay in time. First set the Duration and then the End 3. 4. . With the Duration and End functions, the appliance deactivates automatically.
2. • • All accessories have small indentations at the top of the right and left side to increase safety. The indentations are also anti-tip devices. The high rim around the shelf is a device which prevents cookware from slipping. Put the deep pan into the oven on the necessary shelf position. You can use the trivet to grill flat dishes in large quantities and to toast. 1. Put the trivet into the deep pan so that the supports of the wire shelf point down. 2.
• change the temperature setting. The differences equalize during the baking procedure. With longer baking times, you can deactivate the oven approximately 10 minutes before the end of the baking time and then use the residual heat. When you cook frozen food, the trays in the oven can twist during baking. When the trays become cold again, the distortions are gone. Tips on baking Baking results Possible cause Remedy The bottom of the cake is not browned sufficiently. The shelf position is incorrect.
Food Temperature (°C) Time (min) Shelf position - Sponges 160 - 175 20 - 30 2 - Victoria Sandwich 160 - 170 18 - 25 2 - Madeira 140 - 150 75 - 90 2 - Rich Fruit 140 - 150 120 - 150 2 - Gingerbread 140 - 150 75 - 90 2 - Meringues 90 - 100 150 - 180 2 - Flapjack 160 - 170 25 - 30 2 - Shortbread 130 - 150 45 - 65 2 - Beef / Lamb 160 - 170 150 - 180 1 - Chicken 160 - 180 75 - 90 1 Convenience Foods Follow manufacturer's instructions.
Food Temperature (°C) Time (min) Shelf position Yorkshire Pudding: - Large 200 - 210 25 - 40 1 - Individual 210 - 220 15 - 25 1 Main oven Food Temperature (°C) Time (min) Shelf position Biscuits 180 - 190 10 - 20 3 Bread 190 - 210 30 - 35 3 - Small & Queen 160 - 170 18 - 25 3 - Sponges 160 - 170 20 - 25 3 - Madeira 140 - 160 60 - 75 3 - Rich Fruit 130 - 140 120 - 150 3 - Christmas 130 - 140 180 - 270 3 Fish 160 - 180 20 - 30 3 Fish Pies, Crumbles 170 - 180 3
• • Baste large roasts and poultry with their juices several times during roasting. This gives better roasting results. You can deactivate the appliance approximately 10 minutes before the end of the roasting time, and use the residual heat. For grilling in the top oven adjust the shelf position to suit different thicknesses of food. Always set the pan to collect the fat into the first shelf position. Grill only flat pieces of meat or fish.
Food Quantity Defrosting time (min) Further defrosting time (min) Comments Chicken 1 kg 100 - 140 20 - 30 Put the chicken on an upturned saucer in a big plate. Turn halfway through. Meat 1 kg 100 - 140 20 - 30 Turn halfway through. Meat 500 g 90 - 120 20 - 30 Turn halfway through. Trout 150 g 25 - 35 10 - 15 - Strawberries 300 g 30 - 40 10 - 20 - Butter 250 g 30 - 40 10 - 15 - Cream 2 x 200 g 80 - 100 10 - 15 Whip the cream when still slightly frozen in places.
1. 2. Hold the heating element with two hands at the front. Pull it forwards against the spring pressure and out along the supports on the two sides. 45° 4. 5. 6. Hold the door with one hand on each side and pull it away from the appliance at an upwards angle. Put the door with the outer side down on a soft cloth on a stable surface. This is to prevent scratches. Hold the door trim (B) on the top edge of the door at the two sides and push inwards to release the clip seal.
1. Warning! Danger of electrocution! Disconnect the fuse before you replace the lamp. The lamp and the lamp glass cover can be hot. 1. 2. 2. 3. Deactivate the appliance. Remove the fuses from the fuse box or deactivate the circuit breaker. 4. Turn the lamp glass cover counterclockwise to remove it. Clean the glass cover. Replace the oven lamp with a suitable 300 °C heatresistant oven lamp. Use the same oven lamp type. Install the glass cover.
We recommend that you write the data here: Product number (PNC) ......................................... Serial number (S.N.) ......................................... GB GREAT BRITAIN – Customer Care and Service Standard Guarantee Conditions and Exclusions. All our products come with 12 month warranty. To see our guarantee conditions and exclusions please visit our Customer Care Department www.benchmarxjoinery.co.uk.
867300100-A-042014