User manual Oven SCO1SS
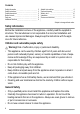
Contents Safety information _ _ _ _ _ _ _ _ _ _ _ _ _ _ _ _ _ _ Safety instructions _ _ _ _ _ _ _ _ _ _ _ _ _ _ _ _ _ _ Product description _ _ _ _ _ _ _ _ _ _ _ _ _ _ _ _ _ _ Before first use _ _ _ _ _ _ _ _ _ _ _ _ _ _ _ _ _ _ _ _ Daily use _ _ _ _ _ _ _ _ _ _ _ _ _ _ _ _ _ _ _ _ _ _ _ Additional functions _ _ _ _ _ _ _ _ _ _ _ _ _ _ _ _ _ _ 2 3 5 5 5 6 Helpful hints and tips _ _ _ _ _ _ _ _ _ _ _ _ _ _ _ _ _ 6 Care and cleaning _ _ _ _ _ _ _ _ _ _ _ _ _ _ _ _ _ _ 9 What to do if… _ _ _ _ _ _ _ _ _ _ _
• Before maintenance cut the power supply. • Do not use harsh abrasive cleaners or sharp metal scrapers to clean the glass door since they can scratch the surface, which may result in shattering of the glass. • If the supply cord is damaged, it must be replaced by the manufacturer, an authorized Service or similarly qualified persons in order to avoid a hazard. • The means for disconnection must be incorporated in the fixed wiring in accordance with the wiring rules.
• Make sure that the ventilation openings are not blocked. • Do not let the appliance stay unattended during operation. • Deactivate the appliance after each use. • Be careful when you open the appliance door while the appliance is in operation. Hot air can release. • Do not operate the appliance with wet hands or when it has contact with water. • Do not apply pressure on the open door. • Do not use the appliance as a work surface or as a storage surface.
Product description 1 2 3 4 1 Control panel 2 Temperature indicator 5 6 7 3 Knob for the temperature 4 Knob for the oven functions 5 Power indicator 6 Ventilation openings 7 Oven lamp 8 Rating plate 8 Oven accessories • Wire shelf For cookware, cake tins, roasts. • Baking tray For cakes and biscuits. Before first use Warning! Refer to the Safety chapters. Initial cleaning • Remove all accessories and removable shelf supports (if applicable). • Clean the appliance before first use. 1.
Oven functions Oven function Application Off position The appliance is off. Conventional Cooking To bake and roast on one oven level. The top and bottom heating elements operate at the same time. Bottom Heat To bake cakes with crispy or crusty bottom. Only the bottom heating element operates. Top Heat To finish cooked dishes. Only the top heating element operates.
Baking and roasting table CAKES Conventional Cooking TYPE OF DISH Cooking time [min] Notes Shelf position Temp [°C] Whisked recipes 2 170 45 - 60 In a cake mould Shortbread dough 2 170 24 - 34 In a cake mould Buttermilk cheese cake 1 170 60 - 80 In a 26 cm cake mould Apple cake (Apple pie) 1 170 100 - 120 In two 20 cm cake moulds on a wire shelf Strudel 2 175 60 - 80 In a baking tray Jam-tart 2 170 30 - 40 In a 26 cm cake mould Fruit cake 2 170 60 - 70 In a 26 cm cake
FLANS TYPE OF DISH Conventional Cooking Shelf position Temp [°C] Cooking time [min] Notes Pasta flan 2 180 40 - 50 In a mould Vegetable flan 2 200 45 - 60 In a mould Quiches 1 190 40 - 50 In a mould Lasagne 2 200 25 - 40 In a mould Cannelloni 2 200 25 - 40 In a mould Yorkshire pudding 2 220 20 - 30 6 pudding mould 1) Cooking time [min] Notes 1) Preheat for 10 minutes.
Conventional Cooking Shelf position Temp [°C] Cooking time [min] Notes Trout / Sea bream 2 190 40 - 55 3 - 4 fish Tuna fish / Salmon 2 190 35 - 60 4 - 6 fillets TYPE OF DISH Care and cleaning Warning! Refer to the Safety chapters. • Clean the front of the appliance with a soft cloth with warm water and a cleaning agent. • To clean metal surfaces use a usual cleaning agent. • Clean the oven interior after each use. Then you can remove dirt more easily and it does not burn on.
Clean the glass panel with water and soap. Dry the glass panel carefully. Installing the door and the glass panel 3 Close the oven door to the first opening position (halfway). Then pull forward and remove the door from its seat. 4 Put the door on a soft cloth on a stable surface. When the cleaning is completed, install the glass panel and the oven door. Do the above steps in the opposite sequence. The screen-printing zone must face the inner side of the door.
Problem Possible cause Remedy The appliance does not operate. The fuse in the fuse box is released. Do a check of the fuse. If the fuse is released more than one time, contact a qualified electrician. The oven lamp does not operate. The oven lamp is defective. Replace the oven lamp. Steam and condensation collect on the food and in the oven. You left the dish in the oven for too long. Do not keep the dishes in the oven for longer than 15 - 20 minutes after the cooking ends.
Electrical installation Important! Only a qualified person must do the electrical installation. 600 The manufacturer is not responsible if you do not follow the safety precautions from the chapter "Safety information". min. 550 20 This appliance is supplied without a main plug and a main cable. Applicable types of cables for Europe: • Minimum size Cable / flex: 1,5 mm² • Cable / flex type: H07 RN-F, H05 RN-F, H05 RRF, H05 VV-F, H05 V2V2-F (T90), H05 BB-F • Fuse 13 A min.
Environment concerns Recycle the materials with the symbol . Put the packaging in applicable containers to recycle it. Help protect the environment and human health and to recycle waste of electrical and electronic appliances. Do not dispose appliances marked with the symbol with the household waste. Return the product to your local recycling facility or contact your municipal office. GB Packaging material The packaging material is environmentally-friendly and recyclable.
892954525-A-232013