
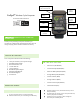
User's Manual

Do not drop your mp3 player. Doing so may result in a
malfunction or damage.
When cleaning your mp3 player, bracket and sensor, do
not use thinners, benzene, or alcohol.
Touch screens may be distorted when viewed through
polarized sunglass lenses.
WIRELESS SENSOR
The sensor was designed to transmit signals within a
maximum range of 3 meters, to reduce chance of
interference.
When adjusting the wireless sensor, note the following:
o Signals cannot be received if the distance
between the sensor and the computer is too
great.
o The transmission distance may be shorter due to
low temperature or low battery.
Interference may occur, resulting in incorrect data, if the
computer is:
o Near a TV, PC, radio, motor, or in a car or train.
o Close to a railroad crossing, railway tracks, TV
stations and/or radar base.
o Using with other wireless devices in close
proximity.
SETUP
LIVECYCLE APP DOWNLOAD
Search for LiveCycle in the App store via the iTunes®
application program
Download the free LiveCycle software application from iTunes
or directly onto your iPhone® or iPod touch® device. If you do
not have iTunes installed on your computer, you can download
it from www.apple.com/itunes/.
GETTING STARTED WITH LIVECYCLE
1. HANDLEBAR MOUNT
Secure the Handlebar Mount Cradle to your bicycle handlebars
in a convenient and safe position using the large cable ties.
Place your iPhone/iPod touch into the cradle.
Insert the LiveCycle dongle into the 30 pin connector at the
base of your iPhone/iPod touch.
2. SENSOR UNIT
Secure the rear wheel Sensor Unit to your rear wheel spokes
using the small cable ties. Depending on the type of bike you
have, secure either the Mountain or Road Pedal Magnet to
your pedal. Secure the Rear Wheel Spoke Magnet to a rear
wheel spoke using the included screw driver.
3. APP SETUP
Open the LiveCycle app by touching the LiveCycle icon on your
home screen.
Press and hold the LiveCycle “Start” icon to bring up the menu.
Select “Settings.”
Touch the icon underneath “Bike Settings.” Touching the space
underneath “Name” and name your bike.
Select your wheel size from the included list of standard wheel
sizes within the “Wheel Size” menu.
Touch the “Sensor” button to pair your LiveCycle dongle to
your sensor. [On this screen, you should also select your
“Units” (miles/MPH or Kilometers/KPH) and enter your “Riding
Weight” by estimating the weight of your body plus bicycle
plus gear]. When you have finished, select “Done.” App setup is
complete.
(Note: Select the LiveCycle icon at the bottom of the
screen at any point to return to the main screen.)
After installation, rotate the front wheel to verify that the
speed is displayed on the computer, and you are ready to start
cycling.
Repeat this setup procedure for all bicycles that you will use
with LiveCycle.
BASIC OPERATIONS USING LIVECYCLE
SAVING AND EMAILING FILES
SAVING SESSION FILES
On the main screen, press and hold the “Pause/Resume”
button.
Select “New.”
Press “Start” and begin cycling.
Your session will be saved as a dated, time-stamped file in the
“File” menu of your bike settings.
ACCESSING AND EMAILING SESSION FILES
On the main screen, press and hold the “Pause/Resume”
button.
Select “File.”
Select your desired previously saved file.
On your “Summary” screen, select “E-Mail” in the upper right
corner.
Type the recipient’s email address in the “To:” field and press
“Send.”
MAP
On the main screen, press and hold the “Pause/Resume”
button.
Select “Map.”
Allow LiveCycle to use your current location, if prompted.
Your location will be mapped.
Press “Locate” to update your position, if needed.
CHASE RIDER FUNCTION
On the main screen, swipe your finger from the top of the
screen to the bottom of the screen to access the Chase Rider
feature.
Touch the green arrow at the top of this screen.
o Choose from the list of data for previously
saved trips
o Press “Select:
o Screen will read “Chase On” and compare your
current speed and cadence to the data from the
trip you selected
To turn off, touch the green arrow again